Are you looking for a creative and eco-friendly way to make homemade candles? Look no further than the art of candle making with milk cartons. In this article, we will explore the beauty and creativity of using milk cartons as a mold for crafting your own unique candles. Not only is this method beneficial for the environment, but it also offers a cost-effective alternative to traditional candle making materials.
Using milk cartons for candle making has a variety of benefits, from being sustainable and environmentally friendly to providing an affordable option for creating personalized candles. We will delve into the advantages of using milk cartons as molds, and how they can contribute to a more sustainable approach to candle making.
In the following sections, we will provide a step-by-step guide to preparing the milk carton for candle making, including tips on selecting the right wax and fragrance for your candle. By the end of this article, you will be equipped with all the necessary information to start your own milk carton candle making journey, allowing you to unleash your creativity and produce beautiful homemade candles.
Benefits of Using Milk Cartons for Candle Making
When it comes to candle making, using milk cartons as molds offers several benefits that make it a popular choice among crafters. Not only is this method eco-friendly, but it also provides a cost-effective alternative to purchasing expensive candle molds. By repurposing used milk cartons, you can contribute to reducing waste and environmental impact while saving money on crafting materials.
Eco-Friendly Advantage
One of the primary benefits of using milk cartons for candle making is the environmentally friendly nature of the materials. Instead of disposing of empty cartons in landfills, repurposing them for candle molds gives them a new life and reduces waste. This sustainable approach aligns with the principles of recycling and upcycling, allowing crafters to create beautiful candles while minimizing their ecological footprint.
Cost-Effective Solution
In addition to the eco-friendly advantage, using milk cartons for candle making offers a cost-effective solution for crafters. Rather than purchasing specialized candle molds, which can be expensive, repurposing milk cartons provides a budget-friendly alternative. This allows individuals to indulge in their passion for candle making without breaking the bank, making it accessible to both beginners and experienced crafters alike.
Durable and Versatile
Milk cartons are also known for their durability and versatility as crafting materials. Their sturdy construction can withstand the heat from melted wax, providing a reliable mold for creating candles. Additionally, their rectangular shape allows for easy handling and pouring of wax, ensuring a smooth and seamless candle-making process. With their versatility, milk cartons can be used to create candles of various sizes and shapes, providing endless possibilities for creativity in candle making with milk carton.
Step-by-Step Guide to Preparing the Milk Carton for Candle Making
Candle making with milk cartons is a fun and eco-friendly activity that allows you to create beautiful, personalized candles while repurposing an everyday item. Preparing the milk carton for candle making is an important step that ensures the success of your project. From cleaning to cutting, it’s essential to properly prepare the carton before pouring in the wax.
To get started with preparing the milk carton for candle making, follow these simple steps:
1. Clean the milk carton: Start by rinsing out the milk carton with warm, soapy water. Make sure to remove any remaining milk residue and dry the carton thoroughly before moving on to the next step.
2. Remove any labels or stickers: If there are any labels or stickers on the milk carton, carefully peel them off. Residue can be removed using a gentle adhesive remover or rubbing alcohol.
3. Cut the top off the milk carton: Using scissors or a sharp knife, carefully cut off the top of the milk carton to create a clean, even opening for pouring in the melted wax.
By following these preparation steps, you’ll ensure that your milk carton is ready for candle making and that you’ll have a successful and enjoyable experience creating your own unique candles at home. Remember to handle sharp objects with care and always supervise children if they’re participating in this craft.
Selecting the Right Wax and Fragrance for Your Candle
When it comes to candle making with milk carton, selecting the right wax and fragrance is essential for creating a personalized and enjoyable candle. The materials you choose will determine the scent, burn time, and overall quality of your homemade candle. In this section, we will explore some tips for choosing the perfect wax and fragrance for your candle.
Choosing the Right Wax
There are various types of wax available for candle making, including soy wax, paraffin wax, beeswax, and more. Each type of wax has its own unique characteristics and benefits. Soy wax is known for its clean burn and eco-friendly properties, while paraffin wax offers a strong scent throw and excellent color options.
Beeswax is prized for its natural honey scent and long burn time. Consider your preferences and the purpose of your candle when choosing the right wax for your milk carton candle-making project.
Selecting the Perfect Fragrance
The fragrance of your homemade candle can set the mood and evoke emotions. When selecting a fragrance, consider the season, occasion, or theme you have in mind for your candle. Whether you prefer floral scents, fruity aromas, or earthy undertones, there is a wide range of fragrance oils available to suit your preferences. Take into account any potential allergies or sensitivities that you or others may have when choosing a fragrance as well.
Customizing Your Candle
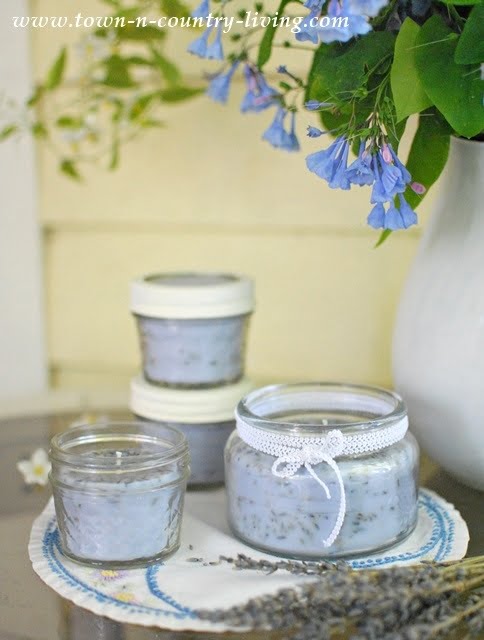
One advantage of making candles with milk cartons is the ability to fully customize every aspect of your creation – including the scent. Experiment with blending different fragrance oils to create a signature scent that is uniquely yours. You can also add dried herbs or flowers to infuse natural elements into your candle’s aroma profile. Personalize both the fragrance and appearance of your milk carton candle to make it truly one-of-a-kind.
By carefully considering these tips when selecting the right wax and fragrance for your milk carton candle-making project, you can create a beautiful and personalized homemade candle that suits your tastes and preferences perfectly.
Pouring the Wax Into the Milk Carton
When it comes to making candles with a milk carton, one of the most important steps is pouring the wax into the carton. This process requires precision and attention to detail to ensure that the candle sets properly and turns out beautifully. Here are detailed instructions on how to safely and effectively fill the milk carton with melted wax:
1. Prepare your workspace: Before you begin pouring the wax, make sure that your workspace is clean and free of any clutter. Lay down newspaper or a protective covering to catch any spills or drips. Set up your double boiler or melting pot on a stable surface, and have your milk cartons ready for filling.
2. Melt the wax: Begin by melting your chosen wax in a double boiler or melting pot. Be sure to monitor the temperature of the wax, as different types of wax have specific melting points. Once the wax is completely melted, remove it from heat and allow it to cool slightly before pouring.
3. Fill the milk carton: Carefully pour the melted wax into the prepared milk carton, ensuring that you leave enough space at the top for any desired decorations or additional layers of wax. Use a funnel if necessary to control the flow of wax and prevent spills.
4. Add fragrance if desired: If you plan to add fragrance to your candle, this is the time to do so. Mix in your chosen fragrance oil with the melted wax before pouring it into the milk carton.
By following these detailed instructions, you can effectively pour melted wax into a milk carton to create a beautiful homemade candle.
Candle making with milk cartons provides an eco-friendly and cost-effective option for creating personalized candles at home with ease. By selecting high-quality materials such as soy or beeswax along with essential oils or fragrance oils, individuals can customize their candles according to their preferred scents while keeping sustainability in mind throughout every step of production.
Designing and Decorating the Milk Carton Candle
When it comes to candle making with a milk carton, the design and decoration process is where you can really let your creativity shine. The first step in designing your milk carton candle is to consider the overall theme or style you want to achieve. Whether it’s a rustic, bohemian, modern, or minimalist look, the possibilities are endless.
One creative idea for customizing your milk carton candle is to use dried flowers or herbs to add an organic and natural touch. Simply place the flowers or herbs inside the milk carton before pouring the wax, and as the candle burns, they will create a beautiful aesthetic and release a subtle fragrance.
Another fun way to decorate your milk carton candle is by using colorful twine or ribbon to wrap around the outside of the carton, adding a pop of color and texture.
For those who prefer a more minimalist look, consider using metallic paint or metallic adhesive sheets to create geometric shapes or patterns on the outside of the milk carton. This can give your candle a sleek and modern appearance that is sure to stand out. No matter what style or design you choose for your milk carton candle, adding personal touches and creative elements will make it truly unique.
Overall, designing and decorating your milk carton candle is an opportunity to express yourself and create a one-of-a-kind piece that reflects your personal style. Whether you prefer a simple and elegant look or something more elaborate and decorative, there are endless ways to customize your candle using materials like dried flowers, twine, paint, or adhesive sheets.
| Ideas for Designing | Materials Needed |
|---|---|
| Dried Flowers/Herbs | Milk Carton |
| Colorful Twine/Ribbon | Wax |
| Metallic Paint/Adhesive Sheets | Fragrance Oil |
Removing the Candle From the Milk Carton Mold
Once your candle has fully dried and set in the milk carton mold, it’s time to carefully remove it. This can be a delicate process, but with the right techniques, you can safely and successfully take out your finished candle.
One method for removing the candle from the milk carton mold is to gently tear away the carton from around the candle. Start by making small tears around the top edge of the carton, and then gradually peel away the sides. Be careful not to apply too much pressure or force, as this could damage the candle or cause it to break.
Another technique is to use a hairdryer to lightly heat the outside of the milk carton. The warmth will help soften the wax slightly, making it easier to separate from the carton. Once heated, gently press on the sides of the carton to release the candle. Again, patience is key here as rushing through this step could lead to an imperfect result.
For candles with more intricate designs or shapes, consider cutting away sections of the carton with scissors before attempting to remove it. This will allow for greater access to different areas of the candle without causing any damage.
| Method | Description |
|---|---|
| Tearing | Gently tear away carton from around candle |
| Hairdryer Method | Lightly heat outside of carton with a hairdryer and gently press on sides to release candle |
| Cutting | Cut away sections of carton with scissors before attempting removal for candles with intricate designs or shapes |
Conclusion
In conclusion, the process of candle making with milk cartons is not only a fun and creative activity but also an eco-friendly and cost-effective one. By using materials that are readily available in most households, such as milk cartons, individuals can create personalized candles while reducing waste at the same time. The benefits of using milk cartons for candle making go beyond just the finished product, making it a rewarding DIY project for anyone to try.
The satisfaction and joy of creating a homemade candle using a milk carton are unmatched. From preparing the carton to pouring the wax and designing the final product, every step allows for personalization and creativity. Additionally, knowing that the materials used are eco-friendly adds to the sense of fulfillment. Encouraging readers to give it a try themselves can open up a world of possibilities for homemade candles tailored to their own preferences.
So, whether you’re interested in making candles for yourself or as gifts, using milk cartons is an excellent choice. Not only does it provide an opportunity to unleash your creativity, but it also contributes to environmental sustainability. As you embark on this DIY adventure, remember that the possibilities truly are endless when it comes to creating unique and beautiful candles with milk cartons.
Frequently Asked Questions
Can You Use Milk Cartons to Make Candles?
Yes, you can use milk cartons to make candles. It involves melting the wax and pouring it into the clean and empty milk carton, then adding a wick in the center before it solidifies.
How Do You Make a Candle Out of Ice in a Milk Carton?
To make a candle out of ice in a milk carton, first fill the milk carton with water and freeze it. Once frozen, carefully remove the ice from the carton and carve out space for a wick. Then melt some wax and pour it into the carved-out space around the wick.
Can Milk Be Used for Candles?
Milk itself cannot be used to make candles since it is not flammable enough to sustain a flame. However, milk cartons can be repurposed as molds for making candles using wax and a wick.

Welcome to my candle making blog! In this blog, I will be sharing my tips and tricks for making candles. I will also be sharing some of my favorite recipes.


