Introduction
Scented candles are becoming increasingly popular as they bring a pleasant aroma to any room. Candle making kits offer users the ability to create their own customized candles with a personalized scent and design. Not only do these kits make people feel like professional candle makers, they provide an opportunity to use creativity to customize one’s décor while practising aromatherapy.
By researching trends in color, aroma and materials, users of candle making kits can stay up-to-date on the latest scented candle options and come up with creative designs for greater customization. As well as customizing the look of a candle with colors, glitter or even dried flowers, users may also enjoy experimenting with various waxes and wicks for desired sizes and burn times. With individually chosen consistencies ranging from soft foam to hard wax balls, users can add unique touches to their candles before engaging in successively more sophisticated processes such as colour mixing or mixing fragrances for different aromas. Candle making is both an enjoyable skill to practice and can be used easily for self expression or décor purposes.
Common Components of Scented Candle Making Kits
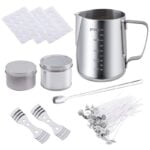
Wax is one of the most important components to candle making and a variety of waxes are available in scented candle making kits, such as soy or beeswax. Candle wicks, made out of cotton or wood, provide the flame that melts the wax. The wicks can be pre-tabbed, which makes them easier to insert into the heated wax. Dyes are added to the melted wax to give it color, while fragrance oils give a unique scent. Wicking tabs provide extra stability and help keep the wick in place during pouring and curing stages. Other necessary materials can include thermometers for checking wax temperature, melting pots for melting down wax pieces before pouring into molds or jars, measuring spoons for scenting and coloring additives, molds for candle shapes, glue dots for holding wick tabs into place on containers, and snuffer caps for extinguishing candles safely.
Steps to Making a Scented Candle
1. Gather supplies. Gather the necessary materials to make a scented candle, including a wax container, wick, wax chips or flakes, essential oils and decorations like dried flowers.
2. Prepping the wick. Snip 8-10 inches off the end of your wick and tape it to the bottom of your containers with paraffin wax or a hot glue gun. Allow 2-3 minutes for it to dry before continuing.
3. Melting the wax chips/flakes. Melt your fragranced wax chips or flakes according to recommended instructions on the product packaging in either a microwave or double boiler on low heat until completely melted, stirring regularly throughout process.
4. Adding fragrance and dye (optional). Gently stir essential oils into melted wax until desired smell is achieved, being careful not to aerate too much which can cause bubbles in final product. If you desire color within your candle add liquid dye now and mix thoroughly using craft stick or popsicle stick for desired color saturation but be careful as adding too much can leave residue after burning as well as stain items it comes into contact with when melted from other additives in dye formula such as vegetable oil and propylene glycol .
5. Pouring Wax into Container & Wicking Candle: Slowly pour melted wax mixture into center of container around your prepped wick, filling all the way up to top of container if desired (*be careful not to overfill).For best results give your newly poured candle at least 3-4 hours at room temperature before moving/burning to help settle any air pockets created while pouring and allow time for perfect curing process to begin while you are making sure that wick has stayed centered during cooling period by occasionally holding taught in place with craft sticks draped across opening of container with side pressed against wick base while letting end rest lightly on edge of lip.(*Note ” If adding additional embellishments be sure they are free floating within liquid pool and not secured down through pouring before proceeding)
6 Finishing touches: Let candle sit 24 hours undisturbed for compatibility testing as well as full cure time between each use depending on size of container used adjust burn time accordingly if needed so that pool and wick remain aligned correctly without being partially submerged in remaining liquid which could potentially smoke when relit..Once finished trimming tip of wick to 1/8 inch above pool before storage inside glass jar or canister positioned away from direct sunlight or ventilation ducts with lid securely closed after each burn also store upright when not lit! Enjoy creating custom candles!
Exploring Fragrance Oils and Scents
Fragrance oils are the essential element behind making scented candles at home. There is a range of options, including natural and synthetic scents, giving you the chance to customize your candles with whatever fragrances you find most appealing. Natural oils often come from plants or fruit such as lavender, lemon and sandalwood, while some synthetic varieties may be floral or fruity in nature.
When making your own candles, it is important to pay attention to the strength of your scent so that it is not overpowering or does not completely create a different smell than intended. To achieve this balance of fragrance oil, start by adding a few drops of oil to your melted wax, then allow the scent to develop for several minutes before testing and adjusting depending on how strong the smell is. Too much aroma will quickly disperse into an unpleasant odour, while too little will result in an undesired lack of perfume. Additionally, double-check that the fragrance oil used can withstand high temperatures and will not turn waxy when mixed with candle wax. To create a personal mix of scents you could experiment by combining two different types of oils. Make sure to document which combinations work best as they could make beautiful gifts or wedding favors!
Benefits of Making Your Own Candles
Making your own scented candles is an incredibly cost-effective way to create your own custom home fragrances. By making your own candles, you likely won’t have to pay for expensive pre-made candles or designer wax blends. You can often find starter kits that contain all the necessary supplies so you can make numerous candles with minimal upfront investment.
Making your own candles not only saves money, but can also be a great way to reduce the environmental impact of store bought options. Crafting and burning recycled materials like used wax, essential oils and other natural products typically creates far fewer pollutants than more traditional collated scent alternatives.
Scented candle making kits are also a great way to express yourself creatively as you get to choose the fragrances and design that suits your needs. Making your own candles allows you to customize unique scents, some of which would simply not be available in stores. This means you can design your very own signature fragrance that is totally exclusive, perfect for gifts or special occasions.
Tips and Tricks to Get the Best Results
Adding Texture to Candles
When it comes to adding texture to scented candles, you can add a variety of materials or wax melts as decoration. To incorporate botanical elements such as herbs and flowers, you can mix them into the melted wax prior to pouring it into your candle mold. If you want an added texture on the surface of your candle, such as glitter or sand, lightly sprinkle the ingredients at the end of pour and gently press them down into the wax before it cools completely. Be prepared for thicker batches of wax if adding too many items with a high melting temperature.
Mixing Colors
Mixing colors in your candles is relatively easy when you have all the right materials. Start by putting individual colors of containers of pre-melted wax together in one larger vessel. Mix small amounts at first, stirring until completely blended before adding additional pigments or effects. For optimal results, use a heat resistent measuring cup with a spout to make pouring easier and more precise.
Troubleshooting Common Mistakes
As with any DIY-project, mistakes are inevitable during the candle making process; some common ones include flickering flames due to fluctuating air temperature or excessive smoke from burning wicks that were cut too long or low-quality oil used for scenting candles. To avoid these issues, be sure follow directions precisely and create test batches (without scent) to adjust factors such as wick size accordingly before moving on with production runs. Additionally, use top quality paraffin wax for optimal results – this will ensure that your candles burn evenly and last longer!
Closing Thoughts
Scented candle making kits are a great way to make your own unique scented candles. Not only does this give you the satisfaction of creating something beautiful for yourself or as a gift, but it also has some wonderful benefits. Candle making can be a very therapeutic and cathartic experience as it requires focus and concentration while allowing you to relax and explore your creativity. There are also no synthetic fragrances used, so you know that your candle is free from any potentially harmful chemicals. When making your own candles, it’s important to consider safety first and foremost. As with all activities involving an open flame, it should always be done with caution; Never leave open flames unattended and always follow the instructions provided in the kit thoroughly. By taking the necessary steps for safety when operating a candle kit, you are sure to have an enjoyable and safe experience as you create amazing works of art through candle making!

Welcome to my candle making blog! In this blog, I will be sharing my tips and tricks for making candles. I will also be sharing some of my favorite recipes.


