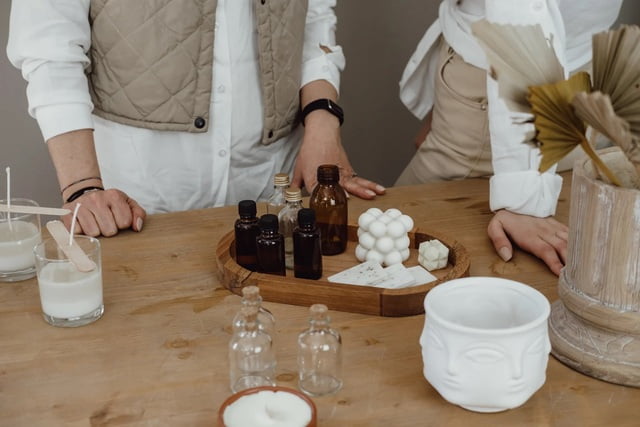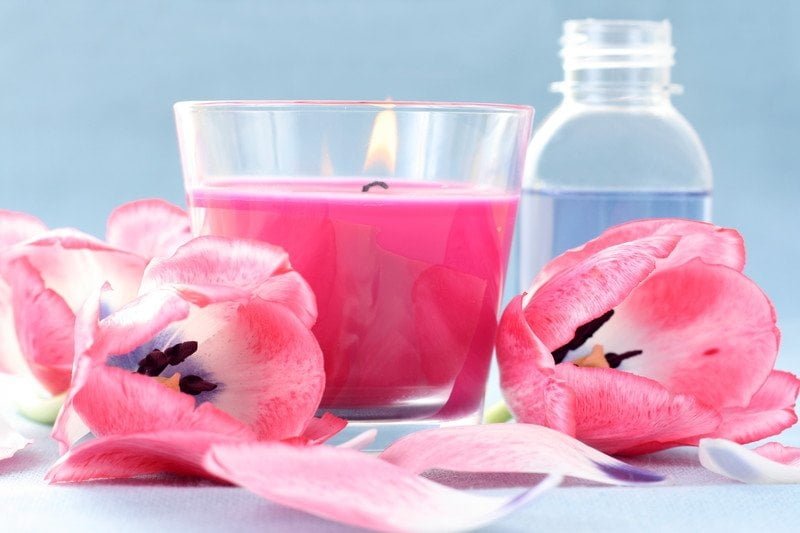
Candle making for beginners has become a popular and therapeutic hobby, allowing individuals to express their creativity while enjoying the process of creating beautiful, fragrant candles. From ancient times to the present day, candles have held historical significance and symbolized various aspects of life, including spirituality, celebration, and relaxation. In this introductory section, we will explore the art and science of candle making, delving into its growing popularity and highlighting its therapeutic benefits.
With the modern-day emphasis on self-care and mindfulness, many people are turning to candle making as a way to unwind and find inner peace. The process of melting wax, adding fragrances and colors, choosing the perfect wick – it all requires focus and attention, providing a sense of relaxation and accomplishment.
As individuals become more aware of the impact their environment has on their well-being, they are also gravitating towards creating customized candles that align with their personal preferences for scents and aesthetics.
Beyond its therapeutic benefits, candle making also encompasses an intriguing blend of artistry and science. Understanding the different materials involved in candle making is crucial for beginners looking to embark on this journey. Essential tools such as melters or double boilers, thermometers, molds or containers play important roles in achieving desired results. Furthermore, having knowledge about various types of wax available in the market helps beginners make informed choices regarding which one would be best suited for their projects.
Essential Candle Making Tools and Materials for Beginners
Tools
When it comes to candle making, having the right tools is essential for a successful and enjoyable experience. Here are some of the must-have tools for beginners:
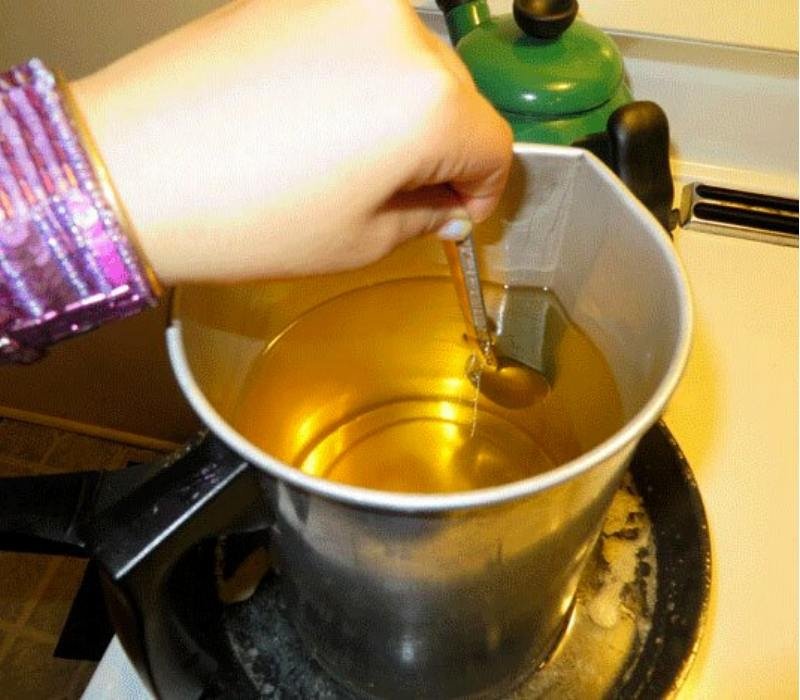
- Double Boiler: This tool is crucial for melting wax safely and evenly. A double boiler consists of two pots, one smaller that fits snugly inside the other. The larger pot is filled with water, and the smaller pot holds the wax. The water in the larger pot creates gentle heat, preventing direct contact between the heat source and the wax.
- Thermometer: To achieve the perfect pouring temperature for your wax, a thermometer is indispensable. Different types of wax require specific temperatures for optimal results. Invest in a good-quality thermometer to accurately monitor and control the temperature during the melting process.
- Pouring Pitcher: A pouring pitcher with a spout makes it easy to pour melted wax into containers without creating a mess or drips. Look for one with a comfortable handle and enough capacity to hold your desired amount of wax.
- Wick Centering Device: Keeping your wick centered while pouring and setting is essential for proper burning and even melt pools in your candles. Wick centering devices come in various shapes and sizes but typically consist of a metal or plastic base with holes to secure the wick.
Materials
Apart from tools, there are specific materials that you’ll need to create your own candles at home:
- Wax: Various types of wax are available on the market, each offering different characteristics such as color, scent throw, burn time, and ease of use. Soy wax, beeswax, and paraffin wax are commonly used by beginners due to their accessibility and versatility.
- Wicks: Choosing the right wick is crucial as it determines how your candle will burn. There are different sizes and types of wicks available based on factors like candle diameter and type of wax. Make sure to select wicks that are appropriate for your specific candle project.
- Containers: The container you choose for your candle is not just functional but also adds a decorative element. Glass jars, tin cans, ceramic bowls, or even recycled containers can be used. Ensure that the container is heat-resistant and doesn’t crack or shatter when exposed to high temperatures.
- Fragrance: Adding fragrance to your candles enhances the overall experience. Essential oils and fragrance oils are popular choices for scenting candles. Be cautious about the amount of fragrance oil used as it can affect the quality of the burn.
By gathering these essential tools and materials before starting your candle making journey, you’ll be well-prepared to create beautiful and fragrant candles in no time.
Choosing the Right Wax for Your Candle Making Project
When it comes to candle making, choosing the right wax is essential for achieving desired results. There are several types of wax available in the market, each with its own unique characteristics and properties. Understanding the pros and cons of different waxes can help beginners make informed decisions and create candles that meet their specific needs.
One common type of wax used in candle making is paraffin wax. Paraffin wax is derived from petroleum and is known for its affordability and wide availability. It has a high melting point, which makes it ideal for creating sturdy pillar candles. However, paraffin wax may release toxins and produce soot when burned, which can be a concern for those seeking a more sustainable option.
Another popular choice among candle makers is soy wax. Made from soybeans, this natural wax offers a cleaner burn compared to paraffin wax. Soy wax also has excellent scent throw capabilities, meaning it can effectively carry fragrance throughout the room when the candle is burning. Additionally, soy wax is biodegradable and renewable, making it an environmentally friendly choice.
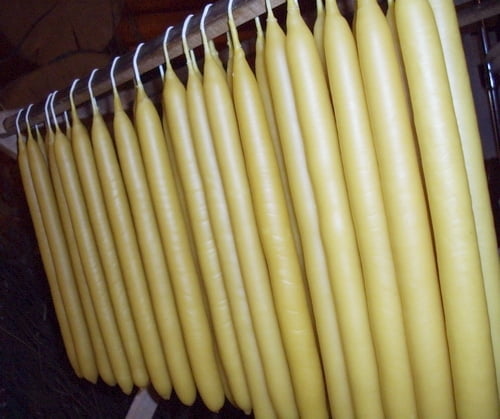
For those looking for an alternative to traditional waxes, beeswax is an excellent option. Beeswax offers a naturally sweet aroma and produces a warm glow when burned. It has a higher melting point compared to other waxes, making it suitable for creating long-lasting candles with minimal dripping. Beeswax candles are also known to emit negative ions that can purify the air by neutralizing pollutants.
| Wax Type | Pros | Cons |
|---|---|---|
| Paraffin Wax | Affordable and widely available | May release toxins and produce soot |
| Soy Wax | Offers a cleaner burn; excellent scent throw capabilities | Pricier compared to paraffin wax |
| Beeswax | Natural sweet aroma; burns with minimal dripping | Higher melting point; may be more expensive |
In addition to these three, there are other types of waxes available such as palm wax, coconut wax, and gel wax. Each has its own unique qualities and benefits, but they may require different techniques or considerations during the candle making process. It’s important for beginners to research and experiment with different waxes to find the one that best suits their preferences and project goals.
When purchasing wax, it is recommended to buy from reputable suppliers who provide high-quality products. This ensures that you are using wax that will yield consistent results and offer a safe burning experience. Online candle supply stores, craft stores, or local artisans are all good places to find quality waxes for your candle making projects.
By carefully considering the characteristics of different waxes and selecting the one that aligns with your specific needs, you can create beautiful and unique candles that enhance any space with their warmth and fragrance.
Adding Fragrance to Your Candle
Adding fragrance to your candle is an important step in the candle making process, as it enhances the overall experience and ambiance of the candle. There are various fragrance options available, such as essential oils and fragrance oils, each offering their own unique scents and benefits.
When selecting a fragrance for your candle, it’s important to consider the desired scent profile and how it will complement the purpose or theme of your candle. Essential oils are derived from natural botanical sources and offer a wide range of fragrances, including floral, citrus, herbal, and woody scents. They can provide therapeutic benefits such as relaxation, stress relief, or energizing effects depending on the chosen oil.
On the other hand, fragrance oils are synthetic blends specifically formulated for candle making. They offer a larger variety of scents compared to essential oils and often have complex notes that can resemble popular perfumes or seasonal aromas. Fragrance oils also tend to have stronger scent throw when used in candles.
When measuring and adding fragrance to your wax, it’s important to follow recommended guidelines provided by suppliers or specific recipes. Generally, a common rule of thumb is adding 1 ounce (30 mL) of fragrance oil per pound (454 grams) of wax for a medium scent throw. However, this may vary depending on personal preference or desired intensity.
The strength of the scent in candles also depends on something called “fragrance load,” which refers to the maximum amount of fragrance that can be safely added to a given amount of wax. It’s important not to exceed this load as it can affect burn quality and safety. The recommended fragrance load varies based on the type of wax being used and can typically be found in supplier guidelines or through testing.
Selecting the Perfect Wick for Your Candle
The wick is a crucial component of a candle as it determines how the candle will burn and perform. Choosing the right wick for your candle is essential in achieving optimal burning characteristics and ensuring a successful candle-making project. In this section, we will explore different wick options, discuss their burning characteristics, and provide guidance on selecting the perfect wick size for different candle sizes and waxes.
There are several types of wicks available in the market, each with its own burning characteristics. Cotton wicks are commonly used due to their clean burn and even flame. They come in various thicknesses or “sizes,” which determine the amount of fuel (wax) that can reach the flame at any given time. The size of the wick will depend on factors such as the diameter of your container and the type of wax you are using.
When selecting a wick size, it’s important to consider both the diameter of your container and the type of wax you are using. A too-small wick may cause poor fragrance throw, tunneling (where only a small portion of the wax melts), or an unstable flame. On the other hand, a too-large wick can result in excessive smoking, mushrooming (carbon buildup at the tip), or sooting.
To determine the appropriate wick size for your candle, you can refer to wick charts provided by manufacturers or suppliers. These charts typically suggest recommended wick sizes based on container diameter and wax type. However, it’s important to note that these recommendations are just starting points, and you may need to experiment with different sizes to find what works best for your specific project.
Properly priming and centering your wick is also crucial for optimal performance. Priming involves coating the wick in melted wax before placing it in the container, which helps with ignition and reduces carbon buildup (mushrooming). Centering ensures that the flame remains in the center of the candle, preventing uneven burning.
In summary, selecting the perfect wick for your candle involves considering factors such as container diameter, wax type, and desired burning characteristics. Experimentation and testing may be necessary to find the ideal wick size for your specific project. Proper priming and centering of the wick are also important for optimal performance. By choosing the right wick, you can ensure a beautiful and well-performing candle that brings joy to its users.
| Wick Type | Burning Characteristics |
|---|---|
| Cotton wicks | Clean burn and even flame; come in various sizes |
| Wooden wicks | Create a crackling sound reminiscent of a fireplace; suitable for larger candles or container with deeper pools of melted wax |
| Zinc core wicks | Firmer structure for stability; often used in pillars or specialty candles with unique shapes and designs |
Mastering the Art of Candle Coloring
Color plays a vital role in the overall aesthetic appeal of candles. Mastering the art of candle coloring allows beginners to create personalized and visually stunning candles that reflect their unique style. This section will introduce different candle colorants, provide tips on achieving vibrant or pastel colors, and emphasize safety precautions when handling coloring agents.
When it comes to candle coloring, there are a variety of options available to beginners. Liquid dyes, color chips, and natural alternatives are commonly used to add color to candles. Liquid dyes offer a wide range of vibrant colors and are easy to work with.
Color chips, on the other hand, provide more convenience as they can be added directly to the melted wax without worrying about measurements. Natural alternatives such as herbs or spices can also be used for a more organic touch.
To achieve vibrant colors, it is important to experiment with different dye concentrations. Start with a small amount of dye at first and gradually increase until the desired color is achieved. For pastel shades, use less dye or dilute the liquid dye with some melted wax before adding it into the main batch.
Creating unique effects in your candles can be done by layering different colored waxes or using techniques like swirls or marbling. To achieve layered effects, pour one color into your container and allow it to partially solidify before pouring the next layer on top. Swirls or marbling effects can be achieved by simply dragging a stick through the melted wax before it fully solidifies.
While experimenting with candle coloring, it is important to prioritize safety precautions. Some dyes may stain surfaces or cause skin irritation if not handled properly. Wear gloves and protective clothing when working with coloring agents and make sure your work area is well-ventilated.
Mastering the art of candle coloring opens up endless possibilities for creativity and customization in candle making. Whether you prefer bold and vibrant colors or subtle pastels, this section has provided an introduction to different colorants and tips to achieve desired effects. Remember to always prioritize safety when working with candle coloring agents and enjoy the process of creating your own unique candles.
Step-by-Step Candle Making Instructions for Beginners
Candle making can be a fun and rewarding hobby for beginners. With the right tools, materials, and knowledge, you can create beautiful candles that are not only aesthetically pleasing but also provide a soothing ambiance in your space. In this section, we will provide you with step-by-step instructions on how to make candles as a beginner.
Gather Your Supplies
Before diving into the candle making process, it is important to have all the necessary tools and materials at hand. Here’s a list of what you’ll need:
– Wax (such as soy wax or paraffin wax).
– Container for your candle (e.g., glass jar or tin).
– Wick.
– Fragrance oil or essential oil (optional).
– Candle dye or colorant (optional).
– Double boiler or a heatproof container and saucepan.
– Thermometer.
– Stirring utensil (e.g., spoon or popsicle stick).
– Heat-resistant surface for pouring (e.g., newspaper or silicone mat).
– Clothespin or wick sustainer tab.
– Scissors.
The Candle Making Process
- Prepare your container by cleaning it thoroughly to ensure that there are no dust or debris.
- Measure the amount of wax you need based on the size of your container. It is generally recommended to use 1 ounce of wax per 1 inch of diameter.
- Use a double boiler or a heatproof container placed in a saucepan filled with water to melt the wax over medium heat. Stir occasionally until the wax reaches its melting point, which is typically between 160°F and 180°F (71°C – 82°C).
- While waiting for the wax to melt, prepare your wick by attaching it to a clothespin or wick sustainer tab. Trim the wick leaving about half an inch above the surface of your container.
- Once the wax has melted, let it cool down to the pouring temperature. The ideal pouring temperature varies depending on the type of wax you are using, so refer to the manufacturer’s instructions.
- If desired, add fragrance oil or essential oil to your wax following the recommended fragrance load for your chosen scent. A general guideline is 1 ounce of fragrance oil per 1 pound of wax.
- If you want to color your candle, add a small amount of candle dye or colorant to achieve your desired shade. Remember that a little goes a long way, so start with a small amount and gradually add more if needed.
- Mix the fragrance and color well into the melted wax using your stirring utensil.
- Carefully pour the melted wax into your container, ensuring that the wick stays centered.
- Let the candle cool completely and cure for at least 24 hours before lighting it.
Troubleshooting Common Issues
While making candles, beginners may encounter some common issues such as sinkholes, tunneling, or wet spots. Here are a few tips to troubleshoot these problems:
– To prevent sinkholes, try gently heating the surface of the poured candle with a heat gun or hairdryer to even out any depressions.
– Tunneling occurs when the wick does not burn all the way across, leaving unused wax on the sides of the container. To fix this issue, trim your wick to an appropriate length (about ¼ inch) before each use.
– Wet spots are patches on the glass container where there is no adhesion between the wax and glass, resulting in an unattractive appearance. To prevent wet spots, try preheating your container before pouring in hot wax.
Now that you know how to make candles as a beginner, it’s time to unleash your creativity and start experimenting with different fragrances, colors, and container styles. Remember to always prioritize safety by following proper candle care techniques and enjoying the therapeutic benefits of this craft.
Candle Care and Safety Tips
Essential Candle Care Techniques
To ensure the optimal burning and longevity of your candles, it is important to follow proper candle care techniques. These practices not only maximize the performance of your candles but also help create a safe environment while enjoying their warm glow. Here are some essential candle care tips for beginners:
- Trim the Wick: Before lighting your candle, always remember to trim the wick to about ¼ inch. This prevents excessive flickering and soot formation, ensuring a clean and even burn.
- Allow the Wax Pool to Reach the Edges: During each burn, make sure that the melted wax pool reaches all sides of the container or jar. This helps prevent tunneling, where a hole forms in the center of the candle, leaving wax on the sides untouched.
- Avoid Drafts: Place your candles away from breezy areas as drafts can cause uneven burning and may even lead to accidents. They can also accelerate the rate at which your candles burn.
- Use Candle Snuffers or Tools: Rather than blowing out your candles, use a candle snuffer or a tool specifically designed for extinguishing flames. This prevents hot wax from splattering and keeps surrounding surfaces clean.
- Store Candles Properly: When not in use, store your candles in a cool and dry place away from direct sunlight or extreme temperatures. This helps preserve their color, scent, and overall quality.
Safety Precautions and Guidelines
While candles are delightful additions to any room, it is crucial to be aware of potential hazards and practice safety precautions when using them. By following these guidelines, you can prevent accidents and promote a secure environment:
- Never Leave Burning Candles Unattended: It is essential to extinguish all candles before leaving a room or going to sleep. Accidents can happen quickly if an unattended flame ignites nearby objects or surfaces.
- Keep Candles Away from Flammable Items: Always make sure to keep candles at least 12 inches away from anything flammable, such as curtains, papers, or decorations. This lessens the risk of accidental fires.
- Use Appropriate Candle Holders: Ensure that your candles are placed on sturdy and heat-resistant surfaces or holders. Avoid using containers that can easily break or that are too small for your candles, as this increases the chance of accidents.
- Protect Your Pets and Children: Keep burning candles out of reach of pets and children to avoid burns or unintended accidents. Make sure they understand the dangers associated with open flames.
- Extinguish Candles Properly: When extinguishing a candle, use a candle snuffer, gently blow it out, or dip the wick into the melted wax and then straighten it again. Avoid forcibly putting out a flame as this can cause wax splattering.
By following these candle care techniques and safety guidelines, beginners can fully enjoy their candle-making journey in a safe and responsible manner while embracing the therapeutic qualities of these handmade creations.
Conclusion
Candle making is a versatile and rewarding craft that allows beginners to ignite their creativity and express themselves through the art of creating beautiful and fragrant candles. Throughout this article, we have explored the various aspects of candle making, from essential tools and materials to choosing the right wax, adding fragrance, selecting the perfect wick, mastering coloration techniques, following step-by-step instructions, and practicing candle care and safety.
By delving into the world of candle making, beginners not only embark on a journey of self-expression but also unlock numerous therapeutic benefits. The act of creating candles can be a form of relaxation and stress relief, offering a sense of accomplishment through the tangible result of their efforts. Additionally, the gentle glow emitted by candles can create a calming ambiance in any space, making them an ideal addition to meditation or self-care routines.
Aspiring candle makers are encouraged to embrace their individuality and experiment with different techniques, scents, colors, and containers. There are virtually endless possibilities for customization in candle making – from combining unique fragrance combinations to creating visually stunning effects with colorants. By seeking inspiration from resources such as online tutorials or books specifically dedicated to this craft, beginners can continue expanding their knowledge and pushing their creative boundaries.
In conclusion, candle making for beginners is not just about producing functional objects; it is an art form that celebrates personal expression and ignites creativity. As you embark on your journey in candle making, remember to have fun while learning from your mistakes and successes alike. Let your imagination run wild as you create candles that reflect your style and personality. So go ahead – infuse your space with light, warmth, beauty – ignite your creativity with candle making.


