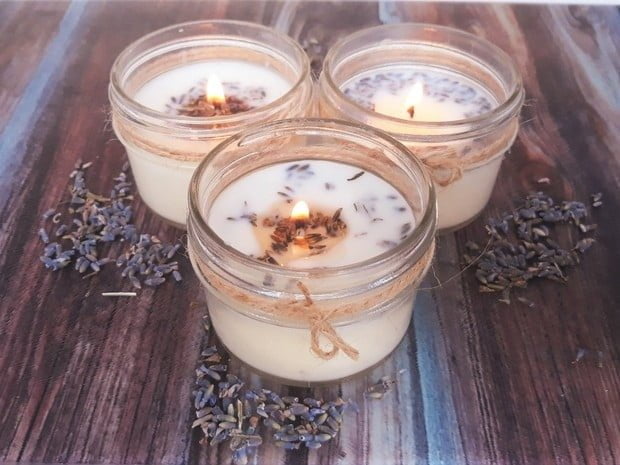
The process of making candles is not only a creative and artistic endeavor but also a skill that requires precision and attention to detail. One crucial aspect of candle making is melting the wax properly, as it can greatly affect the outcome of the final product. Whether you are a beginner or an experienced candle maker, understanding the importance of properly melting wax is essential for achieving beautiful and long-lasting candles.
When wax is melted correctly, it allows for better fragrance distribution, smoother texture, and even burning. On the other hand, improperly melted wax can result in poor candle quality, such as uneven burning or weak scent throw. To avoid these issues and ensure that your candles turn out just the way you envision them, it is crucial to master the art of melting wax.
In this article, we will explore various techniques and methods for melting wax for candle making. We will delve into topics such as choosing the right type of wax, necessary equipment and supplies, essential safety precautions to follow, alternative methods for melting wax, maintaining the right temperature, troubleshooting common issues, and more.
By following our step-by-step guidelines and incorporating our tips and tricks into your candle making process, you will be well on your way to creating beautiful and fragrant candles that are sure to impress. So let’s begin our journey into the world of melted wax and discover how to unlock its true potential in candle making.
Choosing the Right Wax
Choosing the right wax is crucial for creating high-quality candles. Different types of wax have varying characteristics that can impact the appearance, burn time, and fragrance throw of the finished candle. Understanding these differences will help you choose the best wax for your specific candle-making needs.
Paraffin Wax
Paraffin wax is one of the most commonly used waxes in candle making. It is derived from petroleum, making it an affordable option. Paraffin wax has a smooth and shiny finish and comes in various melting points to suit different candle types. It has excellent scent throw and burns cleanly when properly formulated.
Soy Wax
Soy wax is made from soybean oil, making it a renewable and eco-friendly choice. It has a lower melting point than paraffin wax, resulting in longer burning times. Soy candles have a natural creamy appearance but may have less fragrance throw compared to paraffin candles. However, they are popular among consumers who prefer plant-based products.
Beeswax
Beeswax is a natural wax produced by bees in honeycomb cells. It has a delightful honey-like aroma and a beautiful golden color when used in its pure form. Beeswax candles produce a warm glow and burn slowly, but they tend to have less scent throw compared to other waxes unless combined with fragrant oils.
Palm Wax
Palm wax is derived from palm oil and is known for its unique crystalline appearance once solidified. It creates stunning marbled or textured candles but requires careful handling to prevent air bubbles or surface imperfections during pouring.
Gel Wax
Gel wax is not technically a true wax; it is a blend of mineral oil and polymer resin that creates transparent candles with a unique visual effect. Gel candles can embed objects and have a longer burn time, making them great for decorative purposes.
When choosing the right wax for your candle-making project, consider factors such as burn time, scent throw, appearance, and eco-friendliness. Some waxes may require different additives or techniques to achieve optimal results. Experimentation is key to finding the perfect wax that aligns with your desired candle characteristics and personal preferences.
Equipment and Supplies
Choosing the Right Wax
Before diving into the equipment and supplies needed for melting wax, it’s important to understand the different types of wax available for candle making. The choice of wax will greatly impact the final result of your candles, so it’s essential to choose wisely.
One popular type of wax for candle making is soy wax. Derived from soybeans, soy wax is known for its natural and environmentally-friendly qualities. It has a low melting point and often produces a clean burn with minimal soot. Another commonly used option is paraffin wax, which is derived from petroleum. Paraffin wax has a higher melting point than soy wax and tends to give off a stronger scent throw.
Beeswax is another popular choice among candle makers. It is all-natural and offers a natural honey-like fragrance when burned. Beeswax has a high melting point, which can make it more challenging to work with but results in longer burning candles.
There are also various blends available on the market, such as soy-paraffin blends or coconut blended with other waxes. These blends offer unique characteristics that can be tailored to your specific candle making needs. Ultimately, the choice of wax depends on personal preference, desired outcome, and the type of candles you want to create.
Essential Tools and Materials
Now that you have an understanding of different types of wax, let’s explore the essential tools and materials needed for safely melting wax. Here are some must-have items:
- Double boiler: A double boiler is crucial for safely melting wax without direct heat. It consists of two pots-one larger pot filled with water and one smaller pot placed inside where you’ll place your chunks or pellets of wax.
- Thermometer: A good quality thermometer is essential to accurately monitor the temperature during the melting process. Different waxes have different melting points, so it’s important to know when the wax has reached the desired temperature.
- Heat source: You will need a heat source, such as a stovetop or an electric hot plate, to heat the water in the larger pot of your double boiler.
- Wax pouring pitcher: A pouring pitcher specifically designed for candle making helps control the flow of melted wax when pouring into molds or containers.
- Stirring utensil: A long-handled spoon or spatula is necessary for stirring and mixing the melting wax gently.
- Candle molds or containers: Depending on your desired candle shape, you’ll need molds or containers to pour and shape your melted wax.
In addition to these essentials, it’s important to have a clean and clutter-free workspace, protective gear such as heat-resistant gloves and goggles, and a fire extinguisher nearby in case of any emergencies. By having all the necessary tools and materials prepared beforehand, you will ensure a smooth and safe wax melting process for your candle making endeavors.
Preparing the Work Space
Setting up a clean and organized work space is crucial when it comes to melting wax for candle making. Not only does it ensure efficiency and convenience, but it also promotes safety and reduces the risk of accidents. Here are some important steps to follow when preparing your work space for wax melting.
First, start by choosing a designated area for your candle making process. It should be well-ventilated and free from any flammable materials or open flames, as an accidental spill or ignition could lead to a fire hazard. Clear away clutter and ensure there is enough room for all your equipment and supplies.
Next, cover your work surface with a heat-resistant material such as aluminum foil or a silicone mat. This will protect the surface from any spills or stains caused by melted wax. It also makes cleanup much easier at the end of your candle making session.
Organize your equipment in an easily accessible manner. This includes your double boiler or melting pot, thermometer, stirring utensils, pouring container, molds or containers for the candles, and any other tools you may need. Having everything within reach saves time and prevents accidents caused by reaching over hot surfaces.
Lastly, consider having designated storage areas for both raw materials and finished products. A well-organized storage system ensures that you can easily find what you need when making candles and helps prevent contamination or spoilage of unused materials.
By following these steps to prepare your work space, you can create a clean and organized environment that sets the stage for successful wax melting and candle making. Remember, taking the time to set up properly will make the entire process smoother and more enjoyable while ensuring safety throughout.
Safety Precautions
When it comes to melting wax for candle making, safety should always be the top priority. Handling hot wax can be dangerous if proper precautions are not taken. This section will discuss important measures that should be followed to avoid accidents and burns while melting wax.
One of the most important safety precautions is to wear protective gear. It is recommended to wear heat-resistant gloves and long sleeves to protect your hands and arms from potential burns. Additionally, wearing safety goggles can protect your eyes from any splattering hot wax. It is also advisable to have a fire extinguisher nearby in case of emergencies.
Another crucial safety measure is to work in a well-ventilated area. Proper ventilation helps in dissipating any fumes that may arise during the wax melting process. This can prevent respiratory issues or headaches caused by inhaling these fumes. If working indoors, consider opening windows or using fans to promote air circulation.
Furthermore, it is essential to keep flammable items away from the workspace. Wax has a low flashpoint and can easily catch fire if exposed to an open flame or high temperatures. Ensure that there are no flammable materials such as paper or fabric near the melting area. Clearing all clutter from the workspace minimizes the risk of accidents.
| Safety Precautions | Measures |
|---|---|
| Wear Protective Gear | – Heat-resistant gloves and long sleeves – Safety goggles |
| Work in a Well-Ventilated Area | – Open windows or use fans for air circulation |
| Keep Flammable Items Away | – Clear flammable materials from the workspace |
The Double Boiler Method
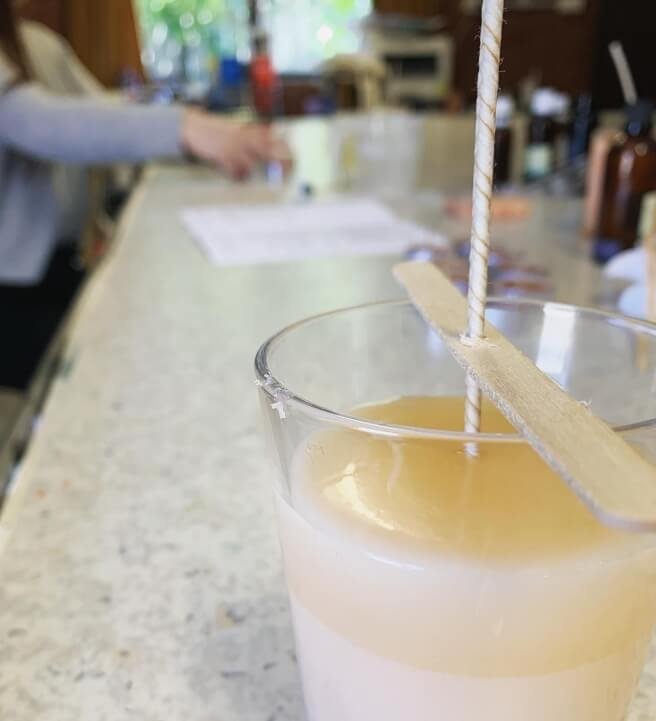
The double boiler method is one of the most popular and effective ways to melt wax for candle making. It provides a controlled and gentle heat, ensuring that the wax melts evenly and without any risk of scorching or burning. Here is a step-by-step guide on how to use the double boiler method for melting wax.
Step 1: Gather Your Materials
Before you begin, make sure you have all the necessary materials ready. You will need a double boiler, which consists of a smaller pot or heatproof container that fits inside a larger pot filled with water. It’s important to use a heatproof container for the smaller pot, such as stainless steel or glass, as plastic containers can melt.
Step 2: Fill the Larger Pot with Water
Pour water into the larger pot, filling it about halfway. The amount of water will vary depending on how much wax you are melting, but aim for at least an inch of water in the bottom of the pot. Place the smaller pot or container into the larger pot, ensuring that it sits securely and doesn’t tip over.
Step 3: Add Wax to the Smaller Pot
Place your desired amount of wax into the smaller pot or container. Cut or break up large chunks of wax into smaller pieces to help them melt more quickly and evenly. It’s important not to overflow the container with wax as it needs room to expand when it melts.
Step 4: Heat on Low to Medium Heat
Turn on the stove to low to medium heat and allow the water in the larger pot to come to a simmer. The steam from simmering water will gently heat up your wax without direct contact from flames or excessive heat. Stir occasionally with a heat-resistant utensil until the wax is completely melted and smooth.
Using the double boiler method ensures that your wax reaches its melting point gradually and evenly, resulting in a high-quality finished product. Always keep an eye on your wax while it melts to avoid any accidents or overheating. Once the wax is melted, you can proceed to the next steps in candle making, such as adding fragrance oils or dyes, and pouring the wax into your desired candle molds or containers.
Alternative Methods
One of the alternative methods for melting wax for candle making is using a microwave. This method offers convenience and speed, making it a popular choice for many candle makers. To melt wax using a microwave, follow these steps:
- Prepare the wax: Begin by cutting the wax into small chunks or using pre-measured wax pellets. This will help ensure even melting.
- Use a microwave-safe container: Place the wax in a microwave-safe container, such as a glass or ceramic bowl. Avoid using plastic containers as they may melt or release harmful chemicals when exposed to heat.
- Heat in short intervals: Place the container in the microwave and set it to low heat or defrost mode. Heat the wax in short 30-second intervals, stirring in between each interval. This helps prevent overheating and ensures that the wax melts evenly.
- Monitor closely: Keep a close eye on the wax while it’s melting in the microwave. Overheating can cause the wax to ignite or release toxic fumes. If you notice any smoke or an unusual smell, stop immediately and allow the wax to cool before continuing.
- Stir well: Once the wax has completely melted, remove it from the microwave and give it a good stir to ensure all solid pieces have dissolved.
- 1.Prepare your slow cooker: Place a heat-resistant container inside your slow cooker, making sure it fits comfortably without touching its sides or bottom.
- 2.Fill with water: Pour water into your slow cooker until it reaches about one-third of your container’s height.
- 3.Cut and place the wax: Cut your wax into small chunks or use pre-measured pellets, then place them inside your heat-resistant container.
- 4.Set the slow cooker: Turn on your slow cooker to its lowest setting. This will provide gentle and steady heat for the wax to melt.
- 5.Wait and stir occasionally: Allow the wax to melt slowly within the slow cooker, stirring occasionally to ensure even melting. As with any method, be cautious of overheating and never leave the slow cooker unattended.
Another alternative method for melting wax is using a slow cooker or crockpot. This method is great for melting large quantities of wax at once and allows for consistent heat distribution. Here’s how to melt wax using a slow cooker:
These alternative methods offer different ways to melt wax for candle making, allowing you to choose the one that best suits your needs and preferences. Whether using a microwave or a slow cooker, always follow safety precautions and monitor closely throughout the melting process.
Maintaining the Right Temperature
Maintaining the right temperature is crucial when it comes to melting wax for candle making. A consistent and appropriate temperature ensures that the wax melts evenly and does not become overheated or scorched. Here are some tips and tricks to help you achieve perfect wax melting:
- Use a thermometer: To maintain the right temperature, it is important to use a reliable thermometer designed for candle making. This will allow you to monitor the temperature of the wax accurately throughout the melting process. Keep in mind that different types of wax have different melting points, so consult a temperature guide or the manufacturer’s instructions for your specific type of wax.
- Stir constantly: While melting wax, it is essential to stir it continuously. The stirring helps distribute heat evenly and prevents any hot spots from developing within the container or double boiler. This ensures that all the wax melts at a uniform temperature.
- Avoid direct heat: Direct heat sources such as stovetop burners should be avoided when melting wax for candles, as they can cause uneven heating and lead to scorching or burning of the wax. Instead, opt for indirect heat methods such as using a double boiler or a dedicated melting pot designed for candle making.
- Be patient: Rushing through the melting process can lead to problems like overheating or incomplete melting of the wax. It is important to be patient and allow the wax to melt slowly and evenly at a controlled temperature.
- Practice small batch melting: If you are new to candle making or if you are working with sensitive waxes, it is always recommended to start with small batches of wax. This allows you to better control the temperature and reduces the risk of wasting large quantities of ingredients.
Remember, maintaining the right temperature during wax melting is essential for creating high-quality candles with an even burn and proper fragrance release. By following these tips and tricks, you can ensure that your candles turn out beautifully every time.
Troubleshooting
When melting wax for candle making, it is important to be aware of common issues that may arise during the process. This section will discuss some of these common issues and provide solutions to help troubleshoot and overcome them.
One common issue when melting wax is the presence of lumps or clumps in the melted wax. This can occur when the wax is not melted at the right temperature or if it has been left unattended for too long.
To solve this problem, it is important to ensure that the wax is melted at the recommended temperature according to the specific type of wax being used. Stirring the wax frequently while it is melting can also help prevent lumps from forming.
Another issue that can arise when melting wax for candle making is discoloration or browning of the wax. This can be caused by overheating or prolonged exposure to high temperatures. To avoid this issue, it is crucial to monitor the temperature closely and not exceed the recommended melting temperature for the specific type of wax being used. If discoloration does occur, adding a small amount of white or uncolored wax can help neutralize any browning.
Furthermore, another common problem when melting wax is uneven heating, resulting in pockets of unmelted or partially melted wax. This can occur if the heat source is not distributed evenly or if there are air bubbles trapped within the melting container.
To address this issue, it is important to use a heat source that provides consistent heat distribution, such as a double boiler method or a hot plate with even heat settings. Additionally, gently tapping on the sides of the container can help release any trapped air bubbles and ensure even heating throughout.
By being aware of these common issues and following these solutions, candle makers can troubleshoot and overcome any problems encountered during the process of melting wax. With practice and attention to detail, mastering the art of troubleshooting will lead to consistently successful results in creating beautiful and fragrant candles.
Conclusion
In conclusion, mastering the art of wax melting is essential for creating beautiful and fragrant candles. By following the guidelines outlined in this article, candle makers can ensure that their wax is melted properly and safely. Choosing the right wax is crucial, as different types of wax have different melting points and characteristics that can affect the final outcome of the candle.
Equally important is having the necessary equipment and supplies to melt wax safely. A double boiler method is often recommended for beginners, as it provides a gentle and consistent heat source for melting wax without exposing it to direct flame. However, alternative methods can also be explored, depending on personal preference and resources.
Maintaining the right temperature throughout the melting process is crucial to achieve perfect results. Taking safety precautions to avoid accidents and burns should also be a top priority when working with hot wax. By preparing a clean and organized work space, troubleshooting common issues, and following proper techniques, candle makers can consistently create high-quality candles that not only look beautiful but also smell amazing.
Ultimately, mastering the art of wax melting takes practice and experimentation. Each individual may have their own unique preferences and techniques when it comes to creating candles that reflect their personal style and vision. With dedication, patience, and attention to detail, anyone can become skilled at melting wax for making candles that bring warmth, light, and fragrance into any space.

Welcome to my candle making blog! In this blog, I will be sharing my tips and tricks for making candles. I will also be sharing some of my favorite recipes.

