Making candles in canning jars has become a popular activity, and for good reason. The process of making them is relatively straightforward, and the resulting candle will look great when completed. Plus, it gives you an excellent excuse to get creative with the colors and scents.
You can make personalized gifts for friends and family with your own homemade candles too. To get started on this exciting project, all you need are several empty canning jars and some wax flakes, along with wick supplies and essential oils or fragrances if you choose.
The First Steps The first step in making candles in canning jars is to prepare the containers. Wash them thoroughly with hot soapy water to remove any dirt or residue from previous uses, then rinse them clean with cold water before drying completely with a lint-free cloth or paper towel.
Next, set up your wax-melting station consisting of a large metal pot filled partway with hot tap water on the stove over medium heat. Place a glass bowl inside the pot that fits comfortably without touching the sides of the pot or bottom of the pan; this will be used to melt your wax flakes slowly until they become liquid.
Adding The Aromantic Fragrance Essential oils or other fragrances may be added to customize your candles’ scent at this time by adding 15 – 20 drops directly into the melted wax prior to pouring it into each jar. Make sure all ingredients are stirred together so that they are evenly distributed before you place your wicks in each container (you may wish to use pre-waxed wicking as this will help it stay in place while pouring).
Once this is complete, allow all ingredients to cool for ten minutes before pouring slowly into each jar; wait another fifteen minutes before moving onto alignment/adjustment of wicks as required.
Types Of Canning Jars To Choose From
Making candles in canning jars is a fun and easy way to make beautiful decorations for the home. They can be made into any size or shape that you want, and they’re an excellent choice if you’re looking for something unique. Canning jars come in different sizes, shapes, colors, and materials; from glass mason jars to metal tin cans. Depending on the type of candle you are making, there are several types of canning jars to choose from.
Glass mason jars are some of the most popular types of canning jars used for candle making. Mason jars come in a variety of sizes ranging from 4-16 ounces which makes them great for creating small votives or large oversized pillars. The larger sizes also allow for more wax than their smaller counterparts.
Glass mason jars also allow for natural light diffusion which creates a warm glow when lit up with candles. They come in clear or color tinted glass and have a sturdy design which is important considering the risks associated with open flame candles.
Metal tin cans are another common type of canning jar option that can be used to make candles. Metal tin cans generally come in taller cylindrical shapes topped off with tight lids that securely seal their contents.
Tin cans provide an interesting rustic look that adds character to many creative candle creations and offers yet another avenue for experimentation. The lids provide extra protection against fire should any wax spill over once the wick is lit up while at the same time eliminating pesky pesky bugs or other pests from invading your premises along with ensuring better heat retention when it comes to burning candles made using these types of containers.
Regular plastic food jars are another popular option due to their affordability and simplistic aesthetic appeal; perfect for anyone who wants to try out candle-making without investing too much money right away at first. Plastic food jar candles can easily customized based on size, shape, opacity (including translucent / clear options), color and scent-making them versatile enough accommodate all styles of dreamy creations envisioned by crafty do-it-yourselfers all around the world.
These plastic containers tend to give off great colors combos when lit such as pink hues which could fit perfectly into romantic occasions such as weddings or other special events like anniversaries amongst other times where it would make sense aesthetically speaking.
The Science Behind the Wax for Making Candles In Canning Jars
Candles in canning jars are a popular and convenient way of lighting up any room. However, they require scientific knowledge and understanding to produce successful results.
One of the most essential aspects of making candles is knowing which wax to use. Wax has a variety of properties that determine its suitability for the ideal candle-making experience.
The main types of wax that can be used for creating candles in canning jars include:
- Paraffin
- Soy
- Beeswax and plant-based
Paraffin is one of the most popular types of candle wax due to its high melting point and long burning time. It is a petroleum-derived product and usually comes in pellets that can be melted down and used for candle making at home. The downside to paraffin is that it may release harmful toxins when burned, so it’s important to make sure that you are using it responsibly.
Soy wax is becoming increasingly popular due to its natural properties and environmental benefits. It has a lower melting point than paraffin but will still give your candles plenty of burn time. Soy wax also does not release any toxins when burned, making it safer for you and your family. Additionally, soy wax can also come in beads or flakes depending on your preference.
Beeswax is another type of wax that’s becoming more prevalent with eco-friendly candles as it produces low levels soot when burned. It’s harvested from bee hives and requires additional chemicals or additives to make the right consistency for candle making.
Plant-based waxes range from beeswax derivatives, such as bayberry or palm oil, to vegetable oils like coconut or sustainable palm kernel oil, all having various melting points suitable for simple at home projects like creating candles in mason jars.
Essential CandleMaking Tools
- Metal pot – A large metal pot is necessary for melting the wax over a stove.
- Thermometer – You’ll use a thermometer to make sure you keep track of the temperature of the melted wax so you get the mixture just right.
- Fragrance oil – Make sure to use fragrance oil that’s specifically designed for candles, not one you might find at your local craft store.
- Wick holders – Wax can be quite sticky, so wick holders will help keep your newly created candle from sticking to its container.
- Wicks – Depending on the size of the candle you are making, select appropriate sized wicks.
Making Candles Step by Step
The first step is to measure out the wax and place it into the metal pot. Heat the wax until it reaches an even temperature (you want to make sure this isn’t too hot or too cold). Once it has reached an even temperature, add in your fragrance oil. Stir thoroughly and then add in the dye if desired.
Now it’s time to pour. Place your prepared wick holders into your canning jar(s) and then carefully pour in your now-colored wax. As you pour, swirl with a spoon or something similar if desired. Allow everything to cool inside of the jars before handling them then attach any necessary trim pieces onto each candle jar.
Finishing Touches
After allowing your candles to cool and harden for several hours or overnight, cut away any excess wick length using scissors or snippers. Now they’re ready to go. If desired you may also attach a label providing information about ingredients used, burn times etc.
Setting Up Your Candle Making Station
Making candles in canning jars is a great way to bring brightness and warmth into your home. To begin, however, you’ll need to set up your candle making station.
Firstly, you should choose the kind of wax you want to use for your candles. Paraffin wax is the most common materials used for making candles. It is easy to shape and offers a long burn time when lit.
Once you’ve decided on your wax choice, it’s time to set up your candle making station:
- Gather all of the supplies needed for candlemaking such as wax, wicks, fragrance oils and dye blocks if desired
- Prepare your work area by laying down newspaper or an old sheet to avoid spills
- Set up the double boiler or microwaveable bowl and place it onto something stable like a cooker stand
- Prepare a thermostat – this is necessary for monitoring the temperature of the wax while melting
- Secure wicks onto glass containers or canning jars with adhesive sealing glue or melted wax
>Tip: > Make sure that your containers are washed and dried thoroughly before using them.
Step-by-Step Guide To Crafting Candles In Canning Jars
Let’s be honest – creating a candle in a canning jar isn’t really a difficult task. All you need is the right supplies and you’re on your way. With the help of this step-by-step guide, you should be able to make your own wax candle from start to finish handy no time.
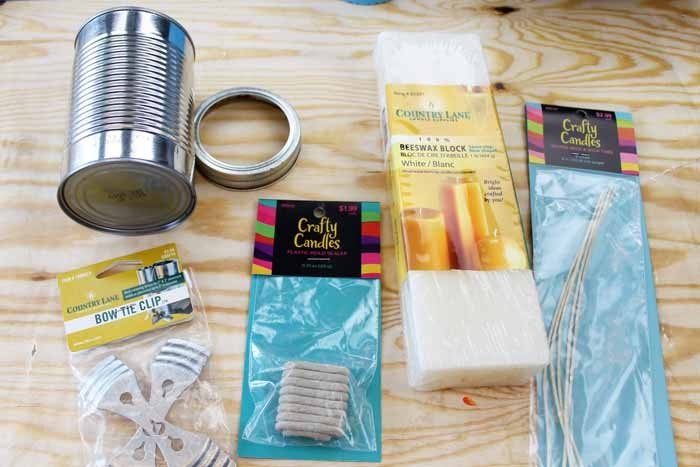
First off, gather supplies. You’ll need wax pellets or chips, some wicking material, fragrance oil if desired, scissors (not knife.), and some color dye for the finished product. Most importantly, you will need one canning jar per candle.
- Melt Wax Pellets
- Prepare Wick
- Add Fragrance Oil & Color Dye
- Pour Wax into Jar
Melting Wax Pellets For melting down wax pellets or chips you must use double boiler method. Place the desired amount of pellets in the top pan of the double boiler and then add sufficient water to cover them completely but make sure that there’s space between water level and top edge of double boiler.
Preparing Wick To prepare your wick, cut its length as per how deep or high your jar is. Longer wick means higher flame but too long wick may cause burning issues due to ash accumulation so it’s best not to make it too long.
Adding Fragrance Oil & Color Dye Add fragrance oil and color dye directly to molten wax after taking out from heat source. Quantity of oil added depends upon scent intensity which temperature can be used to adjust viscosity/consistency Please stir general thoroughly before pouring into jars.:.
Overcoming Common Candle Making Challenges
Making candles in Canning Jars can be a fun and creative way to bring light and beauty into your home. However, there are some common challenges which a novice melt-and-pour candle maker should beware of before diving in to the craft.
Lack of Special Equipment
Many types of candle making need specific equipment, like double boilers or thermometers. The beauty of candle making with Canning Jars is that you don’t need any special equipment – just what you’d already have around the home. So, it can be much easier and more cost effective to get started.
Creating Inadequate Heat Sources
When melting wax for regular candle making, it’s important to control the temperature so you get an even melt. For Canning Jar candles, low heat sources such as tealight candles or an electric tea light candle can work well if placed at the bottom of your jar near the wax. Otherwise, you run the risk of having pockets of unmelted wax still within your jar.
Misjudging Amounts
It’s really important to use the right amounts not only for achieving optimum results but also for safety reasons. Too much wick could cause catastrophic fires whilst too little could prevent lights from burning properly when lit up. A good rule is to measure out 25% wax by volume then adjust depending on how puffy that initial measurement was made – bear in mind that measuring when warm will give different results than when cool.
A Guide to Showcasing Your Finished Candle Making Project
Making candles in canning jars is a fun and creative way to express your artistic talents. Whether you are making them for your own use or as gifts, you will be sure to impress with this homemade project. Not only is it relatively easy, but when you have finished, the result will be very impressive. Here’s everything you need to know about making candles in canning jars and showcasing your results.
One of the best things about using canning jars for candle making projects is that they come in various sizes and shapes so you can experiment with different shapes and colors. When you go to purchase supplies like the wax and wicks, make sure to look for products that specifically say ‘for canning jar candles’ on the label to ensure that they are suitable for the type of project you wish to undertake.
Once you’ve gathered all your materials, it’s time to get started with the actual process of making a candle in a jar. Begin by heating up the wax until it reaches its melting point – double boiler systems work best, so if using one of those make sure not to overheat the wax, so as not to risk unnecessary accidents or fire hazards.
Once melted pour into your clean and empty canning jar keeping an eye on how much wax is being used – allowing 1/2 inch gap between rim of jar and top of wax.
Place wick into center of jar and secure at bottom using wooden skewer or a metal spoon handle if desired. Now leave your project somewhere safe – such as inside kitchen cabinet – allowing the mix to solidify naturally before enjoying its beauty.
There are many ways in which you can show off your candle-making creations once done. Why not place several around a room for romantic illumination (perhaps having first bought some unique holders or glass shades) – or try different combinations of scents or colors within single room for example? Also, depending on seasonality; placing sprigs or branches from fir trees along table tops, mantles etc really helps bring winter atmosphere indoors too.
An open fireplace could always make great effect especially during special occasions such as Christmas night dinners – nothing more magical than brightly burning center pieces filled with festive scents like cinnamon & apples around dinner table right? Finally if wishing present someone with candle; thoughtful gift ideas here include wrapping it up beautifully alongside complementary items such as potpourri bags tied up ribbon bow – definitely perfect house warming present.

Welcome to my candle making blog! In this blog, I will be sharing my tips and tricks for making candles. I will also be sharing some of my favorite recipes.


