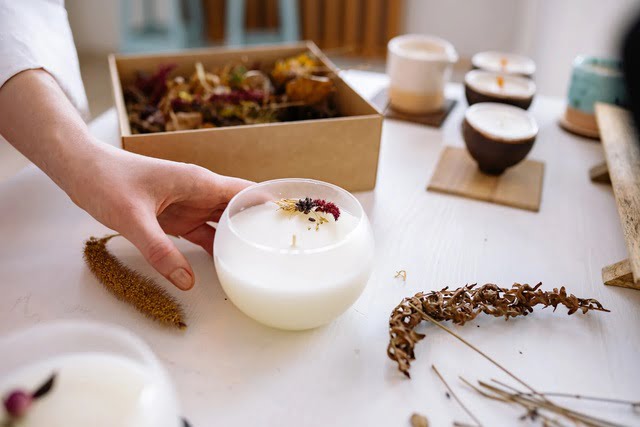
A basic candle making kit is an excellent starting point for anyone wanting to explore the hobby of candle making. It contains all the necessary items you need to create beautiful, aromatic and practical candles at home. The kits come in various sizes and styles depending on how expansive you want your project to be. You can also find kits that specialize in special types of wax like paraffin and soy as well as unique scents.
The benefit of using a basic candle making kit is that it takes away some of the guesswork from learning about candle making for someone new to this craft. They usually come with clear instructions which will help anyone new to home-based candle-making get up and running quickly. Additionally, most of these kits are very affordable when compared to buying each item separately.
When it comes to materials needed to complete a basic candle making kit, it really varies depending on what type of candle you want to make and where you plan on acquiring your supplies from. Most kits include wicks, wax melting pots or double boilers, pourable measurement tools such as spoons and pitchers as well as perhaps some small containers for pouring your candles into when cooled or a mould if you’d like something specific shaped candles.
If there isn’t a meltable wax included in the kit then you’ll need to purchase that separately according to your desired type – beeswax, paraffin or soy are all popular options here.
Fragrances will also need to be purchased separately but luckily there are lots of options out there in both natural extracted oils or synthetic fragrances available online, including high-grade essential oils which come with therapeutic benefits if any of these interest you.
Depending on the type of fragrance oil used in your project and how vigorous your stirring method is you may find that colourants may also be necessary so keep that in mind when gathering supplies for your project if you want coloured candles from wax blocks with dye mixed into them; otherwise, those too can be purchased online or in store if needed.
Benefits of Creating Your Own Candles
Using a basic candle making kit can have quite a few advantages and benefits over buying pre-made candles. First off, by having your own supplies you have control over the type of wax you use, as well as the scents, colors, and decorations that will be used in the creation process. Here are just some of the more unique benefits of making your own candles with a basic candle making kit:
- Save Money – Making your own candles is much less expensive than purchasing pre-made candles from stores. You can buy all of the necessary ingredients and equipment in one easy kit.
- Create Unique Decor – You can use your creativity to create unique and beautiful decor that will light up any room.
- Explore Different Fragrances – With a variety of different fragrances available, you’ll never get bored with your homemade candles.
- Give Custom Gifts – Quality handmade gifts are always appreciated by friends and family. You can even customize the scent based on their favorite aroma.
- Therapeutic Activity – Creating something with one’s hands can be very therapeutic and calming for many people. Working with wax while mixing different scents for therapeutic aromatherapy uses can further increase one’s relaxation.
In addition to all these advantages, there are also numerous types of waxes that you may want to experiment with when creating your own candles. These range from traditional beeswax to newer soy blends so you’re sure to find something suitable for any occasion or project.
Additionally, when it comes to containers for the finished product or packaging, there’s an endless number of options available which means you won’t have any trouble finding something suitable for each individual project.
Items Included in a Basic Candle Making Kit
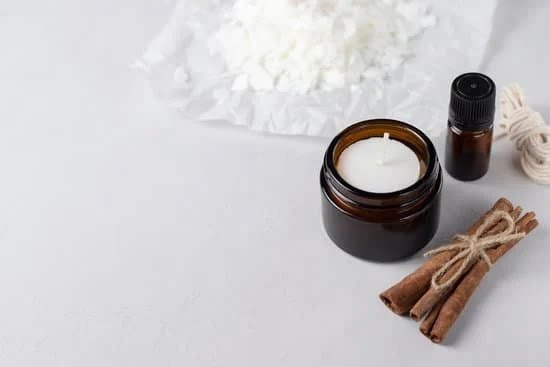
A basic candle making kit provides the fundamentals to create beautiful, fragrant candles that are perfect for any home. The kit includes all of the necessary supplies needed to begin crafting quality candles of various shapes and sizes. The most common items included in a basic candle making kit include wicks, waxes, fragrances, dyes, and containers.
Wicks are an important aspect of any candle making project; they serve as the guide for the flame to travel. As a result, it is important to choose the correct size wick depending on the type of wax used and desired size of the finished product. Cotton or paper wicks are typically used in basic kits because they’re inexpensive and reliable.
The type of wax one decides to use largely depends on the intended finish of their candle; natural beeswax gives off a clean burn whereas soy wax will produce a longer-lasting, cooler burning flame that emits less smoke. Additionally, these types of wax can also be combined with natural oils for added scent and appearance enhancement.
Lastly, what makes candles so special is the combination of fragrances that draw people in from afar. A variety of essential oil or synthetic fragrances can be used to scent your candles, however many who use fragrance oils prefer using phthalate-free oils due to their lack of toxins present within them.
These can be added with either gel dyes or liquid dyes depending on your preference – as both are ideal for combining with different types of waxes. Finally, candles must then be enclosed into an appropriate container such as glass jars or tin vessels before being lit up and enjoyed in your home.
Step-by-Step Instructions for Making a Candle
Preparing the Wax
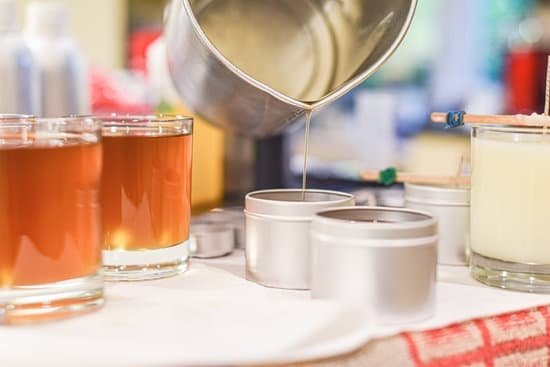
The first step in making a candle is to melt your wax. Depending on the type of wax you’re using, you’ll need to make sure it’s heated at a temperature that won’t cause it to explode or catch fire. For best results, you can use either a double boiler method or a microwave. Whichever method you choose, make sure not to heat the wax too quickly and stir it continuously while heating so it melts evenly.
Adding Fragrance Oil
Once your wax is melted, the next step is adding fragrance oil. This is what gives your candle its pleasant smell once lit. It’s best to add scent when your wax has reached no higher than 160 degrees Fahrenheit.
Then simply measure out the desired amount of fragrance oil for each candle and mix it well into the melted wax. Keep in mind that most candles require less than one ounce of fragrance oil per pound of wax, so be careful not to overdue it as this could affect how fragrant your candle will be or even cause smoking when lit.
Setting Up the Wicks
Before adding your melted wax to your jars or molds, make sure your wicks are set up properly. Most prefabricated wick tabs come with small metal discs attached which should always be placed on top of each wick for stability during burning.
To secure them properly, first push both ends of each wick into their respective pots or molds then press down lightly on top of each disc with something non-metallic such as acrylic paint brush handle or popsicle stick until they firmly connect with surface below them. Now the candles are assmebled and ready for pouring.
Choosing the Right Candle Materials
When choosing the right materials for a candle making project, the type of material used can make a huge difference. There are a variety of different materials available that can be used, such as paraffin wax, soy wax, gel wax, beeswax and coconut oil. These materials have their own unique benefits and should be chosen based on the type of project you’re working on and what look or style you’re trying to achieve.
Paraffin Wax
Paraffin wax is one of the most common candle making supplies and has become popular due to its affordability and ease of use. Paraffin wax is able to hold scent well, provides even burning, throws off strong scents when lit and is available in several different colors.
Soy Wax
Soy wax has become increasingly popular with organic-minded crafters due to its natural properties and lack of chemicals added for fragrances or colorants. Soy wax burns slowly and cleanly providing an even flame and has good “hot throw” performance from fragrance oils.
Gel Wax
Gel candles are an interesting option for those wanting something unique however they require special care when working with them. Gel candles can hold more fragrance than traditional waxes but may not last nearly as long since gel does not adhere well enough on the wick for it to burn completely before melting away.
Beeswax
Beeswax has been used for centuries by artisans creating candles that were both economical and stylish due to its pleasant scent and natural gold coloration that often adds an attractive glow to items crafted from it. Beeswax is also great when blended with other types of waxes for projects requiring firmer structure or softer texture because of its pliability when heated.
Coconut Oil
For those looking for an alternative non-candle material, coconut oil can be used in multiple ways including candle tins or tealight cups added with essential oils as decorative decorations or aromatherapy pieces around your home. Coconut oil melts at low temperatures which then allows the essential oils in it to be released into the air when burned – perfect for relaxation needs.
Tips for Extending Candle Life
1. Each time you light the candle ensure you extinguish it correctly:
- Trim the wick down to 5mm before relighting.
- Ensure the wax has completely melted to the rim of the container every time, this will create an even burn.
- Extinguish with a snuffer or a spoon – never blow out a candle as this can cause soot build up and decrease its life span.
2. Don’t leave your candle unattended – always stay within range while it is lit:
- This improves safety and ensures the flame doesn’t get too hot – which in turn can reduce scent throw, discolour and damage your container.
- It also helps prevent ‘tunneling’ or ‘glazing’ where only sections within direct contact of the flame are melted.
3. Burn for at least 1-3 hours each time you light your candle:
- When first lighting a brand new candle, we recommend allowing it to burn for 4+ hours so that an entire ‘melt pool’ (the liquid wax portion) is created across all areas of accessible wax in the container.
- This large melt pool will ensure further burning and scent delivery.
Popular Candle Fragrance Options
Scenting a candle is an important part of the candle making process that can make all the difference in the overall effect. For experienced crafters, there are many different ways to scent their candles. From extracts and essential oils, to potpourri and wax tart crumble, all offer fragrant options for unique custom-scents. Today, we will take a look at some of the most popular types of scented candles:
- Essential Oils – Essential oils have been used for centuries in aromatherapy to help create a calming environment as well as provide feedback on physical and mental well-being.
- Fragrance Oils – Fragrance oils add delicate aromas without any of the therapeutic effects associated with essential oils. They also come in a wider variety of fragrance options than essential oils.
- Wax Tart Crumble – Wax tart crumble is another way to scent your candles without having to spend money on expensive fragrance oil. All you need is a bit of wax tart crumble (which comes in various colors and scents) and then simply add it to the melted wax before pouring into your mold.
Apart from these options, you can also use extracts or potpourris when making scented candles. Extracts are easy to use; they come pre-diluted so you don’t need any extra equipment or know-how to use them effectively. Potpourris are made up of florals mixed with fragrant herbs giving off very pleasant aromas when released into hot air through burning candles.
As for popular fragrances, vanilla, cinnamon, lavender and jasmine are some of the most popular aromas used when crafting scented candles. Citrus blends like lemon and orange also mix nicely with floral blends such as rose or lily for a more complex and delightful aroma experience.
Storing and Displaying Homemade Candles
When it comes to taking care of homemade candles, proper storage and display should not be overlooked. With proper maintenance, your quality homemade candles will last much longer. For starters, store the candles away from heat sources such as an oven, dishwasher, or window. Sunlight can also damage the candle so it is best to keep them stored in a cool dark place.
Although wax may seem like a solid material, it is actually quite delicate; even when made with a strong wax blend. If two candles are blinked together their shape and texture can be damaged due to heat transfer between them so they should always be kept separated on both the storage shelf and upon the display shelves. Fleece lined cardboard boxes can also provide extra cushion and protection while storing your candles.
Making sure that your candle is stylishly presented can help set off any room décor and allows you to showcase your handmade creations with pride. A wooden roped vessel such as a recycled wine bottle or weather-worn terra cotta pot creates an earthy feel and adds functionality to any space such as outdoors on a patio table top or terrace ledge.
If displaying something with color and texture is desired then using a clear glass holder with dried botanicals inside it floating around the melted wax provides added drama perfect for formal gatherings or special occasions. And for those who are traditionalists an urn shaped ceramic vessel will give any mantlepiece a timeless look that never goes out of style.
Although it may seem intimidating at first, making sure your homemade candles last a long time simply requires having some basic knowledge about best practices for storage and display presentation techniques which fortunately are simple enough to learn in no time at all by anyone interested in diving into this crafty endeavor.

Welcome to my candle making blog! In this blog, I will be sharing my tips and tricks for making candles. I will also be sharing some of my favorite recipes.

