Introduction
Candle making can be an enriching and fulfilling experience. It’s a creative endeavor that conveys the satisfaction of creating something beautiful and useful with your own two hands. Making candles from scratch can be therapeutic and rewarding, both for yourself and for those you may decide to give them as gifts. DIY candle making offers a great opportunity to spend some quality time crafting and experimenting with various scents, waxes, and even color pigments to create a one-of-a-kind masterpiece. Additionally, DIY candle making can open up a potential side business or even hobby because it is relatively low cost to start and allows you the freedom of limitless creativity!
These days there are several different types of waxes you can use for your candle making projects, including vegetable waxes derived from coconut oil, soybean oil, palm oil or beeswax. Many crafters also enjoy incorporating scented oils such as essential oils into their candles to create aromatherapy type creations. This makes creating customized candles that evoke memories or particular feelings quite simple. You can also choose if your candles will be molded versions (which is great for novelty items) or free standing pillar candles which provide wonderful ambiance to any room. Further expanding on the options, colored dyes are readily available so your finished product matches any décor style desired; so no matter what the occasion you can find exactly what fits within any desired budget while still creating something unique in comparison to store bought brands. Either way you go about it making homemade candles gives you complete control over the ultimate outcome unlike most store bought products where you hope for satisfactory results but never really know until after purchase!
Necessary Supplies and Tools
To begin making your own candles from scratch, you will need the following supplies and tools: wax, a double boiler, wicks, essential oils or fragrance oils, dyes and colorants, thermometer, molds, wick holders/centering devices, pouring pot/ladle/spatula.
It is important to make sure each of your supplies is of a good quality that can prepare you for hours of diligent work. Many candle makers also choose to have protective items such as an oven mitt or hot pad to prevent burns as well as goggles and gloves for safety purposes. Additionally, it’s wise to have paper towels on hand to quickly clean up any spills that may occur during the process.
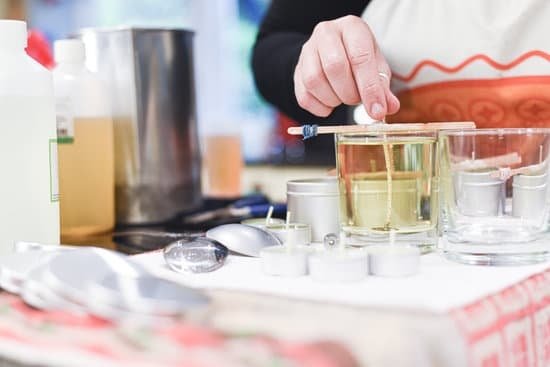
Once all those items are nearby, it’s time to melt the wax slowly in the double boiler on the stove so that it becomes a liquid substance. At this point you can add essential oils or fragrance oils for scent. Then measure out and add dyes and colorants if desired. The wax needs to be thoroughly mixed together in order for these ingredients to disperse evenly throughout the mixture. Afterward use a thermometer to ensure the temperatures remain consistent between 125 – 140 degrees Fahrenheit (51 – 60 degrees Celsius).
Finally use ladles and pouring pots or spatulas in order pour your newly created wax mixture into the mold of choice. It’s advised to use wick holders/centering devices at this junction for additional convenience and accuracy when setting up the coil inside of each mold. Allowing approximately 24 hours before removing your candles will ensure they cure properly giving them time set before moving onto decorative steps such as wrapping and labeling.
Choosing Wax
When it comes to candle making, selecting the right wax is an essential step. Different types of waxes offer different elements, such as different levels of melt points, throw, and longevity that can greatly affect the quality of a candle. Here are some of the most commonly used types of wax for homemade candles:
Paraffin Wax ” Commonly found in traditional and block candles, paraffin wax is a petroleum-based byproduct from the processing phase. It offers great scent throw, but can be more time consuming to use and often has a slightly yellow hue.
Soy Wax ” Made from hydrogenated soybean oil, soy wax is one of the most popular natural alternatives to paraffin wax. It has a lower melting point than paraffin so your candles will last longer and have a cleaner burn.
Beeswax ” Beeswax is another popular natural alternative to paraffin. In addition to being environmentally friendly, it also has great aesthetic properties while producing clean-burning flames without any smoke or soot buildup. However it may not produce a very good scent throw compared to other forms of wax.
Gel Wax ” Gel wax is also known as encased gel wax or jelly wax because when lit produces glass-like bubbles that create interesting candle designs.. It burns slowly which helps enhance fragrance but makes it costlier than other types of waxes.
Regardless of the type you choose, select a high quality option that contains no additives to ensure you get the best results from your candles!
Melting and Moulding Wax
Candle making is an art form that has been around for centuries, and it’s still one of the most rewarding crafts you can undertake. To make a candle from scratch, you will need to first use some type of wax – either paraffin, beeswax, or soy wax – and then melt it down over a double boiler. Once it is melted, pour or spoon the liquid into your desired moulds (such as tins or shapes). You can also add colorants and fragrances to enhance the look and smell of your finished product. After the wax has cooled and hardened, you can remove it from the moulds and trim any excess wick that may be sticking out. Finally, tie any ribbons or bows onto your candles to give them an extra special touch! With the right techniques and materials, anyone can make beautiful homemade candles with creativity!
Additives
Candle making from scratch is a rewarding and creative hobby. It allows you to take complete control over the shape, colour and smell of your candles, making them unique. To make great candles you need to know about the different additives that can be used. One important additive is fragrance oils, which are responsible for giving the candle its aroma. They come in a wide range of exciting scents like lavender, citrus and jasmine. A dye can also be added to give your candle a unique colour or pattern. These come in liquid form or chip form and are usually mixed with paraffin wax or soy wax before being poured into the mold. Finally, there are additives like stearic acid which make your candles stronger and more stable when burning. When experimenting with additives, it is important to follow safety instructions and use only those specifically designed for candle making. With the right knowledge and supplies, adding these special ingredients can make your homemade candles stand out from the rest!
Burning and Testing
Once your candle has fully set, it’s time to light and enjoy the fruits of your labour! When first lighting your candle, ensure that you let the wax melt all the way to the edge of the container so that it forms a full pool. This will help prevent uneven burning and unnecessary tunneling down the centre.
Also make sure that you let your candle burn for at least two hours or until a full pool has formed. Doing this will allow any imperfections in your pour to work themselves out and allow any air pockets to expand evenly. Do move your candle around while burning to break up any tunnels if they do form. Usually on subsequent burns, these issues lessen as long as proper steps were taken initially. If you want an even better burn, try using a wick dipper or snuffer to extinguish your flame; this further captures runaway smoke particles which can sometimes lead to sootting and reduced scent throw if left unchecked. Lastly, don’t forget safety precautions such as maintaining a clear three-inch radius from flammable items when burning and keep away from pets or children!
Creative Decorations
Candle making doesn’t have to involve just wax, a wick, and a mould. You can add some creative decorations to make your candle unique and appealing. Here’s how you can take your candle-making from ordinary to extraordinary with simple embellishments.
One way to make your candles stand out is by adding jewels or other sparkly decorative elements. You could glue small flat back rhinestones or tiny gems to the outside of the candles for an eye-catching and visually pleasing touch. You could also sprinkle glitter on the outside of the candle before it sets for subtle shimmery effect throughout the entire body of the candle. Another option would be to coat sections of the exterior in glossy enamel for a rainbow technicolor effect.
For even more customization potential, consider using scented essential oils or perfumes used on special occasions sprinkled into the wax before pouring it in the mould. This is great if you are aiming to provide aromatherapy benefits specific to each candle type and color you create. Craft texture with moldes as well! Add texture by pressing textured objects such as flowers, leaves, and even feathers into the melted wax just before popping it in it’s mould “” each resulting design will be completely unique with beautiful raised textures that feel amazing against your fingertips
When it comes to customizing candles, let your creativity flow! With so many possibilities, you’ll never run out of ideas that make your finish products truly unique and beautiful for everyone who sees them
Final Thoughts
Candle making from scratch is an incredibly rewarding and fulfilling hobby. Through the journey of making candles, you can use both sight and smell to create a unique combination of colors and scents that will no doubt make any room feel luxurious. From wick selection to packaging your final product, the possibilities for candle making are endless.
The creativity involved in learning how to make candles from scratch really pays off when you get to share your creations with friends and family. Not only do they appreciate the special gifts, but they also have admiration for your workmanship. After all, there’s nothing better than having someone recognize your hard work!
But candlemaking is more than just a fun pastime; it’s an art form if you will. You can express yourself through thoughtful scent combinations, creative container choices, and enticing labels. Plus, playing around with different techniques gives you the opportunity to find out what works best for you so that future experiments can become even more successful! From molds and dyes to scents and containers – it’s all about individualizing the finished item in order to make it a true reflection of who you are or want to be as a candlemaker.
Ultimately, once you’ve crafted your own candles & packaged them up ready for selling, giving away as gifts or using in your own home – that feeling of accomplishment is truly remarkable! Candlemaking satisfies the desire within us all to create something special with our hands ” something which looks great, smells incredible and brings pleasure & satisfaction every time it’s lit!

Welcome to my candle making blog! In this blog, I will be sharing my tips and tricks for making candles. I will also be sharing some of my favorite recipes.


