Introduction
Candle making is a great way to get creative and enjoy the benefits of a handmade product. However, the goal of making candles shouldn’t just be to have nice-smelling candles in your home; another advantage of making your own candles is that you get to control exactly what goes into them. With store-bought candles, you’re not always sure what type of wax or wick was used and what other additives may have been added, but when you make your own candles, you get to choose the exact ingredients for your special creations.
Making your own candles can also be a more affordable option than buying certain types of store-bought candles. If you buy supplies in bulk and take advantage of sales, it’s possible to make a quality candle for significantly less money than it would cost you otherwise. You also don’t have to worry about running out as quickly since buying new wax requires fewer trips to the store thus saving time and effort!
The Process: Waxing
One of the main components when making a candle is the wax itself. It’s important that when making a wax candle that you use an appropriate type of wax depending on what type of vessel or container it will be burned in. Common types include paraffin, soy, beeswax, vegetable oil blends, etc., however each has its own set of pros and cons based on fragrance retention capacity or burn time among others factors. After settling on the type os wax to be used then melting it down must take place either by microwaving or double boiling over low flame heat depending on user preference. Make sure once melted not to exceed temperatures above 200°F/93°C for safety reasons – any higher temperature might cause fire hazards due to hot steam! Finally add desired color pigments (if desired) followed by essential oils/fragrances before pouring it into previously prepared containers according tot their specific filling instructions ” any amount outside this require risk potential hazard in burning or simply poor performance results when lighting up!
History and Popularity of Candle Making
Candle making has been a popular activity for centuries and forms an important part of many different religious and cultural customs. Historically, candles were used to provide light at nightfall, but later evolved into decorated objects used for a wide range of festivities, from religious ceremonies to birthday parties. Candle making was seen as a practical skill needed by every household in the past, and it still fascinates people today with its relatively simple process.
The process of candle-making involves melting down wax until it reaches its liquid form, pouring the melted wax into molds or candle containers, adding dye or scents according to preference, allowing the wax to harden and cure before burning. The type of wax being used often depends on the feature you want in your final product; natural beeswax is usually chosen for its ability to retain scent and produce less smoke when lit while paraffin wax may work better if you are after longer burn times. Popular fragrances known as essential oils can then be added during this stage. The next step is inserting the wick into the mixture before finally letting the candle set for about 24 hours before burning it. This ensures that candles are safe when used indoors and will give off an even glow when burned properly.
Different Types of Candle Wax
The candle wax making process is a craft that people have been enjoying for centuries. Today, there are several types of waxes used, such as paraffin, soy, beeswax, coconut, and palm. The type of wax most commonly used in the candle-making process is paraffin because it is readily available, relatively inexpensive, and easy to find in bulk. Paraffin also produces steady flames long enough to enjoy candles at their fullest on evenings and nights out.
However, many people are now opting for natural alternatives to traditionally used paraffin wax due to its environmental impacts. Soy candles made with 100% organic soy wax burn cleanly without the worry of releasing any toxins into the air when burning. Beeswax is another popular choice due to its natural honey scent and use as a sustainable material given its anti-bacterial properties and adaptability with fragrances or dyes. Coconut or palm wax can be found as an alternative fully vegan option to these traditional materials because it has a heighten melting point allowing for more stability when burning. Moreover, some might favor these waxes due to the fact that they often produce an enjoyable crackling sound akin to a campfire when ignited. Therefore, regardless which material one chooses when making candles there are plenty of options available giving each maker the opportunity make something unique!
What You Need to Get Started
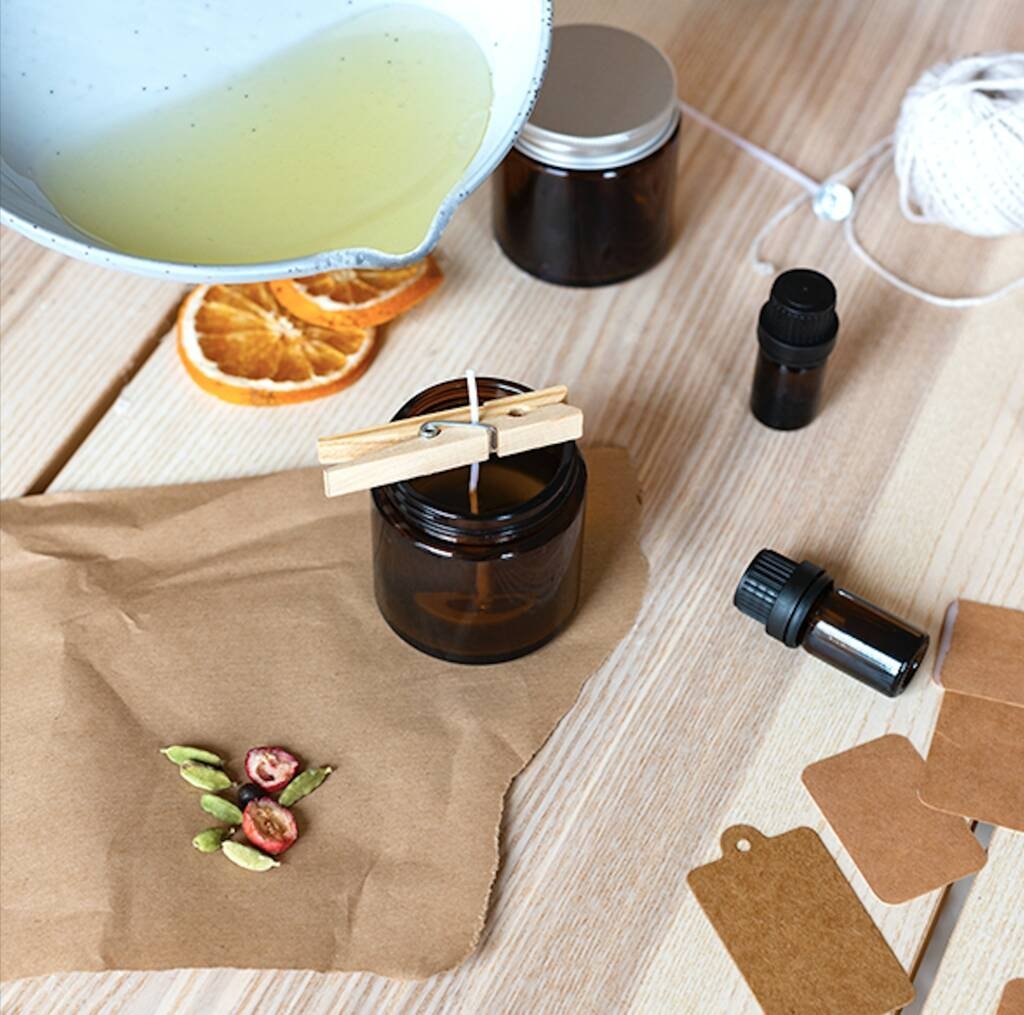
The first step in the candle wax making process is to purchase all the necessary materials. You will need wax, wicks, containers, dyes, and fragrances to create your desired candle. Many craft stores carry specialty supplies for candle making, so you may want to look into these as well.
Next, you need to measure out and melt the wax in a large container such as a double boiler or crockpot. Once it’s melted and up to temperature, you can add dyes and fragrances according to your own preferences. Make sure that all components are stirred thoroughly until combined.
Once everything is blended together properly, begin putting together the containers by cutting tallow strings the same length as the container’s width and inserting them into it. Then place your already prepared mixture of wax in the container cup gently but make sure that it doesn’t overflow or leave any air pockets behind while pouring or else this will adversely affect the burning quality of your candles.
After filling all containers with their mixtures of wax/dye/fragrance and topping off with wicks – carefully set them aside somewhere cool and dry so they can harden properly before lighting them. Once they are completely hardened then they are ready to dress up with ribbons or other decorative items if desired! From there you can confidently light your candles safely knowing that have taken all steps required for a proper candle-making session!
The Making Process
Prepping the Wicks: Before you can start making candles, the wicks must be prepped. This involves cutting pieces of wick to fit your containers with a wire cutter and then dipping them in wax and tying them around sticks or pencils. This prepares them to stay in place while the candles are poured.
Melting the Wax: The wax is melted in double broilers or soy potpourri warmers filled with water over medium heat. It’s important not to let the water boil or go over 185°F. It’s essential that you do not leave the heat unattended or have any flammable substances near when melting on an open flame.
Adding Coloring: After all of the wax is melted, use paste-based colorants to achieve vibrant colored candlewax. Except for beeswax, which provides a slight yellow tint naturally, each candle will require colorant to stay true to its desired hue.
Adding Fragrance: Uses fragrance oils specifically developed for candles for a strong scent throw once poured and burnished. Each kind of wax type requires different measurements of fragrance oil so measure accordingly, using one ounce per pound of wax (or 8% commonly accepted peak).
Pouring the Wax Into Containers: Once everything is combined correctly pour wax into glass containers being careful to move slowly so that there are no air bubbles at all as they will affect burn time, flame size/height and smoke levels after lighting candles later on. Allow at least 2″ between top of wick and top of container during pouring so it will have room to burn above glass container and wont catch fire easily.
Waiting for the Wax to Cool: Let cool overnight before trying burning your new candles; this waiting period allows the wax time to fully harden and stick together properly, otherwise there can be issues such as cracking while burning or tunneling (wax only burning down center leaving sides unmelted) afterwards which would require re-pouring affected candles again from beginning
Troubleshooting Common Candle Making Mistakes
For those who are new to candle making, it can be a difficult process. Fortunately, with some practice and patience, even the most novice novice can create beautiful and impressive candles! Before troubleshooting any common mistakes that may occur when creating your own candles, it is important to understand the basic candle-making process. The three main steps of the candle wax making process are melting the wax, adding your desired fragrance and color (if desired), and pouring into a mold. Once melted, you must carefully measure the proper amount of fragrance oil or dye. Carefully mix in both until fully blended before pouring into molds or handmade containers. Now that you’ve prepared your ingredients prior to pouring them into molds or containers, let’s look at some of the common mistakes that can arise during this process:
1) Wax not heating up properly: If you find that your wax is not getting warm enough to liquify properly, you may need to adjust the heat settings on your stovetop or hot plate. Be sure to keep an eye on both the temperature gauge and wax itself as changes can happen quickly and can cause problems if left unchecked.
2) Incorrect wicking size: When using pre-made wicks for container candles or larger tealights, make sure you are using the appropriate size for each vessel being used. A correctly sized wick should stand upright on its own and have no more than 1/8 inch visible above the top of the candle when it has cooled completely.
3) Separation of fragrance/dye in liquid formula: Fragrance oils in co-emulsified formulas (responsible for keeping colorants & fragrances evenly combined with heated wax) tend to separate over time, which leads to “marbling” on cold casts & ugly spots on burning candles. To ensure even distribution of oils & dyes throughout your wax blend; make sure to thoroughly stir after reheating & allow to cool all the way down between pours if multiple layers are required
Safety Considerations in Candle Making
The candle wax making process requires a few very important safety considerations that should never be overlooked. If you are to make your own candles at home, it is essential to follow these precautions.
One of the most important things to remember when making candles is to always keep the work area clean and organized. Keeping spilled wax and other combustible materials contained will reduce the risk of fire. Always be sure to have a fire extinguisher nearby in case of an accident.
It’s also wise to use protective gear while making candles such as safety glasses, gloves, and long sleeved shirts or aprons. These items will protect against skin contact with hot wax as well as any accidental splatter or spills.
When using hot tools like double-boilers, wax melters, or open flames precautions must be taken when handling them. Set them up away from easily flammable materials, support each piece securely in order for them not to tip over, and always unplug or move away from heat sources when not in use.
Finally, it’s necessary to ensure proper ventilation when melting wax in order to avoid carbon monoxide poisoning. Candle wicks can release soot containing toxic chemicals into the air so having proper ventilation helps eliminate smoke and odors associated with smoldering candles which may causing health issues over time if proper care isn’t taken during the candle wax making process.
Relevant Resources for Candle Making
The candle wax making process begins with the selection of wax. Many types of waxes are available to choose from, including paraffin, beeswax, soy and palm wax. Depending on the type used, the melting point may vary from 130 to 160 degrees Fahrenheit. Once the desired type of wax has been chosen and melted down, it is then poured into a mould or into a suitable container for pouring. Fragrance oils, dyes and other ingredients can be added at this point for desired effect.
From there, wicks must be placed in each candle shape before the wax has set. There is a variety of sizes and materials that are best suited for use in candles; some popular choices being related to soy wax are cotton and paper-core wicks while paraffin or beeswax will require a different core material. Many candle makers have discovered that bamboo skewers or popsicle sticks make a suitable substitute in emergencies!
In order to ensure proper burning of a candle leading up its completion, most makers allow the candles to cure for at least 24 hours before trimming and packaging. This allows for any excess liquid to evaporate so that when lit, the candles will not tunnel or form unsightly hollow spots–the hallmark of an unfinished product!
Once complete, there are many opportunities available for how one may decide to package their candles: they can either purchase rigid plastic containers with clear lids or use glass jars/tumblers decorated with ribbons as well as labels detailing use instructions such as scent name and ingredients list; custom printed stickers can also easily be ordered online to add thematic artwork or design elements unique to your style!
Final Thoughts
The art of candle wax making is a craft that many enjoy engaging in all year long. From selecting scents, selecting colors, finding unique containers and designing the perfect candle-making process – one can easily get caught up in any of the exciting details.
When deciding on a new project, the first step is to select a scent for your wax. There are hundreds of different scents to choose from including floral, herbal, woodsy, fruity, oceanic and even food inspired scents like freshly baked cookies or candied apples. If you’re feeling adventerous you can even try blending scents together like lavender and vanilla or orange blossom and rose.
Next comes color selection – there is an unlimited amount of possibilities here! Colors range from traditional pastels and neons to vibrant jewel tones and metallics with special dyes adding extra sparkle or shimmer. As with scent selection it might also be fun to experiment with layers or multi-tonal candles by blending multiple colors together for creative accents. (What about glitter?! Yes – some specially designed micas can even take your creation one step further by adding flecks of glitter into the mix).
Now it’s time for choosing containers for your finished candles. The most popular choices include glass jars and tins but you don’t have to limit yourself to these ” consider using teacups, vases, terra cotta pots, seashells or even seaside bottles! Add unique finishing touches like labels onto each container so they stand out as individual works of art when displayed side by side. A final festive touch would be taking advantage of seasonal decorations such as pine cones around Christmas time or Easter eggs during springtime ” these can add interesting texture when placed on top or around your candles!

Welcome to my candle making blog! In this blog, I will be sharing my tips and tricks for making candles. I will also be sharing some of my favorite recipes.

