Are you looking for a creative and enjoyable DIY project? Consider candle making using mason jars or tins. Making your own candles at home is not only a fun and rewarding activity, but it also allows you to create unique and personalized scents and designs. With the right supplies and a little creativity, you can create beautiful candles that make perfect gifts or add a cozy touch to your home decor.
There are numerous benefits to making candles at home. You have full control over the ingredients, allowing you to create natural and non-toxic candles. Additionally, DIY candle making can save you money in the long run compared to purchasing expensive store-bought candles.
Not to mention, the process of creating your own candles can be incredibly satisfying and enjoyable. From choosing the perfect scent to adding personalized touches, every step of candle making is an opportunity for creativity and self-expression.
The excitement of creating your own unique candles is unmatched. Whether you want to experiment with different scents, colors, or textures, DIY candle making allows you to unleash your creativity and make one-of-a-kind products. The possibilities are endless when it comes to designing and personalizing your candles. So, roll up your sleeves and get ready to embark on a delightful journey of DIY candle making using mason jars or tins.
Choosing the Right Supplies
When embarking on the journey of DIY candle making in mason jars or tins, selecting the right supplies is crucial to achieving the perfect candle. One of the most important decisions to make is choosing the type of wax for your candles. Soy wax, beeswax, and paraffin wax are popular options, each offering unique qualities and benefits.
It’s essential to consider factors such as burn time, scent throw, and eco-friendliness when making this choice. Additionally, selecting the right wicks is equally important as they come in various sizes and materials such as cotton, wood, or hemp. The size of your container will also determine the length and type of wick needed for a successful burn.
After finalizing your choices for wax and wicks, it’s time to consider the scent and color of your candles. A wide variety of fragrance oils are available for candle making, allowing you to create signature scents that suit your preferences. It’s important to consider how strong you want the scent throw to be in your finished candle as well as any potential therapeutic benefits offered by different scents.
When it comes to adding color, using high-quality liquid dyes or dye chips can help achieve vibrant hues in your candles. Consider experimenting with different color combinations to create unique and eye-catching candles.
In order to ensure successful DIY candle making in mason jars or tins, it’s essential to source affordable yet high-quality supplies. There are many online retailers that offer a wide range of wax types, wicks, fragrance oils, and candle dyes at competitive prices. Local craft stores may also carry a selection of supplies that allow you to see and feel them before making a purchase decision.
Achieving quality results often begins with using quality materials from reputable suppliers when creating homemade candles. By ensuring you have carefully chosen all necessary supplies at the start of your homemade candle-making journey; you’ll be set up for success throughout each step of creating beautiful personalized candles in mason jars or tins.
Preparing the Container
Before diving into the actual candle making process, it is crucial to properly prepare the mason jar or tin that will hold the candle. Cleaning and prepping the container in the right way can ensure a successful and long-lasting finished product. Start by thoroughly cleaning the container with soap and water, making sure there are no dust particles or residue left behind. Once cleaned, consider drying the container completely to avoid any moisture affecting the candle-making process.
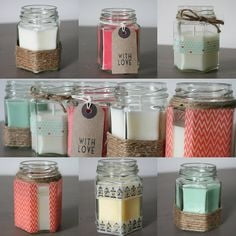
In addition to cleaning, you can also get creative with decorating the containers for a personalized touch. Consider adding decorative elements such as twine, ribbon, or even painting designs on the outside of the jar or tin using non-toxic paint. This step not only enhances the visual appeal of your finished candle but also makes it a unique and personal creation.
For those looking for a vintage or rustic look, consider repurposing old mason jars or tins found lying around in your kitchen or pantry. Upcycling these items not only reduces waste but also adds character to your DIY candles. With a little creativity and resourcefulness, your containers can become part of what makes your candles special.
| Preparation Steps | Decorative Elements |
|---|---|
| Thoroughly clean with soap and water | Add twine, ribbon, or painted designs |
| Dry completely to avoid moisture | Consider upcycling old mason jars or tins |
Melting and Pouring the Wax
When it comes to DIY candle making in mason jars or tins, the process of melting and pouring the wax is a crucial step in creating beautiful and effective candles. Whether you prefer the traditional method of using a double boiler or the convenience of the microwave, it’s important to ensure that the wax is melted properly for a successful candle-making experience.
Properly Melting the Wax
To begin, it’s essential to choose the appropriate type of wax for your candles. There are various options available, including soy wax, paraffin wax, and beeswax, each with its own unique characteristics and benefits. Once you have selected your preferred wax, follow the recommended melting instructions provided by the manufacturer. Whether using a double boiler or microwave, monitor the temperature closely to prevent overheating and avoid any potential safety hazards.
Temperature Considerations
Before pouring the melted wax into your prepared mason jars or tins, be mindful of the ideal temperature range recommended for your chosen wax type. Pouring at too high or too low of a temperature can result in uneven texture or poor fragrance throw in your finished candles. Keep in mind that different waxes may have varying optimal pouring temperatures, so it’s crucial to follow specific guidelines for each type.
Creative Techniques
As you pour the melted wax into your containers, consider experimenting with creative techniques to achieve unique textures and effects. For example, layering different colored waxes or swirling fragrances together can result in visually stunning candles. Additionally, incorporating additives such as dried flowers or herbs can add an extra element of customization to your homemade candles. Embrace this opportunity to unleash your creativity and produce one-of-a-kind creations that reflect your personal style.
Adding Scents and Colors
When it comes to DIY candle making in mason jars or tins, adding scents and colors is a crucial step in creating unique and personalized candles. The right scent can evoke different emotions and create a soothing atmosphere, while the perfect color can enhance the overall aesthetic of the candle.
There are various options available when it comes to selecting candle scents, from floral and fruity to woody and spicy fragrances. Similarly, there is a wide range of color dyes that can be used to achieve the desired hue for your candle.
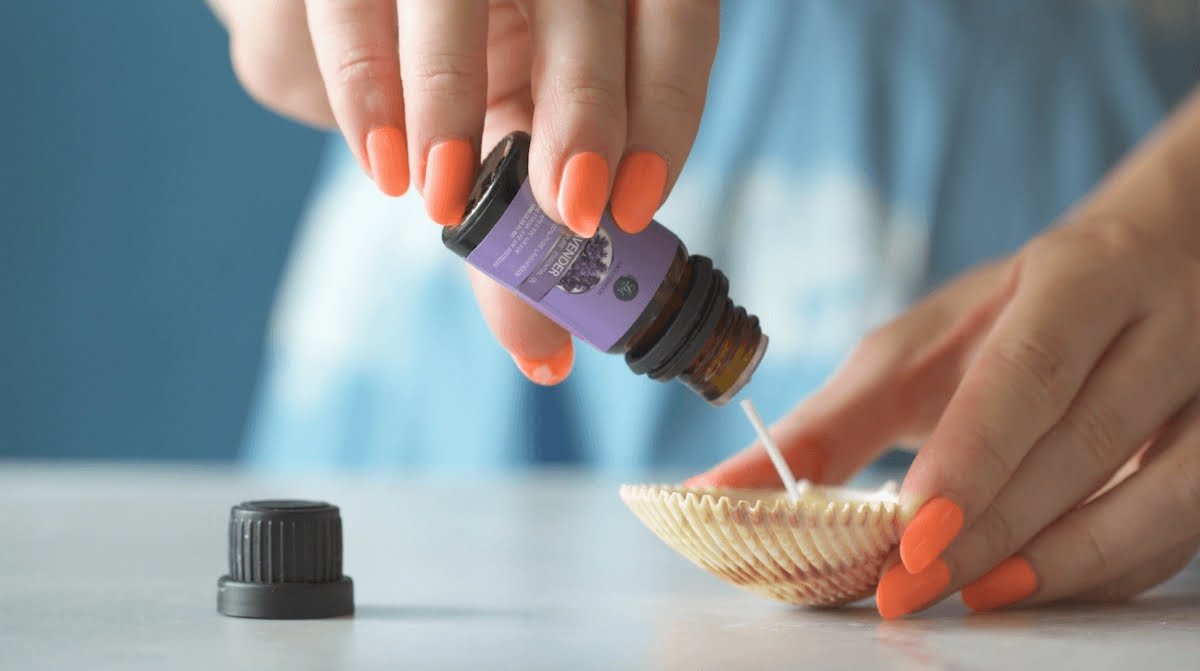
For those who are new to DIY candle making, it’s important to carefully consider the type of scent they want for their candles. Popular choices include vanilla, lavender, citrus, and sandalwood, among others.
Each scent has its own benefits – for example, lavender is known for its calming properties while citrus scents can promote a feeling of freshness and energy. It’s recommended to start with familiar scents before experimenting with unique combinations to find what works best for personal preferences or as gifts for friends and family.
In addition to choosing the right scent, adding color to the wax is another way to customize candles. Whether you prefer pastel hues, vibrant tones, or natural earthy colors, there are color dyes available that can help achieve the desired look. The key is to add the dye gradually while stirring continuously until the desired hue is achieved. For those looking to create multi-colored or layered candles, experimenting with different color combinations can result in stunning visual effects.
| Candle Scents | Candle Colors |
|---|---|
| Vanilla | Pastels |
| Lavender | Vibrant Tones |
| Citrus | Earthy Colors |
Setting the Wick
- Measure and trim the wick: Before setting the wick in the container, it’s essential to measure and trim it to the appropriate length. The ideal length of the wick should be about half an inch taller than the container’s top when poured with wax.
- Secure the wick: To prevent the wick from moving during pouring and setting, it’s important to secure it in place. This can be done by using a wick bar or simply placing two chopsticks or pencils on either side of the wick across the opening of the container.
- Pouring and setting process: Once the wick is securely positioned, carefully pour the melted wax into the container, making sure not to disturb or displace the wick. After pouring, allow the wax to set and cool completely before removing any makeshift supports for the wick.
Properly setting the wick is essential for a successful burn and ensures that your DIY candle making mason jar or tin results in beautiful, long-lasting candles.
Tips for securing the Wick:
- Use a hot glue gun to attach metal tabs to the bottom of your candle’s sustainer
- Place a pencil or chopstick over top of your jar/container with tape across its opening
- Utilize a clothespin by placing one end straight down touching melted wax but enough space from dried wax
Allowing the Candle to Set
After pouring the wax, it is crucial to allow the candle to set properly before attempting to use it. Rushing this process can result in uneven burning and a shorter candle lifespan. Here are some essential steps to follow when allowing your DIY candle making mason jar or tin creations to set:
1. Choose a suitable setting location: Find a place where your candles can sit undisturbed while they set. Make sure the area is not prone to drafts or temperature fluctuations, as these can affect the setting process.
2. Be patient: Depending on the type of wax used and the size of the candles, they may take several hours or even overnight to fully set. Avoid moving or touching them during this time to ensure an even finish.
3. Check for any imperfections: Once the candles have set, inspect them for any irregularities such as air bubbles or sinkholes. These can often be fixed with a quick touch-up using additional melted wax.
4. Consider curing time: While setting allows the wax to harden, curing refers to the process of allowing the scent and color to fully develop within the candle. For optimal results, let your DIY candles cure for at least 24-48 hours before lighting them.
5. Avoid common mistakes: Some common mistakes during this stage include exposing the candles to drastic temperature changes, which can cause cracking, and failing to trim wicks before lighting, resulting in excessive smoke and soot.
By allowing your DIY candles made in mason jars or tins sufficient time to set and cure properly, you can ensure that they burn evenly and emit their delightful scents effectively.
Personalizing the Finished Product
In conclusion, DIY candle making using mason jars or tins is a fun and rewarding activity that allows individuals to create unique and personalized candles right at home. Not only does it provide a creative outlet, but it also offers the benefits of using natural ingredients, customizing scents and colors, and producing handmade gifts for loved ones.
After preparing the containers, melting and pouring the wax, adding scents and colors, and setting the wick, the final step in the candle making process is personalizing the finished product. This can include labeling and packaging the candles in a way that reflects your personal style or brand. Consider creating custom tags or labels for gift-giving and adding decorative touches such as ribbons or charms to give your candles a professional look.
Whether you are making candles for yourself or as gifts for others, taking the time to personalize the finished product adds an extra special touch that shows thoughtfulness and care. With some creativity and attention to detail, you can turn your DIY candles into unique pieces that leave a lasting impression on anyone who receives them.
So go ahead, have fun with your candle making process, and personalize your finished products in a way that truly reflects your personality and style.
Frequently Asked Questions
Is Glass or Tin Better for Candles?
Glass is generally considered better for candles because it allows for better light transmission and can showcase the color of the candle. However, tin can be more practical for travel or outdoor use due to its durability.
What Container Is Best for Candle Making?
The best container for candle making depends on the type of candle being made. For traditional wax candles, glass jars are popular for their transparency and aesthetic appeal. For outdoor or travel candles, metal tins are a good choice due to their sturdiness and portability.
Are Mason Jars Good for Candle Making?
Mason jars are good for candle making due to their heat-resistant properties and their ability to showcase the color and texture of the candle. They also come in various sizes, making them versatile for different candle-making projects.

Welcome to my candle making blog! In this blog, I will be sharing my tips and tricks for making candles. I will also be sharing some of my favorite recipes.

