Introduction to Candle Making
Making candles can be a hugely rewarding and therapeutic hobby – whether you’re interested in making candles for your own use or as gifts for friends, family and loved ones. Not only is it an enjoyable and creative outlet but learning to make candles can also save you money in the long run! Candle making involves learning about the different materials and tools that go into candle creation. With candle making kits widely available now, learning to make custom scented candles at home has never been easier.
The benefits of making candles are endless – from the satisfaction of creating something unique with your own two hands to being able to tailor a specific fragrance that nobody else owns! Additionally, most candle-making projects use natural ingredients such as beeswax, essential oils and soy/vegetable waxes, which are kinder to the environment than conventional paraffin wax options. Some potential things to consider before getting started include: What type of candle will you make? Pillar or jar? Which ingredients are best for your project? How do I scent my candle without masking its natural ingredients ? Learning how to create beautiful candles from scratch is undoubtedly very satisfying – decorate your creations with ribbons or wooden wicks for extra effect! If you want to start exploring this craft, here’s everything you need:
• Wax- You’ll need either soy or paraffin wax, depending on what type of candle you’re making/preference
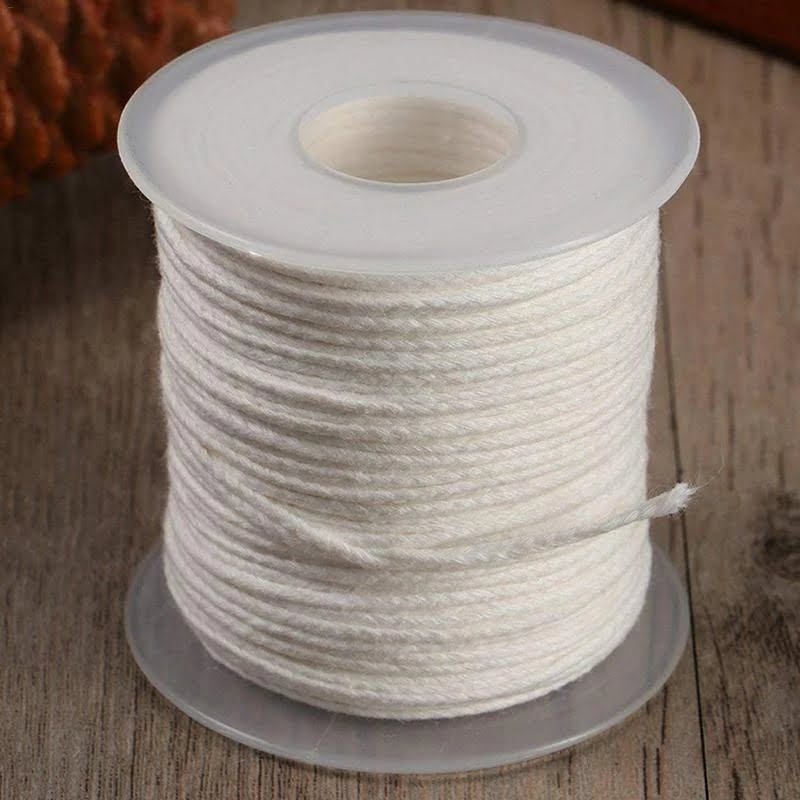
• Wicks- Wooden wicks offer a great look and sound when burning; cotton wicks are easier if you’re just starting
• A melting pot & stovetop (or double boiler)
• Thermometer (ideally candy thermometer)
• Molds/containers ” whatever type of candle container fits the look & feel desired
• Fragrances & essential oil additives
With these items, you’re all set up to begin experimenting with making your own beautiful scented candles!
Essential Materials and Tools Needed to Make Candles
When it comes to candle making, there are a few key supplies and tools you’ll need: wax, wicks, molds, and packaging materials. All of these items can be found in local craft stores and art supply shops as well as online retailers.
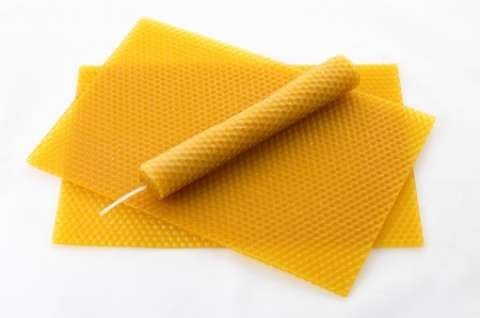
First, you’ll need wax for your candles. There are several types of wax available depending on what kind of candles you’re making such as beeswax, soy wax, gel wax and paraffin wax. Each type has its own set of pros and cons in terms of scent-holding capability, cost, burn time and melting point. Consider the type of candle or characteristic you want before selecting the correct type of wax.
Wicks are also important when making homemade candles – they will hold the heat dispersal from the flame in order to create an even burning surface for your candles. Make sure that your wick is large enough for the amount of wax you have used so that it will burn easily without leaving any residue behind.
Molds will determine the shape and design of your finished candles and come in a variety of sizes and shapes such as cylinders, cubes and tapers. It’s up to you to decide which ones would work best for your particular project. Be sure to remember that when choosing your molds they should be fit with a hole slightly larger than the diameter of the wick so that your wick won’t end up twisted or distorted when finished.
Finally you’ll need appropriate packaging materials like shrink wrap bags or gift boxes in which to store and send out finished candles once complete. If possible try to match up packaging with overall theme or design for neat presentation purposes before customers receive them!
Choosing and Melting the Right Wax for Your Candles
Types of Wax:
When it comes to making candles, there are many types of wax available. Each type has its own unique properties, so it’s important to choose the right kind for the type of candles you are creating. Common types of wax include paraffin wax, soy wax, beeswax, and vegetable or animal based blends. Each provides a different melting point and sets differently when cooled. For example, paraffin sets quickly but is less potent in scent than beeswax candles.
Melting Points:
The melting point of your wax will affect how long it takes to melt down and how easily the wick absorbs the melted wax. Soy wax melts at around 50-60°C (122-140°F) while bee’s wax has a higher melting point at 62-65°C (144-149°F). Paraffin melts between 60″80°C (140″176°F). The higher the melting point, the longer it will take for your candle to set once you have poured it into your jar or mold.
Blending Wax:
To achieve a desired effect with your candles, you can create specialized blends by mixing multiple types of wax together. Blending can reduce the melting point and help with scent retention as well as give your wax extra strength and stability. Experimentation is key when blending; try small batches until you find what works best with your desired results!
Scenting Candles:
Adding fragrance is one of the most popular aspects when crafting handmade candles! There are various ways to scent your candles; depending on which type of wax you are using, you can use an essential oil blend or a concentrated fragrance oil that comes in many different scents. If using essential oils make sure they are massage grade so that they evaporate properly when heated up in your candle mix. Remember that all fragrances perform differently depending on the type and amount being used!
Color and Pigments for Candles
When it comes to making candles, color and pigments play an integral role in creating the right look for your finished product. The most popular types of candle pigments include liquid dye, micas, and natural ingredients. Liquid dye is specific to candle-making and generally offers more vivid colors than other options. It is also very versatile; when combined with oils, gel waxes, or vegetable waxes, it’s capable of producing a wide range of pigmentation effects. Micas are small particles that reflect light and are composed primarily of mica flakes. They come in countless shapes and sizes so you can experiment and achieve different looks for any project. Natural ingredients such as annatto seed powder, madder root powder or honeycomb pollen are great for giving your candles a unique texture or shimmer since the pigment is created directly from their natural sources without any additives or dyes involved. Additionally, by choosing natural ingredients over synthetic ones you can contribute to a more sustainable production process. Ultimately, the choice between liquid dye , micas, and natural pigments will depend on your creative vision as each option has its unique benefits depending on the type of effect you’re aiming for!
Decorate Your Candles
Making candles is a great way to explore your creativity and create beautiful decorations for the home. Once you have the basics of candle making down, such as melting wax, pouring it into molds, and adding scents and color, it’s time to take your project to the next level. One of the best ways to do this is by decorating and designing your candles. Decorating is fun and easy with just a few simple supplies.
One way to add creativity to your candles is by using stencils. You can buy premade stencils or make your own custom ones on the computer. Be sure to treat both types of stencils with a special flame retardant spray before use. You’ll then want a brush handy ” you can use either sponge brushes or regular art brushes depending on what type of look you’re going for. With stenciling, as long as you keep the surface dry and decoupage paste-free, you can create a truly unique design on each candle creation!
Another great way to dress up candles is by embedding delicate items in them. From flowers and leaves, to shells or even tiny stones ” these items will help make your candle come alive with something extra special. Pick up some glass paperweights filled with glitter for an added touch of bling or colorful beads for an extra twinkle! Whatever choice you make, be sure that whatever item you’re embedding in your candle won’t cause any fire hazards or damage when exposed to heat during burning or moving around while holding hot wax.
Finally, don’t neglect the power of ribbons! Ribbons come in every shade imaginable and can easily be cut into various sizes that are perfect for wrapping around candle holders or bowed together decoratively on top of candles themselves. Plus ribbons are relatively inexpensive so play around with whichever colors match perfectly with whatever design ideas you have in mind!
Understand and Troubleshoot Candle Making Issues
Candle making can be an exciting and fulfilling hobby, but it requires skill and knowledge to create good candles. Understanding the basics of candle making and troubleshooting any potential issues is necessary for a successful process.
The most common issue with candle making is wicks that are too small, resulting in poor performance and inadequate combustion. This can result in candles burning down too quickly or extinguished altogether. To prevent this problem, choose the right size wick depending on the size of the candle being made. Also make sure you trim the wick before relighting your candle to ensure that it is burning cleanly.
Another problem you may encounter while making candles is an uneven burn pool. This means that the melted wax is forming an uneven circle around the wick when lit, leaving unmelted wax patches. In most cases, this is caused by using a large wick and inadequate heating which doesn’t allow for proper melting of all areas of wax on top of the candle. The best solution for this issue would be to switch to a smaller size wick and better heat distribution when pouring your molten wax into molds or jars. Keeping your environment consistent in temperature will also help keep from having an uneven burn pool as well as cooling your candles properly after curing them so they don’t overheat during their use.
For more intricate projects like container candles, cold-process soap-making or working with gel wax, air bubbles can be an issue due to their highly viscous nature (which means they tend to absorb a lot of air when poured). To prevent air bubbles try not to vigorously stir your material during preparation as well as ensuring everything is free flowing with no obstructions in pouring containers or molds. If bubbling still occurs, try tapping or shaking your container lightly post-pour and letting it cool slowly away from any sources of agitation such as blowing fans or open windows before proceeding with further curing measures such as adding embellishments since sudden movements could cause further disturbance in already set materials.
Safety Tips and Warnings for Making and Burning Candles
Making and burning candles is a fun, creative activity that can be done in the comfort of your own home. If you are new to candle making it is important to recognize the following safety tips and warnings.
First and foremost, always make sure that your work environment is set up correctly with no open flames nearby, an area free from foot traffic and objects that could catch fire, and any small children or pets out of reach. Also make sure to provide ample ventilation when working with hot wax as vaporized particles may be harmful if inhaled deeply.
When creating candles for burning purposes, only use materials meant for that purpose, such as approved waxes (paraffin waxes are easier to work with), wicks designed specifically for candle making and approved dyes/fragrances (not all dyes and fragrances used in cosmetics are suitable). This helps ensure a safe burn time as well as good scent impregnation and colouring.
Any containers or moulds used should also be flammable material-approved such as ceramic or high-temperature glass containers and silicone moulds. Avoid using cardboard or paper mache moulds as they do not tolerate flame or heat well at all.
Finally, while burning your homemade candles make sure they stay on a steady surface away from drafts that could increase the speed at which they burn unevenly, smoke harshly or even start a fire accidentaly. Additionally always check each candle before lighting to make sure it doesn’t have any open cracks in its surface that could cause dripping of hot wax during burning. Keep an eye on them during their burning period and always extinguish them properly when finished.
Create Your Own Signature Candle Fragrance
Creating an amazing, unique fragrance for your candles can seem like a daunting task. However, with the right tools and knowledge, creating a one-of-a-kind scent for your candle can be easy and enjoyable.
When it comes to creating a candle fragrance that’s tailored specifically to you, it’s important to recognize the different types of “notes” available – top note, middle note, and base note. Each type of note has its own unique role in your custom fragrance creation:
• Top notes are the scents that you smell first when lighting your candle; they’re lighter molecules and dissipate quickly. Scents such as citrus or floral are good examples of top notes.
• Middle notes provide balance and richness to the overall fragrance; these molecules take longer to evaporate than top notes. Common middle notes include spices such as clove or cinnamon.
• Lastly, base notes offer warmth and complexity while adding a smooth finish to your signature scent; fragrances like vanilla or sandalwood are typically used as base notes in candles.
In addition to understanding what type of notes make up a fragrance, blending those different kinds of scents is key to reach a perfectly balanced custom fragrance in your candle creation. Start by selecting one ‘theme’ scent from each category (i.e., floral top note + spicy middle note + sweet base note) before taking an opportunity for experimentation! Have fun with experimenting various ratios of the different ingredients until you achieve something unique that does justice to your candle creation.
Once you have all three notes blended together keep in mind that some fragrances need time to properly mingle – so if at first certain combinations don’t smell quite right don’t give up too soon! With enough experimentation over time you’ll be able to create the perfect aroma for any occasion – not just candles!
Promoting Your Candles
Advertising Ideas:
The first step to selling your candles is getting the word out about them, so you’ll need some creative advertising ideas. You could create custom flyers to hand out or use online marketing strategies like promoting through social media and websites such as Etsy and Google AdWords. You can also offer coupons in local newspapers and publications to attract customers. Word-of-mouth referrals will also go a long way with candle enthusiasts!
Selling Your Candles:
Once people know about your candles, you’ll need a plan for selling them. Consider selling them at craft fairs in your area or setting up a stall at a farmer’s market on weekends. You could even open an eCommerce website or join an Etsy store where you will bring lots of shoppers from all around the world. Investigate how these different outlets work and determine which marketing channel would be most effective for you!
Building An Online Presence:
Establishing an online presence is essential for businesses today, if you want to reach potential customers outside of your local area. A good place to start is by creating a company website or blog where customers can learn more about your products and services, so they can make informed decisions when choosing their candles. To ensure success, make sure that your website has strong branding messaging, attractive images of your product range, high conversion landing pages and other elements which are needed to capture potential buyers’ attention quickly. Be sure to take full advantage of the vast resources available online ” through blogs and vlogs that allow you to connect with more people ” and invite customers to leave comments and reviews on their experience with you via email or social media platforms like Instagram, Facebook or Twitter.
Conclusion
If you are considering candle making as a hobby, the good news is that it is a relatively inexpensive craft to get started with. Once you have all the materials and tools needed, such as wicks, wax, dyes, molds, thermometers, and fragrances, you will be able to create unique candles of all shapes and sizes. Being able to design these on your own can be satisfying and should keep you motivated to continue creating beautiful candles. You will also learn a lot about the science behind candle-making as you go along.
That said, it’s important that when starting out in this craft that you read up on safety information regarding proper handling of the wax and how to avoid accidents from open flames or hot wax spills. Once familiar with the necessary precautions – like always keeping a fire extinguisher nearby – there comes an added sense of freedom that comes with having a greater knowledge in getting started with this fun new hobby. With this foundation set up according to industry best practices and safety standards it’s time to really let creativity flow by experimenting with various scents, colors and shapes of candles during your venture into making these delightful pieces of art!

Welcome to my candle making blog! In this blog, I will be sharing my tips and tricks for making candles. I will also be sharing some of my favorite recipes.


