Dipped candle making is a fantastic activity for kids to engage in, as it not only allows them to tap into their creativity but also provides them with a unique hands-on experience. Creating their own candles from scratch can be an exciting and rewarding endeavor for children of all ages. Not only do they get to design and decorate their own masterpieces, but they also have the opportunity to learn about the science and art of candle making.
Engaging in this activity offers numerous benefits for kids. Firstly, it encourages creativity and self-expression, allowing children to explore different colors, shapes, and scents when creating their candles. This process allows them to develop their artistic skills while having fun. Additionally, dipped candle making helps improve hand-eye coordination and fine motor skills as they dip the wick repeatedly into the wax, creating layers that build up the candle’s shape.
Furthermore, dipped candle making provides an opportunity for learning outside of traditional academic settings. As children engage in this process, they gain a deeper understanding of the materials used in candle making and how heat affects the wax. They can observe firsthand how liquid wax solidifies and transforms into a beautiful handcrafted candle. By partaking in this activity, children cultivate patience as they wait for each layer of wax to dry before adding another.
Overall, introducing kids to dipped candle making opens up a world of creativity and learning while providing an enjoyable experience that can be shared with friends or family members. Whether it’s creating personalized gifts or simply exploring new techniques within this art form, the possibilities are endless when kids embark on their journey into the world of dipped candle making.
In the following sections of this article, we will dive into essential materials needed for this activity, safety precautions to take, step-by-step instructions for creating dipped candles, and much more.
Essential Materials
Dipped candle making is a fantastic activity for kids that allows them to explore their creativity while also learning a new skill. Before embarking on this exciting craft, it’s important to gather all the essential materials needed. Having the right supplies on hand will make the process smoother and more enjoyable for both kids and adults alike.
Wax
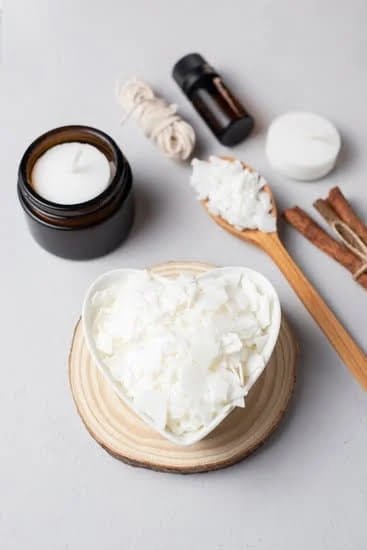
The main ingredient you will need for dipped candle making is wax. There are different types of wax available, such as beeswax, soy wax, and paraffin wax. Beeswax is a popular choice as it is natural and non-toxic. Soy wax is another great option, especially for those who prefer a vegan-friendly material. Paraffin wax, which can be found in most craft stores, is another widely used choice due to its affordability.
Wicks
Wicks are an essential component of any candle and can be easily found at craft stores or online. When selecting wicks for dipped candles, choose ones that are specifically designed for dipping. These wicks should be longer than the desired length of your finished candle since they will be continuously dipped into the wax.
Containers
To hold the melted wax during the dipping process, you will need containers such as metal cans or glass jars. It’s best to choose containers that are heat-resistant to prevent any accidents or damage caused by melting wax.
Dye or Colorant
If you want to add color to your candles, you will need dye or colorants specifically formulated for candle making. These come in various forms such as liquid dyes or color blocks. Make sure to choose non-toxic options that are safe for children to use.
Once you have gathered these essential materials, you’ll be ready to embark on your dipped candle making journey with kids. Remember to always supervise children during this activity and ensure that safety precautions are followed. With the right supplies, you can create beautiful and unique dipped candles that children will be proud to display or give as gifts.
Safety First
Ensuring a safe environment is of utmost importance when kids are engaging in any activity, including dipped candle making. By taking the necessary precautions, you can create a secure and enjoyable environment for your little ones to explore their creativity. Here are some essential steps to follow in order to prepare a safe space for kids to make dipped candles:
- Choose an appropriate workspace: Select a well-ventilated area with sufficient lighting for the candle-making process. A clean and spacious table or countertop will provide enough room for the children to work comfortably without any hazards.
- Protect the area: Cover your workspace with newspaper or tablecloth to protect against spills and drips of hot wax. This will make it easier to clean up afterward and prevent any damage to surfaces.
- Use proper attire and protective gear: Ensure that children wear long-sleeved shirts, pants, aprons, and closed-toe shoes during the activity to minimize skin exposure. It is also advisable for them to wear heat-resistant gloves for extra protection while handling hot wax.
- Impart safety instructions: Before starting the activity, explain essential safety rules such as not touching hot surfaces, keeping fingers away from open flames, and never leaving candles unattended while they are drying or burning.
To further enhance safety during dipped candle making, it is crucial for adult supervision at all times. The presence of an adult will mitigate potential risks and ensure that children follow safety protocols closely. Remember, creating an environment where kids feel safe allows them to fully enjoy the experience while minimizing any chances of accidents or injuries.
Step-by-Step Guide
Making dipped candles can be a fun and rewarding activity for kids. By following a step-by-step guide, children can learn the art of candle making while also unleashing their creativity. Here is a detailed breakdown of the dipped candle making process to help kids get started:
Step 1: Prepare the Work Area
Before beginning the candle making process, it is important to set up a clean and organized workspace. Place newspaper or a plastic tablecloth on the surface to protect it from any spills or drips. Gather all the necessary materials and tools, such as wax, wicks, a double boiler or melting pot, a thermometer, and any desired color dyes or fragrance oils.
Step 2: Melt the Wax
Start by melting the wax in a double boiler or melting pot over low heat. Be sure to closely supervise children during this step as melted wax can be quite hot. It is important to use caution and avoid direct contact with the hot wax. Use a thermometer to monitor the temperature and ensure that it does not exceed the recommended range for your specific type of wax.
Step 3: Prepare the Wicks
While waiting for the wax to melt, prepare the wicks by cutting them into appropriate lengths for your candles. Dip one end of each wick into melted wax and then press it firmly onto the bottom of a mold or container. Allow the wax to cool and harden completely before moving on to the next step.
Step 4: Begin Dipping
Once the wax has reached the desired temperature, you can start dipping. Take one prepared wick and slowly lower it into melted wax until only a small portion remains exposed above the surface. Hold it in place for a few seconds to allow the wax to cool slightly before lifting it out. Repeat this process, layering the wax onto the candle in a smooth and even manner, until you achieve the desired thickness.
Step 5: Layering and Cooling
To create dipped candles with different colors or designs, allow each layer of wax to cool partially before adding another color. This will create distinct layers and patterns. You can experiment with different color combinations or even add decorative elements like dried flowers or glitter between layers for added visual interest.
By following these steps, kids can easily create their own beautiful dipped candles. It is important to always supervise children during this activity and teach them about fire safety precautions. With a little creativity and imagination, kids can enjoy the process of making their own unique candles while also developing valuable skills in crafting.
Fun Variations
Dipped candle making is a fun and creative activity for kids, and one of the best parts is being able to experiment with different colors, shapes, and scents. This allows children to showcase their own unique style and personality through their handmade candles.
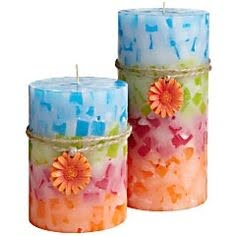
When it comes to colors, there are endless possibilities. Consider using different shades of the same color to create an ombre effect or mixing complementary colors for a bold and vibrant look. You can also experiment with adding glitter or other decorative elements to make the candles sparkle and shine.
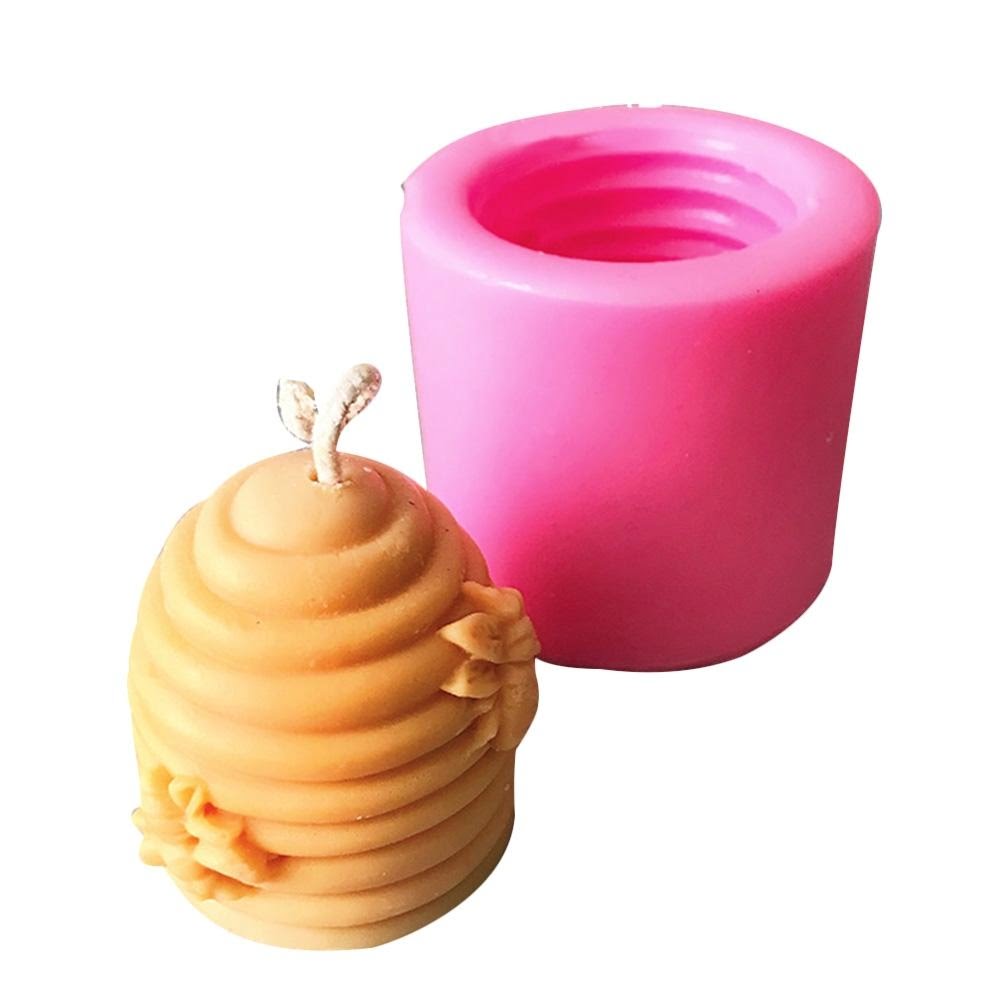
Shapes are another fun variation in dipped candle making. While traditional taper candles are always a classic choice, you can also try making round pillar candles, heart-shaped candles, or even mold your own custom shape using silicone molds. Encourage kids to think outside the box and get creative with their designs.
Adding scents to dipped candles can elevate the sensory experience. There are various ways to incorporate scents into your candles – you can use scented wax chips or drops specifically designed for candle making or add essential oils of your choice during the melting process. Just be sure to choose kid-friendly scents that are not overpowering.
| Colors | Shapes | Scents |
|---|---|---|
| Pastel Shades | Taper Candles | Lavender |
| Bold and Vibrant | Pillar Candles | Citrus Burst |
| Ombre | Heart-shaped Candles | Vanilla Bean |
| Glittery | Custom Molded Shape | Coconut Lime |
By providing a range of options for colors, shapes, and scents, children can truly make their candles unique masterpieces. Encourage them to explore different combinations and discover what they enjoy the most. This not only makes the candle making process more enjoyable but also fosters their creativity and personal expression.
Creative Customization
Candle making is not only a fun activity for kids, but it also provides them with the opportunity to explore their creativity and add personal touches to their creations. In this section, we will discuss various ways in which kids can customize and decorate their dipped candles.
One popular way to add personalization to dipped candles is through the use of different colors. Kids can experiment with mixing and layering different colored wax to create unique patterns and designs on their candles. They can also incorporate color dyes or even food coloring into the wax to achieve vibrant hues. Encourage them to use their imagination and create candles that match their favorite colors or themes.
Another way to customize dipped candles is by using various shapes. Kids can choose from a wide range of molds available in craft stores or even household items like cookie cutters or small plastic containers. By pouring the melted wax into these molds, they can create candles in different shapes such as hearts, stars, flowers, or even dinosaurs. It’s important to ensure that the chosen mold is heat-resistant and suitable for candle making.
To further enhance the beauty of their dipped candles, kids can also consider adding decorations. This could include applying glitter, beads, sequins, or small stickers onto the surface of the candle while the wax is still soft. Alternatively, they can wrap decorative ribbons or lace around the base of the candle or tie cute charms onto the wick. These embellishments allow kids to truly make their candles one-of-a-kind and showcase their individual style.
Overall, encouraging kids to get creative with customization and decorations helps them develop their artistic skills while giving them a sense of accomplishment in creating something unique. It also provides an opportunity for parents or guardians to bond with children as they work together on these creative projects.
| Customization Ideas | Description |
|---|---|
| Color Mixing | Experiment with different colored wax to create unique patterns and designs. |
| Shape Options | Use molds or household items to create candles in various shapes such as hearts, stars, or flowers. |
| Decorative Embellishments | Add glitter, beads, sequins, stickers, ribbons, or charms to enhance the appearance of the candles. |
Troubleshooting Tips
During a dipped candle making session, kids may encounter some common issues that can be easily overcome with a little troubleshooting. Here are some tips to help address and resolve these issues:
Uneven Dipping
One common problem that kids may face while dipping candles is achieving an even and smooth coat of wax. To overcome this issue, make sure that the temperature of the wax is consistent throughout the dipping process. If the wax becomes too cool, it can result in uneven layers. You can maintain the temperature of the wax by using a double boiler or a candle making pitcher placed in a pot of simmering water.
Another tip is to rotate the wick slowly while dipping it into the wax. This can help distribute the wax evenly on all sides of the candle. Additionally, allowing each dip to dry completely before dipping again can also prevent any lumps or bumps from forming.
Dripping Wax
Sometimes, kids may experience problems with dripping wax while removing the candles from the dipping container or during drying. To avoid this issue, ensure that excess wax is removed from each dip by gently tapping it against the side of the container before removing it.
For drying, you can use a drying rack with an absorbent material underneath to catch any drips. Placing newspaper or paper towels around your workspace can also help in case of any accidental spills.
If there are still drips after drying, you can carefully trim them off with a sharp knife or scissors once the candle has completely cooled down and hardened.
Color Fading
Sometimes, colors in dipped candles may appear faded or dull. To prevent color fading, make sure to use high-quality candle dyes or color blocks specifically designed for candle making. Follow the recommended guidelines for coloring ratios provided by your supplier.
Additionally, pay attention to how long you leave each dip in the dye bath as well as the temperature of the dye bath. Leaving the candle in the dye bath for too long or using a dye bath that is too hot can lead to color fading.
By following these troubleshooting tips, kids can overcome common issues encountered during dipped candle making and create beautiful candles with ease.
Clean-Up Made Easy
After an exciting and creative dipped candle making session with kids, it’s important to have a plan in place for cleaning up. With the right tips and techniques, tidying up can be a breeze and ensure that the experience remains positive for everyone involved.
Firstly, it is essential to have designated areas for each step of the candle making process. This will help keep things organized and make clean-up easier. Set up a space where the dipping can take place, another area for drying the candles, and a separate spot for any spills or messes that may occur. By having specific zones for each task, you can easily identify what needs to be cleaned up later.
To simplify the clean-up process, it is recommended to use newspaper or plastic sheets as a protective covering on your work surfaces. This will catch any wax drips or spills and can easily be folded up and disposed of once you are finished. Additionally, consider using disposable gloves when handling the wax to avoid any unnecessary mess on your hands.
When it comes to removing excess wax from utensils or equipment used during the dipped candle making process, there are a few tricks you can try. One simple method is heating the utensils slightly by running them under warm water before wiping them down with a paper towel. Alternatively, placing the utensils in hot soapy water and allowing them to soak can also help loosen any remaining wax residue.
By following these clean-up tips, you can ensure that the aftermath of your dipped candle making session is as enjoyable as the activity itself. Remember that involving children in cleaning up fosters responsibility and teaches them about taking care of their materials. With some organization and effort put into tidying up, you’ll be able to enjoy more fun-filled dipped candle making sessions with your little ones in no time.
Showcasing the Masterpieces
Once the kids have completed their dipped candle making masterpieces, it’s time to showcase their creations in a creative and visually appealing way. Displaying the finished candles can not only be a source of pride for the kids but also serve as a beautiful decoration in your home or as heartfelt gifts for loved ones. Here are some creative display ideas for kids’ dipped candles that will make them shine:
- Candle Holders: Using unique and decorative candle holders can elevate the appearance of the dipped candles. Look for holders that match the theme or style of the room where they will be displayed. Consider using colorful glass votive holders, rustic wooden candlesticks, or even repurposed jars or bottles decorated with ribbons or paint.
- Tray or Platter Arrangement: Arrange a collection of dipped candles on a stylish tray or platter to create a visually appealing centerpiece or focal point in a room. Choose trays made from materials like wood, metal, or acrylic and experiment with arrangements by varying heights, colors, and shapes of the candles.
- Floating Candles: Create an enchanting display by placing the dipped candles in clear bowls filled with water. Add flower petals, beads, or floating tea lights to enhance the beauty of this arrangement. This display idea works perfectly for special occasions like birthdays, weddings, or holiday gatherings.
- Hanging Candles: If you’re looking to add an element of whimsy to your display, consider hanging the dipped candles from strings or hooks attached to a wall or ceiling. You can create vertical arrangements using varying lengths of string and different colored candles for an eye-catching visual effect.
- Seasonal Displays: Switch up your display according to the seasons by incorporating natural elements such as pinecones, leaves, shells, or flowers around the base of the dipped candles. For example, during Halloween, arrange black and orange dipped candles with spooky decorations like plastic spiders or miniature witches’ hats.
Remember to always prioritize safety when displaying the kids’ dipped candles. Keep them away from flammable materials, ensure they are not placed near drafts or heat sources, and never leave burning candles unattended. With these creative display ideas, the kids’ dipped candles can become a source of joy, inspiration, and admiration for everyone who sees them.
Conclusion
In conclusion, dipped candle making is a fantastic activity for kids that encourages creativity and bonding. By engaging in this hands-on craft, children can develop their artistic skills while also spending quality time with their friends or family members. Not only does it provide a fun and enjoyable experience, but it also allows kids to explore different colors, shapes, and scents, making each candle unique to their personal tastes.
Dipped candle making also provides an opportunity for customization and personalization. Kids can add their own touches and decorations to their candles, allowing them to express themselves creatively. This process not only enhances their artistic abilities but also fosters a sense of pride and accomplishment as they showcase their masterpieces.
Furthermore, dipped candle making offers a chance for problem-solving and learning through troubleshooting any issues that may arise during the process. By overcoming these obstacles, children develop resilience and critical thinking skills. Clean-up after a successful session is made easy with tips provided earlier in the article, ensuring that the creative experience is enjoyable from start to finish.
Overall, dipped candle making with kids is an activity that not only provides endless possibilities for creativity but also strengthens bonds between children and caregivers or friends. Encouraging continued engagement in such activities will nurture imagination and promote quality time spent together. So gather your supplies, create beautiful dipped candles with your little ones, and cherish the memories made along the way.
Frequently Asked Questions
How do you dip candles for beginners?
Dipping candles for beginners is a simple and enjoyable process. Start by melting wax in a double boiler, ensuring it reaches the appropriate temperature for dipping. Next, attach a wick to a dowel or stick which will serve as the handle. Dip the wick into the melted wax, making sure to fully immerse it before allowing it to cool and harden.
Repeat this process several times, giving each dip enough time to harden before dipping again. Gradually, the candle will start to take shape and increase in size with each layer of wax added. With practice and patience, beginners can master the art of dipping candles and create their own beautiful homemade creations.
How do you make a candle kid friendly?
Making candles kid friendly involves a few important considerations to ensure safety and enjoyment for children. First and foremost, always supervise children when working with open flames or hot wax to prevent accidents or injuries. Opt for low-temperature waxes that melt at lower temperatures than traditional candle wax, reducing the risk of burns if accidentally touched.
Additionally, choose child-friendly scents and colors that are non-toxic and safe for young ones to be around. Consider using pre-tabbed wicks that are easier for kids to handle and avoid loose or hanging wicks that could pose hazards.
How do you make dip dye candles?
Creating dip dye candles is an artistic way to add vibrant color gradients to your homemade candles. Start by preparing multiple containers with different colored dyes according to your desired design. Assemble several lengths of cotton wick attached to wooden sticks or dowels as handles.
Dip each end of the wick into one container of dye, holding them down until you achieve the desired depth of color on each end of the candlewick. Carefully transfer the dipped ends from one color container to another until you have achieved the desired gradient effect on both ends of the wick.

Welcome to my candle making blog! In this blog, I will be sharing my tips and tricks for making candles. I will also be sharing some of my favorite recipes.


