Candle making at home has become a thriving trend in recent years, captivating the interest of people from all walks of life. From hobbyists seeking a creative outlet to those looking to add personal touches to their living spaces, the allure of crafting homemade candles has never been stronger. In this introductory section, we will delve into why candle making at home has gained such popularity and explore the benefits it offers.
One of the primary reasons for the surge in candle making as a hobby is the opportunity for customization. When you make candles at home, you have complete control over every aspect of the process – from selecting the wax and wicks to choosing fragrances and colors.
This level of personalization allows you to create unique pieces that reflect your individual style and preferences. Whether it’s crafting soothing lavender-scented candles or vibrant colored ones for special occasions, the possibilities are endless.
Additionally, making candles at home can also be a cost-effective alternative to purchasing store-bought ones. The materials needed for candle making are often readily available and affordable, allowing you to save money while indulging in a fulfilling hobby. Moreover, creating your own candles gives you the ability to reuse containers or repurpose items into molds, further reducing expenses.
Understanding the Basics
When it comes to making candles at home, there are several essential supplies that you will need in order to get started. Having the right materials not only ensures that your candles turn out beautifully, but also helps to ensure that they burn properly and safely. Here is a detailed list of necessary supplies for candle making:
Wax
The first and most important supply for candle making is wax. There are different types of wax available, including soy wax, beeswax, and paraffin wax. Each type has its own unique characteristics and benefits. It is important to choose high-quality wax that is specifically designed for candle making.
Wicks
Wicks are another crucial component of candle making. They help to provide a steady flame and regulate the burn rate of the candle. When selecting wicks, it is important to consider the size and diameter of your candles, as well as the type of wax you are using, as different wicks work better with certain types of wax.
Fragrance Oils and Colorants
If you want scented or colored candles, fragrance oils and colorants are essential supplies. Fragrance oils come in a wide variety of scents and allow you to customize the aroma of your candles. Colorants can be in liquid or solid form, allowing you to add vibrant hues or subtle tints to your creations.
In addition to these basic supplies, other materials you will need include a double boiler or melting pot for melting the wax, a thermometer for ensuring proper temperature control, containers or molds for shaping the candles, pouring pitchers or jugs for easy pouring of melted wax, and various tools such as stirring sticks and heat-resistant gloves for safety purposes.
When selecting your supplies, it is important to choose high-quality materials for optimal results. Investing in good quality wax and wicks can make a significant difference in the quality and burn time of your candles. Additionally, consider purchasing fragrance oils and colorants from reputable suppliers to ensure that they are safe to be used in candles. By using the right materials, you can create beautiful, long-lasting candles that will bring warmth and ambiance to any space.
Preparing Your Workspace
Creating a safe and efficient workspace is crucial when it comes to candle making at home. This section will provide essential tips on how to set up a designated area for candle making, away from flammable materials, as well as advice on proper ventilation and organization.
First and foremost, it is important to choose an appropriate location for your candle-making area. Select a space that is well-ventilated and away from any potential fire hazards such as curtains, paper, or other flammable objects. Ideally, this space should have good air circulation to minimize the buildup of fumes released during the melting process.
Once you have chosen a suitable location, it is time to organize your workspace efficiently. Having all the necessary supplies within easy reach will help streamline the candle-making process and prevent accidents. Consider investing in storage containers or shelves to keep your materials neatly organized.
Proper ventilation is crucial when working with wax and fragrance oils. Make sure there is adequate airflow in your workspace to prevent any potential health risks associated with inhaling fumes or vapors. Opening windows or using fans can be effective ways to improve ventilation in your candle-making area.
In summary, creating a safe and efficient workspace for candle making at home involves selecting an appropriate location away from fire hazards, organizing your supplies for easy access, and ensuring proper ventilation to minimize health risks. By following these guidelines, you can enjoy the art of candle making while keeping yourself and your surroundings safe.
| Tips for Creating a Safe and Efficient Workspace |
|---|
| Select a well-ventilated area away from flammable objects |
| Organize supplies for easy access |
| Ensure proper ventilation through windows or fans |
Step-by-Step Guide
Gathering Your Supplies
Before you begin making your first candle at home, it is essential to gather all the necessary supplies. These include wax, wicks, a container or mold for the candle, fragrance oils or essential oils for scent (optional), and colorants (optional). It is recommended to choose high-quality materials to ensure optimal results.
When selecting wax, consider factors such as melting point and type of wax (e.g., soy, beeswax, paraffin) based on your preferences and desired outcomes. Similarly, choose wicks that are appropriate for the size and type of candle you want to make.
Melting the Wax
The first step in making a candle is melting the wax. Begin by setting up a double boiler or using a heat-resistant container placed in a pot of boiling water on low heat. Gradually add chunks or flakes of wax into the container, stirring gently with a heat-resistant utensil until it melts completely. Pay close attention to the temperature; different types of wax have different melting points.
Adding Fragrance and Pouring into Molds
Once the wax has melted thoroughly, you can add fragrance oils or essential oils if desired. Be sure to follow the recommended guidelines for fragrance load depending on your chosen oil and amount of wax. Stir gently but thoroughly to ensure even distribution throughout the melted wax.
Next, prepare your chosen container or mold by securing the wick in place. You can use adhesive tabs or hot glue to attach one end of the wick to the bottom center of the container or mold.
Carefully pour the scented melted wax into your prepared container or mold, making sure not to disturb or misplace the wick. Leave some space at the top (about half an inch) as additional room will be needed for future steps like finishing touches and trimming.
Allow adequate time for the candle to cool and solidify. This process usually takes a few hours, but it can vary depending on the type and size of the candle. Once the wax has hardened completely, you can trim the wick to an appropriate length (about ¼ inch) to ensure optimal burning performance.
Follow these step-by-step instructions to confidently create your first homemade candle. As you gain experience and become more comfortable, feel free to experiment with different colors, fragrances, and designs to personalize each creation according to your preferences and artistic vision.
Different Types of Candles
Candle making is a versatile craft that allows for endless creativity and personalization. In this section, we will explore the different types of candles that you can make at home and provide step-by-step instructions for each type. Whether you prefer pillar candles, container candles, votives, or tea lights, there is a style to suit every preference and occasion.
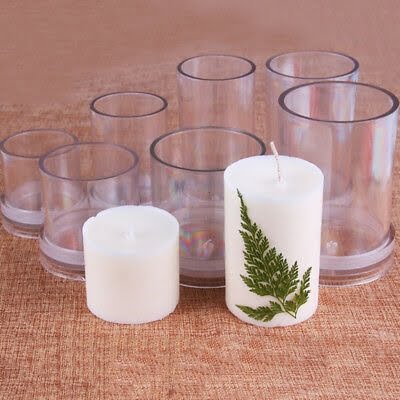
Pillar candles are one of the most classic and popular types of candles. They are known for their cylindrical shape and clean lines. To make a pillar candle, you will need to use a mold that is specifically designed for this type of candle. The process involves melting the wax, adding fragrance if desired, and pouring it into the mold. Once cooled and hardened, the candle can be easily removed from the mold to reveal its beautiful shape.
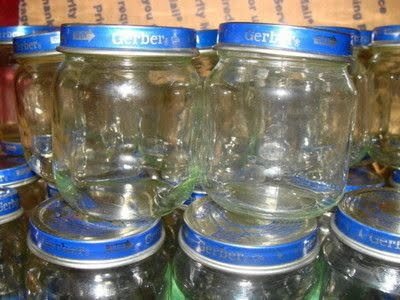
Container candles are another popular choice among candle makers. As the name suggests, these candles are made in containers such as jars or tins. The advantage of container candles is that they can be easily transported and have a longer burn time compared to other types of candles.
To make a container candle, simply melt the wax, add fragrance or color if desired, and pour it into the chosen container. You can further personalize your container candle by decorating the outside with ribbons or labels.
Votives are small cylindrical or square-shaped candles that are typically wider than they are tall. These candles are often used as decorative accents or in candle holders during special occasions or religious ceremonies. Making votive candles involves melting the wax and pouring it into special votive molds or heat-resistant containers like metal cups. Once cooled and hardened, these mini-candles can be easily removed from their molds.
Tea lights are tiny candles that come in small aluminum cups or plastic containers with thin metal wicks attached. They are perfect for creating an intimate atmosphere or adding a warm glow to any space. To make tea lights at home, you will need to melt the wax and pour it into the pre-made cups or containers. After the wax has cooled and solidified, simply trim the wick and your tea lights are ready to be ignited.
| Type of Candle | Description |
|---|---|
| Pillar Candles | Cylindrical candles made in specific molds. |
| Container Candles | Candles made in jars or tins. |
| Votives | Small cylindrical or square-shaped candles often used as decorative accents. |
| Tea Lights | Small candles in aluminum cups or plastic containers with metal wicks. |
These are just a few examples of the different types of candles you can make at home. Each style offers its own unique beauty and functionality, allowing you to create candles that suit your personal style and needs. Don’t be afraid to experiment with different shapes, sizes, colors, and scents to truly unleash your creativity.
Enhancing Your Candles
Candle making at home provides a wonderful opportunity to express your creativity and personalize your candles. Adding unique designs, patterns, and textures to your candles can enhance their aesthetic appeal and make them truly one-of-a-kind. Here are some creative ideas for personalizing and beautifying your homemade candles:
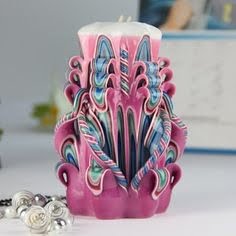
- Incorporating Unique Designs: One way to enhance the visual appeal of your candles is by incorporating distinctive designs into the wax. You can achieve this by using special candle molds that create intricate patterns or shapes. Silicone molds are particularly popular for this purpose as they allow you to easily remove the finished candle without damaging the design.
- Playing with Colors: Experimenting with different shades can transform a plain candle into a work of art. Consider adding layers of differently colored wax to create a beautiful gradient effect or using colorants to dye the entire candle in vibrant hues. Remember to use high-quality colorants specifically designed for candle making to ensure optimal results.
- Adding Textures: Textured candles not only look visually appealing but also provide an interesting tactile experience when touched. There are various ways you can introduce texture into your candles, such as by embedding dried flowers, herbs, or spices into the wax or using special additives like sand or coffee grounds.
- Exploring Decorative Elements: To further enhance the aesthetics of your candles, you can experiment with decorative elements such as glitter, dried flower petals, or even small embeds like seashells or gemstones. These elements can be added onto the surface of the candle or embedded within the wax for a stunning effect.
Remember to always consider safety when incorporating these creative ideas into your candle making process. Ensure that any decorative elements used are non-flammable and will not cause any hazards during burning.
By exploring these creative ideas for personalization and aesthetics, you’ll have endless possibilities to elevate your homemade candles and showcase your unique style and personality through each piece you create.
Troubleshooting and Pitfalls to Avoid
Candle making, like any craft, can have its fair share of challenges. Whether you’re a beginner or an experienced candle maker, it’s important to be aware of common mistakes and pitfalls to avoid. By taking proactive measures and knowing how to troubleshoot, you can ensure that your candle making experience is smooth and successful.
1. Uneven Burning:
One common issue faced by candle makers is uneven burning. If your candles are burning faster on one side or tunneling down the center, there are a few possible causes. Firstly, make sure to trim the wick before each burn to prevent excess soot and mushrooming.
Secondly, ensure that the container or mold you are using has a wide enough diameter for even heat distribution. Lastly, be patient when burning candles for the first time as they need sufficient time to create a full melt pool.
2. Air Bubbles:
Air bubbles can detract from the beauty of your homemade candles. To prevent air bubbles, begin by pre-warming your containers in the oven before pouring the wax. This helps eliminate temperature differences that can cause bubbles to form. Additionally, gently tapping the container on a solid surface after pouring can release any trapped air bubbles.
3. Fragrance Problems:
Scented candles offer an extra layer of ambiance but getting the fragrance just right can be tricky. If you find that your homemade candles lack fragrance throw or smell different when burned compared to their unlit state, there may be issues with the fragrance oil itself or how it was incorporated into the wax. Ensure that you are using high-quality fragrance oils specifically formulated for candle making and follow recommended usage rates provided by suppliers.
4. Overheating Wax:
Overheating wax not only affects the quality of your candles but can also pose safety risks such as fire hazards or discoloration of the wax. It is crucial to use a thermometer to monitor the wax temperature throughout the melting and pouring process. Different types of waxes have specific melting points, so be sure to follow the recommended temperature range for the type of wax you are using.
5. Poor Adhesion:
For container candles, poor adhesion can result in the wax pulling away from the sides of the container or sinking inwards. To ensure proper adhesion, make sure your containers are clean and dry before pouring the wax. You can also use a fragrance oil-compatible adhesive like double-sided candle adhesive dots to secure the wick at the bottom of the container.
By being aware of these common pitfalls and taking preventative measures, you can avoid many frustrations that may arise during candle making. Remember that practice makes perfect, so don’t be discouraged if you encounter difficulties along the way. With time and experience, you will become more adept at troubleshooting and creating beautiful homemade candles.
Caring for Your Homemade Candles
Once you have successfully made your homemade candles, it is important to know how to properly care for them to ensure their longevity and optimal performance. Taking the time to care for your candles will not only enhance their burning experience but also help you enjoy them for a longer period of time. Here are some essential tips for caring for your homemade candles:
Firstly, it is crucial to trim the wick before each use. Trimming the wick to about ¼ inch will prevent excessive smoke and soot from forming while also helping the candle burn evenly. You can use a pair of wick trimmers or simply trim it with scissors. Be sure to remove any trimmed pieces of wick from the candle before lighting it.
Secondly, proper storage is key in maintaining the quality of your homemade candles. It is best to store them in a cool and dry place away from direct sunlight, as sunlight exposure can cause discoloration or warping of the wax. Additionally, storing candles in a container or wrapping them in plastic wrap will help maintain their fragrance over time.
Another important tip is to always allow your candles to burn long enough for the wax pool to reach the edges before extinguishing them. This helps prevent tunneling, which is when a candle burns unevenly, leaving wax buildup on the sides of the container and wasting valuable candle wax.
Lastly, never leave a burning candle unattended. It is essential to practice safe candle usage by keeping lit candles away from flammable objects and out of reach of children or pets. Extinguish a candle if there is less than one inch of wax remaining at the bottom.
By following these simple tips, you can maximize both the lifespan and performance of your homemade candles. Properly caring for your candles ensures that you get the most out of your creations and creates an enjoyable ambiance every time you light them.
Conclusion
In conclusion, candle making at home is a thriving trend that allows individuals to tap into their creativity and enjoy the art of candle making in a rewarding and fulfilling way. Throughout this article, we have explored the various aspects of candle making, from understanding the basics of essential supplies to exploring different types of candles and enhancing them with personalization and aesthetics.
By learning how to make candles at home, not only can individuals save money by making their own customized candles, but they also have the opportunity to ignite their creativity and explore different techniques. The process of making candles can be a therapeutic and relaxing activity that brings joy and satisfaction. Whether it’s experimenting with different fragrances, colors, or decorative elements, there are endless possibilities for creating unique and beautiful candles.
To fully embrace this hobby, it is important to continue learning and improving. By troubleshooting common mistakes and following proper care instructions, homemade candles can last longer and provide optimal performance. Trimming wicks, storing candles correctly, and practicing safety precautions will ensure a pleasant experience every time you light your homemade creations.
So why not dive into the world of candle making? With this guide as a starting point, you can begin your journey towards discovering the beauty of creating your very own candles at home. With each candle you make, you’ll not only fill your space with warmth and fragrance but also gain a sense of pride in your craftsmanship. So go ahead – ignite your creativity and embark on this enchanting journey of candle making at home.
Frequently Asked Questions
How do you make candles for beginners?
Making candles for beginners can be a fun and rewarding craft. To start, gather all the necessary supplies such as wax, wicks, containers, fragrance oils (if desired), and a double boiler or heat-resistant container for melting the wax. Begin by melting the wax in the double boiler or heat-resistant container on low heat until it reaches a liquid consistency. While the wax is melting, secure the wick to the bottom of your candle container using a tab or glue dot.
Once the wax is melted, remove it from the heat source and add any fragrance oils or colorants if desired. Stir gently until well mixed and then carefully pour the melted wax into your candle container around the secured wick. Allow it to cool for several hours or overnight until completely hardened and then trim your wick to about ¼ inch before lighting.
What are the basic ingredients in candle making?
The basic ingredients in candle making include wax, wicks, fragrance oils (optional), and colorants (also optional). Wax is at the core of any candle and can come in various forms such as soy wax, beeswax, or paraffin wax.
Wicks are essential to provide a flame for burning; they come in different sizes depending on the width of your candle jar or container. Fragrance oils add scent to your candles beyond their natural aroma while colorants can be used to create visually appealing candles with different hues if desired.
How do you make candles without a machine?
Making candles without a machine is entirely possible and can yield beautiful results. One way is through traditional hand-pouring methods using readily available materials. Start by melting your chosen wax using a double boiler or microwave-safe container until fully melted but not boiling hot. Securely place your wick at the center of your chosen candle container using any suitable adhesive like hot glue.
Optional: Add fragrance oil or colorant to your melted wax according to preference. Slowly pour the melted wax into your prepared container around the secured wick, allowing it to cool and harden naturally. Another option is to make rolled beeswax candles by softening the wax sheets with gentle heat, rolling them tightly around a cotton wick, and securing the shape with fingertips or a small tool. Both methods allow for creativity and experimentation while producing beautiful homemade candles without requiring any specialized machines.

Welcome to my candle making blog! In this blog, I will be sharing my tips and tricks for making candles. I will also be sharing some of my favorite recipes.


