Introduction
Clean burning candles are a type of candle that produce minimal smoke or soot during their burn, making them much more eco-friendly and healthier for both humans and the environment. Clean burning candles may use plant-based wax such as soy, coconuts and beeswax as opposed to paraffin wax which is derived from petroleum. As well as using a natural wax source, many clean burning candle manufacturers will use essential oils instead of synthetic scents to provide them with their aroma. Making your own clean burning candles at home is easy and requires just a few simple ingredients.
Steps:
1. Choose an Aromatherapeutic Essential Oil: Decide on an aroma you would like the candle to have and select an essential oil accordingly. For example, if you want a calming scent, try lavender or chamomile. Research different types of essential oil powders and oils to find the one that works best for your desired scent for the candle.
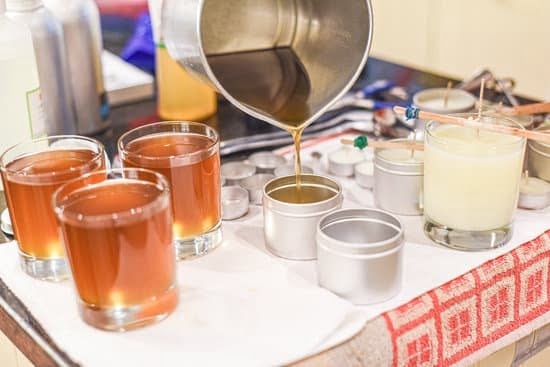
2. Melt Wax with Double Boiler Method: Use small vessels placed inside one another such as a glass Mason jar with hot water as the base or a bowl over boiling water over low heat on the stove top to melt your plant-based wax pellets until completely liquid. Make sure not to leave unattended or boil too quickly otherwise it could ignite!
3. Add Wax Colorant: Depending on your desired look for the candle, you can add either natural dyes or soap colorants (available in most craft stores) into the melted wax mixture in order to get your desired colouring once cooled again.
4. Combine Scented Oils & Wax Mixture: Once everything is melted together smoothly, add your chosen essential oil into the mix while stirring continuously until combined then remove from heat source and let cool slightly before pouring into jars or molds of choice so that it sets correctly when cooled down fully afterwards.
5 Wick Your Candles: Take large wicks which should be found in most craft stores & attach them in centre of molds by looping through holes already present where appropriate ” then feed rest out opposite end leaving enough room for melting yet still having tension within when placed correctly before pouring mixture over top of wick & leaving space near top for flame once lit thereafter!
6 Finish Candle Making Process: Wait patiently until all candles are completely cooled off before attempting lighting – this may take up to 4 hours depending on size/thickness(es) involved with final products; finally trim wicks down evenly afterward if desired so that they don’t cause any excessive smoke whilst in burn-mode going forward!
Essential Candle-Making Supplies and Tools
Making clean burning candles starts with selecting the right candle-making supplies and tools. Depending on the type of candle you want to make, your supplies can range from basic (ceramic bowls) to specialized (wicks and wax). Some essential candle-making items include:
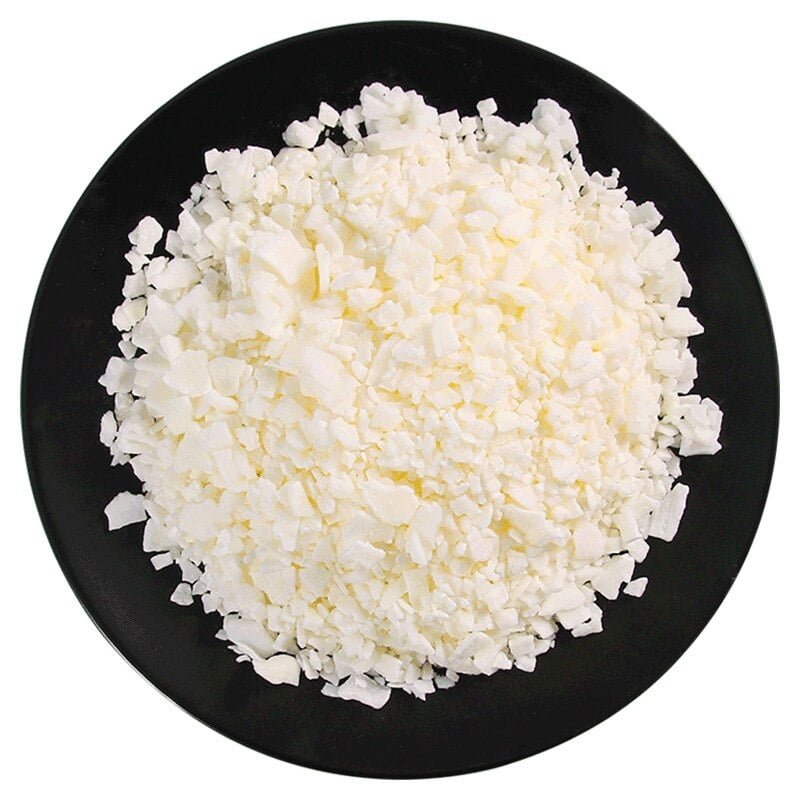
● Candle Wax: A spectrum of wax types exists for making a variety of candles, such as paraffin, soy wax, and beeswax, each with their own particular properties. Paraffin is most often used but must be blended with additives like stearic acid or Vybar to help it burn cleaner. Soy is becoming a popular choice because it’s more eco-friendly, burns longer, and is easy to clean up if there’s a spill. Beeswax has long been an ingredient in making candles since it naturally produces no smoke when burning.
● Candles Molds: There are various molds available that are made out of metal or silicon. Choosing either depends on your preference as both have benefits”silicon flexibility making them easier to remove while metal giving offers more supportg when pouring hot liquid wax into it.
● Candle Colorant: Candle colorants may be controversial due to some containing toxins that don’t belong in the air we breathe and could pose health risks such as triggering asthma. Fortunately, natural options now exist like dyes derived from plants and fruits which contain no harmful chemicals. If particles do enter the air from your candles due to ventilation and other factors, at least you know it’s not because of toxic dye.
● Wicks: The type of wick used will affect how well a candle burns as some wicks for example produce a lot of smoke even when made with high quality waxes containing additives designed for clean burning candle pour recipes. Cotton wicks are favored because they work well with soy waxes especially when properly primed with stiffening solution such as “wick stiff” before setting up in your molds. Those made from plant fiber also tend to be much less prone to smoking which causes soot build up on surrounding walls when burning while flimsier metallic core wicks may require adjustment as they burn down throughout the life of the candle in order prevent melted wax spilling out near the base stem onto surfaces sensitive furniture or décor items – please use caution here!
Choosing Quality Ingredients for Cleaner Burning Candles
Making your own candles at home can be an enjoyable and rewarding experience. However, the quality of candles you make is entirely dependent on the quality of ingredients you use. To ensure clean burning candles, start with high-quality waxes, wicks, and colorants. High-grade wax such as soy or beeswax is usually recommended for best performance since paraffin wax can contain impurities that will be released into the air when lit. All-cotton wicks are often reliable sources and lead free so they burn longer without creating too much smoke. When looking at colorants, avoid dyes because they’re often full of chemicals. Natural options like herbs, spices, ultraviolet inhibitors or iron oxide typically offer better results with fewer environmental impacts. Finally, you may want to consider adding essential oils to provide aromatherapy while burning your candle. Essential oils provide a pleasant scent and have been known to have therapeutic properties when incorporated into one’s lifestyle. Just be sure to avoid those that contain phthalates as those compounds release dangerous gas emissions when burned like candles with synthetic fragrances can do. With the right quality ingredients to utilize for your candle making venture, you’ll have healthier and cleaner burning candles for all your friends and family!
Preparing and Measuring Candle Wicks
Before you can make clean burning candles, the first step is to measure and prepare the candle wick. Start by measuring out a length of wick that is slightly longer than the overall height of your candle container. If the wick is too long, it can cause excessive smoking and an uneven flame; if it’s too short, there won’t be enough oxygen or combustible fuel for an efficient burn. Once you have determined the correct length for your wick, thread it through a metal or plastic tab at one end and tie off securely with either string or wire. This will help to hold your candle wick upright during the pouring process. Also use a small amount of wax glue at one end to help keep the wick centered in position while the wax sets completely.
Setting Up the Melting Pot Safely and Effectively
When melting wax for clean burning candles, it is important to ensure that your workspace and equipment are set up safely and effectively. The most common way of melting wax is in a melting pot. Make sure that the area you are working on is away from children and pets. Wear protective gear such as a face mask, gloves, and heated resistant clothing for protection against any splatters of molten wax. Place the melting pot on a level surface, preferably on top of a heat resistant mat or board to protect the surface underneath. If available, connect an exhaust fan above the work area to remove any smoke or fumes produced by the burning candle wax.
Before lighting the stovetop burner underneath your melting pot, make sure that there are no flammable materials near it. Furthermore, only use dedicated pots for making candles as using pots that have been used previously can compromise the quality of your candles due to residue left by other products being melted in them previously. Finally, do not forget to always follow manufacturer’s instructions when operating any kind of equipment related to candle making!
Blending Wax and Fragrance for Optimal Burn Quality
Making candles is an art form that can bring peace and relaxation, or add just the right touch of ambiance to any home. If you want to make sure that your candles burn cleanly and consistently, it is important to blend wax and fragrance properly. Here are some tips for creating optimal burn quality in your candles:
1. Start with a high-quality wax. For the best results, use a wax that has the right melting and dripping point with low odor. This will ensure that any added fragrances remain strong throughout the entire process.
2. Fragrance oils should be added when the melted wax is still hot but not boiling. Doing this helps create an even distribution of scent and prevents large droplets from puddling on top of the candlewick or on the side of the container.
3. It’s also important to avoid overloading with fragrance as too much scent can negatively affect performance in a lower-grade wax, causing rapid burning or inconsistent burning patterns. Use around 8% fragrance oil per batch for optimum burning quality.
4. When pouring candle containers, make sure to leave a little space at the top so as not to overload them during lighting and burning sessions as too much melted wax may near or overflow out of container walls onto surfaces below them.
5.Lastly, most importantly, always place wicks securely in containers before pouring melted wax then allow candles enough time cool before trimming excess wick off if needed; making certain lamps remain open to promote consistent burning pattern among other factors that contribute towards creating clean burning candles!
Pouring the Wax and Wicks into Molds Evenly
When pouring clean burning candles, it is important to make sure the wax and wicks are evenly distributed within your molds. Begin by melting a large amount of wax in a double boiler over low to medium heat. Once it is melted and any color dyes or scents have been thoroughly mixed in, use a candle pouring pot to pour the wax into your molds. Use a thermometer to measure the temperature of the wax before pouring into the molds, as you want it to be between 130-150°F (54-66°C). Most importantly, you want ensure that all of the wicks are standing upright and in the center of each mold before pouring the wax. This will ensure an even burning process once your candles are lit. After you’ve poured them, simply let them cool for at least 24 hours before removing them from their molds and trimming off excess wick if necessary.
Candle Curing Process and Finishing Touches
One of the key aspects to creating safe, clean-burning candles is the candle curing process. This involves burning the candle for an extended period of time. Depending on the size and type of your candle, it may need to be lit for at least two hours minimum. During this process, it is important to monitor the amount of wax being used so that the flame should not get too close or too far away from the wick. You can use a ruler or other measurements during this time if needed. Once you are satisfied with the burn, extinguish it and allow the wax to cool down completely before removing any wick trimmings or ash left behind by burning.
Additionally, if you would like to give your candles that perfect finished look, consider trimming and straightening out stray wicks after each burn session until they are all even in height and length. Gently brushing off any dust build-up with a soft cloth can also help keep them looking neat and polished within their containers. If you want to spruce up their looks further, adding decorations such as lavender buds, dried herbs or glitter can put finishing touches on your creations!
Troubleshooting Tips for Making Cleaner Burning Candles
If you’re looking for a way to make cleaner burning candles, then here are some troubleshooting tips to help.
1. Use the Proper Wick Size: Making sure you’re using the properly sized wick for your candle is one of the most important steps in creating clean burning candles. A wick that is too small could cause a weak flame and smoking issues, while a wick that is too large can lead to an overly robust flame and dripping wax.
2. Use Natural Waxes: Natural waxes like soy or beeswax will usually produce less smoke and strong odors when burning compared to paraffin-based waxes. Additionally, natural materials tend to burn more slowly than paraffin, meaning more of the fragrance oils can be released into the atmosphere rather than going up in smoke.
3. Stripe Out Additives: When adding colorants or additives such as glitter or shavings, use as little as possible so you don’t overburden your wax with heavy fractions that won’t burn cleanly. This can lead to extra smoke and poor performance from your candle overall.
4. Keep Contaminants Away From Your Wax: When melting down or working with your wax, make sure there are no contaminated materials mixed in that could potentially create problems down the line due to interference with combustion or saturation with foreign particles making it difficult for enough oxygen to get through adequately for proper burning conditions to be maintained correctly.
5. Use Fragrances Correctly: Many people are unaware that fragrances need specific amounts added per pound of wax based on flash points”the temperature when something ignites”and this can lead to candles burning improperly and releasing toxic chemicals unless done correctly. Aim for no more than 8% scent loading per pound of wax at around 140-160 degrees Fahrenheit (60-70 Celsius) depending on the type of fragrance used in order to minimize contamination from ash or smoke when it burns as intended due diligence has been taken beforehand during production stages already followed successfully!
Conclusion
To make clean burning candles, first start by melting your wax in a double boiler over low heat. When the wax is completely melted, add 10% of your wax’ weight in stearin to increase the burning time of the candle. After that, carefully add your chosen molds or wick holders to the wax and ensure that they are secure and stable. Then, evenly distribute any type of pigment or decorations you may use to color the candle. Place the wicks securely into the molds/holders ensuring that they dip down deep into the container without touching its sides. Lastly, pour melted wax slowly into each mold until it reaches 3/4 full for best results. Allow at least 24 hours for it to fully cool and harden before attempting to remove from molds.
Using these steps will ensure that your candles burn clean with minimal smoke emission. Be sure to periodically check and trim wicks when lighting candles to achieve proper flame size and make sure you store them away from dust and humidity when not in use- this will help extend their life span significantly! With these tips in mind, you should have no problem creating wonderful smelling, beautiful looking burns with minimal smoke output each time.

Welcome to my candle making blog! In this blog, I will be sharing my tips and tricks for making candles. I will also be sharing some of my favorite recipes.


