Decorative candle making has become an increasingly popular art form, allowing individuals to express their creativity while enhancing the ambiance of their living spaces. Candles have long been valued for their ability to create a warm and inviting atmosphere, and now, with the art of decorative candle making, they can also serve as stunning pieces of decor that reflect personal style and taste.
In this introductory section, we will delve into the world of decorative candle making, exploring its growing popularity and the significance of candles in home decor. Whether you are a seasoned candle maker or new to the craft, this article will provide you with essential information and step-by-step guidance on how to create beautiful and unique decorative candles.
Candles have been used for centuries as a source of light and warmth, creating an inviting atmosphere in homes across cultures. However, in recent years, there has been a surge of interest in using candles as both functional objects and works of art. People are now embracing personalized candles as statement pieces that add character and charm to their living spaces.
By incorporating different materials, colors, fragrances, and designs into candle making, enthusiasts can transform a simple wax structure into a product that tells a story or captures a particular aesthetic. Whether you prefer rustic farmhouse vibes or contemporary minimalism, there is a decorative candle-making technique to suit every style.
Join us on this journey into the art of decorative candle making and discover how you can create stunning candles that not only illuminate your space but also serve as unique decor items tailored specifically to your taste. With our comprehensive guide and step-by-step instructions, you’ll be able to hone your skills and unleash your creativity in crafting candles that truly reflect your personal style while elevating any room’s ambiance. So let’s dive in.
Essential Materials and Tools for Decorative Candle Making
List of Materials
Before diving into the world of decorative candle making, it is essential to gather all the necessary materials. The following is a comprehensive list of materials needed for this craft:
- Wax: Choose a wax that suits your desired candle design and personal preferences. Options include paraffin wax, soy wax, beeswax, and palm wax.
- Wicks: Select wicks that are appropriate for the type and size of candles you plan to make. Cotton or hemp wicks are popular choices.
- Molds: Consider the shape and size of your desired candles when choosing molds. Some common options include pillar molds, container molds, votive molds, and silicone molds for novelty shapes.
- Colorants: Add vibrancy and appeal to your decorative candles with colorants such as liquid or powdered dyes specifically made for candle making.
- Fragrances: Elevate the ambiance of your home by incorporating fragrances into your candles. Essential oils or fragrance oils designed for candle making can be used to create customized scents.
- Additional Decorations: Get creative with embellishments such as dried flowers, seashells, glitter, or decorative charms that can be embedded into the wax to enhance the aesthetic appeal of your candles.
Importance of Quality Tools
Apart from the materials mentioned above, having quality tools is crucial for successful decorative candle making. Here are some essential tools every candle maker should have:
- Double Boiler: This tool allows you to melt wax safely without direct heat exposure by using a water bath method.
- Thermometer: A thermometer is necessary for monitoring the temperature of the melted wax. Different types of waxes require different melting points for optimum results.
- Heat-Resistant Containers: These containers will hold the melted wax before pouring it into molds or containers.
- Stirring Utensils: Wooden spoons or stainless steel stirrers are ideal for mixing the wax and colorants thoroughly.
- Measuring Tools: Accurate measurement is essential in candle making. Use a digital scale or measuring cups and spoons to measure the ingredients precisely.
By gathering these essential materials and tools, you will be well-prepared to embark on your journey into decorative candle making. Remember to invest in quality tools and materials as they can greatly impact the final outcome of your candles.
Choosing the Perfect Candle Design and Shape
When it comes to decorative candle making, choosing the perfect design and shape is key to creating candles that not only look beautiful but also complement your aesthetic preferences and home decor style. With a wide range of options available, from classic pillar candles to novelty shapes, there is something for everyone. Here are some tips to help you navigate the world of candle design and shape:
- Consider your aesthetic preferences: Before diving into different designs, take a moment to think about your personal style and the overall theme of your home decor. Do you prefer sleek and contemporary designs or are you drawn towards more whimsical and rustic styles? Knowing your preferred aesthetic will guide you in selecting the right candle design.
- Match the candle design to its purpose: While aesthetics are important, it’s equally vital to consider the purpose of the candle. For example, pillar candles are great for creating a cozy ambiance on a dining table or mantelpiece, whereas container candles work well as decorative accents in bathrooms or bedrooms.
Votives are perfect for adding a touch of elegance to any space, while novelty shapes like animals or flowers can be fun additions to children’s rooms. - Experiment with different shapes: Don’t be afraid to step outside your comfort zone and try out unique candle shapes. Tapered candles can add sophistication to formal dinners, while floating candles create an ethereal glow when placed in water-filled vases. The possibilities are endless – let your imagination soar.
Finding the perfect design and shape is just one aspect of decorative candle making that allows you to express your creativity and enhance your living spaces. By carefully considering your aesthetic preferences and matching them with the purpose of the candle, you can create truly stunning pieces that bring beauty and warmth into any room.
So go ahead, explore different options, experiment with colors and fragrances (as discussed in Section 5), and have fun crafting candles that reflect your personal style.
Step-by-Step Guide
One of the most important aspects of decorative candle making is mastering the art of pouring and melting wax. This step is crucial in creating candles that have a smooth and even finish. In this section, we will explore the different types of wax available and provide detailed instructions on how to melt it properly and safely.
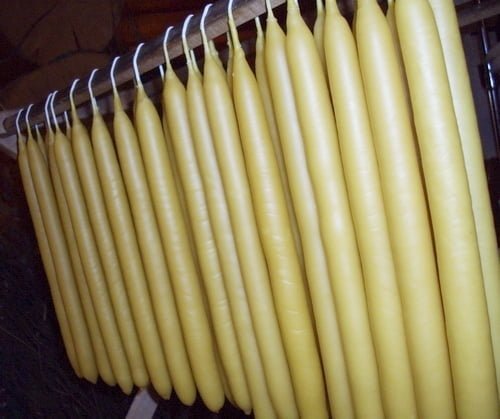
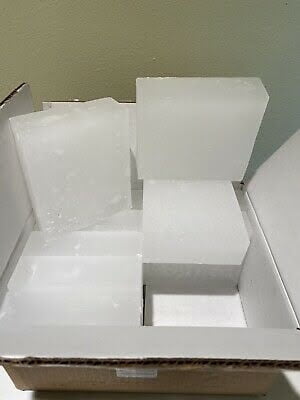
When it comes to decorative candle making, there are several types of wax to choose from. The most common options include paraffin wax, soy wax, and beeswax. Each type has its own unique characteristics and benefits. Paraffin wax is affordable, easy to work with, and produces a clean-burning candle. Soy wax is a natural alternative that is eco-friendly and renewable. Beeswax offers a beautiful natural scent, a longer burn time, and a golden color.
To melt the wax properly, it is important to use a double boiler method. This involves placing the wax in a heat-resistant container that sits inside a larger pot filled with water. The water in the pot should be heated gently over low to medium heat. It’s crucial to monitor the temperature of the wax using a thermometer, as overheated or burned wax can affect the quality of your candles.
Once the wax has reached its melting point (which varies depending on the type of wax), it should be stirred gently but thoroughly to ensure uniform consistency. At this point, colorants or fragrances can be added to enhance the aesthetics and ambiance of your candles. It’s important to follow product-specific instructions when adding these elements.
To pour the melted wax into your chosen molds or containers, hold them steady on a flat surface and slowly pour in the melted wax. Be sure not to fill them all the way up – leave some room at the top for proper burning later on. As the candles cool and solidify, it’s essential not to move or disturb them until they are completely set.
| Types of Wax | Characteristics and Benefits |
|---|---|
| Paraffin Wax | Affordable, easy to work with, produces clean-burning candles |
| Soy Wax | Natural, eco-friendly, renewable; burns longer |
| Beeswax | Natural scent, longer burn time, golden color |
Adding Flair
Decorative candles are not only visually appealing but also play a significant role in creating the desired ambiance in any space. One way to add flair and personality to decorative candle making is by using colors and fragrances. Colors can evoke specific moods and enhance the overall aesthetic, while fragrances can create a multisensory experience that engages both sight and smell. Here are some tips on how to use colors and fragrances effectively in your decorative candle making:
Colors:
- Choose a color palette: Before diving into your candle-making project, consider the mood or atmosphere you want to create. Warm colors like reds, oranges, and yellows can convey coziness or passion, while cool colors like blues, greens, and purples can promote relaxation or tranquility.
- Experiment with colorants: There are various types of colorants specifically designed for candle making, including liquid dyes and dye chips. Start with small amounts of colorant until you achieve your desired hue, as adding too much may affect the burn quality of the candle.
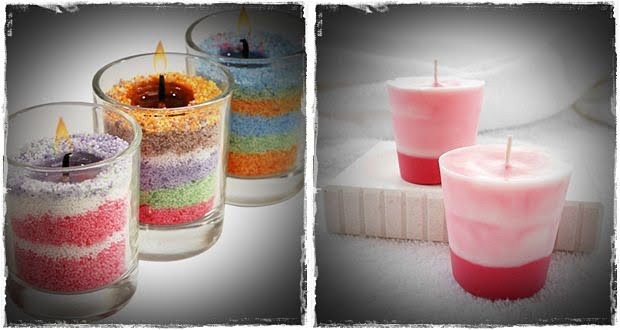
- Layering and blending: Get creative by layering different colored waxes or blending them together to create unique patterns and effects. Use techniques such as marbling or dipping one end of the candle into a contrasting color for a visually striking result.
Fragrances:
- Consider scent profiles: Just as essential oils have different properties in aromatherapy, certain fragrance notes can elicit particular emotions or memories. Floral scents like lavender or rose promote relaxation, while citrus scents like lemon or grapefruit energize and invigorate.
- Fragrance load: Be mindful of the amount of fragrance oil you add to your candles as too much can overpower the room when burning. Follow guidelines provided by fragrance oil suppliers to determine proper usage rates based on your wax type.
- Combining scents: Don’t be afraid to experiment with blending different fragrance oils together to create custom scents. Just like with colors, layering or blending scents can result in a unique and personalized aroma for your candles.
When using colors and fragrances in decorative candle making, remember to test your creations before producing them in larger quantities. This allows you to ensure that the color and scent combination is what you envisioned. With these tips, you can take your decorative candle making to the next level by adding flair through the use of colors and fragrances.
Design Techniques
Decorative candles are not only sources of light but also beautiful additions to any home decor. One way to take your candle making skills to the next level is by learning the art of embedding decorative elements into your candles. This technique allows you to create unique and personalized candles that add a touch of elegance and charm to any space. In this section, we will explore different design techniques for embedding decorative elements in candles.
Choosing the Right Decorative Elements
Before diving into the design process, it’s important to consider the types of decorative elements you want to embed in your candles. The possibilities are endless, ranging from dried flowers and herbs to seashells and gemstones. Think about the theme or aesthetic you want to achieve and select elements that complement it.
One popular option is using dried flowers or petals, such as rosebuds or lavender. These delicate embellishments create a romantic and natural look when embedded in wax. On the other hand, if you’re looking for a beachy or ocean-inspired vibe, consider embedding seashells, small pieces of driftwood, or even sand into your candles.
Embedding Techniques
There are several techniques you can use to embed decorative elements into your candles. One method is called “double pouring,” where you pour a layer of wax into your candle container, let it cool slightly, then place your desired decorations on top before pouring another layer over them. This technique ensures that the decorative elements are evenly distributed throughout the candle.
Another method is “direct embedding” which involves placing the decorations directly into the molten wax before pouring it into a mold or container. This technique gives you more control over how the elements are positioned within the candle.
When embedding delicate materials like flowers or herbs, it’s essential to ensure they won’t burn when exposed to heat from burning wicks. To prevent this, dry out any fresh botanicals before embedding them or consider preserving them with clear resin beforehand.
Maintaining Candle Integrity
When embedding decorative elements, it’s crucial to maintain the structural integrity of your candle. Make sure the decorations are securely placed in the wax and won’t become dislodged when the candle is burned. It’s also important to avoid overcrowding the embedments, as this can cause an uneven burn or interfere with the candle’s stability.
As you experiment with different design techniques and decorative elements, remember to test each combination before producing larger batches of candles. This will help you identify any issues or challenges specific to your chosen materials and ensure that your final products are both safe and visually appealing.
By mastering the art of embedding decorative elements in candles, you can create truly unique pieces that reflect your personal style and creativity. Whether you choose dried botanicals, seashells, or other materials, this design technique adds a special touch that will make your decorative candles stand out as works of art in any space.
Enhancing Your Decorative Candles with Creative Labeling and Packaging
Decorative candles not only provide beautiful illumination and ambiance but also serve as a way to express one’s personal style and creativity. One key aspect of enhancing decorative candles is through creative labeling and packaging. By incorporating unique labels and packaging materials, you can elevate the overall aesthetic of your candles and make them stand out in any setting.
When it comes to labeling your decorative candles, there are endless possibilities for customization. Consider using different types of labels such as custom printed labels, handwritten labels, or even vintage-inspired stickers. These labels can feature the name of the candle, its fragrance, or any other details you want to highlight. Additionally, consider including your own branding or logo on the label to further personalize your creations.
In terms of packaging materials, think beyond conventional options like simple jars or boxes. Explore different textures such as burlap or fabric wraps that can add an element of rustic charm to your candles. You can also incorporate ribbons, twine, or lace for a more delicate and elegant touch. Furthermore, consider using unique containers like vintage teacups or mason jars for a whimsical feel.
The key is to align your labeling and packaging choices with the overall aesthetic and theme you wish to achieve with your decorative candles. Experiment with various materials and design elements until you find the combination that perfectly showcases your creativity while appealing to potential customers or adding charm to your living space.
With thoughtful labeling and packaging, your decorative candles will not only be a source of beautiful light but also an exquisite piece of art in their own right.
Safety Precautions and Maintenance for Decorative Candles
Decorative candles can not only enhance the aesthetic appeal of your living space but also create a relaxing ambiance. However, it is crucial to prioritize safety when using and maintaining these candles to prevent any accidents or damage. In this section, we will explore some important safety precautions and maintenance tips for decorative candles.
To ensure the safe use of decorative candles, it is essential to know some basic guidelines. Firstly, always place the candles on a stable surface away from flammable materials such as curtains or paper. Avoid placing them near windows or drafts where they could be knocked over easily. Additionally, never leave burning candles unattended and always extinguish them before leaving the room or going to sleep.
When it comes to maintenance, regularly trimming the wick is important to ensure a clean and steady flame. Trim the wick to about ¼ inch before each lighting session to avoid excessive smoke and prolonged burning time. This will also help in preventing soot buildup on the container or candle holder.
It’s advisable to store decorative candles in a cool and dry place when they are not being used. Be cautious while handling lit candles, as even a small amount of spilled hot wax can cause burns or damage.
Furthermore, using appropriate candle accessories can contribute to maintaining candle safety. For example, consider using candle holders or trays designed specifically for decorative candles as they provide stability and protect surfaces from heat damage. Moreover, utilizing tools like long-reach lighters ensures safe lighting without risking any accidental burns.
By following these safety precautions and implementing proper maintenance techniques for your decorative candles, you can enjoy their beauty and create a soothing environment without compromising on safety. Remember that practicing responsible candle usage is essential not only for protecting yourself but also for safeguarding your home from potential fire hazards.
Inspiring Decorative Candle Making Ideas and DIY Projects
Decorative candle making offers endless possibilities for creativity and personal expression. Once you have mastered the basics of pouring and melting wax, it’s time to explore inspiring ideas and DIY projects to take your decorative candles to the next level. Whether you are looking for unique gifts or want to enhance your own living space, these ideas will inspire you to create one-of-a-kind decorative candles.
One idea is to create layered candles with different colored waxes. Start by pouring a thin layer of one color into the mold, allowing it to cool and solidify before adding the next layer. You can experiment with different color combinations and thicknesses to achieve stunning visual effects. For an added touch, consider using fragrances that complement each layer’s color.
Another popular DIY project is creating marbled candles. To achieve this effect, melt several different colors of wax separately. Once melted, pour small amounts of each color into the mold at random intervals, allowing them to blend together naturally. Use a skewer or toothpick to gently swirl the colors together in a marbled pattern before they begin to harden.
If you want to incorporate natural elements into your decorative candles, consider embedding dried flowers or herbs into the wax. Choose flowers that are pressed and dried flat so that they adhere nicely against the sides of the candle as you pour in the wax. This technique creates a beautiful botanical effect when the candle is lit.
As you embark on these DIY projects, remember to prioritize safety first and follow proper guidelines for using materials such as fragrance oils or dried botanicals in candle making. Each project may require different techniques and precautions, so be sure to research and prepare accordingly.
These inspiring decorative candle ideas demonstrate how this art form allows for limitless creativity and personalization in home decor. Let your imagination run wild as you experiment with new designs and techniques to create beautiful decorative candles that will enhance any space with warmth and style.
Conclusion
In conclusion, decorative candle making is a versatile and rewarding art form that allows individuals to express their creativity while enhancing the ambiance of their living spaces. Throughout this article, we have explored the various aspects of this craft, from essential materials and tools to choosing the perfect candle design and shape. We have also delved into techniques such as embedding decorative elements in candles and enhancing them with creative labeling and packaging.
By following the step-by-step guide provided, readers can confidently pour and melt wax, add colors and fragrances, and create unique designs that reflect their personal style. It is essential to remember safety precautions when working with candles, ensuring proper burning techniques and maintenance for longevity.
Through decorative candle making, individuals can transform their homes into inviting sanctuaries that cater to their aesthetic preferences. Candles not only add a touch of elegance and warmth but also contribute to creating a relaxing atmosphere. So why not embrace this art form and unleash your creativity? Explore new designs, experiment with different techniques, and let your imagination run wild.
Incorporating decorative candles into your home decor will not only elevate its overall look but also provide a sense of accomplishment and satisfaction knowing that you have created something truly special. So go ahead, gather your materials, follow the outlined steps, and discover the joy of decorative candle making as you embark on a journey towards self-expression through this beautiful art form.
Frequently Asked Questions
How do you make decorative candles?
Making decorative candles involves several steps and creative techniques. First, gather all the necessary materials, such as candle wax, a double boiler, wicks, fragrance oils or essential oils for scent, and dyes for color. Begin by melting the wax in the double boiler until it reaches the desired temperature. Next, add any colorants or fragrances to the melted wax and stir well.
Prepare the candle molds by spraying them with mold release spray or lining them with parchment paper. Place the wicks into the molds and slowly pour the melted wax into each mold. As the candles cool and solidify, you can decorate them using various methods such as adding dried flowers or herbs onto the surface of the candle or using a heat gun to create unique patterns on the wax. Once completely cooled and set, carefully remove your decorative candles from their molds.
What can I put in candles for decoration?
When it comes to decorating candles, there are numerous options that can enhance their aesthetic appeal. Adding dried flowers like lavender buds or rose petals to your candles creates a beautiful visual effect when embedded within the translucent wax. Similarly, you can incorporate herbs like bay leaves or cinnamon sticks for both decoration and aromatic purposes.
Another popular option is to embed small decorative items such as seashells or gemstones into the wax for an added touch of elegance. Additionally, you may consider painting designs onto plain pillar candles using non-toxic acrylic paints or applying adhesive stencils before carefully peeling them off once dry.
How do you make custom candles at home?
Creating custom candles at home provides an opportunity for individual expression and personalization. To make custom candles, start by selecting a container for your candle like a mason jar or teacup that suits your style and preference. Determine which type of wax you would like to use – soy wax is popular due to its natural properties and clean burn characteristics but paraffin wax works well too if handled carefully. Melt your chosen wax in a double boiler until fully melted, and consider adding fragrance oils or essential oils for a pleasant scent. To create personalized candles, you can also experiment with color dyes to achieve different shades.
Before pouring the melted wax into your chosen container, place a pre-tabbed wick in the center and secure it by using a wick holder or pencil laid across the opening. Pour the wax slowly into the container around the wick, and let it cool and harden at room temperature. Once set, trim the wick to about ¼ inch from the candle’s surface. The final step is to decorate your custom candle as desired—consider adding decorative ribbons or labels with personal messages or names for an extra touch of customization.

Welcome to my candle making blog! In this blog, I will be sharing my tips and tricks for making candles. I will also be sharing some of my favorite recipes.

