Are you tired of seeing your hard work go to waste when your beautiful handmade candles develop unsightly sinkholes? In this article, we will explore how to stop wax sinking when making candles. Whether you are a beginner or an experienced candle maker, understanding the causes of wax sinking and learning effective prevention and troubleshooting techniques is essential for creating professional-looking candles.
Candle making is a delicate art that requires a thorough understanding of the melting point of wax, choosing the right wick, and proper pouring techniques. When candle wax sinks, it not only affects the aesthetic appeal of the candle but also its burn time and overall performance. By following the tips and techniques outlined in this article, you can ensure that your candles remain sink-free and visually appealing.
Join us as we delve into the science behind wax sinking, explore additives that can enhance stability, learn about proper pouring techniques, and discover how to use a heat gun to fix sinking wax. By incorporating these strategies into your candle-making process, you can enjoy a seamless and rewarding experience without having to worry about wax sinking ruining your creations.
Understanding the Melting Point of Wax
When making candles, understanding the melting point of wax is crucial to prevent sinking. The melting point of wax refers to the temperature at which it changes from a solid to a liquid state. Different types of waxes have different melting points, so it’s important to select the right type for your candle-making project.
Paraffin wax, soy wax, beeswax, and gel wax are some of the common types of waxes used for candle making. Each type has its own unique melting point, which can affect how the candle burns and whether or not it will sink. For example, paraffin wax has a lower melting point than soy wax, so it may be more prone to sinking if not handled properly.
To prevent wax sinking when making candles, it’s crucial to choose a wax with a suitable melting point for the type of candle you want to create. Additionally, understanding the optimal pouring temperature for the specific type of wax is essential in ensuring that your candles don’t sink as they cool.
Properly understanding and managing the melting point of wax is essential in preventing sinking when making candles. By choosing the right type of wax and controlling the pouring temperature, you can create beautiful and long-lasting candles that are free from sinking issues.
| Types of Wax | Melting Point (Fahrenheit) |
|---|---|
| Paraffin Wax | 99-130°F |
| Soy Wax | 120-180°F |
| Beeswax | 144-147°F |
Choosing the Right Wick for Your Candle
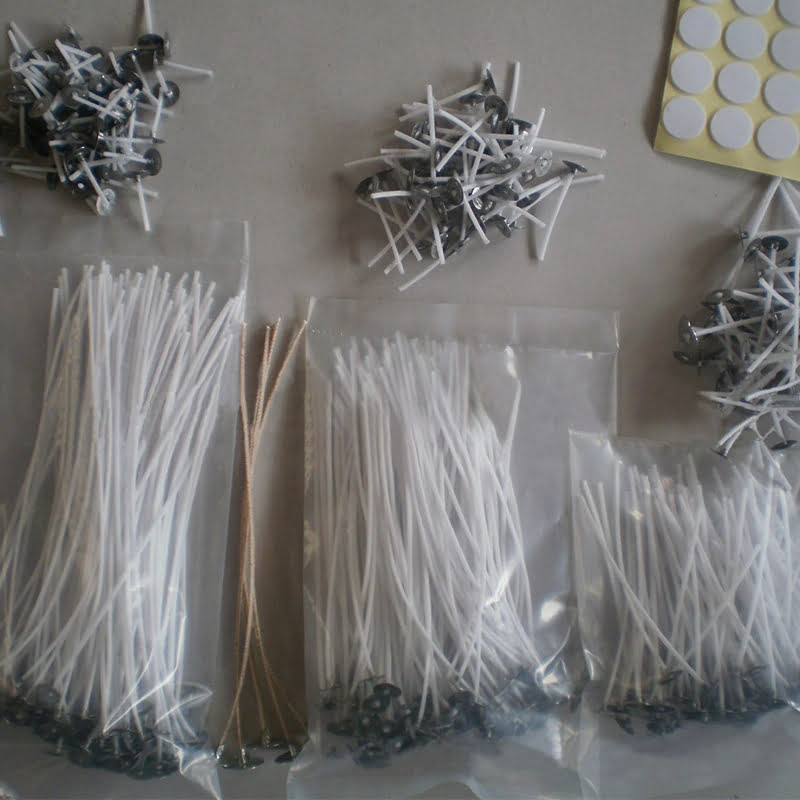
When it comes to making candles, choosing the right wick is crucial in preventing wax from sinking. The wick plays a significant role in how the candle burns and affects the overall performance of the candle. Here are some key points to consider when choosing the right wick for your candle:
- Consider the diameter of your container or mold: The size of your container or mold will determine the size of wick needed for your candle. A larger diameter will require a larger wick to ensure that the wax melts evenly and prevents sinking.
- Think about the type of wax you are using: Different types of wax require different types of wicks. For example, soy wax may require a different type of wick compared to paraffin wax. Be sure to research and test different wicks with your chosen wax to find the best match.
- Choose a high-quality wick: Investing in a high-quality, well-made wick can make all the difference in preventing sinking wax. Look for wicks that are specifically designed for the type of candle you are making and consider factors such as stability and burn time.
By carefully considering these factors, you can choose a wick that will help prevent sinking wax and ensure that your candles burn evenly and beautifully.
In addition to choosing the right wick, it’s important to test different options before settling on one for your candle-making project. Conducting burn tests with different wicks allows you to observe how each one performs with your chosen wax and container.
This process will help you identify which wick is most effective in preventing sinking and achieving an optimal burn. Always remember that selecting the right wick is a crucial step in creating high-quality candles that are free from sinking issues.
Ultimately, by understanding how different factors such as container size, type of wax, and quality of the wick can influence candle burning, you can take proactive measures to stop wax from sinking when making candles. With proper consideration and testing, you can achieve consistent, beautiful results with your candle-making endeavors.
Adding Additives to Your Wax for Stability
When making candles, one common issue that many candle makers encounter is the sinking of wax. This occurs when the wax sinks in the center after the candle has been poured and cooled, leaving a hole in the middle. This can be frustrating, but there are measures you can take to prevent this from happening. In this section, we will discuss how adding additives to your wax can contribute to the stability of your candles and help prevent wax sinking.
Here are some additives that you can incorporate into your wax to enhance its stability and reduce the likelihood of sinking:
- Stearin: Adding stearin to your candle wax can help harden the wax and improve its burning characteristics. This additive is especially useful for pillar candles.
- Paraffin Wax: Blending paraffin wax with other types of waxes such as soy or beeswax can increase the hardness and stability of the final candle.
- UV Inhibitors: If you plan on using your candles outdoors or in areas with direct sunlight, adding UV inhibitors to your wax can help prevent color fading and maintain the structural integrity of the candle.
It’s essential to research and experiment with different additives to find the right combination for your specific candle-making needs. By incorporating these additives into your wax, you can enhance its stability and reduce the risk of sinking, ultimately leading to a more successful candle-making experience.
In addition to selecting the appropriate additives for your candle wax, it’s important to consider other factors such as pouring techniques, wick selection, and troubleshooting common issues that may arise during the candle-making process. By taking a comprehensive approach and implementing these tips, you’ll be better equipped to create beautiful, stable candles without experiencing frustrating issues like sinking wax.
Proper Pouring Techniques to Prevent Sinking
When it comes to making candles, one of the most frustrating issues that many candle makers face is the sinking of wax. This can happen for a variety of reasons, but improper pouring techniques are often a major culprit. In this section, we will explore some proper pouring techniques that you can use to prevent sinking and ensure that your candles come out looking beautiful and evenly set.
Choose the Right Temperature
One of the most important factors in preventing wax sinking is ensuring that you pour your wax at the correct temperature. If the wax is too hot when poured, it can cause uneven cooling and lead to sinking.
On the other hand, if the wax is too cool, it may not adhere properly to the container and result in sinking as well. The ideal pouring temperature will vary depending on the type of wax you are using, so be sure to follow the manufacturer’s recommendations for best results.
Avoid Rapid Cooling
Another key aspect of proper pouring technique is to avoid rapid cooling of the wax once it has been poured. Placing your candles in a drafty area or next to a fan can cause them to cool too quickly, leading to sinking. Instead, allow your candles to cool at room temperature in a still environment. This will help ensure that they set evenly and reduce the risk of sinking.
Properly Seal Your Wick
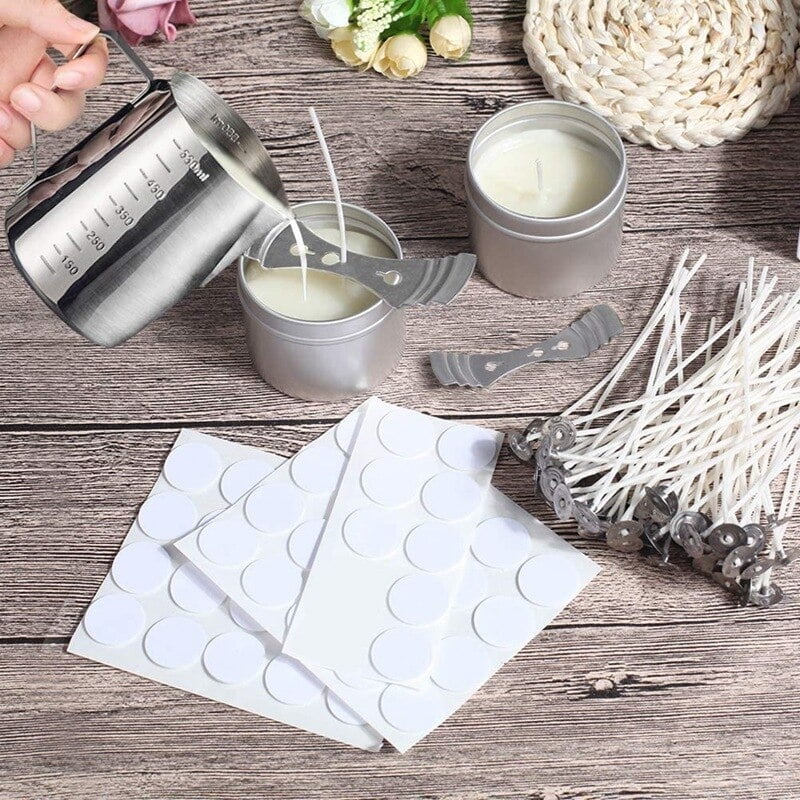
Lastly, be sure to properly seal your wick in place before pouring your wax. If the wick is not secure, it can shift during pouring and cause an uneven distribution of wax, leading to sinking. Use a wick sticker or hot glue gun to firmly attach the wick to the bottom of the container before pouring your wax. This will help keep everything in place and prevent sinking from occurring.
By following these proper pouring techniques, you can greatly reduce the risk of wax sinking when making candles and produce beautiful, high-quality products every time.
Using a Heat Gun to Fix Sinking Wax
When making candles, it is common to encounter the issue of sinking wax. This can be frustrating, especially after you have put in time and effort into creating a beautiful candle. However, there are methods to fix sinking wax, one of which involves using a heat gun. By applying the right technique, you can salvage your candle and prevent further sinking.
Steps for Using a Heat Gun
The first step in using a heat gun to fix sinking wax is to ensure that the candle has completely cooled down. In doing so, you prevent any unintended alterations to the shape or texture of the candle. Once the candle is at room temperature, use a heat gun on its lowest setting. Hold the heat gun about six inches away from the surface of the wax and move it around in a circular motion.
After this, allow the candle to cool down again and observe if there are any signs of sinking. If needed, repeat the process until you achieve an even surface on your candle. It is crucial to practice caution when handling a heat gun and ensure that it does not come into contact with any flammable materials. Always follow safety guidelines provided by the manufacturer for using a heat gun.
Tips for Using a Heat Gun Safely
When using a heat gun on candles, it’s essential to prioritize safety at all times. Make sure that you are working in a well-ventilated area and use protective gear such as gloves and goggles to shield yourself from any potential hazards. Additionally, keep flammable materials away from the area and never leave a heat gun unattended while it is running.
By following these steps and tips for safely using a heat gun to fix sinking wax when making candles, you can salvage your creations and prevent them from going to waste due to uneven surfaces caused by sinking wax issues.
Tips for Prevention and Maintenance
Preventing sinking wax when making candles is crucial to ensure a high-quality final product. One of the main causes of wax sinking is the type of wax being used. To avoid this issue, it’s important to choose the right type of wax with a higher melting point. This will help maintain the structural integrity of the candle as it cools and solidifies.
In addition to selecting the appropriate wax, choosing the right wick for your candle can also play a significant role in preventing sinking. The size and material of the wick can affect how evenly the candle burns, which can impact the likelihood of sinking. Be sure to do thorough research on wick options and consider testing different types before settling on one that works best for your specific wax and container.
Adding additives to your wax can also provide stability and prevent sinking. For example, stearic acid is often used as an additive to increase hardness and opacity in candles, helping to reduce sinking issues. Be sure to carefully follow instructions for adding any additives, as using too much or too little could have negative effects on your candle’s performance.
| Prevention Tips | Maintenance Tips |
|---|---|
| Choose wax with higher melting point | Test different wicks for optimal burning |
| Add stability additives like stearic acid | Properly store finished candles in cool, dry place |
Troubleshooting Common Issues With Sinking Wax
Sinking wax is a common problem that many candle makers encounter, but there are ways to troubleshoot and fix this issue. When candles sink, it not only affects the overall appearance of the finished product but also its performance. Understanding the root causes and knowing how to address them can help prevent sinking wax in your future candle-making endeavors.
One common reason for wax sinking in candles is using the wrong type of wick for the specific type of wax being used. The size and type of wick should match the melting point and composition of the wax.
If the wick is too small, it may not be able to create a large enough flame to melt the wax evenly, resulting in sinking. On the other hand, if the wick is too large, it can create excessive heat that leads to uneven melting and sinking as well.
Another potential cause of sinking wax is improper pouring techniques. When pouring hot wax into a container, it’s essential to do so slowly and steadily. Rapid pouring or sudden changes in temperature can cause uneven distribution of wax, leading to sinking as it cools. To prevent this, take your time when pouring and ensure that the temperature of both the container and the wax are properly regulated.
In addition to choosing the right wick and mastering proper pouring techniques, adding additives to your wax can also contribute to stability and prevent sinking. Certain additives like stearic acid or vybar can help increase hardness and reduce shrinkage in candles, resulting in a more even burn and less likelihood of sinking. Understanding how different additives interact with your specific type of wax can make a significant difference in preventing this issue altogether.
Learning how to stop wax sinking when making candles involves a combination of factors such as selecting the right materials, practicing proper techniques, and troubleshooting potential issues along the way. By taking these proactive steps, you can minimize the chances of encountering sinking wax in your candle-making process and enjoy beautiful, high-quality candles every time.
Final Thoughts and Conclusion
When it comes to candle making, dealing with sinking wax can be a frustrating issue. However, by understanding the melting point of wax and choosing the right wick for your candle, you can significantly reduce the chances of experiencing sinking wax in your creations. Adding additives to your wax can also provide stability, ensuring that your candles maintain their shape and appearance.
Proper pouring techniques are crucial in preventing sinking wax. By allowing the wax to cool at a controlled pace and avoiding sudden temperature changes, you can minimize the risk of sinkholes forming in your candles. Additionally, using a heat gun can help fix sinking wax by carefully melting and leveling the surface of the candle.
In conclusion, while dealing with sinking wax when making candles can be discouraging, there are several effective methods for preventing and addressing this issue. By following these tips for prevention and maintenance, as well as troubleshooting common problems that may arise, you can enjoy a sinking-free candle making experience. With patience and attention to detail, you can create beautiful, high-quality candles that are free from sinking issues.
Frequently Asked Questions
Why Do My Candles Sink When I Make Them?
Candles can sink when they are not properly cooled or if the wax is poured at too high of a temperature. This can cause the candle to form holes or valleys as it cools, resulting in a sinking appearance.
How Do You Make Candles Without Sinking?
To make candles without sinking, it’s important to ensure that the wax is poured at the correct temperature and allowed to cool slowly and evenly. Using a proper mold with a wick that is centered and straight can also help prevent sinking.
How Do You Fix a Sinking Candle?
If you have a sinking candle, there are a few ways to fix it. One method is to use a heat gun or hairdryer to gently warm the surface of the candle and then smooth it out with your fingers or a spoon.
Another option is to melt additional wax and pour it into the sunken areas to level out the surface of the candle.

Welcome to my candle making blog! In this blog, I will be sharing my tips and tricks for making candles. I will also be sharing some of my favorite recipes.


