Are you interested in learning how to use silicone molds for candle making? Silicone molds have become a popular choice among crafters due to their versatility and ease of use. In this article, we will explore the benefits of using silicone molds for candle making and provide step-by-step instructions on how to prepare and use them for your next project.
Silicone molds offer a wide range of shapes and sizes, making it easy to create unique and intricate candle designs. Whether you are looking to make simple pillar candles or more elaborate shaped candles, silicone molds provide endless possibilities for creativity. They are also durable and flexible, allowing for easy removal of the finished candles without causing any damage to the mold.
In this comprehensive guide, we will discuss how to choose the right silicone mold for your project, prepare the mold for candle making, select the appropriate wax and fragrance, pour and set the candles, demold and finish the final product, as well as provide tips for caring and storing your silicone molds.
Whether you are new to candle making or a seasoned crafter looking to try something new, using silicone molds can take your candle-making experience to the next level.
So let’s dive in and discover the wonderful world of silicone molds for candle making.
Choosing the Right Silicone Mold
When it comes to candle making, choosing the right silicone mold is crucial in achieving the desired shape and design for your candles. Silicone molds offer a wide variety of options, from traditional shapes like cylinders and spheres to more unique designs such as animals, flowers, and geometric patterns. Here are some tips for selecting the best silicone mold for your candle making project:
- Size: Consider the size of the mold in relation to the desired finished candle size. If you’re making small tea lights or votives, a smaller mold will be suitable. For larger pillar candles or decorative pieces, opt for a larger mold that can accommodate the volume of wax needed.
- Shape: Think about the shape of the candles you want to create and choose a silicone mold that complements that shape. Whether you prefer classic round candles, novelty shapes like hearts or stars, or intricate designs, there’s a silicone mold out there to suit your needs.
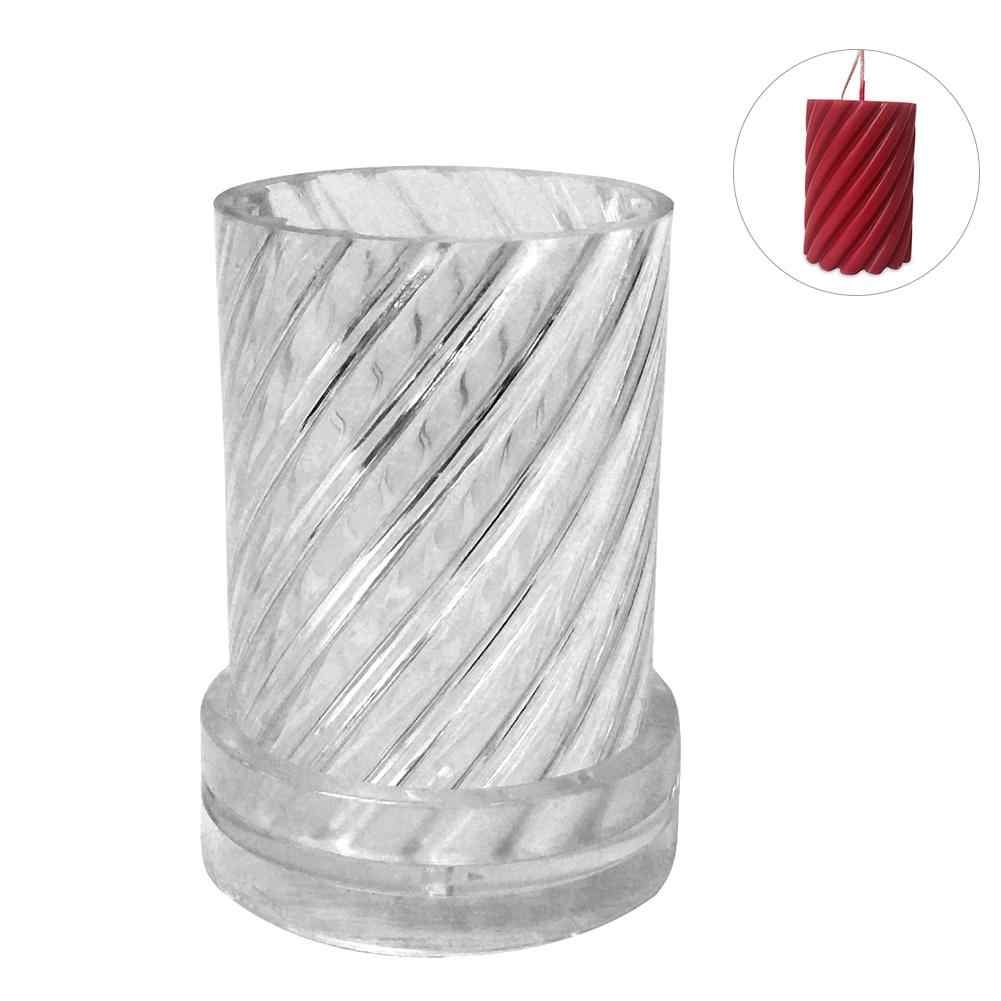
- Design Options: Some silicone molds come with intricate details and textures that can add visual interest to your candles. For example, there are molds with floral motifs, swirl patterns, or mosaic textures that can create beautifully unique finished candles.
When choosing a silicone mold for candle making, consider the overall aesthetic you want to achieve and select a mold that aligns with that vision. Take into account factors such as size, shape, and design options to ensure you find the perfect mold for your project.
Whether you’re a beginner looking to make simple pillar candles or an experienced crafter wanting to experiment with elaborate designs, there’s a silicone mold out there for every type of candle making project. With careful consideration of size, shape, and design options, you can select the best mold to bring your candle creations to life successfully.
Preparing Your Silicone Molds
Silicone molds are a popular choice among crafters for candle making due to their versatility and ease of use. They come in a variety of shapes, sizes, and designs, allowing for endless creativity and customization when it comes to creating unique candles. In order to achieve the best results when using silicone molds for candle making, it is important to properly prepare the molds before pouring in the wax.
The first step in preparing your silicone molds for candle making is to ensure that they are clean and free from any dust or debris. This can be done by washing the molds with warm, soapy water and allowing them to dry completely before use. It is important to pay attention to any intricate details or crevices within the mold that may require extra cleaning to ensure a smooth release of the finished candles.
Once the molds are clean and dry, it is recommended to use a mold release spray or powder to prime the surface of the silicone. This will help prevent the wax from sticking to the mold, making it easier to demold the finished candles later on. Be sure to follow the manufacturer’s instructions when using a mold release product, as application methods may vary depending on the type of mold release used.
In addition to cleaning and priming the silicone molds, it is also important to inspect them for any damage or imperfections that could affect the quality of your candles. Look for any tears, cracks, or warping in the silicone and replace any damaged molds before use. By following these steps for preparing your silicone molds, you can ensure a smooth release of your finished candles and create professional-looking results every time.
| Preparing Your Silicone Molds | Candle Making Tips |
|---|---|
| Properly clean silicone molds before use | Ensure no dust or debris affects candle quality |
| Use mold release spray or powder | Prevents wax from sticking |
| Inspect for any damage or imperfections | Replace damaged molds before use |
Selecting the Right Wax and Fragrance
When it comes to making candles using silicone molds, choosing the right wax and fragrance is crucial for creating high-quality, beautiful candles. The type of wax you select will have a significant impact on the appearance, burn time, and overall quality of your candles. Additionally, the fragrance you choose will determine the scent throw and aroma intensity of your finished product.
There are several types of wax commonly used in candle making, including soy wax, paraffin wax, beeswax, and coconut wax. Each type of wax has its own unique properties and characteristics that can affect the outcome of your candles. It’s important to consider factors such as burn time, scent throw, and eco-friendliness when choosing the right wax for your project.
In addition to selecting the right wax, choosing the perfect fragrance is equally important. When it comes to fragrance selection, there are countless options available, ranging from essential oils to synthetic fragrances.
It’s important to consider factors such as scent strength, compatibility with the chosen wax, and potential allergies or sensitivities when selecting a fragrance for your candles. Once you have chosen a fragrance that complements your desired scent profile for the candles you want to make it’s time to prepare them for pouring into the silicone molds using proper measurement techniques and blending procedures.
When preparing a scented candle using silicone molds in place of traditional molded materials like metal or glass this process should be undertaken carefully in order that no damage comes to either component during transformation from liquid form back again later once cooled off.
You’ll need enough room inside each cell within which hot molten liquid can fill completely without any overflowing – but also leaving sufficient space at top so there won’t be an issue removing finished product once they’ve hardened enough.
When properly combined with good ingredients at proper ratios before pouring into molds where they’re then allowed hardening up over period less than few hours (usually overnight), followed by long-term cure times results come out smelling amazing.
Pouring and Setting the Candles
When it comes to candle making, using silicone molds can make the process much easier and more versatile. Silicone molds are a popular choice among crafters due to their flexibility, durability, and ease of use. Whether you’re a beginner or an experienced candle maker, silicone molds offer a wide range of options for creating beautiful and unique candles.
To begin with, choosing the right silicone mold is essential for successful candle making. There are various types of silicone molds available, including different sizes, shapes, and designs. It’s important to select a mold that suits your project requirements and fits the style of candles you want to create. Some molds are designed for specific purposes such as pillar candles or container candles, so take the time to consider which type is most suitable for your needs.
Once you have chosen the perfect silicone mold for your candle making project, it’s important to properly prepare it before pouring the wax. Cleaning the mold thoroughly and ensuring it is completely dry is crucial to ensure a smooth release of the finished candles.
Additionally, priming the mold with a small amount of melted wax can help facilitate an easier release once the candles have set. This step is essential in ensuring that your final product comes out looking clean and professional.
Now that you have selected and prepared your silicone mold, it’s time to pour and set the candles. The key to successful candle making lies in pouring the wax evenly into the mold in order to avoid any lumps or uneven distribution within the finished product.
It’s also important to allow sufficient time for the candles to properly set before attempting to demold them. This allows for a clean release and ensures that your finished candles maintain their shape and integrity.
| Section Topic | Key Points |
|---|---|
| Choosing the Right Silicone Mold | Consider size, shape, and design options |
| Preparing Your Silicone Molds | Thoroughly clean and dry; prime with melted wax |
| Pouring and Setting the Candles |
Demolding and Finishing
When it comes to candle making, demolding and finishing the candles from silicone molds is an important step to ensure that you achieve professional-looking results. In this section, we will walk you through the process of demolding the finished candles from the silicone molds and provide tips on how to trim and finish the candles for a polished appearance.
Demolding Your Candles
To begin, carefully remove the silicone mold from around the set candle. The flexibility of silicone makes this process relatively easy, but it’s important to do so gently to avoid damaging the candle. Gently flexing and pressing on the sides of the mold can help release the candle, and in some cases, turning the mold inside out can also help facilitate easy removal.
Trimming and Finishing Touches
After demolding your candles, you may notice excess wax or uneven edges. Use a sharp knife or scissors to trim any imperfections from the candle’s surface. Be mindful of any special designs or patterns on your candle as you trim to preserve their integrity.
To give your candles a professional finish, consider using a heat gun or blow dryer on low heat to smooth out any rough edges or blemishes on the surface of the candle. This step will give your finished product a sleek appearance.
Lastly, if desired, you can add additional decorative elements such as ribbons, labels, or charms to further enhance the aesthetic appeal of your candles.
Tips for Success
- Allow your candles to fully set before attempting to demold them to ensure that they maintain their shape.
- Clean and dry your silicone molds thoroughly after each use to prolong their lifespan.
- For more intricate designs and shapes, consider using a release spray specifically designed for candle making silicone molds.
By following these steps for demolding and finishing your candles from silicone molds, you can elevate your handmade creations to a professional level and impress friends, family, and customers alike with beautifully crafted candles.
Care and Maintenance of Silicone Molds
Proper care and maintenance of your silicone molds is crucial to ensure that they last for multiple candle making projects. Given their versatility and durability, silicone molds can be reused numerous times if properly cared for and stored. Here are some essential tips for maintaining the quality of your silicone molds.
Cleaning Your Silicone Molds
After each use, it’s important to clean your silicone molds thoroughly to remove any residual wax or fragrance. To do this, you can simply wash the molds with warm soapy water, using a soft sponge or cloth to gently scrub away any leftover residue. Avoid using abrasive materials or harsh chemicals, as they can damage the silicone material.
Proper Storage
To prevent dust and debris from settling on your silicone molds, it’s crucial to store them in a clean and dry environment. Once the molds are completely dry after cleaning, stack them neatly in a cool, dark place away from direct sunlight. Stacking the molds will help preserve their shape and prevent any warping over time.
Avoiding High Temperatures
Silicone molds should be kept away from extreme temperatures, as excessive heat can cause them to warp or lose their shape. Store your molds at room temperature whenever possible, and avoid exposing them to direct heat sources such as stovetops or ovens. Additionally, refrain from placing hot candles directly into cold silicone molds, as sudden temperature changes can affect the integrity of the material.
By following these simple care and maintenance tips, you can ensure that your silicone molds remain in top condition for future candle making projects. Properly caring for and storing your molds will extend their longevity and allow you to continue creating beautiful candles without having to frequently replace your mold collection.
Creative Ideas for Using Silicone Molds
In conclusion, silicone molds offer a fantastic way to add creativity and personalization to your candle making projects. With their versatility, durability, and ease of use, they have become a popular choice among crafters of all levels. By choosing the right silicone mold, preparing it properly, selecting the right wax and fragrance, and following the pouring and setting process, you can create beautiful, professional-looking candles with ease.
One of the great benefits of using silicone molds for candle making is the endless creative possibilities they offer. From layered designs to incorporating embeds and creating custom shapes, there are countless ways to make your candles unique and personalized. Whether you’re making candles for yourself or as gifts for others, using silicone molds allows you to unleash your creativity and produce one-of-a-kind pieces that are sure to impress.
When it comes to caring for your silicone molds, proper maintenance is key to ensuring their longevity and continued use for future candle making projects. By following simple cleaning and storing tips, you can keep your silicone molds in top condition and ready for use whenever inspiration strikes. With the right tools and techniques at your disposal, there’s no limit to what you can achieve with silicone molds for candle making.
Frequently Asked Questions
Can You Use Silicone Molds for Candle Making?
Yes, silicone molds can be used for candle making. These molds are flexible, durable, and heat-resistant, making them ideal for creating unique and intricate candle designs. They also make it easy to remove the finished candles.
How Do You Keep Candles From Sticking to Silicone Molds?
To prevent candles from sticking to silicone molds, you can try several techniques. One option is to lightly grease the inside of the mold with a non-stick cooking spray or a small amount of vegetable oil. Another approach is to chill the mold in the freezer for a few minutes before removing the candle.
How Do You Wick a Candle in a Silicone Mold?
Wick placement in a silicone mold is crucial for ensuring that the candle burns evenly and effectively. When wicking a candle in a silicone mold, make sure to center the wick and secure it in place using a wick holder or by simply tying it to a pencil resting across the top of the mold.
This will help keep the wick straight and centered as the wax cools and solidifies.

Welcome to my candle making blog! In this blog, I will be sharing my tips and tricks for making candles. I will also be sharing some of my favorite recipes.


