Candle making is a fun and rewarding hobby that has been around for centuries. Each candle created is unique and offers the added benefit of creating beautiful and aromatic fragrances to your favorite room or space. With just a few simple steps, you too can create candles at home using basic instructions and the right supplies.
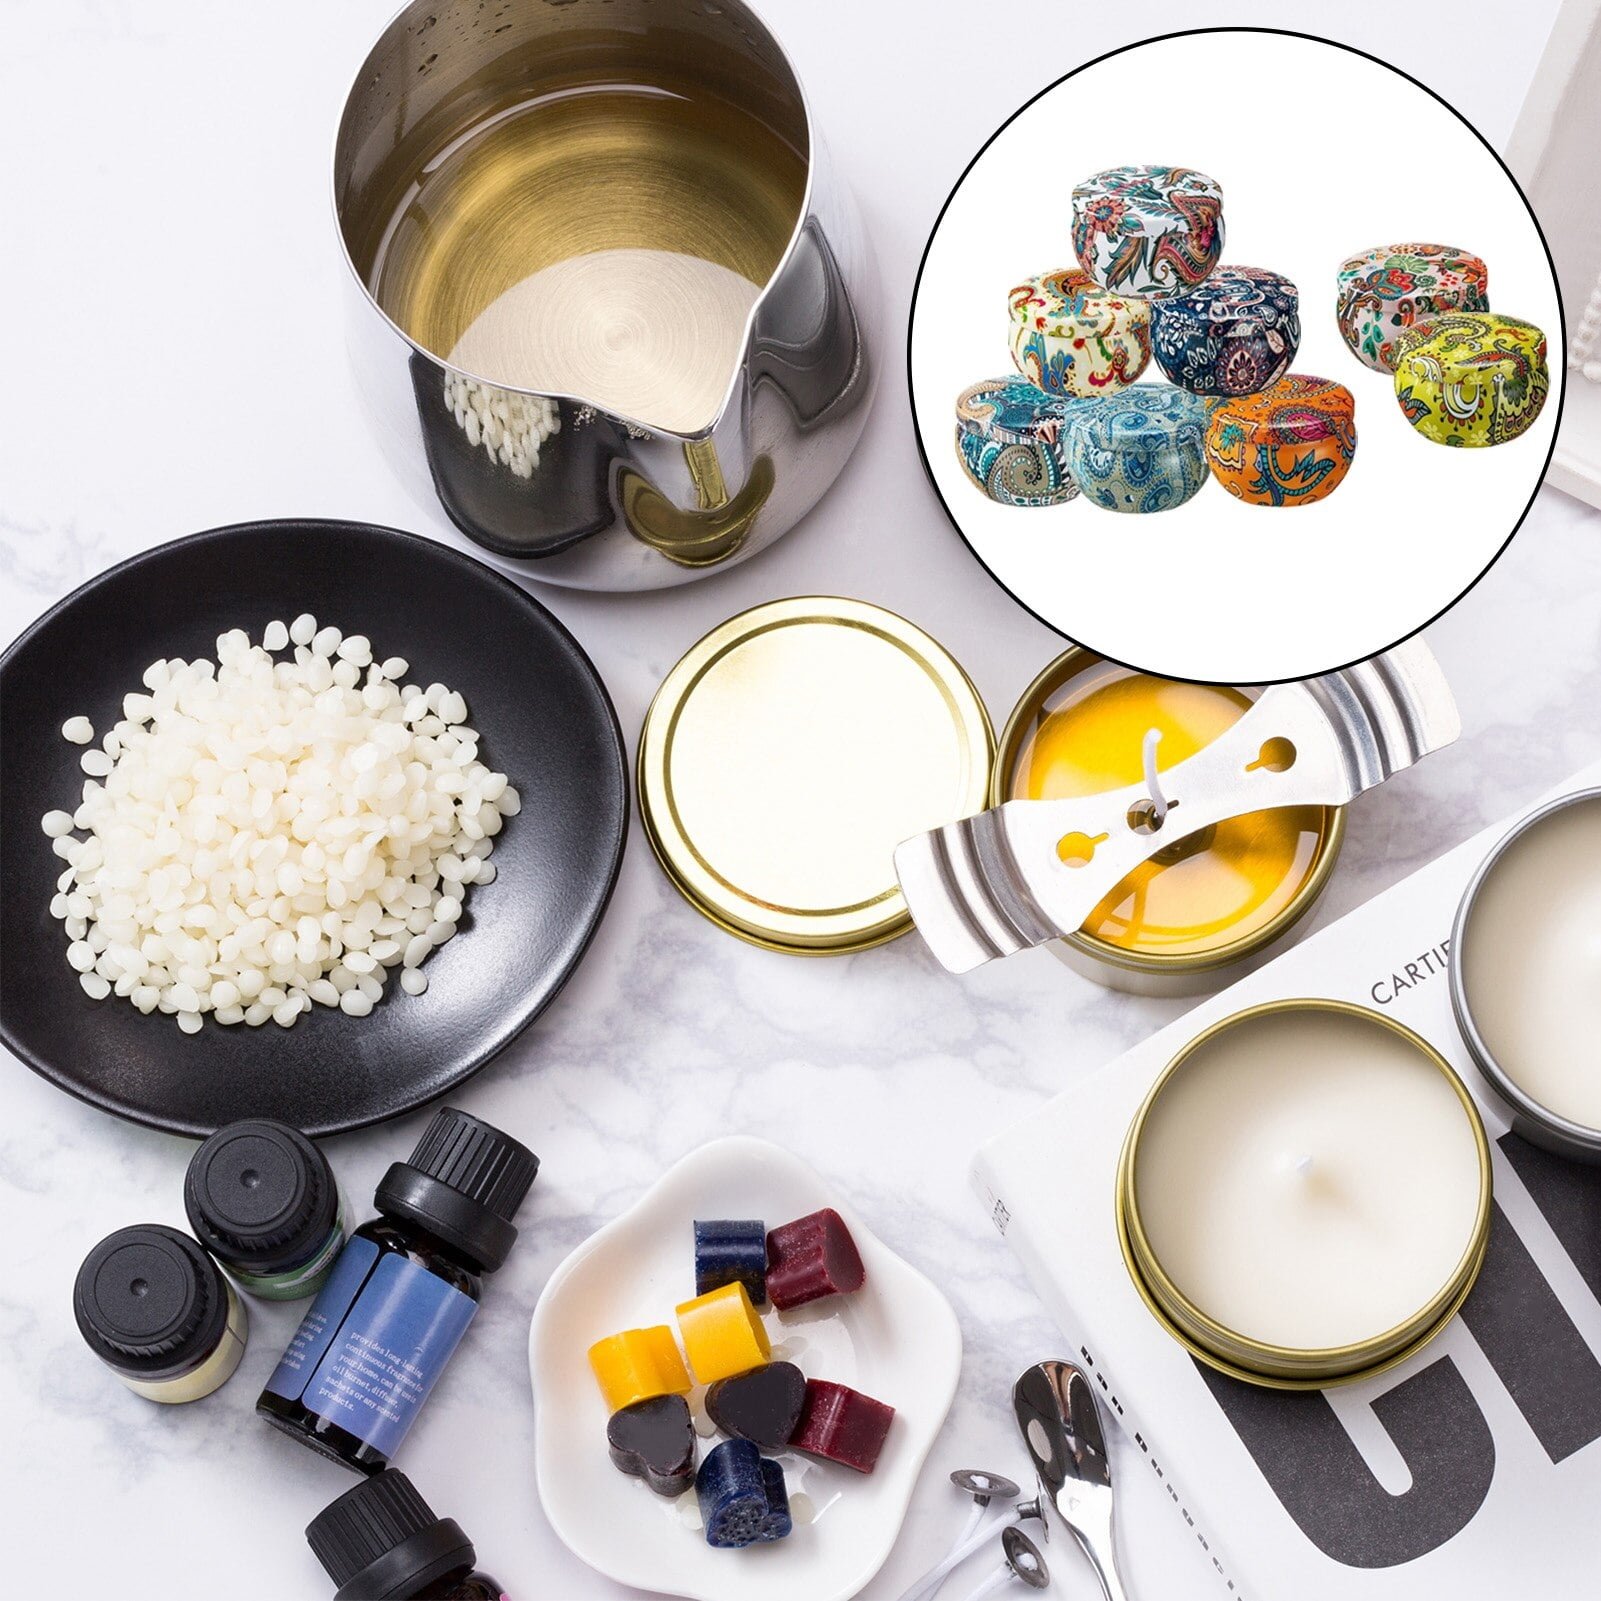
The Basics: Candle Making Supplies Making candles from scratch requires several basic supplies which can be purchased from most craft stores. These items include natural or paraffin wax, wick, fragrance oils, dye chips or liquid dye, container waxing glue, metal wick holder, and thermometer. Depending on the project, you may also require cookie cutters or other tools for molding special shapes as well as scissors for cutting wicks.
The Process: Steps for Making Candles After gathering all of the necessary ingredients together, it is time to assemble your workspace with all of the needed materials before beginning your project. Step one involves preparing your container by affixing the wick in place with a metal holder using wax glue around the edges of the vessel’s bottom.
The second step involves heating up either paraffin or natural beeswax until it reaches 180-200°F before adding in scent oil. If desired, liquid dye may be added to create attractive colors but this is totally optional.
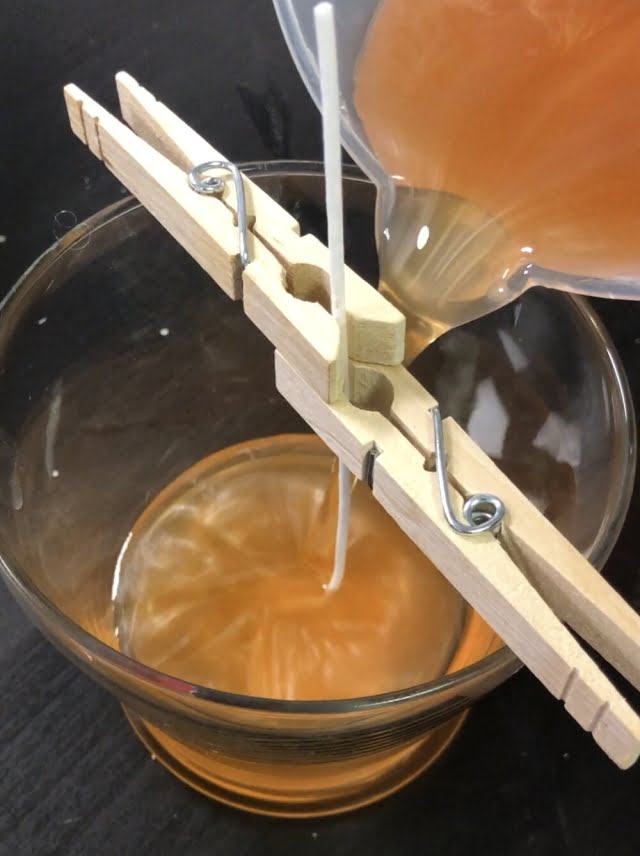
Once everything has been blended evenly into molten liquid form, slowly pour it into your containers while holding down the centrally placed wick with tongs if necessary when working with taller vessels. Once cooled completely after 24-48 hours you will need to trim extra length from one side of each wick (about ½ inch) in order to encourage better combustion throughout its burning life cycle.
Finally dispose or recycle leftover wax safely before enjoying your creations over many hours of agreeable aromas.
Supplies Needed to Make Quality Candles
Candle making is a fun and rewarding activity that can easily be done at home. But, before you get started, there are some important supplies you need. Here’s what you need:
Wax: The most common waxes used for candlemaking are paraffin, soy, and beeswax. Paraffin is an inexpensive choice that works well with fragrances and colors, while soy makes for a creamy white finish and is more eco-friendly than paraffin. Beeswax candles have the longest burn time and require no additional additives to achieve their beautiful honeycomb structure.
Wicks: The right wick size is essential for the finished product of your candle. Generally, the bigger the candle, the longer the wick should be so it can reach the melted wax without falling into it. To test which wick size would work best for your candle, light several pieces of them at different lengths to see which ones burns best with your chosen wax type.
Molds & Containers: Candle molds come in various sizes and shapes so you can create whatever design you desire. If you’re not using molds, glass containers like jars or teacups lined with aluminum foil make great vessels for poured candles as well as votives and tea lights placed in metal holders or thermoses designed especially for such items.
Now that you know what supplies are needed to confidently make quality candles at home, it’s time to begin. Start off by measuring out how much wax you will need based on the size of your container/mold using a kitchen scale if possible then proceed by melting it slowly either over hot water or low heat on your stovetop.
When completely melted add any desired scent or color if working with paraffin wax according to instructions on product labels and stir with a stick until evenly distributed throughout before pouring into molds/containers having pre selected wicks attached to them via glue or clips beforehand if necessary and secure in place by pressing down slightly if needed.
Wait patiently until the wax has cooled down enough that it has hardened enough to keep its shape (about 15-20 minutes depending on amount used) then remove from molds/containers, trim any excess from wicks if necessary and voila. You’ve successfully created your own candle masterpieces ready to be enjoyed.
Types of Wax Used in Candle Making
Candle making is a wonderful and versatile craft. There are many different types of wax available for candle making which can create lots of different effects, aromas, and colors. The type of wax you choose will depend on the kind of candles that you intend to make, what scents you wish to add, and how long you would like your candles to burn. Here is a list of some popular types of wax used in candle making:
- Paraffin Wax: This is the most common wax used in candle making and is an ideal choice for beginners. It’s relatively inexpensive compared to other waxes, easy to work with, and it allows for the incorporation of synthetic fragrances. In addition, it produces a bright light once burning.
- Beeswax: Beeswax has been used in candle-making since ancient times and has distinct benefits. It burns longer than paraffin or soy waxes and lights more easily as there are no wicking instructions required with beeswax candles. While beeswax does not generally accept synthetic fragrances well, it has a beautiful natural honey aroma when burned.
- Soy Wax: Soy candles are becoming increasingly popular as they are non-toxic and have good scent throw capabilities when combined with fragrance oils. They offer excellent color retention too. Candles made from soy melt slowly so they produce an even burn when lit.
- Palm Wax: Candles made from palm wax have a unique crystalline structure that sets them apart from other types of waxes. Palm wax is very hard at room temperature, but melts quickly when exposed to heat producing a bright glowing flame without releasing any smoke or soot as it burns.
- Coconut Wax: Coconut wax is produced through hydrogenation process using coconut oil rather than refined petroleum-based paraffin or soybean oil which makes it less likely to harm the environment during production. Coconut is often blended with other plant-based oils such as soybean or palm oil creating luxurious, creamy container candles with great scent throw.
Choosing the Right Wick for Your Candle
Choosing the right wick for your candle is essential in order to ensure a successful outcome. In general, it’s important to find a wick that corresponds with the size of your candle and the wax type you have chosen to use in its creation.
A larger than necessary wick can cause smoking problems and carbon build-up on the surface of the burning candle, while a small size will lead to poor scent throw or a flame that is difficult to keep lit.
Understanding Wick Types
There are various types of wicks available on the market today, from natural fibers such as cotton and hemp, to metal core and wood wool wicks. Natural fiber wicks are ideal for use with vegetable waxes such as soy or palm waxes, while metal core or wood wool options have been designed exclusively for paraffin candles. Using these materials can make it much easier to achieve optimal burning performance.
Sizing Wicks Correctly
In order to determine which size of wick should be used for your candle, it’s important to take into account the diameter of the vessel itself. Generally speaking, larger candles require thicker or bigger diameter wicks; whereas smaller candles can work with thinner strands.
Additionally when calculating which size you’ll need, take into consideration that modern poured candles require longer burn times due to their usually deeper depths compared with other types of containers; as an example, jar candles need approximately 1/4″ taller flames than other designs due to their design origins – so choose accordingly.
Investing in a good quality measuring tool (such as a combination caliper) is highly recommended when sizing up not only your wick but also all components concerned with your project – such as container wall thickness or diameter diameters themselves (as both may affect how often you change out old ones versus new).
That being said even if you don’t have access to any measuring devices, there’s still plenty options available online where ‘wick sizing’ information tables will help guide your selection process when making your own DIY creations.
Preparing the Candles (Snuffers, Tabs and Tapers)
Candle making is a fun and creative activity that is perfect for both kids and adults. Tapers, snuffers, and tabs are some of the most popular types of candlesticks used in crafting.
Making tapers is quite easy as all that is required is to dip the wick into a hot pool of wax until it has absorbed enough to make a candle of desired length. For snuffers, start by cutting a long strip of felt or other material and wrapping it around two heavy objects such as books that have been placed on either side over your work surface.
Once everything is arranged tightly, drip wax onto the middle portion of the fabric wrap and roll it between your hands until it forms a cylinder shape. For making tabs, begin by cutting biscuit-shaped pieces out of cardboard or any other material you like.
Place the piece over the end of your wick and dip it into hot wax until the whole tab has been dipped in successfully. After all three candle types have been prepared they can then be decorated with glitter, paint or whatever materials you choose.
Knowing how to make candles successfully starts with selecting suitable wicks for each one being made. Wick choice should depend on the type of candle being made – thicker wicks work best for large candles while thinner ones are usually needed for smaller versions like tealights or votives.
Having all necessary tools such as thermometers, measuring cups or electronic scales will also make your task easier and enable greater accuracy when melting wax or adding scent oils. Moreover, having appropriate molds will determine the outcome of not only aesthetic look but also burning time connected to each one’s size/type depending on kind chosen (cylinder, jar etc).
Wax selection is also an important factor in guiding successful outcomes as each type melts at different temperatures and may require additional stabilizer /hardener depending on climate where they are stored/used afterwards (soy wax vs paraffin for instance). This information needs to be properly addressed when creating these beautiful items as incorrect preferences can result in multiple problems from subpar shapes /sizes to color inconsistencies or even slower burn times resulting from incorrect measurements when putting everything together.
To avoid these common problems, find tutorials online on how to correctly use specific ingredients before taking part in this relaxing craftsperson hobby – candle making.
Step-by-Step Guide to Making Your Candle
Making your own candles is an easy and enjoyable way to create something helpful and decorative for your home. There are many different items you will need before you can get started, so it’s important to make sure that you have all of the right items available before attempting this task. After gathering the necessary materials, here’s a step-by-step guide on how to make your own homemade candle.
- Gather supplies
- Choose a container or a mold
- Prepare your wick
- Melt your wax/oil
- Mix in desired scent/color
- Add essential oils
- Pour melted wax into container or mold
- Let cool completely
The first step is to gather all the supplies necessary for making your candle. This includes a large pot, either paraffin or soy wax, a thermometer, wicks and holders (or waterproof tape), safety glasses and oven mitts, and any essential oils or colorings of your choice.
Make sure that all containers or molds you choose are heat resistant as high temperatures will be used during the process. After obtaining all of these supplies, start by preparing the wick by threading it through the holder (or securing it with tape) if needed and then dipping it in melted wax to secure its position at the bottom of the container.
Next, melt down your wax in a large pot over low heat on an induction stovetop (using water baths). It’s also important to remember safety while doing this; always wear safety glasses and oven mitts here. Once melted down add in any essential oil or coloring you desire until it is thoroughly blended together.
If adding scents like flowers extract, drop them into different parts of prepared wick after melting down is finished. Then pour heated wax into prepared container with prepared wick inside and let it cool completely-ideally for several hours. Once cooled off treat yourself to an incredible-smelling candle or give them away as gifts.
Adding Interest with Color, Fragrance, and Homemade Embellishments
When making candles, there are many ways to add a unique and personal touch. Adding color, fragrance, and homemade embellishments will help to make the candles interesting and give them that homemade feel.
Adding Color
Adding color to a candle is quite easy. Most craft stores sell liquid dye or food coloring specifically for candle making. There are varying intensities of colors with the amount of drops needed for different types of wax.
For natural beeswax, add 10-15 drops of dyes or food coloring for a vivid result. Other waxes may take twice as much or more depending on the type and color intensity you’d like to achieve. It may take some experimenting before you get the desired color tones.
Adding Fragrance
You can also make your candles smell wonderful by adding scentedessential oils to them once they begin melting in the pan. Essential oils are available in a plethora of aromas such as jasmine, lavender, peppermint, sandalwood, and many more. Aim for approximately ½ teaspoon of oil per pound of wax used to create a strong scent when lit.
If you would like a mellower scent, use less essential oil; if you prefer a stronger scent, adjust as needed until satisfactory results are achieved. Not all fragrances work in both paraffin & beeswax; it is important do research on what fragrances work best with each before committing an entire batch to one specific scent choice.
Homemade Embellishments
For further personalization you can also add homemade embellishments such as glitter or dried flowers or herbs directly in the melted wax effort before pouring it into molds or vessels. You can also dry-brush pigmented powdered dyes onto votives after they have cooled down and hardened but before they have been removed from their molds – this method is great for achieving layered pastel stripey patterns on votive-style holders.
- Adding Color: Use liquid dye or food coloring specifically made for candle making.
- Adding Fragrance : Use 1/2 teaspoon of essential oil per pound of wax used.
- Homemade Embellishments : Glitter, dried flowers or herbs can be added directly into melted wax.Powdered dyes can be used to dry-brush votives after they cool down.
Tips for Properly Curing and Storing Your Candles After Making
Once you have crafted your own homemade candles, the next step is to properly cure and store them. By following these simple tips, your candles will last longer and provide a pleasant experience when they are burned.
The most important step in curing and storing your candles is allowing the scent to settle. This helps bring out the subtle notes in any fragrance that you have chosen to use in your wax blend.
Each wax comes with its own curing time, so make sure that you read the instructions for whichever wax blend you went with. After it has been allowed to cure for the recommended time period, keep your candles stored away from direct sunlight or high temperatures which can both have an effect on the scent throw over time.
In order to maximize their performance, it is advised that you trim off any excess wick before each use. To do this, you will want to take some snips and cut off up to one-eighth of an inch from the top of whatever remains after burning it down for a few hours.
This should help create an even burn when lit again. You will also want to make sure your wicks are centered at all times once they’ve been trimmed so as not to interfere with optimal flame height; this allows wax closer to the side edges of the container to fully melt and pool before extinguishing itself.
Aside from necessary trimming, rotation is key when it comes to storing candles; placing common containers such as mason jars at different levels on shelving will ensure air flow throughout storage units enabling all of their scent layers interact evenly over time.
As long as there are no sharp temperature changes while burning one candle or layer after another (which can cause clumping), rotation will guarantee all levels remain balanced in a single box or jar-based setup – maximizing lifespan efficiency dramatically.
Lastly, don’t forget about proper labeling – include both name/type along with any specific instructions provided originally by manufacturer/vendor so anyone who burns them knows exactly what they’re getting into before lighting up.

Welcome to my candle making blog! In this blog, I will be sharing my tips and tricks for making candles. I will also be sharing some of my favorite recipes.


