Introduction
Making a great candle can be an exciting and rewarding experience. It is an art form that requires patience, plenty of safety precautions and an eye for detail when measuring and creating the candle. Crafting a beautiful candle requires the same level of attention as any other craft or artwork. To make sure your candle is perfect, you must start with the right materials as well as pay attention to even the tiniest details throughout every step of the process. This guide is intended to provide all the information you need in order to make a great candle.
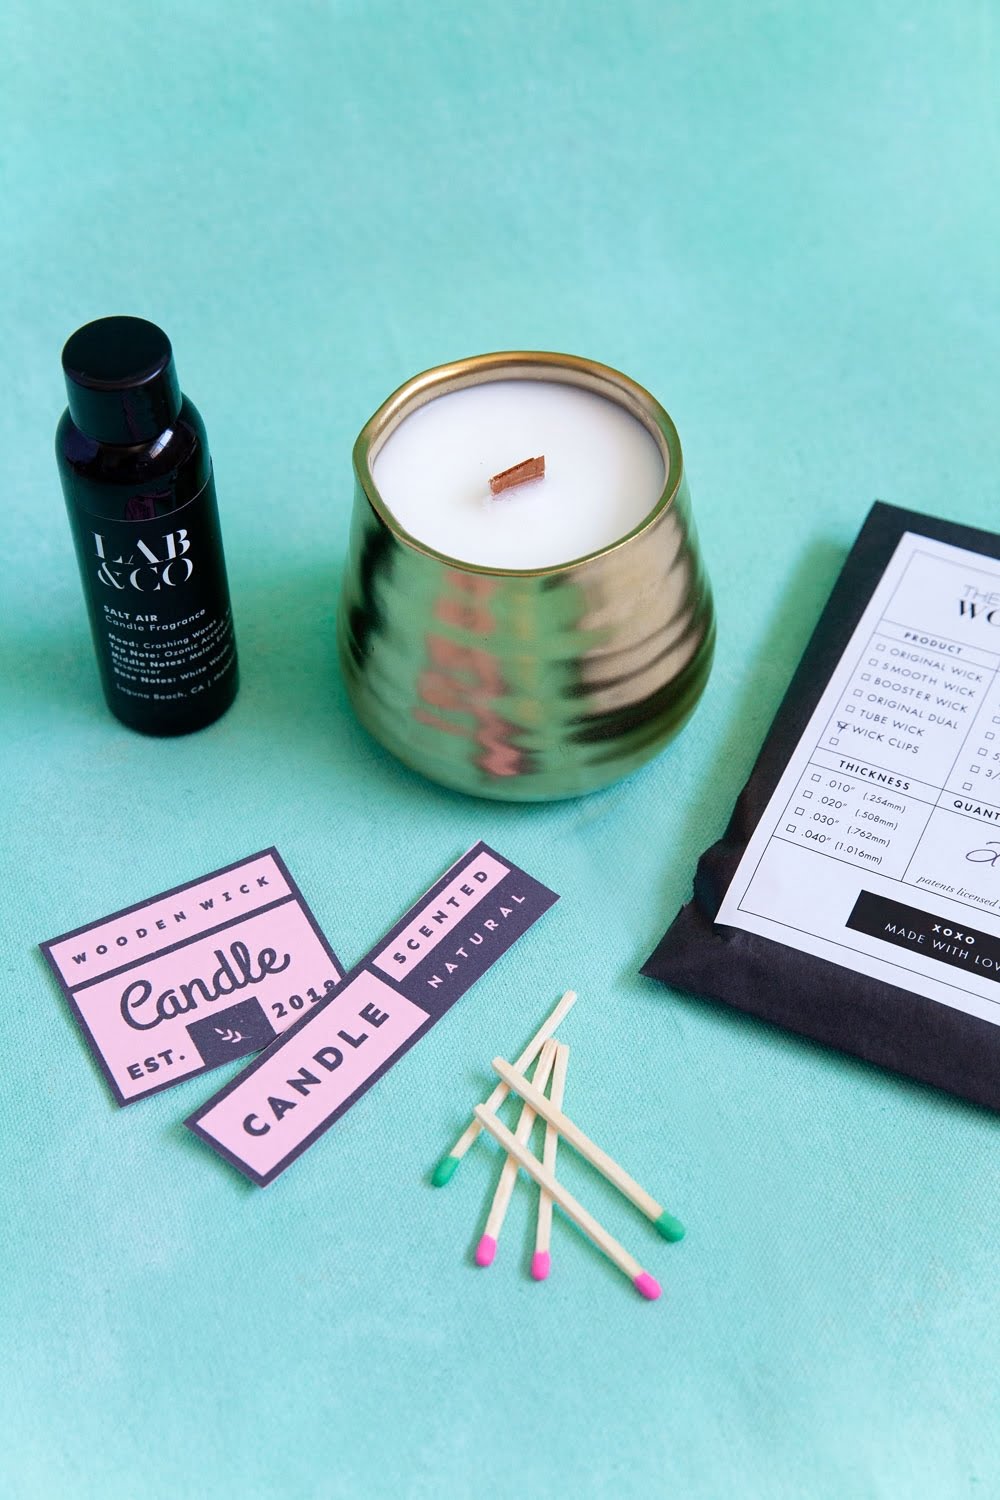
Following these steps will ensure that you create a beautiful candle that not only looks amazing but has a pleasant aroma and burns evenly. Before getting started, it’s important to gather all of your materials so you have everything on hand when making your candle. The supplies will typically include wax, fragrance oil, wicks, containers or molds for the candles, dyes and any other embellishments you want to add (glitter, beads, etc). Additionally, one may need items such as thermometers, stainless steel pots/jars for melting wax (be sure not to use aluminum), metal mixing spoons or stirrers to mix ingredients together and hot pads or gloves for safety measures.
Once you have collected everything necessary for making your masterpiece, it’s time to begin! The first step is heating up the wax according to its instructions – be sure to do so carefully! Once it’s melted properly and at safe working temperatures, dye chips can be added in order to give color as desired in addition to fragrance oils should one wish their candles have fragrant scent too; stir until they both fully blended into the molten wax mixture ” but remember not combine certain types of fragrances with certain types of dyes though! Finally pour out into pre-measured containers wherein once cooled or through refrigeration if needed – insert wicks into position if desired before attaching them onto the container either by using wick sustainers or glue dots. Allow at least 24 hours before testing out your handiwork ” if anything goes wrong simply melt more wax again then start all over from there adjusting amounts & combinations as desired till getting desired result attained!
Materials You’ll Need
Making a great candle requires some materials. You will first need wax, which can be any type of wax, including soy, beeswax, or paraffin. It’s important to buy the right amount of wax for your project to avoid wasting it. You’ll also need wicks that match the size and type of container you’re using for your candle. Next, you’ll need essential oils or fragrance oils to scent your candle. If you’d rather not use traditional scents, you can add baking spices and herbs as well. Lastly, you’ll need a heat source and a double boiler in which to melt the wax for pouring.
Besides these supplies, it is also helpful to have the appropriate containers for candles you want to make: tins, tealight molds or jars are all good options depending on how large or small your project is. Additionally, if your project has multiple parts or layers with different colors of wax then separate double boilers may be necessary to melt each separate layer. Assembling items like color chips and glitter also might be required depending on the design of your candle so these items should also be taken into account when purchasing supplies. Finally, safety equipment like an eyewear protector and oven mitts are important pieces when making hot wax so these items should not be forgotten when planning to make candles!
Preparing the Candle Mold
Making a great candle requires having the correct tools, supplies and preparation. Before you begin creating your perfect candle, it is important to prepare the candle mold that will hold your finished product. You need to use the correct type of mold for the kind of wax you are using. If you are working with a paraffin or beeswax blend, you should choose an aluminum or polycarbonate container. These molds allow for easy removal of the hardened wax once it has cooled. You should also make sure that any accessories such as a wick holder and votives fit securely within the mold before pouring in your wax mixture. Once setup is complete, you should preheat your mold so that the cooling process is faster when pouring in hot melted wax. After heating up your chosen container in a double boiler, be sure to check for any water residue so that it doesn’t interfere with the burning ability of your candles once cooled. Choose carefully and be sure to clean all irregularities from inside the mold to give your finished product a professional look!
Selecting the Best Wax for Your Candle
When making a great candle, it’s essential to select the best wax for your project. When choosing the wax you will use, take into consideration the type of wick that will be used and the fragrance if you are adding any. Paraffin wax is a popular choice for making candles as it is widely available and easy to work with. Other popular choices include Soy wax, Beeswax and Palm wax. Each type of wax has their own particular properties that influence the performance of a candle such as burning time, fragrance holding capabilities, melting points and hardness. To get the best results when using different types of waxes, research is key since they all react to temperature differently. Depending on what type of look you are going for; colorants can be added to make your candle stand out more aesthetically. They come in various forms such as powders and liquid dyes that provide vibrant colors without compromising smell or burn time.
Melting and Pouring the Wax
Candle making begins with melting the wax. Depending on which type of wax you are using, this step can be done in a number of different ways. Paraffin wax can be melted over a direct heat source or in a double boiler. Soy and Beeswax require low heat to melt. You may wish to use a crock pot or pour pot to melt these types of waxes as it allows you to maintain an even temperature. It is important not to get the wax too hot during this step because high temperatures can cause discoloration and bad odor when burning. Once the wax reaches its melting point, it should be transferred into a pouring pot for easier maneuverability when transferring the molten liquid into its vessel or jar. When adding any colorants or fragrances, ensure that the ingredients are compatible with your wax before adding them into your mixture!
Adding Color, Fragrance, and Other Additives
When making a great candle, adding color and fragrance are essential. Depending on the type of effect you would like to achieve, there are several different ways to add these components. For example, many people like to use dyes to give their candles a vibrant and unique look. Colors can be added in chips, liquid pigment or powder form depending on the desired end result. Fragrance can also be added in a variety of ways such as pre-scented wax flakes, fragrance oils that have been specifically formulated for use in candles, and concentrated fragrance oils mixed with natural carrier oils.
In addition to color and fragrance, other additives can really bring a candle to life. For instance, you could add glitter or mica powder for sparkle and visual appeal. Dried herbs can help provide subtle yet beautiful aromas while giving some texture to the finished product too. Finally, embedded objects like seashells or gemstones can make your candle an eye-catching centerpiece piece. All these additions are optional but will truly help make your candle stand out from the rest!
Adding a Wick and Attaching It Securely
When making a great candle, it is important to add a wick that is properly sized for the size and shape of the candle. The length of the wick should be slightly longer than the height of the container being used for the candle, giving some extra allowance to make sure it remains secure once placed. To attach the wick to the bottom of the candle container, a bit of hot glue could be used. Alternatively, some containers have small holes to insert the end of a specially made tabbed wick that can then be secured into place. However you choose to secure your wick, it needs to stay in one spot so that your candle burns evenly and in a consistent manner. Once added and secured, you are ready for pouring your wax mixture into your desired container!
Setting and Cooling the Candle
After the candle has been made, the next step is to set and cool it. This involves letting the candle cool completely at room temperature. This could take up to a few hours depending on the size of the candle and how much wax was used. As it cools, be sure to keep an eye out for any ripples or drips that may have formed in the wax while pouring it. If any are noticed, use a popsicle stick or something sharp like a pin to adjust them out. After the candle is cooled, it is ready for display!
Final Touches and Gifts for Gift-Giving
Making a great candle requires more than just selecting the right ingredients- it requires finesse and attention to detail. The final steps in the candle-making process are part of what gives candles their “wow” factor. Depending on how you want your candles to look, you can add several embellishments to make them beautiful and unique. Consider adding dyes, fragrances, wicks, decorations, or packaging for a creative touch that will make your candle stand out.
When it comes to dyes, there are a variety of options available depending on the desired color; natural dyes such as turmeric and annatto seed can be used as an alternative to synthetic dye chemicals. Fragrances can also be added at this stage; top and middle notes are perfect for creating layered scents that blend well together. Wicks must also be carefully selected; the type of wax being used will help determine the best size for optimal burning. Once these elements have been chosen and added into your mix, decorations may be added for extra flare! Glitters, sprinkles and other decorative items can be applied when possible ” just use caution when working with hot melting wax! For longer lasting candles, consider molding them in ornamental containers or jars so they hold their shape better over time. Last but not least – consider customizing your candles as gifts! Labels or hang tags can be printed with personalized messages or quotes; wrapping in tissue paper with ribbon is a beautiful way to present them to those special people in your life. With these creative touches you’re sure to create candles that are truly fantastic!
Conclusion
Making a great candle is more complicated than it looks. Aromas, ingredients, and the temperature of the wax can all affect the quality and performance of a candle. For longevity and optimal fragrance, start with high-quality materials like natural oils and wicks that will not cause your candles to smoke or create soot. It is also important to use the right technique for blending waxes and fragrance oils as well as proper pouring temperatures to ensure no air pockets remain in your candles. Making sure you have adequate ventilation while working with hot or hazardous material will ensure safety during production. Finally, experimentation is key when trying to craft that perfect scent or mood for your candles. Successful smell tests are necessary so customers will enjoy their experience from the moment they light it up until its finished burning- leaving them wanting more!
In conclusion, making a great candle requires attention to detail in regards to ingredients, temperature, ventilation, and experimentation. The right blend of premium ingredients such as natural oils and wicks plus research into pouring methods should yield successful results every time. Conducting smell tests are essential when determining the perfect aroma while still accounting for safety needs. With all of these steps combined, one can truly achieve great scented candles that customers will love – making sure they keep coming back for more!

Welcome to my candle making blog! In this blog, I will be sharing my tips and tricks for making candles. I will also be sharing some of my favorite recipes.

