Introduction
Sand candles are beautiful and fragrant creations made from sand, wax, and essential oils. The unique combination of materials allows for the creation of a candle that looks like crystal but with a soft glow. They can be used to decorate any area in the home by adding a subtle hint of light and scent.
To make sand candles, start by combining equal parts sand and wax in a pan over medium heat. Stir the mixture until all of the sand is coated with the wax. Remove it from the heat and add several drops of your desired essential oil by stirring gently.
Once you have finished preparing your mixture, create candle molds using simple materials such as silicone rubber molds or Styrofoam trays removed from egg cartons or food containers. Fill each mold ¾ full with your sand candle mix then place them in a cool place. Allow up to 24 hours for the candles to set then carefully remove them from their molds for the final reveal! Traditional wicks can also be added at this stage if desired; then simply tie onto either end of your new creation before selecting your perfect spot to proudly display them!
Now that you’ve crafted your own gorgeous candles, they’re ready to add beauty and fragrance to any space throughout your home! Place them along shelves or dressers, use as an accent on countertops, or group several together on a coffee table – just remember not to leave candles burning unattended or near any flammable materials when not in use. Get creative while adding character and… Voila! Your own wee piece of handmade art is ready to take pride of place in its new home!
Selecting Your Materials
When it comes to making candles out of sand crystals, the materials you choose are essential. Before starting on your project, consider the type of wax and sand you need.
Paraffin wax is a popular choice as it is very affordable, easy to obtain and won’t produce noxious fumes when melting. For your sand crystals, look for natural quartz or colored glass. Make sure to only use non-toxic dyes with these materials in order to make a safe candle.
Now that you know your material choices, it’s time to start gathering supplies. Luckily, most craft stores will carry everything you need for the project. You can also purchase items online from candle making suppliers if necessary. Just make sure that whatever you buy is high quality and suitable for the project at hand.
Once all of your supplies have been gathered, its time to get started on crafting your sand crystal candle!
Prepare the Container
Cleaning the Container: Before you get started with your sand crystal candle project, it is important to make sure all of the dust and other particles are removed from your container. You can do this by giving it a thorough cleaning with warm soapy water or, for stubborn deposits, use a degreaser.
Filling the Container: Next, decide how much wax you should put into the container. Depending on what size of container you have chosen and what type of design you are looking to achieve, the amount will vary. Typically, the wax should be filled to about two thirds of the container’s capacity which will allow enough room for the sand crystals and their heatproof holders without overflowing when melting.
Creating a Design with the Container: This step requires some patience and creativity but has great results in terms of creating an intricate candle design. The decorative element of your sand crystal candle will be created by arranging several kinds of sand crystals around each wick-holder in something like a layered ring pattern. Keep in mind that different colored crystals can enhance and add another level to your design as well as provide varying heights and textures when arranged around each holder properly. Enjoy experimenting!
Making the Wax
When melting wax for candle making, it is important to use a double boiler setup. This will ensure that the wax does not get too hot and avoids the risk of burning or oxidation. Use a large pot filled with water as the bottom part of the boiler and another pot to hold your wax in the upper portion. Make sure the top of your upper vessel is dry before placing it into the bottom one. Heat both parts together on medium heat until all of your wax is melted, stirring occasionally to ensure even heating and mixing.
You can add color to your melted wax using dye chips specifically designed for candle-making or pre-colored wax tarts available at most craft stores. Usually, 3-4 ounces of chips will be enough for 1 lb of paraffin wax or soy wax flakes; 4-6 ounces for beeswax pellets. Take caution when adding color as too much can affect burning quality and may stain wicks or containers if spilled over them.
Adding scent to your candle can be done either by using scented oil or through melted scent chips specifically made for candle-making. Generally, 12 teaspoon of scented oil is sufficient enough per pound of paraffin wax oil while 2 ounces per pound should be used with beeswax pellets or soy nuggets ” but this really depends on personal preference. Remember that scents may fade during curing so you may need different levels before lighting than when you first make them!
Pouring the Wax
Making candles out of sand crystals is relatively easy to do. To start, you will need the sand crystals of your choice and a melting pot. Melt the wax in the melting pot over low heat; this will ensure that you don’t overflow your container. Once the wax has melted, slowly pour it into the pre-prepared container where you wish to make your candle. Be careful not to overpour ” if you do, simply wait until it cools down before discarding any excess wax.
If you desire a level candle surface, try setting up an adjustable base for the container on which you will be pouring and placing a spirit level on top. This way, when adjusting and changing levels, you can use the spirit level to ensure even and smooth container edges. Additionally, once you have poured all of the wax, level out any lumps or uneven patches with either a palette knife or spoon handle ” both provide a good foundation for ensuring that your candle’s surface remains level while cooling.
Arranging the Sand Crystals
Creating unique and mesmerizing designs with sand crystals to make candles is an increasingly popular craft among both hobbyists and professionals. To properly arrange the sand crystals for an interesting appearance, the candlemaker will need to pay attention to several elements of design and layering effects.
One technique for creating unique sand crystal designs is by using different sizes and colors of crystals. The sand particles should be chosen with consideration for the candle’s eventual appearance. Different colored hues, shapes, textures, fragrances and waxes can be used together to create interesting visual effects when layered together. Furthermore, any decorative embellishments or accessories such as shells or stones can be added in between layers of the crystals to help create a beautiful layered 3D effect.
Layering techniques can also play a big role in creating memories with candles created out of sand crystals. Whether one uses pour-in glaze or sets individual particles onto melted wax in order to keep them in place after they are arranged, there are plenty of methods that can result in interesting visuals when lighting the candle later on. For example, creating different sections within the same container which contain differently colored sand crystals may provide a pleasant surprise once the flame sets off shadows from each individual layer that together combine into a unique design when lit up by flame. Additionally, experimenting with multiple wax layers can also lead to fascinating results due to how heat reacts differently with each type of wax layer based on its composition and temperature resistance capabilities
Cooling and Setting the Wax
Once the cooled wax is in the mold, it is ready for setting. Setting the candle ensures the shape of the final product won’t change. To do this, you must use a process called “tapping”. Tapping involves taking a blunt object and lightly tapping around and over the top of the uncured wax. This releases small air bubbles that can form when cooling or when mixing different colored waxes together. After tapping all sides of the mold, let it sit for about 30 minutes to harden. Once cured, pop out your sand crystal candles and enjoy their subtle ambient glow!
If necessary, you can even use heat guns to warm up any stubborn sections of wax while trying to extract them from their molds. After extrication, shake off any excess pieces of sand crystals and place them back into corresponding buckets to be reused in future projects! Also make sure that you keep some sand crystals on hand so more decorations can be added once cooling and setting are complete. This will help add more texture and color to your candles! Finally, once everything is set and cooled off properly, trim off any unsightly edges or rough surfaces with a knife or scissors for a neat finished look.
Testing the Candle
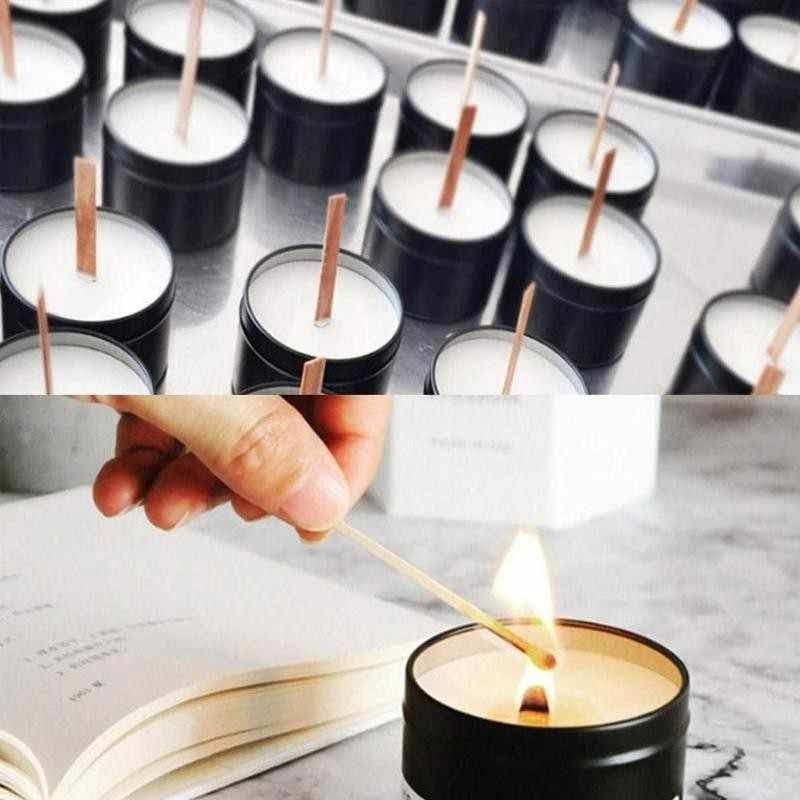
Before lighting candles made from sand crystals, it is important to ensure that they will burn safely and for a long period of time. To test the candle, first locate an environment where open flames can be safely used. Gently touch the wick with a lighter or match to observe and determine if the flame is stable and does not flicker. Additionally, make sure the flame does not spread across the crystal or any of its surroundings. Once determined safe to use, there are several ways to keep the candle burning longer. First, trim the wick regularly, as this helps ensure proper oxygen flow throughout the candle and promotes a steady flame. Additionally, burning your candle in shorter increments of no more than four hours at a time increases their longevity. Keep your candles away from drafts to prevent them from growing too bright and consuming oxygen quickly. Lastly, avoid blowing out a lit candle by using a snuffer instead to keep wax off those nearby surfaces and increase its life span significantly.
Burning Tips
To get the most out of your sand candle, here are some best practices and tips to follow:
1. Trim the wick before each use. Make sure to keep the wick at a length of 1/4-1/2 inch to prevent smoking.
2. Place the candle in an area where it will not be disturbed. This will help keep the level of wax even throughout burning and avoid any dripping that could potentially occur once it gets too hot.
3. Burn the sand candle for no more than 4 hours at a time, allowing it to cool completely in between uses. You must also make sure that you never leave your sand candle unattended, as the open flame can easily start a fire if not monitored regularly.
4. To create unique lighting effects with your sand candle, try tipping over the vessel so that half of it is submerged in hot wax and re-burning it for 2-4 hours for unique swirls and patterns in the wax that resemble crystals!
Conclusion
Now that you have all the supplies and equipment to make your very own sand crystal candles, it’s time to put it all together! Start by mixing equal amounts of borax and hot water in your Pyrex bowl. Stir the mixture until the borax has fully dissolved in the water. Then, add food coloring and a scent of your choice. Submerge each wick into the mixture for about a minute and then take it out. The candle wick should be coated with a thin layer of crystals if done correctly. Hang the wick from something above or hold onto one end while the other is immersed in the Pyrex bowl. Allow it to sit for an hour or two until tiny sand crystals form along the length of the wick. Lastly, remove from your artsy masterpiece from its liquid bath, trim off any excess crystal build-up, and curl up into whatever shape you desire! If desired, you can also paint over or spray with lacquer – have fun experimenting to achieve unique results! With this information in tow, you are now ready to enjoy your newly created sand crystal candles and bask in their sparkling beauty!

Welcome to my candle making blog! In this blog, I will be sharing my tips and tricks for making candles. I will also be sharing some of my favorite recipes.

