Introduction
Making candles without a thermometer requires some finesse and technique, as well as the right tools. It is important to have the correct materials for each step of the process. Depending on your preferences, there are multiple ways to go about creating beautiful homemade candles. Generally speaking, you’ll need wax, wicks, vessel containers and molds, plus some type of fuel used for melting such as microwaves or stoves; in the absence of a thermometer, it is also helpful to have cookie sheets ready for pouring excess wax onto.
Now that you have the general tools necessary to make a successful candle creation, it’s time to get started! Here are some tips on how you can make different styles of candles without having a thermometer available:
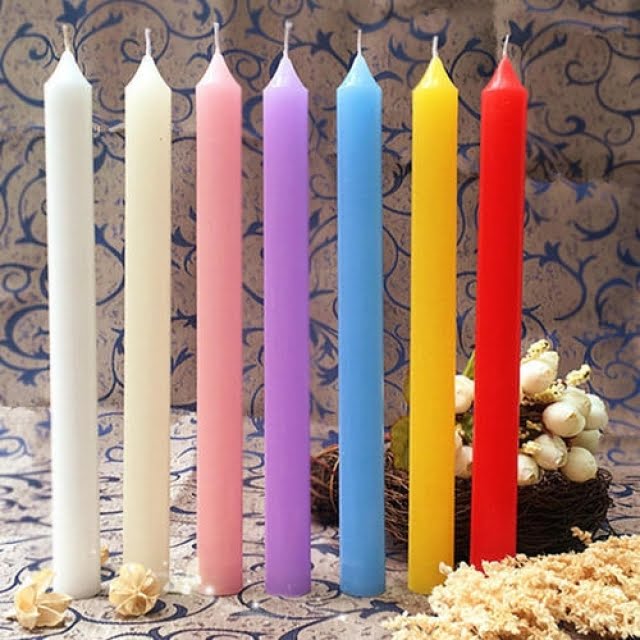
1. Layered Candles – Layered candles create a unique visual look and aesthetic easily achieved by pouring layers of melted wax into the same mold. This method works best with taper-shaped molds rather than jar-shaped ones because taper shaped molds allow even pours on all sides during each layer of wax. It is best to pour your layers in small amounts — this prevents bubbling while cooling.
2. Scented Candles – Start by melting your wax then adding two percent fragrance oil per weight (about ½ tsp per 1 lb). Making scented candles without a thermometer requires mastery in its art form; too much fragrance oil can cause wafting difficulty once lit, too little will not provide enough scent even when lit properly and burning uniformly throughout.
3. Colored Candles – Adding colorant to your base allows you more customizability when creating colored candles with the desired shade that fits your decorating needs or desires best. When using colorants without access to a thermometer, anticipate what would work best with added colorant: soft shades require only 0 – 8 drops depending upon shade, medium toned tones require 10 – 15 drops depending upon shade, and darker shades take 16 – 20+ drops depending upon shade desired—you may end up having slightly different shades than normal but don’t worry! If that’s what happens then just accept them and roll with it.. Colored candle creations are beautiful no matter their hue!
By following these steps and exercising creative licenses accordingly where needed or wanted along the way culminates in one set outcome–a wonderful set of handmade candles ready to be enjoyed! Each method listed above serves as an introduction into making great-looking creations without relying too heavily on accuracy through digital assistances like specialized torches or electric melters using pre-measured temperatures programmed beforehand–now go out fulfill your vision in spite of this limitation!
Tools Needed for Making Candles Without Thermometer
Making candles without a thermometer is possible with the right supplies and techniques! To begin, you’ll need some essential items to get started. These include wax, wicks, containers, dye or color blocks, fragrance oil, and a double-boiler. It’s also helpful to have a liquid measuring cup or spoon, wooden or stainless steel stirring spoons and tongs for wick handling. Additionally, you can use old newspaper for containing any possible messes during the candle-making process. Finally, it is important to have safety glasses and protective gloves available for use when handling the hot wax or melted dye/color blocks. Once all these supplies are gathered, you’re ready to start making your own custom candles without using a thermometer!
Selecting the Perfect Wax Type for Candle Making
When making candles without a thermometer, it is important to select the right wax type. The type of wax used primarily depends on what kind of candle you are trying to make, such as votives, pillars, tapers, and so on. For instance, if you are looking for a longer burning time, then you should consider using paraffin wax. This type of wax is the most efficient and inexpensive option when creating candles. However, if you’re looking for something that smells more fragrant, then beeswax may be a better choice. Beeswax tends to burn slower but offers a pleasing odor that will linger in your home for hours after the flame has snuffed itself out. Additionally, palm and soy waxes are excellent choices for those looking for an earth-friendly alternative as these types of waxes generally contain fewer toxins than other traditional waxes do.
Melting the Wax for Candle Making
Making candles without a thermometer is possible, but it’s important to be careful and patient when molding the wax. To begin with, you will need wax flakes or pellets, wicks, an old pot or saucepan, and something to stir the wax with. Start by adding the correct amount of wax into the pot before heating it slowly until the wax comes to its melting point. Be sure to keep stirring consistently throughout this process as it decreases the risk of hot spots that can cause uneven burning of your candles. When melted completely, transfer your liquid wax into a suitable mold or container before adding in your wick. If necessary, hold your pre-cut wick in place until the wax hardens around it. Once cooled and solidified, you can flip over and remove your new candle from the mold if needed!
Enhancing the Candle Through Colors, Scents, and Embellishments
Many people opt to make candles at home without the use of a thermometer. However, this doesn’t have to mean giving up on creative options. In fact, it provides an opportunity to be creative and explore different ways of making beautiful candles. Here are some tips for enhancing your candle without a thermometer:
Colors: This can be achieved in a number of ways. Most wax is available in basic colors and many craft stores even carry dye specifically for wax projects. Additionally, other kinds of coloring agents can be used too, such as liquid watercolors or colored pencil shavings to create something truly unique.
Scents: Adding scent to your candle is easy! Using essential oils or fragrance oils is by far the best method but there are also some neat tricks that don’t require any additional ingredients like after melting the wax, add a few drops of perfume or drop pieces of incense onto the melted wax for a subtle fragrance.
Embellishments: A great way to make your candle more interesting is by adding embellishments like flowers or beads which can be laid over the top of the still-melted wax right before it cools fully in order to give an interesting texture and look once complete. Recycled materials like old jewelry pieces are also a great way to make an eye-catching design!
Preparing the Container Before Adding the Wax
Before you can begin making candles without a thermometer, it is important to properly prepare the container that will be used. This includes ensuring that the wick placement and size are correct for your desired candle size. It is vital to measure accurately and make sure that the wick holds in place securely with a small amount of melted wax known as “tabbing.” Tabbing should be about ½ inch above the bottom of the container; any higher could cause the wick to burn too quickly. You also need to make sure any dust or debris has been removed from the sides of the container before adding any wax. These preparations should ensure that your final product has a safe burning environment and an aesthetically pleasing appearance.
Pouring the Wax Into the Candle Containers
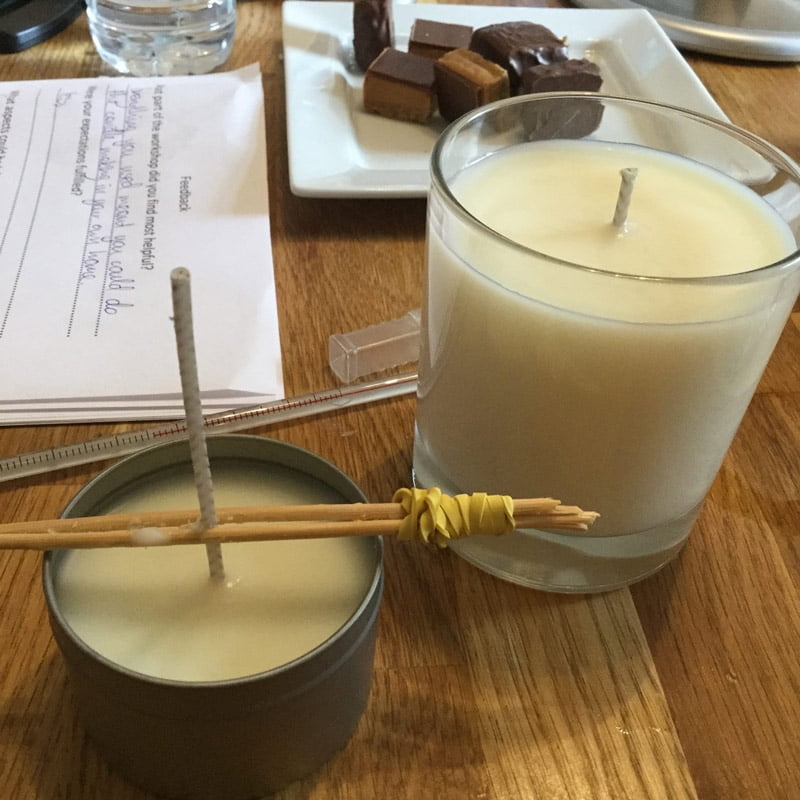
Once you have gathered all the necessary materials, it’s time to start pouring. Make sure you have a clean, dry surface to work on and an area for cooling your candles. Place the wick into the container you plan to use for your candle and tie or tape it at the bottom of the container so that it stands upright and centered. Place your wax in a double boiler or microwave safe bowl and melt it. If using a double boiler, make sure the bottom pot is ¾ filled with water. When using a microwave, heat in intervals of 15-30 seconds stirring occasionally until melted. Once melted, carefully pour the hot wax into your containers slowly as to not disturb your wick position. Fill each container 2/3 full of wax once it has cooled down slightly from its original temperature. Allow 24 hours for cooling before trimming any excess wicks. To ensure an even burning candle once lit, make sure to wait at least 1 hour after hardening before lighting your candle.
Cooling & Setting the Candle Wax
Once you have poured your molten wax into the molds, you will need to let it cool and set. This process can take anywhere from an hour up to 8 hours, depending on the size of the candle. While cooling, keep an eye on the candles and gently agitate them every so often to even out the surface of the candle. This helps remove potential air bubbles that may have been formed when pouring in your mold. Additionally, place a fan nearby to help speed up the cooling process and ensure a smooth, even set. Once cooled at room temperature, check for firmness by touching each side of the candle using your finger or some other cold object – if it’s still soft then let it set for longer. Once fully set and cool, pop out each of your new candles and enjoy!
Expert Tips for Making Candles Without a Thermometer
Making candles without a thermometer is possible, but it will take some diligence and practice. The main challenge is that the temperature of the wax used to make the candle can affect its quality; hotter temperatures may lead to sunken centers, weak edges, and/or smoke residue — none of which are desirable outcomes when making a candle. To ensure success, one needs to understand the properties of the wax being used and be able to spot any signs that the wax may be getting too hot during the melting process.
Additional tips include:
– Slowly melt your wax in a double boiler or other low-heat setup. Never use direct heat — this can cause burning or thermal shock which can both damage the accuracy of your temperature readings when you do eventually get a thermometer.
– When melting your wax, keep an eye on it. Look for “flashing” — where air bubbles suddenly appear on top of the melted wax as they escape from bubbles that have formed inside — at around 160 degrees Fahrenheit (71 Celsius). This is good indication that your wax has reached a good pouring temperature and should be allowed to cool slightly before using for candle making.
– Provide ventilation when melting your wax by keeping windows open and ensuring that candles are not placed near stoves or other sources of heat. Waxes react differently with different temperatures and it’s important to give yourself enough time in order to avoid common issues like peakless tops, spilled puddles from molds, ash buildup from improper ventilation, etcetera.
– Additionally add essential oils or herbs after you pour and let your candle mixture cool down for about 15 minutes for best results. This will ensure that your desired scent will penetrate through out and throughout the whole candle!
Decorative Touches to Make Your Candle Look Professional
As the wax melts, it is possible to add decorative touches to make your candle look professional. If you are using a bundt pan, this can involve swirling colors or adding items like herbs and spices. Once the wax is partially set, you can also insert a wick for a larger candle that could sit in its own holder. To give it an extra touch of charm, consider drizzling some wax over the edge of the candle mold and gently pull away in various directions with a toothpick or spoon. This will freeze into interesting shapes as it sets. You can also sprinkle bits of pieces of natural items such as cinnamon sticks on top of the wax while it’s still hot or liquid. Going even further, different fragrances can be added to your candles depending on what kind of oils you have available. You should always add scent towards the end of your candle-making process so that you don’t compromise any of the ingredients in your recipe! Lastly, before making any candles without thermometers remember to buy pre-tabbed wicks for easier melting and removal from your molds – this will save time and effort when putting them together!
Wrapping Up
If you’re looking to make beautiful candle masterpieces without the need for a thermometer, there are still plenty of ways to enjoy this crafty activity. First, gathering all the supplies you will need to get started with your candle crafting can help speed up the process. Typical supplies required include wax, wicks, dyes and scents, along with containers or molds for the candles. Once everything is gathered together, melt the wax either in a double boiler system or in a microwaveable bowl or container. It’s important to be extra careful when working with hot wax as it can cause serious burns if mishandled.
Once melted it’s time to add in any colorants or fragrance oils that you wish. After stirring everything together its then just a case of pouring the wax into your containers and mixing around until it has cooled and hardened enough to accept the inserted wicks. Before being lit always ensure that the wick is standing up straight so that they flames won’t come into contact with the side of your container and sticks at least ½ an inch above the surface of your candle. These steps will ensure your safe completion of crafting beautiful candles even without thermometer!

Welcome to my candle making blog! In this blog, I will be sharing my tips and tricks for making candles. I will also be sharing some of my favorite recipes.

