Making homemade candles preschool, is a great way to introduce young children to the basics of candle making. Candlemaking for preschoolers incorporates many elements they already know and love such as sensory activities, art and crafts, science and even math.
It teaches them how to measure ingredients properly and understand the properties of different materials. Moreover, it is important for young minds to start understanding the importance of sustainability and recycling and making their own recycled candles can achieve this goal.
In addition, candlemaking allows preschoolers to practice creative problem-solving skills when learning about heat sources used for melting wax or mixing scents together. This helps increase their comfort with interpretation of instructions as well as making connections between different concepts being practiced (like the relationship between melting wax and temperature). Overall, teaching a three-year-old candlemaking offers exposure to concrete lessons usually only intended for much older students in middle school or high school.
Moreover, creating homemade candles with preschoolers is definitely worthwhile because it builds confidence in success. Noticing something tangible they created provides motivation that fuels engagement in future projects and tasks. In addition to building confidence in mastery of skills learned like following instructions or measuring ingredients correctly; an extra incentive is that any finished product made can be poured into containers supplied by family members or taken home in unique fun ways like mason jars decorated uniquely by each child.
To conclude, there are numerous benefits that come with teaching homemade candlemaking for preschoolers. The activity encourages hands-on learning through exploration while giving early insight into various academic topics like math, science and art – as well as the fundamentals of sustainability.
Such activities help foster teamwork in communication exchanges while also building confidence along with other soft skills such as problem-solving abilities. All these aspects come together equipping learners at a young age with better tools for meaningful growth throughout life.
Gather the Necessary Supplies and Tools
- Wax (paraffin or soy)
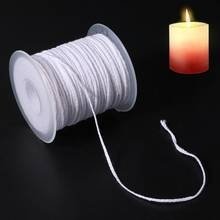
- Candle wicks
- Fragrance oil and/or essential oils
- Coloring dye chips (for white wax)
- Double boiler or wax melter
- Thermometer
- Pitcher with a spout or measuring cup
- Pillar molds, container molds, novelty molds
It’s a great idea to introduce your preschooler to the craft of making homemade candles. They will love the process as well as the satisfaction of creating something from scratch. Depending on their age, you may need to guide them more closely as they create their candles. Here are some steps that can help you get started and have some fragrant and colorful homemade candles around the home in no time.
Melt Wax and Prepare Molds
To begin, melt the wax in a double boiler or wax melter then use a thermometer to check that it is no hotter than 160-180 degrees Fahrenheit; too hot and you could burn yourself. When it is at the right temperature, add fragrance or essential oils and coloring dye chips if desired.
Then use either a pitcher with spout, measuring cups, syringes or droppers to pour in the hot wax into your chosen candle molds; remember not overfill them with wax.
Wait for Candles to Set and Trim Wick
Once all containers are filled with wax, leave them untouched for around four hours until they set completely. Afterwards trim off any access wick sticking out. When left longer than four hours later they must be reheated again so that they remain liquid long enough to be poured into another container when removed from mold.
Safety Considerations and Equipment
When making homemade candles with preschoolers, safety should be a priority. Due to the heat and flammable nature of candles, an adult should be present at all times when dealing with candles and any associated tools or materials. Safety glasses should be provided for each child and adult in attendance as potential pieces of wax could splatter. Additionally, gloves can help protect hands from getting burned.
Wax Swirls
One simple project that kids enjoy is making wax swirls. Begin by preparing the wick and then securing it on a metal holder covered in hot glue gun wax placed inside the small container to be used as a mold. Depending on age and ability, you can decide whether to pre-melt the wax chips or ask kids to melt colored beeswax chips using either a microwave oven or double boiler – always supervised by an adult.
Next, kids can mix different colored chips together until they get their desired color blend or patterns before pouring it into their molds in a swirling motion. Delighted at watching the swirling wax take shape as it cools down, once hardened they then get to pull out the candle and admire their own masterpiece.
Layered Candles
Layered candles are another fun idea young kids will love making. Start by asking them again if they want pre-melted wax or if they want to melt colored chips themselves before pouring them directly into the chosen odorless candle jar one layer after another with different colors – surrounded by assistance from an adult throughout – adding scissors trimmed wick every 3 layers – until full.
Again this effort rewards your handful of artists with stunning layered creations they simply won’t be able to resist lighting up.
Now comes time for these tiny inventors fun part – add glitter powder when layering each color if desired for extra sparkle and creative flair. When no more layers can fit spray some liquid glycerin over the top layer which will ensure maximum even burning before careful lighting up of these hard work results.
Step-by-Step Demonstration of the Candlemaking Process
Paragraph 1 Candlemaking is an excellent activity for preschoolers. It is straightforward and simple, but it can have a beautiful and mesmerizing result. The process of making homemade candles involves melting wax, forming wicks into the wax, and allowing the wax to cool and settle in a designed shape. In this demonstration, we will be following the steps as outlined below:
- Gather necessary supplies: wax blocks or chunks, wick material, essential oils (if desired), cookie cutter or other molds
- Melt the wax over medium heat in a double boiler until it reaches a liquid state
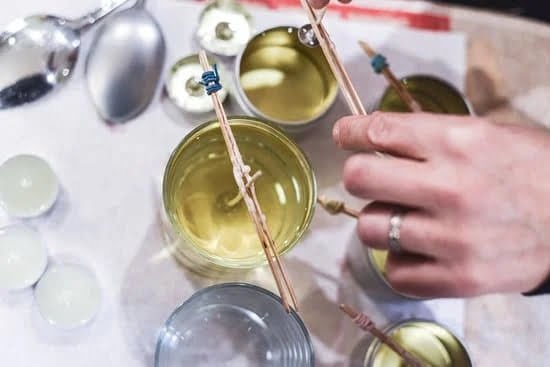
- Insert several wick strands into the melted wax and tie them together at their base
- Add essential oils if desired for scent
- Carefully pour melted wax into cookie cutters or other molds. Tie the exposed ends of the wick strands onto something that will hold them in place above the mixture while your candle solidifies
Paragraph 2 Once all of these steps are completed, you will need to wait for your candle to cool. Depending on your preferences and desired size of the finished product, this could take anywhere from two to four hours. Be sure that you use caution when handling both hot and cooled candles during and after production as wax can cause burns when it’s hot or can pinch fingers when it’s cooled.
Paragraph 3 Additionally, setting up shop at a local craft store before beginning may be necessary. Items like metal melting pots with handles may be easier for small children to handle than regular kettles on the stove. Various forms of wicks such as wood skewers may be suitable alternatives depending on preference.
Decorative items such as dyes or spices should also be considered if aesthetic value is desired. Finally, ensure that proper safety precautions are followed throughout – keeping gloves handy may prove beneficial when handling both delicate supplies and hot surfaces.
Have Preschoolers Participate at Each Step of the Process
Making candles with preschoolers can be a fun, educational and creative experience. Watching the wax melt, smelling the essential oils used to add scent, experimenting with colors and shapes of the wicks helps children learn about science and art in the process. Getting preschoolers involved in each step of making homemade candles will further increase their engagement in this interesting activity.
Materials
- Wax (Beeswax, paraffin, soy)
- Candle wick
- A container to melt wax
- Essential oils (optional)
- Colored liquid dyes (optional)
Before starting to make candles with preschoolers it is essential to explain some safety rules. The container used should be wide enough for children’s hands and stable enough so it won’t tip over easily when they stir the wax in it. It is also important that teachers or adults supervise children throughout the entire process of candlemaking, as molten wax gets hot quickly which poses a risk of burns if handled improperly.
Once all safety rules are explained, adults can help distributes materials among students and provide instruction on how use them. For instance, beeswax is provided in solid pieces that need to be melted first before pouring into containers for setting candles. Children can also cut off pieces from a candle wick using scissors; however they need instructions on choosing a length that fits into the specified jar sizes.
Same goes for adding scents or colors: either drops of essential oils or colored dyes can be added into hot wax while it’s still molten before pouring it off into jars to set. Preschoolers might find particularly fun dropping few drops at a time while stirring materials together until desired consistency is achieved.
How to Stimulate Creative Thinking About Candlemaking
Children of all ages are naturally curious and fascinated by light. Introducing preschool students to candlemaking can help awaken the child’s creativity and encourage further exploration while teaching important science concepts. Here are some ideas to help engage young minds in the world of wax, wicks, and flames:
- Create a creative display that covers physical properties of candles such as color, size, shape, thickness, scent.
- Utilize dramatic play centers where children pretend and imagine themselves as being at a specialty candle shop or making candles at home.
- Provide different waxes to explore such as beeswax blocks, paraffin chips or rods and gel.
- Discover what liquid oil mixtures work the best when adding fragrance or dye.
It’s important to teach preschoolers appropriate safety practices before letting them explore their creative side with candlemaking. Establish strategies for avoiding any sharp tools or flames plus identify crucial stop-and-go signals you can use in case they get too close to potentially hazardous materials.
Explain why it is so important to keep the flame away from flammable surfaces like drapery and bedding. Teaching sensory awareness skills allows older children more freedom while participating in activities involving fire and hot tools without sacrificing safety.
Take your class on a field trip or bring special guests into the classroom who possess knowledge about candlemaking techniques and supplies. Investigate questions like “What does wax consist of?” & “What happens when you add fragrance to molten wax?” In this way children build scientific understandings throughout the process while also improving communication skills through sharing what they have learned with peers and adults alike.
An engaging preschool activity is getting everyone involved in designing their own custom made candles. Begin with learning ways to manipulate the wax such as rolling balls of various sizes or pressing shells into spiral shapes.
Show how layers of diverse colors melt together beautifully over time even if they appear separated when melting begins. Let each student select choice items from a list or limited supply basket of wick lengths, colors of dyes & fragrances and decorative items; then create their very own personalized masterpiece.
Useful Tips and Tricks for Candlemaking with Preschoolers
1. Start Simple: Begin by having the preschoolers create a single wick candle. They can dip their wick in melted wax and let it cool until the wax hardens. They will get to watch as their personal creation takes shape, while learning the basics of candlemaking.
2. Experiment with Different Colors & Scents: After mastering one-wick candles, move onto color and scents. Give them colorful sheets of wax which they can cut up and mix into their melted wax for various shades & textures. Explore aromatherapy too and allow them to pick out different essential oils to add for scent.
3. Get Creative: Introduce unique molds that come in various shapes like hearts, animals or even iconic holiday figures, which will spark creativity and excitement in the class. They can create special keepsake candles or festive decorations just in time for the holidays.
Essential Supplies
- Candle molds
- Wax melting pot
- Different colors & scents of wax
- Essential oils/scented oils
- Wicks
Wrapping Up
When the candles are finished, it is time for the students to wrap them up. Materials such as tissue paper, colorful ribbon, and festive wrapping paper should be supplied by the teacher. This provides an opportunity for the children to get creative and decorate their individual candles with decorations that they believe represent them best. The students can then write messages or draw pictures about their candle-making experiences on their wrappings to serve as a memento.
At this point in the lesson plan, it is important that each student takes a moment to appreciate what they have created. Celebrating takes many forms and can include discussion between teacher and student or between several students together. The premise of this part of the activity is to remind the kids that not all successes need to conform to a certain standard or required outcome; creativity needs to be celebrated.
In small group conversations, teachers might ask questions about each individual’s unique approach or process when making their candles. It could also provide an opportunity for dialogue between fellow classmates and discuss different approaches if one student’s team was more successful than the other. By experiencing shared success with another person who has completed similar tasks, students might have a greater appreciation for both practice and outcomes alike.
The presentation aspect also encourages pride in self and work ethic when people are allowed some measure of ownership over something tangible. Through this exercise, children learn teamwork skills while taking part in communal activities in which everyone came away with different results – yet equally valuable lessons – in an atmosphere where everyone feels welcomed regardless of ability or prior knowledge of candle-making techniques.
By celebrating creativity along with success, this workshop can ensure that garden-variety energy is transformed into ardor for challenges great and small.

Welcome to my candle making blog! In this blog, I will be sharing my tips and tricks for making candles. I will also be sharing some of my favorite recipes.


