Introduction Overview of the History of Candle Making
Candle making has been a part of human history for thousands of years and events have been lit using fire from candlelight. The earliest known record of a wax candle comes from China as early as 200 BC, where it was made from whale fat. Ancient Egyptians then improved the technique by combining 1 part beeswax to 2 parts asbestos which made candles fairly lightweight and capable of burning for quite some time. During the Roman era, candelabras were used to light temples and in 6th century Europe, the first modern-style molded candles were created with molds that had a wick protruding from them. These early candles only produced dim light, but throughout the Middle Ages, improvements led to higher quality candles that burned brighter and longer.
Materials
The most common materials used for making traditional candles include wax (such as paraffin), sheets of cotton wicking and dye or colorant (to give the candle its desired hue). Additional materials may be needed depending on the specific type of candle you decide to make; these could include natural oils (for scenting), herbs/petals or geometric shapes if you’re going for an unconventional look.
Procedures
1. Determine what type of candle you want to make ” this is important as different types require different materials and techniques such as pillar, votive or tea-light candles.
2. Make sure you have all necessary supplies prepared beforehand – including wax, wicks, dyes/colorants, natural oil scents (if desired) etc; all depending on your desired final outcome.
3. Prepare your workspace with the necessary safety equipment such as heatproof gloves/eye protection etc ” this will be essential when dealing with hot melted wax!
4. Measure out the appropriate amounts of wax and heat it until it melts fully ” stirring periodically to ensure an even melt throughout.
5. Once fully melted, add any dyes/colorants into the molten liquid before pouring it into individual molds/containers according to their size – adding any geometric shapes if applicable at this point also before allowing them to dry completely once poured in each mold respectively..
6. Then place a length of wicking centrally in each container before sealing them up – ensuring they’re secured properly so that no leakage takes place during melting /burning process later on..
7. Finally allow all containers enough time to cool down completely before displaying or burning your finished DIY handmade creations!
Getting Started Choosing the Right Wax and Wick
Before you begin making candles, it is important to choose the right wax and wick for your project. The wax used for candles varies depending on the type of candle being made. For example, paraffin is a popular wax for creating pillars and votives, while beeswax or soy wax are often used in rolled or container candles. When selecting a wick to use with your chosen wax, look for one that is designed specifically for that particular variety of wax. Do not skimp on quality here as using an inferior wick can cause excessive soot or an uneven burn.
Preparing Supplies
Once you have chosen the correct materials, the next step is preparing supplies. Begin by pouring out enough melted wax into a heat safe container to fill your desired mold. A double-boiler can be used melt the wax if necessary. Next, attach your chosen wicks to any molds that you are using by tensing them around something heavy and suspending it in the center of the mold with a small amount of melted wax”you will need to do this before pouring in any molten wax. If you are making rolled candles, start by cutting width of fabric equal to a few inches more than what you want in terms of total candle length. Then use an iron or other heating element to fuse down one end before rolling up the tube around its wick tightly but not too tight as it should still be able to draw up melted wax without issue when placed in something like hot water once finished with rolling up..
Wax and Wick Prepping
Before you can begin making your candles, there are some materials and procedures that need to be followed. First, you should procure the necessary wax and wick for your particular candle design. Paraffin wax is a popular choice” it has strong scent retention properties and comes in many colors” but there are also natural alternatives such as beeswax or soy wax. You will also need an appropriate sized wick for your candle design; pick one that is suitable for the type of wax you plan to use. The suggested size range can be found on the wax packaging so make sure to do some research before deciding. Once everything is gathered, cut the wick to length and attach it to a wicking tab so you’re ready for later steps in the process.
Melting & Pouring Temperature Considerations
When melting wax for candle making, it’s important to consider the melting temperature of the wax and pouring temperature. The melt point is the temperature at which the wax begins to liquefy. Pouring temperature is when the wax reaches a certain viscosity and can be poured easily without splashing or snowflaking.
The average melting temperature for paraffin wax is around 130°F (55°C), however, it may vary depending on the blend of ingredients. Soy and beeswax typically have lower melting points in comparison, between 113-122°F (45-50 °C). Once melted, pour temperatures should range between 150-165°F (66-73 °C) depending on vibe-point infusion additives and molds used. Lowering pouring temperatures helps with an even burn while higher temperatures provide more stability. If essential oils or fragrances are being added during manufacturing process, they should be blended into the mix before proceeding with pouring as these ingredients prefer a lower pour temperature (150″160°F or 66″71 °C).
Including Other Materials Embeds, Plants, Etc.
Materials:
Candle Wax: Depending on what type of candle you want to make, you will need either paraffin wax, soy wax, beeswax, or a combination of all three.
Wick: This is an essential component in order to ensure that your candle will burn evenly and safely. You can usually find wicks at craft stores.
Essential Oils (optional): To add scent to your candles, you’ll need essential oils such as lavender, lemon, rosemary and peppermint.
Dyes (optional): If desired, you can use dye pellets to color your candles. Dyes come in liquid form and are safe for use with both paraffin and soy waxes.
Embeds: Embeds are decorative items placed inside the candle such as toy figures, shells, beads or other objects ” much like a snowglobe! Again these can be purchased at craft stores.
Plants (optional): If using an herbal infusion or dried petals or leaves to scent the candle then plants may be added for decoration purposes. Dried herbs blend well with the darker colored dyes for creating an earthy but sophisticated look for any space.
Molds: Choose appropriate molds that match your desired design and size of the candle; various sizes & shapes available at craft stores.
Procedures:
1. Melt the wax: Heat up the wax in a double boiler until it has melted entirely ” do not leave unattended! Make sure to monitor temperature so that it doesn’t exceed 180°C/356°F
2. Prepare the wick: Secure the wick into place to keep it upright within the candle mold using either clothespins or clamps- this will help prevent it from moving around when adding other materials later on
3. Color & Scent :If desired add essential oils & dyes into melted wax – mix and stir until obtained desired shade
4. Add Embeds & Plants : Place decorative items such as embeds & plants into top of melted wax mixture; make sure they are securely set before moving forward
5 Fill Mold : Carefully fill up mold with wax mixture ” do this very slowly since spilled hot liquid onto yourself can cause serious injury; if necessary use gloves to remain safe ! Allow some time for cooling before moving forward
6 Remove From Mold : Unmold once cooled down; trim off excess wick threads carefully + respect distance between flames when lighting up!
Adding Color & Fragrance to Candles Natural Alternatives
When making candles, adding color and fragrance can be an important part of the candle-making process. When incorporating these elements into a candle, there are two options available ” synthetic or natural alternatives.
Synthetic dyes are typically easier to work with since they are more vibrant in color than natural alternatives and disburse better among wax mixtures. Most waxes either come pre-colorized or may require the use of a dye block or liquid dye for tinting purposes. For fragrancing, synthetic fragrances are usually easier to acquire than their natural counterparts because most artifical fragrances come in a variety of scents that make them appealing to customers. Synthetic fragrances can also be used in small amounts and still provide a great deal of scent to large batches of candle wax.
On the other hand, if an individual is seeking an all-natural option while still adding some visual appeal and fragrance to a candle, plant-based pigments and essential oils can be used to achieve these effects as well. Natural herbal extracts may be utilized for coloring purposes; for example turmeric root powder is known for providing a strong yellow hue when mixed with warm water. Additionally, essential oils derived from natural sources such as flowers, herbs, and other plants are able to provide pleasant aromas when added directly into a melted wax mixture or burn pool. Essential oil based fragrances last longer than maximum artificial counterparts due to their higher concentration levels but will also tend to cost more per ounce as well.
Finishing Touches Customization & Packaging
When completing the candle making process, there are several options that can be used to make the customer’s candle unique. Common methods include adding a custom label with a message such as name or special greeting, using custom colors or scents, and personalizing the style of wick. This can also involve packing the finished product in a custom-printed box or bag depending upon the desired style of packaging. Companies should make sure they are aware of any local laws regarding decorations and public safety considerations when designing their candles. Furthermore, the size and type of packaging should be determined ahead of time in order to ensure it is able to safely ship products without damage to its final destination.
Safety Guidelines & Tips Working in a Ventilated Space
It is important to always work in a well-ventilated area when making candles, as the scent of melted wax can be intense. Additionally, working in an open space will decrease the risk of heat buildup around your candle-making supplies and be a safer environment for making candles. Make sure that all sources of ignition (such as gas stoves or pilot lights) are turned off while working with melted wax, and never touch hot equipment such as wick rods or burning wicks. Wear protective eyewear, an apron and oven mitts at all times to prevent burns from any sputters or splashes of hot wax.
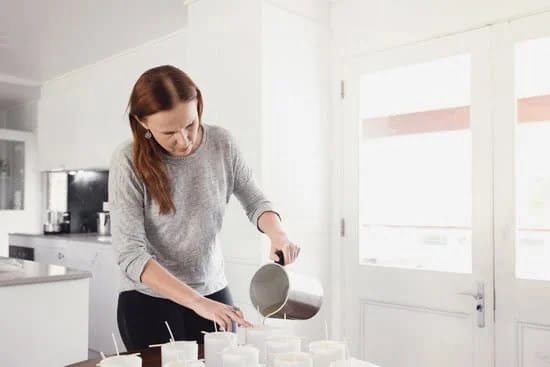
In addition to these safety guidelines and tips, it is also important to ensure you have all the materials necessary for candle-making: a variety of waxes (such as soy wax, beeswax and paraffin), wick rods, fragrances and dyes along with pouring containers or molds for the desired candle shape. Have scissors handy to trim off any remaining wick once your candle has cooled completely. Once your supplies are gathered and you’re ready to start melting wax, use a double boiler system over low heat on the stove top ” this allows you temperature control while heating large volumes of wax evenly without burning it. Once melted, add colorants, scents, wicks and pour into the desired container. Let the candles cool until solid before handling again; most recommended cooling time is between 3-6 hours depending on the size of your container/mold. Finally, trim off excess wick once cooled entirely with scissors and enjoy!
Conclusion Rewards of Taking a DIY Approach
Making your own candles is a fun and rewarding activity. It doesn’t require too much time or money, and the results are often well worth the effort. There are many materials and procedures to consider when making candles, depending on your desired outcome. This includes the choice of wick, wax base, scents, colorants, and molds. The process starts with melting the wax in a double boiler. Once melted, add any desired scents and colorants before pouring into molds. After allowing them to cool completely, remove from the molds and trim off any excess wax from the wicks. The finished product should look beautiful, with bright colors and exotic scents that will turn your home into a candle-lit paradise!
The rewards of taking a DIY approach include cost savings as homemade candles can be produced at a fraction of store prices with none of the shipping costs; creating unique blends of colors and scents that you cannot find in stores; producing quality products that are great gifts for family and friends; learning new skills; inspiring creativity; and gaining an overall sense of pride in one’s own craftsmanship. In today’s busy world it can be hard to find time for creative projects but taking an hour or two out of your week to make your own candles is guaranteed to bring about positive benefits no matter how simple or intricate you take it!

Welcome to my candle making blog! In this blog, I will be sharing my tips and tricks for making candles. I will also be sharing some of my favorite recipes.

