Beeswax has been used for centuries in candle making, and for good reason. Its natural properties make it an excellent choice for crafting beautiful, long-lasting candles. In this guide, we will explore the benefits of using beeswax, the unique qualities it offers, and delve into the fascinating history of beeswax candle making.
When it comes to candle making, beeswax stands out among other materials. Unlike paraffin or soy wax, which are derived from petroleum or crops respectively, beeswax is a renewable resource produced by honeybees. This makes beeswax candles an eco-friendly option that supports sustainable beekeeping practices.
Additionally, beeswax candles have a number of unique qualities that set them apart from other types of candles. They produce a warm and inviting glow that is reminiscent of natural sunlight. Beeswax releases negative ions when burned, which can help to purify the air and improve overall air quality in your space. Furthermore, these candles burn slowly and evenly, resulting in longer-lasting illumination than many other types of candles.
The tradition of using beeswax for candle making dates back thousands of years to ancient civilizations such as Egypt and Rome. In those times, beeswax was considered a precious commodity reserved for royalty and religious ceremonies. Today, we have the opportunity to revive this ancient craft and experience the timeless beauty and charm that only beeswax candles can provide.
In this article, we will take you on a journey through the art of chandlery with a comprehensive guide to beeswax candle making. From understanding different types and grades of beeswax to mastering essential techniques and troubleshooting common issues, you will learn everything you need to know about creating your own stunning beeswax candles. So let’s dive in and discover the rewarding world of bee-inspired candle making.
Understanding Beeswax
Different varieties of beeswax available for candle making
When it comes to beeswax candle making, it is important to understand the different varieties of beeswax available. Beeswax can be sourced from various regions, and each variety has its own unique characteristics. Some popular types of beeswax include white beeswax, yellow beeswax, and filtered beeswax.
White beeswax is naturally bleached or processed to remove impurities and has a lighter color. Yellow beeswax is raw, unprocessed wax that retains its natural yellow hue. Filtered beeswax falls somewhere in between, with some impurities removed but still retaining its natural color.
How the color of beeswax affects the appearance of the candles
The color of the beeswax used in candle making can greatly affect the appearance of the finished candles. Yellow beeswax tends to produce candles with a warm and inviting glow, giving a cozy ambiance to any space. On the other hand, white or bleached beeswax can create candles with a clean and elegant aesthetic, perfect for more modern or minimalist settings. The choice of color ultimately depends on personal preference and the desired atmosphere.
Grades of beeswax and their significance in candle making
Beeswax is graded based on its purity and quality, which can vary depending on factors such as filtration process and source. The most commonly recognized grades are cosmetic grade, organic grade, and food grade. Cosmetic grade is often used for beauty products like lip balms and lotions but can also be suitable for candle making purposes.
Organic grade refers to wax that is produced without synthetic chemicals or pesticides, making it an eco-friendly option for those concerned about sustainability. Food grade refers to wax that meets specific safety standards for use in contact with food items.
It’s important to consider the grade of beeswax when selecting it for candle making, as lower-grade wax may contain impurities that can affect the candle’s appearance and burn quality. Additionally, using food grade or organic grade beeswax can be a good choice if you have specific health or environmental concerns. Overall, understanding the different types, colors, and grades of beeswax will help you make informed decisions and create beautiful candles that meet your specific preferences.
Essential Tools and Materials for Beeswax Candle Making
When it comes to creating beautiful beeswax candles, having the right tools and materials is essential. Here is a comprehensive list of what you’ll need to get started on your beeswax candle making journey:
- Beeswax: The star ingredient in beeswax candle making, this can be purchased in sheet form or as blocks. Look for pure, high-quality beeswax without additives.
- Molds: Choose molds that are specifically designed for candle making with beeswax. Silicone molds work well as they allow for easy release of the finished candles.
- Wicks: Selecting the right wick is crucial for proper burning. Cotton wicks are commonly used for beeswax candles. Make sure to choose a wick thickness appropriate for the size of your candles.
- Fragrance Oils or Essential Oils (optional): If desired, you can add fragrance to your beeswax candles using oils specially formulated for candle making. Essential oils can also be used for natural scents.
- Scales and Thermometer: Accurate measurements are key in candle making. A digital scale will help you measure the correct amount of wax, while a thermometer ensures the wax reaches the proper temperature.
- Pot or Double Boiler: A heat-resistant pot or double boiler is needed to melt the beeswax gently and evenly. Avoid direct heat sources as this may cause overheating or scorching.
- Stirring Utensils: Use stainless steel or heat-resistant plastic spoons or spatulas for stirring the melted beeswax and mixing in fragrance and color.
- Colorants: Beeswax candles can be left natural or dyed using colorants specifically made for candle making. Be sure to choose high-quality dyes that are compatible with beeswax.
- Heat-Resistant Surface: Protect your work area with a heat-resistant surface such as a silicone mat. This will prevent any damage caused by hot wax spills.
Finding quality materials for beeswax candle making is also essential. Look for reputable suppliers who offer pure and sustainably sourced beeswax. They may also provide other candle making supplies such as wicks, molds, fragrance oils, and colorants.
Remember to always follow safety guidelines when working with hot wax and open flames. Adequate ventilation is important to prevent the buildup of fumes, so consider working in a well-ventilated area or using a ventilator. Additionally, wear protective gloves to avoid burns and have a fire extinguisher nearby as a precautionary measure.
With these essential tools and materials in hand, you’re ready to embark on your beeswax candle making adventure. The next section will guide you through the step-by-step process of creating your own beautiful beeswax candles.
Step-by-Step Guide to Beeswax Candle Making
Preparing and Melting the Beeswax
To begin making beeswax candles, it is important to start with high-quality beeswax. Start by gathering all the necessary materials and tools, such as a double boiler or a stainless-steel pot and a heat-resistant container for melting the wax. Use a kitchen scale to measure the desired amount of beeswax needed for the candle.
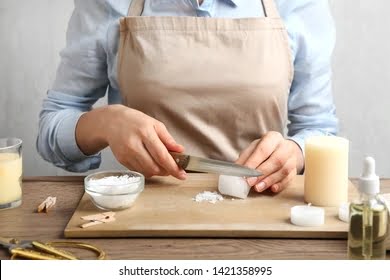
Next, break up the beeswax into smaller pieces or use pellets for easier melting. Place the beeswax in the double boiler or pot, and gently heat it over low-medium heat until it completely melts. Stir occasionally with a wooden spoon to ensure even melting and to prevent scorching.
Adding Fragrance and Color to the Beeswax
Once the beeswax has melted, it’s time to add fragrance and color to enhance your candles. Choose fragrance oils that are specifically designed for candle making, ensuring they are safe to use in melted wax. Add about 1 ounce of fragrance oil per pound of beeswax, or adjust according to your preference for scent strength.
For adding color, there are different options available. Natural dyes such as mica powder or powdered herbs can be used for subtle tints, while liquid candle dye provides vibrant hues. Start with a small amount of dye and gradually increase until you achieve your desired shade. Stir well to distribute the fragrance and color evenly throughout the melted wax.
Pouring the Wax into Molds and Inserting Wicks
Before pouring the melted wax into molds, prepare them by applying mold release spray or coating them with a thin layer of vegetable oil. This will make it easier to remove the finished candles later on. Carefully pour the melted wax into each mold up to three-quarters full, leaving room at the top for proper wick placement.
While waiting for the wax to cool slightly, attach the wicks to the bottom center of each mold using a wick tab or by dipping the wick into melted wax and placing it in the desired position. Allow the wax to cool and solidify before moving on to the next step.
Proper Cooling and Curing Techniques
After pouring the wax and inserting the wicks, it is crucial to allow sufficient time for the candles to cool and cure properly. This process can take several hours or even overnight, depending on the size of your candles. Avoid moving or disturbing the molds during this time, as it may cause uneven cooling and potential defects in your finished candles.
To speed up the cooling process, you can place the molds in a cool room or refrigerator. However, avoid freezing them as this can cause cracks in beeswax candles. Once fully cooled and hardened, carefully remove each candle from its mold by gently pushing on the bottom.
Continue on to “Troubleshooting Common Beeswax Candle Making Issues” for tips on dealing with common problems that may arise during this process.
Troubleshooting Common Beeswax Candle Making Issues
Beeswax candles are known for their natural beauty and premium quality, but like any craft, candle making can come with its own set of challenges. To help ensure that your beeswax candles turn out perfectly every time, it’s important to know how to troubleshoot common issues that may arise during the process. This section will provide helpful tips and solutions for troubleshooting some of the most common beeswax candle making problems.
One common issue that many candle makers encounter is the presence of air bubbles in their finished beeswax candles. Air bubbles can detract from the overall appearance of the candle and make it look less professional. To prevent this problem, it’s important to properly prepare and pour the wax into molds.
The key is to slowly pour the melted wax into the mold, allowing it to cool slightly before pouring more. This will help minimize the formation of air bubbles. Additionally, gently tapping or vibrating the mold while pouring can also help release any trapped air.
Another issue that candle makers may face is uneven burning and tunneling. This occurs when a candle burns down in a way that leaves unused wax along the sides, causing a tunnel-like effect instead of an even burn across the entire surface.
To prevent this from happening, it’s important to use appropriate wick sizes for your specific candle size and container diameter. Using a wick that is too small can cause tunneling because it does not provide enough heat for complete melting and burning of the wax.
Cracks and imperfections in finished candles are another common problem that can arise when working with beeswax. These imperfections can be caused by various factors such as rapid cooling or improper pouring techniques. To avoid cracks, always allow sufficient time for the poured wax to cool and solidify before moving or handling them.
It’s also important to pour the wax at an appropriate temperature – not too hot or too cold – to ensure proper adhesion to the mold. Additionally, properly prepping the mold by greasing it with a release agent can help prevent sticking and potential damages to the candle surface.
In order to troubleshoot wick-related problems, it’s important to consider factors such as wick type and size, as well as fragrance load in the wax. Using the wrong wick can result in poor burning performance and excessive smoking.
If a candle is not burning properly or producing black soot, try using a larger wick size or selecting a different type of wick suitable for beeswax candles. It’s also important to be mindful of the fragrance load in your wax, as an excessive amount of fragrance oil can clog the wick and inhibit proper burning.
By being familiar with these common issues and their solutions, you will be better equipped to troubleshoot any challenges that may arise during your beeswax candle making journey. Remember that practice makes perfect, and don’t be discouraged if you encounter setbacks along the way. Embrace the process of learning and experimentation, and soon you’ll be creating beautiful beeswax candles with confidence.
| Troubleshooting Issue | Solution |
|---|---|
| Air bubbles in beeswax candles | Slowly pour melted wax into molds; tap or vibrate mold while pouring |
| Uneven burning and tunneling | Use appropriate wick sizes for candle size and container diameter; avoid using a wick that is too small |
| Cracks and imperfections in finished candles | Allow sufficient cooling time; pour wax at appropriate temperature; grease mold with release agent |
| Wick-related problems | Select correct wick type and size; avoid excessive fragrance load in wax |
Enhancing Beeswax Candles
Beeswax candles not only offer a warm glow and the soothing aroma of honey, but they also present an opportunity for creativity and personalization. By exploring decorative techniques and ideas, you can transform your beeswax candles into unique works of art that emanate beauty and warmth in any setting.
One way to enhance the visual appeal of beeswax candles is by adding artistic elements. Dried flowers, herbs, or spices can be embedded into the surface of the candle to create a stunning botanical display. To achieve this, simply press the desired items onto the softened surface of the candle before it fully hardens. This technique not only adds texture but also imparts a delicate scent as the candle burns.
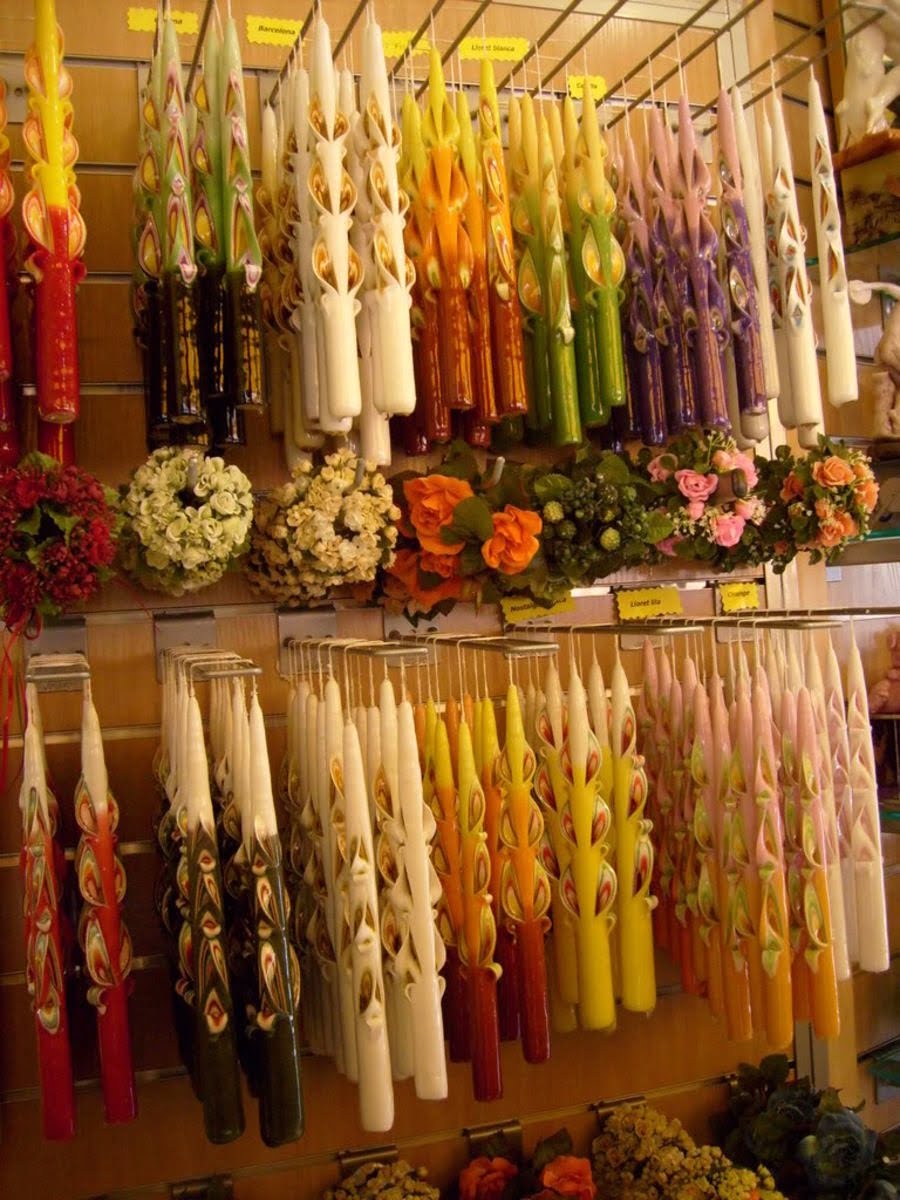
Playing with different textures and patterns can also elevate the aesthetic appeal of your beeswax candles. To achieve a textured look, gently carve intricate designs into the softened surface of the candle using specialized carving tools or even a toothpick. This allows light to shine through the carved areas, casting beautiful patterns on surrounding surfaces when lit.
For those inclined towards sculpting, creating unique shapes and designs with beeswax can be a rewarding creative endeavor. Beeswax sheets are readily available in various colors and can be easily molded into desired shapes like flowers, animals, or even abstract sculptures. One popular technique is rolling sheets of colored beeswax to form vibrant multi-colored candles that are visually captivating.
Safety Precautions and Tips for Beeswax Candle Making
Beeswax candle making can be an enjoyable and rewarding craft, but it is essential to prioritize safety when working with hot wax and open flames. By following the proper safety precautions and tips, you can ensure a safe and successful candle-making experience.
Guidelines for Working with Hot Wax and Open Flames
When melting beeswax, it is important to use a double boiler or a dedicated wax melter to prevent direct contact with heat sources. Never leave melting wax unattended, as it can become extremely hot and potentially cause fires or burns. Additionally, keep flammable materials, such as paper or fabric, away from the stovetop or heating device.
When pouring the melted beeswax into molds, make sure to do so slowly and carefully to avoid splatters or spills. Always wear protective gloves to shield your hands from hot wax and prevent burns.
Using Proper Ventilation and Equipment
Working with beeswax can generate fumes that may be harmful when inhaled. It is crucial to work in a well-ventilated area or use a fume hood to minimize exposure. Consider wearing a respirator mask if ventilation is limited.
In addition to proper ventilation, using the right equipment is essential for safety. Ensure that you have heat-resistant containers, such as metal or glass pouring pots, as plastic containers may melt or deform when in contact with hot wax. Use long-handled tools like spoons or tongs to handle heated materials safely.
Preventing Wax Spills and Fire Hazards
To prevent wax spills while pouring, place newspaper or a silicone mat underneath your workspace. This will catch any drips or overflows and make cleanup easier.
Never leave burning candles unattended. Always extinguish them before leaving the room or going to bed. Keep flammable materials away from lit candles and make sure they are placed on a stable, heat-resistant surface.
Proper storage and disposal of beeswax and candle-making supplies are also crucial for safety. Store beeswax in a cool, dry place away from direct sunlight to prevent melting or degradation. Dispose of used wax and other materials according to local regulations for waste management.
By following these safety precautions and tips, you can enjoy the art of beeswax candle making while minimizing risks. Remember to prioritize safety at all times to ensure a pleasant and hazard-free experience.
| Guidelines | Tips |
|---|---|
| Use a double boiler or dedicated wax melter for melting beeswax. | Work in a well-ventilated area or use a fume hood to minimize fume exposure. |
| Pour melted wax slowly and carefully into molds to prevent spills. | Always extinguish candles before leaving the room or going to bed. |
| Wear protective gloves when handling hot wax. | Store beeswax in a cool, dry place away from direct sunlight. |
Caring for and Enjoying Beeswax Candles
Caring for and enjoying beeswax candles is essential to ensure their longevity and maximize their soothing effects. Here are some tips and recommendations for maintaining and getting the most out of your beeswax candles:
- Extending the Lifespan: To prolong the burn time of your beeswax candles, make sure to trim the wick to about ¼ inch before each use. This helps prevent excessive flickering, smoking, and uneven burning. Additionally, remember to always extinguish the candle completely after use to avoid wasted wax.
- Cleaning and Maintaining Candle Holders: Beeswax can leave residue or build-up on candle holders over time. To keep your candle holders clean and in good condition, gently wipe them with a soft cloth soaked in warm soapy water or a mild cleaning solution. Avoid using abrasive materials or harsh chemicals that could damage the surface.
- Enjoying the Soothing Effects: The natural aroma of beeswax candles can create a calming ambiance in any space. To fully enjoy their soothing effects, consider creating a quiet and relaxing environment while you light your beeswax candles. Dimming the lights, playing soft music, or practicing meditation can enhance the overall experience.
- Incorporating Beeswax Candles into Self-Care: Beeswax candles can be a wonderful addition to self-care routines and rituals. Whether you’re taking a bath, reading a book, or practicing yoga, lighting a beeswax candle can help create a peaceful atmosphere and enhance relaxation.
Remember that safety comes first when using any type of candle. Always place your beeswax candles on heat-resistant surfaces away from flammable materials, pets, and children. Never leave lit candles unattended.
By following these tips and taking proper care of your beeswax candles, you can fully embrace their beauty, tranquility, and benefits for many enjoyable moments to come.
Conclusion
In conclusion, beeswax candle making is not just a craft, but an art form that allows individuals to embrace their creativity and express their unique style. Throughout this guide, we have explored the benefits and joys of using beeswax for candle making, from its natural and sustainable qualities to the beautiful glow and ambiance it brings to any space.
By understanding the different types, colors, and grades of beeswax, as well as acquiring the essential tools and materials needed, anyone can embark on the journey of creating their own beeswax candles. The step-by-step guide provided in this article offers a solid foundation for beginners to follow while still leaving room for experimentation and personalization.
Moreover, troubleshooting common issues that may arise during the candle-making process ensures that individuals can overcome challenges with ease and achieve professional-looking results. By incorporating decorative techniques and exploring various design possibilities, beeswax candles can become not only a source of light but also exquisite works of art.
Therefore, I encourage readers to embrace the art of beeswax candle making by allowing themselves to connect with this ancient craft as they engage in an activity that is both enjoyable and rewarding. Whether it’s for personal use or as homemade gifts for loved ones, beeswax candles provide a unique touch of nature’s beauty within our homes.
Finally, I invite you to continue your exploration of chandlery beyond this guide. There are countless resources available – from books to workshops – which can further deepen your knowledge in this art form. Remember that each candle you create tells a story; let your imagination soar as you continue to discover new ways to bring warmth and joy into your life through the creation of handmade beeswax candles.
Frequently Asked Questions
How do you make the perfect beeswax candle?
To make the perfect beeswax candle, you will need a few key ingredients and materials. First, ensure that you have high-quality beeswax, preferably from a reliable source. Start by melting the beeswax using a double boiler or a wax melter, being careful not to overheat it. Next, add any desired colorants or dyes to achieve the desired hue for your candle.
If you want to add fragrance, make sure to use only essential oils suitable for candle-making to preserve the integrity of the beeswax. Once everything is melted and mixed properly, carefully pour the liquid wax into a prepped container with a properly sized wick in the center. Allow the wax to solidify at room temperature undisturbed for several hours before trimming and lighting the wick.
How many candles does 1 pound of beeswax make?
The number of candles that can be made from 1 pound of beeswax may vary depending on several factors such as the size of each individual candle being produced and how densely its molds are filled. However, as a general estimate, one pound of beeswax is usually sufficient to produce around two medium-sized candles.
Remember that this estimate may not be precise since factors like wastage during melting and pouring can impact the exact number of candles produced.
What is the ratio of essential oils to beeswax for candles?
When it comes to determining the ratio of essential oils to beeswax for candles, it’s important to be cautious and avoid using too much fragrance oil. The recommended guideline is typically around 1 ounce of essential oil per pound (or slightly more) of beeswax.
However, this ratio can also depend on personal preference and the specific essential oil used since certain scents may require less or more concentration for optimal fragrance when burning. It’s always advisable to start with smaller amounts when adding essential oils to melted wax and gradually increase if necessary while conducting small test batches until reaching your desired scent strength without overpowering or compromising the quality of your beeswax candles.

Welcome to my candle making blog! In this blog, I will be sharing my tips and tricks for making candles. I will also be sharing some of my favorite recipes.


