Introduction
Candle making is a wonderful hobby for all ages. Not only is it relaxing and therapeutic, but it’s also an easy and enjoyable way to get creative without needing expensive tools or materials. By following simple instructions, you can create beautiful pieces of art that will add a personal touch to any room in your home or surprise a special someone with a unique and thoughtful gift. With all the fun benefits, the possibilities are endless when it comes to candle making recipes for beginners!
Besides being an affordable pastime that takes very little equipment, candle making has countless benefits. Crafting handmade candles not only adds a personal touch to any décor style or celebration, but they can also be made utterly vegan-friendly and eco-friendly with soy wax and cotton wicks. Additionally, homemade candles require fewer natural energy sources overall than manufactured ones which lowers their carbon footprint significantly. Furthermore, many essential oils have physical and mental health benefits that can be celebrated with their fragrant aromas, making them perfect for using in all types of candles such as tea lights scented with lavender oil to help relax your mind after a long day or gel containers infused with rosemary oil that may help increase concentration while studying.
Essential Tools & Materials For Candle Making
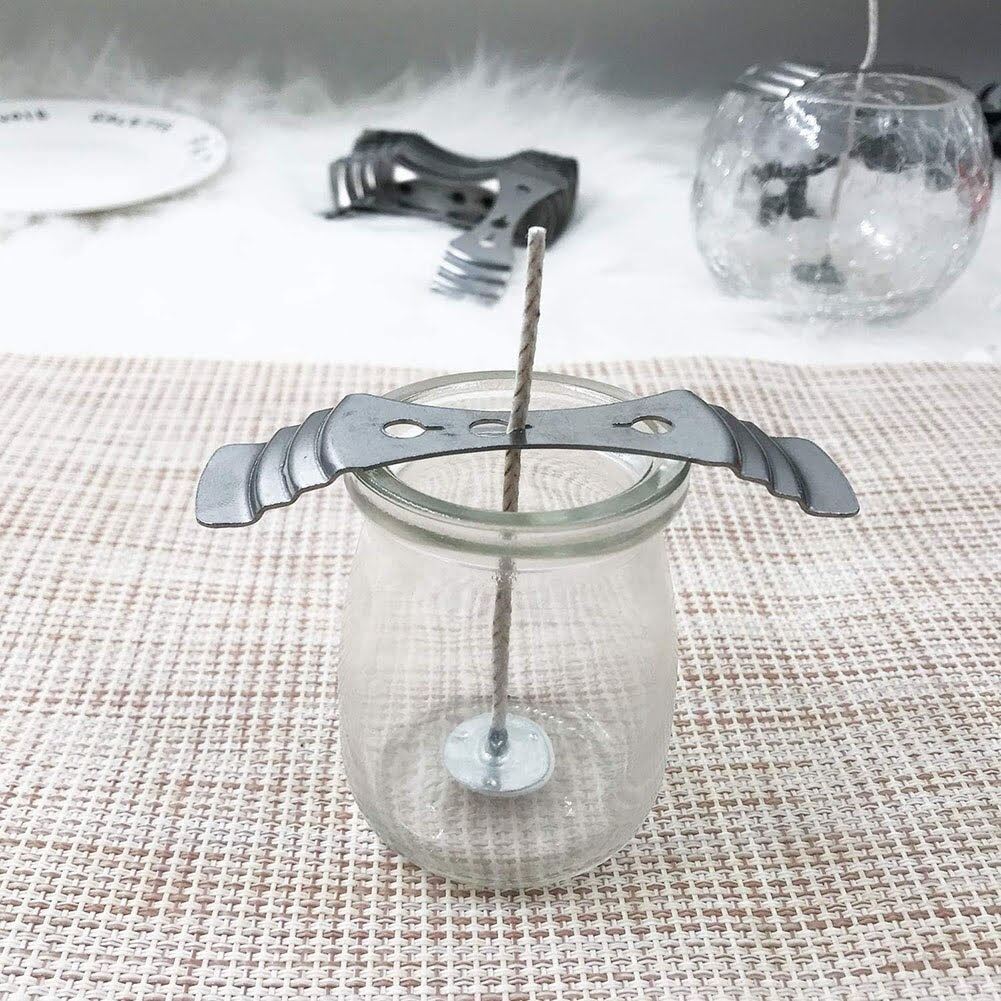
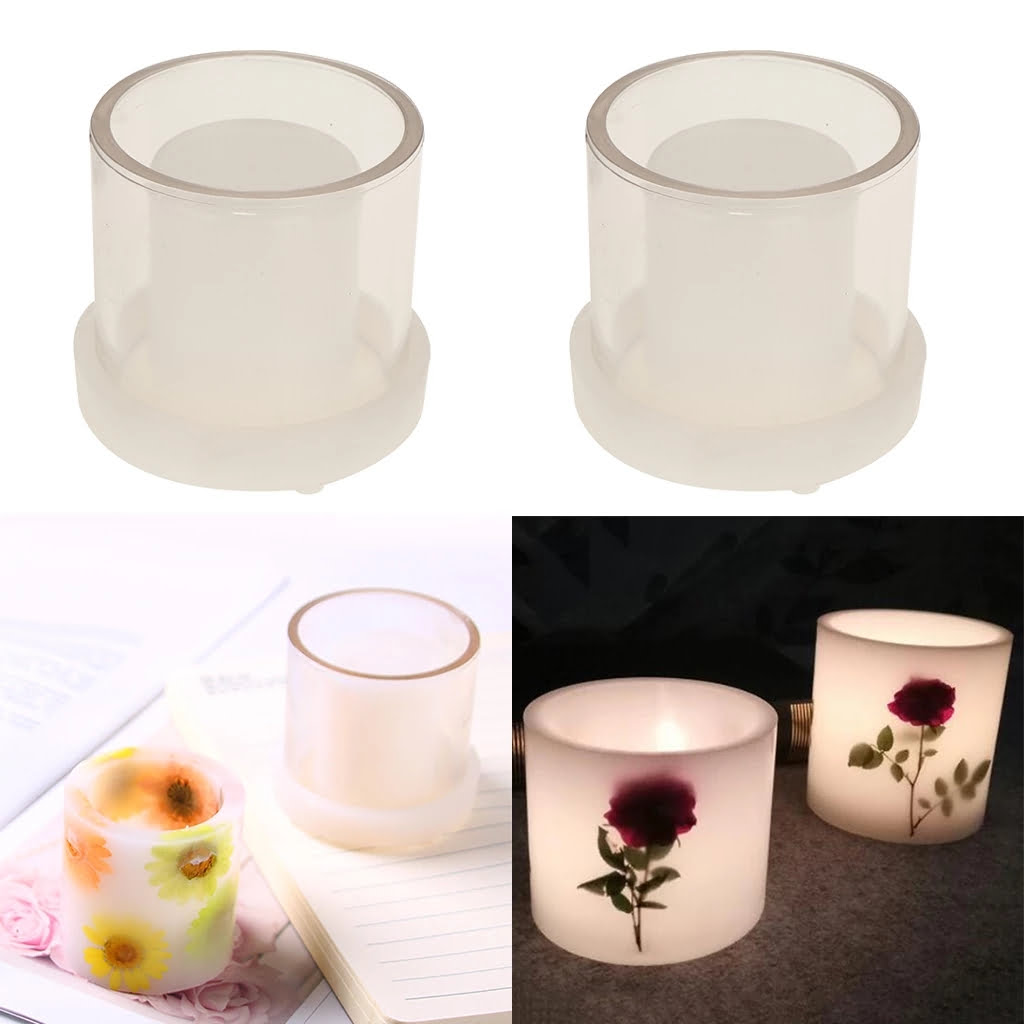
Essential tools and materials for candle making include a heat source, such as a double boiler or a slow cooker; wax, such as beeswax or paraffin; wicks; a thermometer; dye tablets; essential oils (optional); molds; a stirring stick; and metal cutters. Depending on the type of candles you are making, metal tins can be used instead of molds. Additionally, if you’re making scented candles, you will also need fragrance oils to achieve your desired aromas. Before starting your first project, it is very important to have all of the necessary items in order to ensure the best results. It is also helpful to read up on safety precautions for working with hot wax and melting material before diving into candle making.
Safety Guidelines to Keep in Mind When Making Candles
When making candles, safety should be a top priority. Below are some safety guidelines to keep in mind when creating your own handmade candles:
1. Always work in a well-ventilated area. Burning candles and wax produce smoke and fumes that can be hazardous if inhaled over long periods of time.
2. Utilize appropriate protection like gloves and eye-wear when handling hot wax and melting equipment. Wax can cause serious burns and the steam from hot wax is scalding!
3. Use wicks that have been specifically designed for candlemaking – not any old string or fabric found around the house! Make sure the burner size or diameter you’re using is appropriate for both the size of your candle container and the weight of your wax blend being used.
4. Be aware of flammable materials in proximity to an open flame. Candles should never be left unattended, as things such as curtains or even furniture can effortlessly catch fire if located too close to an actively burning candle.
5. Keep young children away during candle production as tools required for creating candles may contain sharp edges or reach high temperatures which creates a potential safety risk to curious little ones who mistakenly believe they can help mommy!
How to Choose the Right Wax Type For Your Candles
Choosing the right wax type for your candles is an important step in candle making, as it will set the tone for your creation. The main types of wax used in candlemaking are paraffin, soy, and beeswax. Each material has its own properties that must be taken into account when selecting one for your project.
Paraffin wax is the most popular and widely available type of candle wax. It is produced from petroleum and therefore has a longer burning time and a smooth texture. Paraffin can also be scented and colored to create vibrant and unique candles, although they may tend to emit some smoke while burning.
Soy wax is made from renewable resources like soybean oil and provides an eco-friendly alternative to paraffin. They tend to burn cleaner than their petroleum-based counterparts and have a lower melting point which makes them great for fragrance releases. Soy candles burn longer than paraffin ones but need particular attention when using metal containers as they can discolor the material if too hot during pouring time.
Lastly, beeswax has been around since ancient times, so it’s no surprise that it’s found its way into current day candle making too! This beeswax produces a more heavenly scent because of its unique ingredients like honey, pollen, and resins. As long as you only use pure beeswax there won’t be any added chemicals or toxins affecting your creations either!
Tips & Techniques For Creating Perfect Candles
Beginners should start by getting familiar with the basic components of candle making: wax, wick, and fragrance. When it comes to wax, there are several choices available. For example, paraffin and soy are two popular options, but beeswax is also a great option for those looking for something natural. Paraffin has a higher melting point than soy and provides a more consistent end product, while soy holds scent better than paraffin.
Wicks come in both natural fibers (usually cotton) and synthetic materials. Natural fibers such as cotton tend to burn cleaner and last longer than some of the synthetic options, however they may require more support from your candle container as they can sag or move around too much during burning. Synthetic options are made of a variety of materials such as rayon or paper-core wicking that provide strong air flow and exceptional burning quality.
Fragrance is essential when creating candles! Oils such as essential oils provide the best, most potent aroma due to their concentrated nature and because they don’t require additional ingredients like chemical fragrances do in order to work properly. However, note that some essential oils may need to be blended in order to create an even aroma profile (this is where Fragrance Formulators come into play). Finally, you’ll need keep in mind that the amount of fragrance used can significantly influence the performance of your candle; too much fragrance can cause your wick to overpower its fuel source or lead to an uneven beeswax surface on top or sides of your candle ” so use sparingly!
Common Mistakes to Avoid When Making Candles
When making candles, common mistakes include not allowing enough time for the wax to cool and harden, causing it to crack or become misshapen. It is also important to slowly introduce heat when melting the wax to avoid scorching. Using the wrong type of wick can also cause issues with burning, as certain wicks are designed for different types of wax. Choosing a wax that does not match your desired rigidity may create an unappealing texture or cause your candle to collapse. If using accessories such as dyes, fragrances, and additives, be sure to read any guidelines provided as incorrect usage could lead to unsatisfactory results. Finally, make sure all tools used are clean and free from residue from past projects in order to maintain a safe pour into the mold.
Recipes & Tutorials for Making Different Types of Candles
If you are a beginner in the craft of candle making, don’t worry! There are many simple and easy recipes available that anyone can make. Before you get started, here is a quick overview of the different types of candles that are available to make.
One popular type of candle is the paraffin wax candle. This type of wax is relatively easy to work with and comes in a wide variety of scents and colors. Paraffin wax can be poured into virtually any type of container, making it very versatile for homemade candle makers.
Gel candles have gained in popularity over the last few years due to their unique appearance and increased scent retention. They require special molds due to their thick liquid state, which when cooled will form an interesting shape like a jelly cup or prism. Gel candles should not be placed in drafty areas or near open flames as they can easily explode at high temperatures.
Another popular technique used by beginners is to use beeswax sheets. These sheets are malleable and come in various sizes, allowing you to create specialty shaped candles such as pillars or tapers without having to use molds or melting wax directly on your stovetop.
Finally, soy candles have become increasingly popular due to them being natural, renewable and sustainable sources for producing light in your home. Soy candles typically hold more aromas than typical paraffin based waxes and can burn longer than other types of waxes as well.
These are just some common recipes for beginners who want to start making their own homemade creations! With the right supplies, time and commitment any kind of candle project can be accomplished with stunning results!
Recipe #1
This simple-to-follow candle making recipe is perfect for beginners. To begin, you’ll need two 16 oz mason jars and lids, 1 lb of pure soy wax flakes, a double boiler, scissors, and two 3 inch pre-tabbed cotton wicks. You’ll also need your preferred scent additive (locally sourced beeswax or essential oil) and parchment paper to protect your surface.
Begin by placing the wax flakes in the double boiler and heating them until melted. Once melted, add 1 tablespoon of your preferred scent”make sure to mix it in thoroughly. Line up the mason jars side by side and cut the wicks to size so that they fit perfectly at the center of each jar. With the parchment paper underneath your work surface, carefully dip one end of each wick into the wax until securely attached to the bottom of each jar. Dispose any excess wax residue before pouring it evenly into both jars until almost full but leave some room for air movement on top. Lastly, place the lid on one side first then wrap a rubber band around both of them simultaneously to secure the wicks in place while they cool overnight. Enjoy your newly made candles!
Recipe #2
Hand-dipped pillar candles are a unique and fun way to make beautiful candles of all different sizes and colors. They require a bit more effort than simply pouring melted wax into a mold, but the end result is worth it! To make hand-dipped pillar candles, begin by melting your choice of wax in a double boiler. Once melted, add some dye and fragrances if desired. Once the wax is completely melted, you’ll need to attach wicks to the candle molds ” for this project, you’ll want a cone shape for your pillar. You can purchase wick pins that clip onto the mold or buy pre-tabbed wicks from most craft stores. Next, securely clamp the molds together with two C-clamps. Finally, you can start dipping the molds into the melted wax! Let each layer harden for around 20 minutes before dipping again until your pillar candle reaches your desired thickness. After it’s finished, you can spray sealant on the outside of it (optional) to give it a glossy look, or top with decoration like glitter or sequins!
Recipe #3
Making Salt Candles is an ideal DIY activity for the beginner candle maker! This simple recipe only calls for two ingredients”salt and wax ” plus a few basic tools to make beautiful, eye-catching candles.
To start, you’ll need to gather your supplies: one pound (or more!) of salt crystals; a container of wax flakes such as soy, beeswax or paraffin; wicks; double boiler; and heatproof molds (such as heat-resistant glasses). You can either purchase these items separately or buy them all together in a ready-made candle making kit.
To begin making your salt candles, use the double boiler to melt the wax flakes while stirring regularly until they are completely melted down. Once melted, pour the liquid wax into your heatproof molds and slowly add your salt crystals until they reach the desired thickness. Place the wick in each mold and allow it to set up completely. Once cooled, you can now enjoy your unique salt candles! Use multiple colors of wax with varying levels of salt crystals to create interesting shapes, sizes and effects. For added decoration, try adding decorations like sprigs of dried flowers or colorful beads into your molds before pouring in the wax!
Recipe #4
Gel candles make for an attractive and unique handmade gift! They are simple to make and can be customized by using a variety of colors, scents and molds. For this recipe you will need the following ingredients:
-A small heatproof bowl
-7 ounces of Gel Wax
-Approximately 1/2 ounce of candle dye
-3/4 teaspoon of your desired fragrance oil
-Candle wick or hemp cord (preferably one that is self-supporting)
Directions: Begin by preparing your mold before melting the wax. This may involve lightly greasing the inside with vegetable oil (depending on the type of mold), adding some decorative accents, or wrapping with ribbon. Next, place the gel wax into the heatproof bowl and gently melt it in a double boiler over low heat (do not boil). Once melted, add in the candle dye and stir until it is evenly incorporated. Then, stir in the fragrance oil until well blended in. Lastly, pour your melted wax into each of your prepared molds very slowly, being careful not to splash or spill it outside of the molds. Insert your premeasured wick or hemp cord into each hole in the center of each mold before they cool completely. Let cool until fully set before carefully popping out candles from their molds. You now have stunning homemade gel candles ready to enjoy ” or to give as heartfelt gifts!
Recipe #5
For this candle making recipe, you will need the following supplies: wax pellets, wick, colored string or rope (a natural fiber is best), double boiler or crockpot, thermometer, and a container to make the candles in. Begin by heating the wax pellets in a double boiler or crockpot until the temperature reaches 167 degrees Fahrenheit. Then add in your chosen colored string or rope. Wrap it around the wick several times before fully submerging it into the wax. Allow the wick to absorb enough of the wax before removing it and placing it onto your prepared mold. Once cooled, remove your candle and trim any extra string as desired. Finally, enjoy your handmade candle!
Creative Ideas for Decorating Your Own Candles
Candle making is a fun and enjoyable hobby, especially for beginners. Whether you want to make candles as a gift or just to add some extra decoration around the house, it can be an easy and affordable activity. With a few simple recipes and ideas, everyone can make beautiful candles of all shapes and sizes.
For those hoping to make their own candles, there are plenty of different scents, colors, and styles available. A popular choice is soy wax as it holds its shape extremely well, produces small amounts of soot when burned, and creates a nice creamy finish after hardening. If you’d like to customize your candle further, essential oils can be added for natural fragrances such as lavender or eucalyptus. Scented oil can also create unique combinations such as rosemary and citrus for something a bit more creative! Next comes the wick – choose cotton wicks that are specially designed for container candles if the finished product will stay in one spot or metal-core wicks if they will done off around the room.
When it comes to decorating your own homemade creations, there are loads of options out there! From adding color with dye chips or glitter to choosing different vessel sizes or textures (e.g., glass jar vs tin cupcake mold). You could also use ribbons or fabric folded up into flower shapes secure them with hot glue gun on top of the candle before pouring in the melted wax mixture ” the possibilities really are endless! Try out different techniques until you find your favorite combination – there’s truly no limit when it comes crafting candles at home.
Tips for Storing & Extending the Life of Your Candles
When it comes to storing and extending the life of your candles, there are a few simple tips you can follow to ensure they stay safe, looking lovely and lasting as long as possible. First, be sure to store your candles in a cool, dark place out of direct sunlight or near any source of heat (such as a stove). This will help to prevent them from melting or warping. Secondly, invest in some lid containers for your candles so that dust does not settle on them and potentially compromise their flame. Finally, always burn your candles responsibly by following the manufacturer’s instructions on wick size and length as too much wick can cause them to flicker and produce black smoke. Furthermore, each time you light your candle make sure that the wax pool has reached from edge-to-edge before extinguishing ” this will stop the candle from tunneling (creating an uneven shape within the container) and burning through quicker than expected.
Concluding Remarks on Candle Making For Beginners
Making your own candles is a fantastic and rewarding activity that anyone can enjoy! There are plenty of recipes for beginners to try, from scented soy votives to layered gel tapers. Before beginning any recipe, be sure to take all necessary safety precautions. Always use appropriate supplies such as cotton wicks and waxes rated for candle making. Ensure that the area you work in is well ventilated and free of drafts. Once you have the basics down, experimenting with different recipes will be sure to bring a smile to your face. Have fun creating beautiful, unique candles in no time at all!

Welcome to my candle making blog! In this blog, I will be sharing my tips and tricks for making candles. I will also be sharing some of my favorite recipes.

