Introduction
Making candles at home is a great way to bring the warmth, comfort and ambience of candlelight into your own home. Candles can be made in various styles, sizes and scents. Home-made candles also provide a great opportunity to express creativity through color, design and scent selection. Making candles at home is also more economical than purchasing from a store – you can purchase bulk wax and create several candles for a fraction of the cost. In addition to having the freedom of customizing your candle however you choose, making them at home allows you to carefully monitor what wax or emissions are put into the atmosphere; using natural ingredients whose origins you trust will ensure that your homemade creations are as safe as possible.
Gathering Supplies
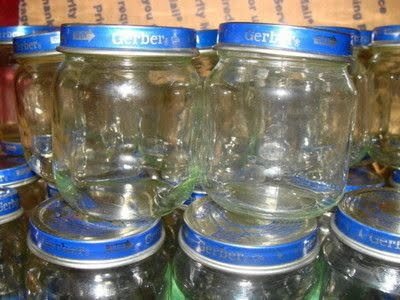
Making a candle at home with wax is an enjoyable and easy craft project that anyone can do. To get started, you will need to gather the necessary supplies. These include wax (preferably beeswax or soy wax), wicks of various sizes, a metal mold or container for the candle (mason jars work great for this!), thermometer (optional but helpful), essential oils and/or fragrance oils, and some type of heatproof bowl or pot. You may also want to have on hand scissors, pencils, and glue dots.
Once you have gathered all the necessary supplies, you are ready to make your candle! Before getting started with the wax melting process it is important to prepare the molds or containers with wicks attached. This can be done by adding glue dots to one end of the wick, then pressing them onto the bottom center of each container. Use a pencil to hold the wick in place while you fill each container with melted wax. This helps keep it centered within each jar before it solidifies too quickly.
To begin melting your wax using your heat-proof bowl or pot over a simmering pot filled with water is recommended as this allows for more steady temperature control. If you wish you can use a food thermometer to check that your wax won’t exceed 210°F. Once the desired temperature is reached add in any essential oils and/or fragrance oils for scent if desired; about 3-4 tablespoons for every pound of wax should be used for best results when creating scented candles. Stir these around until fully blended in before pouring carefully into molds or containers where previously arranged wick was placed; allow candle materials an appropriate amount of time to harden before burning up 2 hours depending on their conditions when preparing them.
Preparing the Wax
Preparing the Wax:
1. Choosing a Wax Type: When making a candle at home with wax, one of the most important steps is selecting the right type of wax to use. There are different varieties available including paraffin, beeswax, and soy. Each wax type offers different characteristics when it comes to burning time, scent and color. For instance, beeswax candles have a natural yellow hue and hold their shape well when burning; soy candles burn cooler than paraffin but do not hold as much scent.
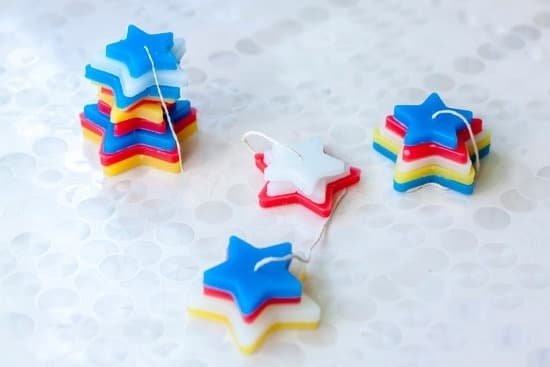
2. Choosing Proper Mixture: In order to achieve the desired characteristics from your candle-making project (burn time, scent strength and color), you will need to combine different types of wax in just the right proportions. This can be tricky, so starting with pre-mixed blends is highly recommended for beginners. Wax melts can also be used if you wish to create multiple pillars instead of one larger candle.
3. Using Alternative Methods: If you’re looking for something outside of traditional wick & wax methods, you can also experiment with alternative techniques to create unique candles at home with wax such as rolling melted wax into sheets or pouring them over shells or containers filled with dried flowers or herbs ” both methods will give your homemade candles a beautiful rustic touch!
Pouring the Wax
1. Understanding the Heat Point Process: Before you start pouring your wax, you need to understand heat point process. This is the temperature at which waxes melt and solidify when mixed with natural additives, such as oils and butters. If your wax has a lower heat point, it means that it melts faster and more easily when heated. So the higher your heat point is, the stronger and more durable your candle will be.
2. Designing The Container: When designing the container for a homemade candle, consider size and safety first. Generally speaking, non-porous material such as glass or metal makes an ideal holder for a candle’s wax base, as these materials do not absorb any of the added ingredients during the melting process. Also make sure that whatever container you choose won’t shatter when exposed to direct heat from a burner or stovetop.
3. Preparing The Wick: Once you’ve chosen your container, it’s time to prepare the wick for burning once the wax is poured into it. Most wicks are made from either cotton or paper; whichever you choose, pre-soak them in melted vegetable oil before placing them inside the container to ensure your candles burn evenly over time and avoid any smoky residue when lit up. Positioning them correctly along the center of your container also helps keep air bubbles away from forming around segments of burnable space; this will prevent uneven burning and help extend the life of your candles significantly!
Decorating and Designing
Making your own candles at home is not just a fun craft that adds a personal touch to your living space, it can also make great gifts for friends and family. Making candles isn’t difficult but does require some planning, patience and appeal. The first step is to select the wax you will be using in your candle; this could be beeswax, paraffin, soy or even palm wax depending on what look and scent you want to achieve.
Once you have selected the type of wax, determine if it needs to be melted before pouring it into your mold or container. If needed, melt it slowly over low heat — never leave unattended and do not let the wax reach too high of a temperature as this can cause burning in both scent and color. After melting any necessary wax, add several drops of colorant such as crayon shavings to give your candle some depth of color.
With coloring complete, now comes the tricky part – creating custom fragrances. You can mix essential oils with vegetable oil for a milder smell or use fragrance oils for a stronger finish – adding more scent at whichever degree you prefer until you are pleased with the overall potency. When satisfied with your custom blend, stir into the melted mixture slowly until everything is evenly combined.
Finally pour all of ingredients (scent included) into the container that best fits your candle crafting aesthetic so that your candles don’t just smell amazing but are visually appealing as well! Be patient while they cool; this takes time – enjoy a cup of coffee while you wait! After completing his process and waiting for them to cool completely, voila! Your masterpiece is done!
Finishing your Candle
Combining Wax Types: Depending on what kind of candle you are making, you can combine different wax types for optimal results. If you are looking for a harder or longer-lasting candle, you could use a combination of beeswax and paraffin wax. Paraffin wax is often used in votive and container candles as it has a lower melting point compared to other wax types. Additionally, if you want your candle to burn slowly, you could use a combination of soy wax and palm oil wax which both have lower melting points for an even burning appearance.
Adding Decorative Touches: Once you’ve decided on the type of wax combination that works best for your project, there are many ways that you can decorate your candle. Adding color pigments to the melted wax will create unique designs and shapes when poured into the mold. You can also add scents such as essential oils or herbs that correspond with your desired design or fragrance preference. Furthermore, adding accents like glitter or dried flowers can be an attractive addition to mix in with the melted wax.
Cleaning Your Space: After completing your candle, it is important to make sure all of the tools used during the process are thoroughly cleaned so they can be used again at a later time. For example, after removing any unmelted wax from containers and molds using warm water, it is highly recommended to ensure all surfaces are wiped down with warm soapy water and dried properly before storage for next-time projects. Since mistakes are always possible when creating homemade candles, be sure to keep safety in check by avoiding open flames or hot surfaces until all cleaning is complete!
Enjoying the Finished Product
Making candles at home with wax is a wonderful way to enjoy the serenity and relaxation of candlelight in your home. Not only can you create beautiful decor items, but you can also enjoy the calming scent of essential oils or herbal blends of your choice. To make your own candles with wax, there are several easy steps you will need to follow:
1. Pick out the right type of wax: The most commonly used types of wax for making candles are paraffin and soy wax. Paraffin is pretty easy to work with and has excellent heat stability so that it burns evenly. Soy wax is also becoming increasingly popular because it’s natural and much cleaner than paraffin-based candles.
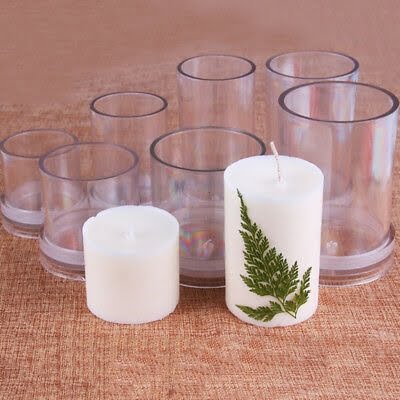
2. Get some containers or molds: You’ll need to decide whether you want to make jar candles or use molds for votives or tapers. If you’re going for molds, it’s important to find ones that are easy to remove once the candles have cooled off completely.
3. Choose your wick: If done correctly, wicks will determine how well your candle ultimately burns. There are various types of wicks available, each made from different material; cotton core (most widely used), paper core (better flame quality but more prone to smoking), and flat braided (great flame quality).
4. Add in scent if desired: Candle fragrances come in liquid form or pre-measured scented beads which dissolve at set temperatures during the melting process so they will not be lost during the cooling period. Scented scents may be added either before pouring into containers or after by spritzing lightly on top with a fine spray applicator bottle filled with diluted essential oils and water solution.
Once finished with these steps, you can then appreciate the finished product in all its beauty! Enjoying scented candles offers many benefits beyond merely providing light throughout any room; it is also known for being therapeutic and can help promote relaxation due to their soothing aromas that may allow people to disconnect from stressors and tune into their inner selves more effectively. In addition, lighting up scented candles around the house helps create an atmosphere suitable for winding down after a busy day while providing sensory pleasure through its sights, smells and soft dancing flicker of the flickering flames – all of which combined help us better relax our minds and bodies in harmony with each other!
Conclusion
Making a candle with wax at home requires several steps and a lot of precision. The most basic method is to melt wax in the microwave, then pour it into a heatproof container with a wick at the bottom. Allow for the wax to cool and solidify. As you start experimenting with this process, there are some key tips to follow for success:
• Always safety first ” use oven mitts when handling hot wax and never leave the microwaved melting bowl unattended while it’s in use
• Use high-quality wax, such as soy or beeswax
• For best results, add just a few drops of scented oil once the melted wax reaches 140 °F
• Place wicks strategically – they should be centered in the vessel or slightly off center to prevent smoking
• Trim away any excess wick after the candle has solidified
• Ensure even pouring when adding melted wax – do not overfill containers.
In conclusion, making candles at home with wax is an enjoyable hobby that requires preparation and patience in order to ensure optimal results. When using quality ingredients, following safety measures and paying attention to detail, you can create beautiful handcrafted candles with ease!

Welcome to my candle making blog! In this blog, I will be sharing my tips and tricks for making candles. I will also be sharing some of my favorite recipes.


