Introduction
Candle making is a fun and creative hobby that allows anyone to create natural candles from the comfort of their own home. Natural soy wax is a great option for those who would like to achieve a more eco-friendly approach to candle making. Soy wax is used because it burns cleaner than traditional paraffin wax and can come in a variety of scents to create unique candles. The use of Mason jars allows you to have a consistent look while still using durable materials that will resist heat.
When using soy wax, there are many different factors that must be kept in mind such as the melting points, mixing temperatures, proper wick size and scenting basics. Melting points refer to the temperature at which the wax melts, this must be done properly so that not too much or too little heat is added. Mixing temperatures refer to adding different types and amounts of fragrance oils to create unique combinations and also allowing themroom temperature before pouring into containers. Another important factor when making candles with soy wax is selecting the appropriate wick size for your project, too large or small of wick sizes may cause burning issues. Finally, scenting basics include being aware which essential oil combinations are safe for each type of candle you make – some may be overpoweringly strong whereas others could actually weaken the strength of your candle due to their potency.
Candle Making Materials
Essential Materials:
Soy Wax: Soy wax is an excellent choice for candles as it is slow-burning, yields strong scent throw and creates vibrant colors. It is also eco friendly and burns cleanly with very little soot produced.
Mason Jars: Mason jars are a convenient option for making your own candles as they come in various sizes, allow you to control the amount of wax used, and provide a safe base for burning.
Wicks: Ensure you have enough appropriate size wick for the jar size that you are working with. For example, if using a large 16 oz Mason jar, you would need a 6 inch wick. This can easily be found at any craft store or online product retailer.
Colorant & Scent: Any type of cosmetic grade colorant and/or natural essential oil blend is suitable to add to soy wax to customize your candle’s appearance and smell. However, it is important to use the correct ratio of colorant and scent when adding them to soy wax; too much will create smoke when burning resulting in an unpleasant experience!
Double Boiler & Thermometer: It is advisable to use two separate pots (one larger pot filled with water and one smaller pan) as this will enable direct heat transfer from the water pot to the pan; this lower temperature allows for better control over wax melting temperatures as well as minimizes smoking emission associated with high temp burning caused by direct heat sources such as stoves or flame-lit burners. Also make sure that you have a reliable thermometer capable of measuring temperatures between 120 ” 220°F (50 ” 105°C).
Ruler & Scissors: Lastly, ensure that you have both a ruler and scissors ready; these tools will assist significantly in cutting the wicks accurately – resulting in even burning candles!
Optional Materials/Tools:
Pouring Pitcher/Bowl & Stirring Spoon/Spatula : This can be helpful when transferring melted wax from one vessel (double boiler pot) into another containing Mason jars etc.; pitchers or bowls can create an easier pouring process while stirring spoons or spatulas can help mix colors effectively prior to pouring into containers.
Candle Molds & Adhesive Tape : If opting out of using mason jars altogether then candle molds will be necessary (with tape utilized around the bottom edge). Alternatively, adhevise tape could also be useful in conjunction with mason jars – attaching wick tabs firmly onto jar lids so that wick remains securely upright during pouring phase.
Bee’s Wax : To add an extra layer of luxury feel/each time upgrade consider blending bee’s wax into mix which can result smoother surfaces post burn time frames -increasing primary shelf life span on each individual hand crafted soy candle created!
Candle Making Steps
1. Choose your mason jars: Start by selecting the perfect mason jars for your soy wax candle craft. Make sure to select sturdy, quality mason jars that will hold up when filled with the melted wax. Some popular variations include pint-sized, quart-sized, straight sided, and wide mouth mason jars.
2. Prepare your wicks: Once you have selected your ideal mason jars, it’s time to prepare the wick. Cut the wick down to size so it is only a few inches above the surface of the jar. Additionally, make sure to use an adhesive sealant on the bottom of each wick in order to ensure they are properly secured within each Mason jar before pouring your melt wax.
3. Melt Soy Wax: Now that your wicks have been ordered, it’s time to start melting down your soy wax for pouring into each Mason jar. To melt down this type of wax most efficiently, use a double boiler set up where one metal pan rests inside of another water-filled metal pan on a stove top burner set on low heat for continual stirring until completely melted & reachable temperatures between 120 and 140 degrees Fahrenheit (49 – 60 degrees Celsius).
4. Pour Soy Wax Into Jars: Once your soy wax has been fully melted down and reaches optimum pour temperature carefully funnel or ladle the melted wax into individual Mason jars close enough to just cover their wicks but not go over them entirely in order to avoid spillage and possible fire hazards from flammable hot liquid spilled over flame or onto surrounding objects or areas.
5. Finishing Touches: Upon successful completion of pouring equal amounts of melted soy beeswax into each Mason jar with respective secure firmly placed wick in center of jar or containers leave some space at top for when fluid cools and partially solidifies again as it contracts around darkened encased vertically centered intact air trapped handmade natural candle Wick creating traditional shaped enjoyable ornamental functional candles!
Adding Fragrances, Coloring and Toppings
One great way to personalize your soy wax candles is by adding fragrances, colors and toppings. Depending on the type of fragrance that you choose, it can either help create a calming mood or an invigorating atmosphere. There are many different types of essential oils that you can use for this purpose, such as lavender, orange, peppermint and much more. Aside from essential oils there are also scented waxes available in craft stores and online which will allow you to easily add a nice scent to your candle. Colouring your soy wax candles can be done with either dye chips or liquid dyes depending on how vibrant of a colour you want to achieve. Popular colour choices include yellow, red, green and even black if you want a more mysterious looking candle. Toppings for soy wax candles are also an option for adding an extra touch of individualization and styling them up. These range from items like flower petals, glitter or other small decorations that bring visual interest to the jar when lighted up at night. All these elements when combined carefully will help make unique and beautiful candles each time you make one!
Filling the Mason Jars
Measure the amount of soy wax needed for each candle beforehand. Make sure to use a kitchen scale and measure in ounces. This will help ensure an accurate pour when adding the wax to the Mason jars.
Before you begin, prepare your workspace with tools like newspaper, cookie sheets, and wicks. Place the Mason jars on flat surfaces like wooden cutting boards or breadboards.
Melt your soy wax in a double boiler over low to medium heat. Use caution when melting wax because it can become dangerous if not heated properly.
When pouring the melted soy wax into the Mason jars, it’s important to do so slowly and steadily. If your Mason jar is too full, use a spoon or chopstick to stir the surface of the melted wax before it cools to help fill in any air bubbles that may have formed when pouring. Also be sure to leave enough space at the top of your Mason jar for any embellishments that you want to add later on.
Allow your candles plenty of time to cool and set correctly before lighting them. A few hours should be enough time for them to solidify completely before they’re ready for use!
Display Ideas
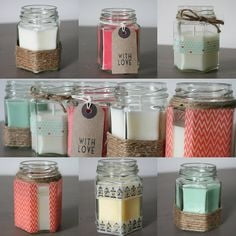
If you’re looking for a unique way to display and decorate your natural soy wax candles in mason jars, there are many creative options to consider. A popular option for displaying these gorgeous creations is to place multiple mason jars together in the same area or group them together on shelves or tables. You can also use painted mason jars to make a statement and add a charming touch of color to your home. Another idea is to surround the candle with decorations such as ribbons, flowers, strings of beads, or fabric swatches. This adds an extra level of detail and artistry to your candle making project. Additionally, you can also create themed displays that tie in with special occasions or seasons like Christmas or Easter by adding small figurines, holiday trimmings, ribbon wreaths, etc. Lastly, hanging mason jar candles around the house is an excellent way to create instant ambiance in any room and make a unique lighting source at the same time.
Lighting Tips
When lighting the candles in your mason jars, it is important to keep a few things in mind. First, ensure you use the correct wick size for the width of your mason jar; wicks that are too small can lead to burning issues. Before lighting your mason jar candle for the first time, allow it to sit overnight until the entire top has been solidified. This creates a better seal and guarantees the even flow of heat when lit which can extend its burning time.
Before lighting, trim the wick to ¼ inch before each burn so that there are no wax dripping problems or other issues due to too much smoke or carbon buildup on the wick. You may want to slightly rotate your mason jar while doing this process to help even out any bumps in wax buildup on its surface as well. Ignite by only using wooden matches or long stem lighters, avoiding short lighter sticks that may get too close and cause problems.
Keep an eye on your candle when lit and never leave it unattended- make sure you supervise for at least 30 minutes after lighting for optimal burning effects. The added heat from being lit can sometimes cause fractures in cooler spots which can lead to an unstable flame (known as “mushrooming”). If you happen to notice this happening, extinguish the flame safely and gently rearrange your candles wax layers with a non metallic object such as a wooden spoon if necessary before reigniting again afterwards.
Cleaning and Care Guidelines
Cleaning your Mason Jars and Soy Wax Candles is a vital part of candle making. Before you begin making any candles, it’s important to make sure that all of your supplies are clean, so they produce the best quality candles that last longer and burn cleaner.
Cleaning Mason Jars: Always handle your jars with care when handling them and cleaning them”these can be very fragile. To remove residue from the outside of the jar or any dirt inside the jar, use a clean cloth and warm water with a mild soap. Be sure to rinse the jar very well with warm water and dry thoroughly with a towel before reuse.
Caring for Soy Wax Candles: When you’re finished making your soy wax candles, take extra measures to help ensure their long life by cutting the wicks to an appropriate length before lighting them. Taking proper care of your soy wax candles includes never burning more than four hours at a time and trimming wicks as needed as they burn down. Keeping wicks trimmed will help avoid soot build-up in the jar or on its lid, but also preserves the life of oils in scent too!
Safety Tips
1. It is essential to practice appropriate safety measures when making candles with mason jars and soy wax. Wear gloves and goggles to protect your hands and eyes from hot wax and fragrances.
2. Make sure the area where you are conducting candle making activities is free of combustibles such as papers, rags, or other flammable items. This will reduce the risk of fire hazards occurring.
3. When melting your soy wax always make sure you follow the manufacturer’s instructions carefully and use recommended temperatures to maintain safety. Aim for a lower melting temperature so that you do not have to worry about the wax overheating or becoming too hot for handling or contact with glassware used for your mason jar candles. Take necessary precautions when handling hot containers which contain melted wax as they can burn if touched directly when warm.
4. Exercise caution when mixing in fragrance oils during candle making, as they are highly concentrated and can cause irritation if exposed directly to skin or inhaled in large quantities; wear protective gear such as face masks, gloves, pants and long-sleeved shirts while mixing scents into the melted wax.
5. Set up a dedicated space for pouring your soy wax into mason jars away from any furniture or upholstery that could be damaged by spilled hot liquid wax; a covered table should work perfectly but any place with good airflow will suffice to prevent any build-up of fumes caused by burning candles within close proximity
6. Allow the candles made with soy wax in mason jars time to cool down before attempting to move them from one place to another; this measure helps prevent accidents caused due to the fluidity of warm candles once they are removed from existing casings such as Mason jars before they have hardened completely
Conclusion
Overall, candle making with natural soy wax in mason jars is a project that requires patience and technique. It comes with plenty of rewards ” as you take your time to learn the fundamentals, practice and gain experience, you can create beautiful, scented candles that will add an inviting atmosphere to any room. Whether you’re just starting out or if you’re an experienced candle maker looking to refine your skills, natural soy wax in mason jars provides great options with regards to customization and potential setup. Taking the time to practice, experiment and learn new techniques will go a long way towards improving your craftsmanship and the quality of your candles. Candle making should be enjoyable and rewarding; taking small steps on each new project can make this hobby even more fulfilling. Above all else, careful attention should be paid at every step of the way to ensure safety for yourself – and anyone around you – throughout this fun process.

Welcome to my candle making blog! In this blog, I will be sharing my tips and tricks for making candles. I will also be sharing some of my favorite recipes.

