Are you looking to learn the art of candle making with beeswax? In this article, we will provide you with step-by-step instructions for creating beautiful candles using beeswax. Beeswax is a natural and versatile material that can be used to make high-quality candles, making it a popular choice for candle makers. Whether you’re new to candle making or an experienced crafter, these instructions will guide you through the process of creating your own beeswax candles.
Beeswax candle making is not only a fun and rewarding hobby, but it also offers several benefits over traditional paraffin wax candles. In this section, we will explore the advantages of using beeswax for candle making and why it is a preferred choice among many crafters. From its natural fragrance to its clean-burning properties, beeswax has become a go-to material for those who want to create environmentally-friendly and sustainable candles.
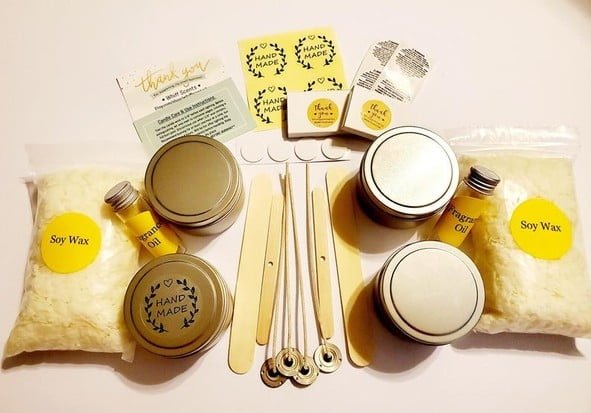
Before you begin your beeswax candle making journey, it’s important to gather all the essential materials. From wicks and molds to fragrance oils and dyes, having the right supplies at your disposal is crucial for a successful candle-making experience.
In the following sections, we will discuss in detail the necessary materials needed to start making your own beeswax candles from the comfort of your home. Get ready to unleash your creativity and embark on an exciting adventure into the world of beeswax candle making.
Benefits of Using Beeswax for Candle Making
Beeswax has been used for centuries in candle making due to its numerous benefits. As a natural and renewable resource, beeswax is a popular choice among candle makers who want to create high-quality, eco-friendly candles. In this section, we will explore the many advantages of using beeswax for candle making.
Clean and Non-Toxic
One of the main benefits of using beeswax for candle making is that it burns cleaner and produces less soot than other types of wax. This means that beeswax candles are non-toxic and do not release harmful chemicals into the air when burned, making them a healthier option for both the environment and your home.
Long-Lasting Burn
Beeswax candles have a significantly longer burn time compared to other types of wax, such as paraffin or soy. This means that you can enjoy the glowing ambiance of a beeswax candle for much longer, making it a cost-effective choice in the long run.
Natural Honey Scent
Another appealing benefit of beeswax candles is their natural honey scent. When burned, beeswax releases a delicate fragrance reminiscent of honey, which adds to the overall sensory experience of candlelight. Additionally, this natural scent makes beeswax an excellent base for adding essential oils or herbs to create custom fragrances for your candles.
Getting Started
Beeswax candle making is a delightful craft that allows you to create beautiful, natural candles with a warm, honey-like scent. To get started with beeswax candle making, it’s important to gather the essential materials needed for this project.
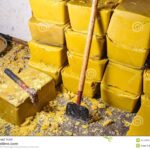
The key ingredient, of course, is beeswax, which can be found in the form of sheets or blocks. You will also need wicks specifically designed for beeswax candles, as well as a double boiler or melting pot to melt the wax.
In addition to beeswax and wicks, you will also need a few other basic materials such as a pouring pitcher, a thermometer to monitor the temperature of the melted wax, and molds or containers for shaping your candles. It’s important to choose molds that are suitable for use with beeswax, such as silicone or metal molds. Finally, don’t forget about tools like a stirring stick and a cutting tool for trimming the wicks.
As you gather these essential materials for beeswax candle making, it’s also worth considering investing in high-quality ingredients. Beeswax from reputable sources will ensure that your candles burn cleanly and efficiently. Similarly, using top-notch wicks and fragrances can elevate the quality of your homemade candles. By starting with the right materials, you’ll be well on your way to creating stunning beeswax candles that you can enjoy or share with others.
Step-by-Step Instructions for Making Beeswax Candles
Beeswax candles are a popular choice for candle making due to their natural aroma, clean burn, and long-lasting qualities. Here we will discuss step-by-step instructions for making beeswax candles at home.
Materials Needed
Before you begin making beeswax candles, gather the essential materials. You will need beeswax sheets or blocks, candle wick, scissors, a double boiler or melting pot, a pour pot, fragrance oils (optional), and color dye (optional).
Preparing the Beeswax
Start by cutting the beeswax into small chunks if you are using blocks. Place the beeswax into a double boiler or a melting pot and melt it over low heat. Be careful not to overheat the wax as it can become flammable.
Assembling the Candle
Once the beeswax is completely melted, take a pre-tabbed wick and dip one end into the melted wax. Then center the wick on one end of the beeswax sheet and carefully roll it up tightly around the wick. Press down on the edge to secure it in place.
Following these step-by-step instructions for making beeswax candles will help you create your own beautiful and aromatic candles at home. Experiment with different colors and scents to personalize your creations and enjoy the soothing glow of your handmade beeswax candles.
Tips and Tricks for Achieving the Perfect Beeswax Candle
Beeswax candles are a great option for those looking to create their own natural, eco-friendly candles at home. Here we will discuss some helpful tips and tricks for achieving the perfect beeswax candle.
When making beeswax candles, it is important to use high-quality beeswax for the best results. Look for pure beeswax from a reputable supplier to ensure that your candles burn cleanly and evenly. Additionally, using 100% cotton wicks will help promote an even burn and prevent excessive dripping.
Another important tip is to properly prepare your work area before starting the candle making process. Beeswax can be sticky and difficult to clean, so covering your work surface with parchment paper or a silicone mat can make cleanup much easier. It’s also a good idea to have all of your materials and tools organized and within reach before you begin melting the beeswax.
Furthermore, when pouring the melted beeswax into your candle containers, be sure to do so slowly and steadily to avoid air bubbles forming in the wax. This will help ensure that your candles have a smooth, professional-looking finish. After pouring, allow the candles to cool and harden completely before trimming the wick and enjoying your beautiful homemade beeswax candles.
| Tips & Tricks | Benefits |
|---|---|
| Use high-quality pure beeswax | Natural & eco-friendly option |
| Prepare work area for easy cleanup | Clean burning & even distribution of fragrance |
| Pour melted wax slowly & steadily into containers | Professional-looking finish & even burn |
Adding Fragrance and Color to Beeswax Candles
One of the many benefits of making candles with beeswax is the natural aroma it provides when burned. However, if you want to enhance the scent further, you can add fragrance oils to your beeswax candles. When choosing a fragrance oil, make sure it is specifically designed for candle making and is safe to use with beeswax. Essential oils are also a great option for adding natural scents to your candles.
To add color to your beeswax candles, you can use dye chips or blocks made specifically for candle making. These dyes come in a wide range of colors and are designed to be safe for use with beeswax. Be mindful of the amount of dye you use as too much can affect the burning quality of the candle. It’s best to start with a small amount and gradually add more until you achieve the desired color.
When adding fragrance and color to your beeswax candles, it’s important to do so at the correct temperature. Adding fragrance oil or dye when the wax is too hot can cause them to evaporate or burn off, affecting the overall quality of your candles. Follow the specific instructions provided with your fragrance oil or dye for the best results.
| Benefit | Description |
|---|---|
| Natural Aroma | Beeswax provides a natural scent when burned, but additional fragrance oils can enhance this aroma. |
| Color Options | Dye chips or blocks designed for beeswax candles provide a range of colors that can be added during the candle making process. |
| Safety Caution | It is important to add fragrance and color at the correct temperature in order not be affecte in overall quality. |
Safety Precautions When Working With Beeswax
When working with beeswax for candle making, it is important to prioritize safety to avoid any accidents. Beeswax, although a natural material, can still pose some risks if not handled properly. Here are some essential safety precautions to keep in mind when working with beeswax:
- Protective Gear: It is crucial to wear protective gear such as gloves and an apron to shield your skin and clothing from hot wax and potential splatters.
- Well-Ventilated Area: Ensure that you work in a well-ventilated space to minimize inhalation of fumes and to prevent the buildup of potentially harmful gases as the wax melts.
- Use of Heating Equipment: When melting beeswax, be cautious when using heating equipment such as double boilers or melting pots. Avoid direct heat sources like open flames which can cause the wax to catch fire.
Moreover, it is also important to consider additional safety measures such as keeping a fire extinguisher nearby in case of emergencies and being mindful of hot surfaces. By taking these safety precautions, you can enjoy the process of making beeswax candles while minimizing any potential risks.
Lastly, it’s important to remember that beeswax should never be left unattended while melting, as it could easily overheat and become a fire hazard. Always exercise caution and supervise the melting process closely from start to finish. With these safety measures in place, you can focus on creating beautiful candles with peace of mind.
Creative Candle Making Ideas Using Beeswax
Beeswax candles are not only a sustainable and eco-friendly option, but they also provide a unique opportunity for creativity. Once you have mastered the art of making beeswax candles, there are plenty of ways to take your creations to the next level. Here are some creative candle making ideas using beeswax to inspire you:
Rolled Beeswax Candles
One of the most versatile ways to create unique beeswax candles is by rolling sheets of beeswax into various shapes and designs. This method allows for endless possibilities, from simple rolled tapers to intricate patterns and colorful designs. All you need is sheets of beeswax, wick, and a little creativity to get started.
Embedded Objects
Adding embedded objects such as dried flowers, herbs, or decorative elements can elevate the beauty of your beeswax candles. Consider incorporating natural elements that complement the warm glow of beeswax for a stunning visual effect. Just be sure to follow safety precautions when adding any materials to your candles.
Layered Beeswax Candles
Layering different colors of beeswax can create striking and visually appealing candles. By pouring layers of differently colored melted beeswax at specific intervals, you can achieve beautifully blended designs or even create eye-catching patterns within the candle itself.
These creative ideas are just a few examples of how you can elevate your beeswax candle making skills. Whether you’re looking to add decorative elements or experiment with different techniques, the possibilities for creative expression with beeswax candles are endless. So don’t hesitate to let your imagination run wild and explore new ways to make stunning beeswax candles that reflect your personal style and creativity.
Conclusion
In conclusion, beeswax candle making is a timeless and rewarding craft that offers a plethora of benefits. Not only does beeswax provide a natural and clean-burning alternative to traditional paraffin wax, but it also offers a subtle honey-like fragrance and a beautiful golden hue. By following the step-by-step instructions for making beeswax candles and incorporating essential materials, anyone can create their own homemade candles with ease.
When embracing the art of beeswax candle making, it is important to keep in mind the safety precautions when working with beeswax. Ensuring proper ventilation, using heat-resistant containers, and being cautious around open flames are crucial steps to prevent accidents and ensure a safe candle-making experience. Additionally, adding fragrance and color to beeswax candles can enhance the aesthetic appeal and create personalized scents that suit individual preferences.
Furthermore, creative candle making ideas using beeswax allow for endless possibilities in terms of shapes, sizes, and decorative accents. Whether creating pillar candles, votives, or even experimenting with unique molds and designs, the art of beeswax candle making offers an avenue for creativity and self-expression. Overall, embracing this craft allows individuals to not only create beautiful candles for personal use or gifting but also to connect with nature through the use of pure beeswax.
Frequently Asked Questions
What Do You Mix With Beeswax to Make Candles?
Beeswax is typically mixed with a variety of materials to make candles, including different oils like coconut oil or essential oils for scent. Some also add in a small amount of resin to help the candle burn more evenly.
What Is the Ratio of Beeswax to Oil for Candles?
The ratio of beeswax to oil for candles can vary depending on personal preference and the type of candle being made. A commonly used ratio is around 70% beeswax to 30% oil, but some may prefer a different balance for their specific candle making needs.
How Do You Process Raw Beeswax for Candles?
Processing raw beeswax for candles involves several steps, including melting the raw beeswax to remove any debris or impurities in it, such as bits of honeycomb or pollen. After melting, the beeswax is typically filtered through cheesecloth or a fine mesh strainer to remove these impurities before it can be used for candle making.

Welcome to my candle making blog! In this blog, I will be sharing my tips and tricks for making candles. I will also be sharing some of my favorite recipes.

