Introduction
Fragrance candles can be a great addition to any home for providing an overall sense of wellness and reduced stress levels. Fragrance candles offer many opportunities for creating your own unique atmosphere by using different blends of quality essential oils. Not only will these oils give your space a subtly pleasant smell, but they also have various aromatherapy benefits associated with them that can help to reduce anxiety, promote relaxation and improve focus. In this article, we will provide you with a step-by-step guide on how to make fragrance candles that best suit your needs.
To begin, choose the type of wax to use in your candle making experience. Though beeswax is the most popular choice, there are many types of waxes available such as soy wax, paraffin wax and coconut wax that offer great results. It’s important to weigh the pros and cons of each option before making your selection.
Once you’ve chosen the type of wax, select the scents or essential oils you’d like to incorporate into your candle project. You should consider not only what smells best but also which aromatherapy benefits associated with different oils might be helpful for creating a soothing environment in your home (e.g., lavender oil has been used historically as a calming agent). Researching such details beforehand may assist you in finding the perfect scent blend for achieving desired outcome from your fragrance candles.
Next comes the actual candle making process; measure out small amounts of the melted wax using an appropriate scale, pour the liquid wax into individual molds (this could range anywhere between small travel tins or votive candlesticks), then add 10″20 drops of essential oil per pound of melted wax while stirring gently to combine all ingredients thoroughly together until completely mixed in; let cool slightly before adding more essential oil if necessary but be sure not too overdue it as overly strong scents can have negative effects instead! Finally install wick tabs into each mold before pouring mixture directly in – this allows tip top results as they hold wicks uprights while they cure and form properly around sides so don’t forget these! Finally put aside until fully hardened over several hours before trimming wick down or giving away in gift boxes with decorations for added presentation value – voila!
Types of Waxes
There are several types of waxes available for making fragrance candles, each with its own melting point and characteristics. Paraffin waxes typically have a melting temperature of around 130-140 Fahrenheit (54-60 Celsius). This type of wax is easy to work with, as it melts quickly and maintains shape when burned. It is a common choice for making containers, pillars, votives, and other molded candles. Soy wax offers a more renewable alternative to paraffin wax with similar melting temperatures (around 135 Fahrenheit/57 Celsius). Furthermore, soy wax often burns longer than paraffin due to its lower melt density. Beeswax is popularly used in votives and tealights due to its ability to hold fragrance oils without the use of additives. It has a high melting point – typically around 145 Fahrenheit/63 Celsius – and possesses a natural golden color when melted. Palm wax has started gaining popularity in recent years due to its hardness and slow melt rate; when burned, this type of wax can produce “feathers” or idiosyncratic patterns on the surface of the candle that many find attractive. It generally has a higher melting temperature than other types of waxes, ranging anywhere from 158-180 Fahrenheit (70-82 Celsius). Finally, coconut oil-based blends offer flexibility in mix ratio as they blend easily with different types of oils more readily than other options like soy or paraffin. They have high smoke points making them ideal for seating core wicks inside container candles; these may range from 312 degrees (92 Celsius) all the way up to 600 degrees (316 Celsius).
Melting the Wax
When melting the wax for fragrance candles, it is important to ensure that the wax is heated properly and safely. The most common ways of melting the wax are through a double-boiler, a microwave oven, or a slow-cooker.
For melting wax on the stove top in a double-boiler, fill the lower pot with an inch of water and place it onto medium heat. Place the wax into the upper pot (or pan) and allow it to melt slowly, stirring regularly so it does not burn or form lumps. Once completely melted, remove from heat and let cool before transferring to molds or containers.
The second option for melting wax is in a microwave oven. Using this method requires precise timing to get it right – place your wax into a heat safe container, set at medium power for about four minutes then check if fully melted. If not, then repeat process in intervals of 30 seconds until all of the wax has melted but not burned or discolored.
Finally, some people prefer using a slow cooker when making fragrance candles as they tend to provide even heat and burn more evenly than other methods due to its low temperature setting over longer periods of time. Line your slow cooker with parchment paper before adding your desired amount of grated or chopped up paraffin or beeswax into it ” keep an eye on it as you may need to scrape down any buildup along the sides – use medium heat setting and stir occasionally until melted. When finished, turn off heat and remove remaining chunks of un melted wax with tongs then pour mixture into containers while still hot (be careful when doing this step). Allow cooling before decorating candles with scent oils/additives as well as decorations such as confetti or herbs.
Pouring the Wax
For making fragrance candles, you will need to begin by preparing your mold properly. Wax molds are usually made from metal, ceramic, glass, or even silicone and should be very clean in order to get a good finish on your product. Once the molds are ready, you can begin by heating wax until it reaches approximately 170-180 degrees Fahrenheit, being careful not to overheat as this will negatively affect performance.
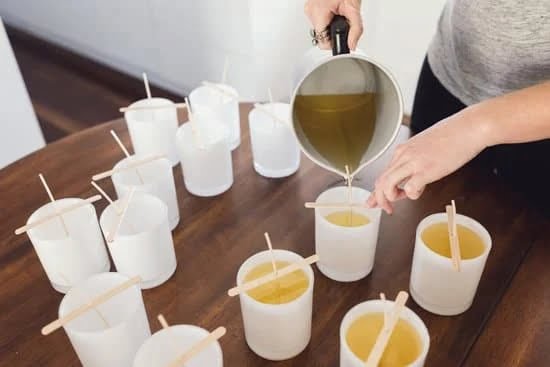
When your wax is hot enough, you can start pouring it into the molds. It is important to pour slowly and evenly in order to keep air bubbles out of the finished candle. Additionally, pouring too quickly may cause excess wax to accumulate on the edges of each mold. Move the pot of wax slowly around each mold while pouring and wait for the steam or bubbles to settle at regular intervals throughout pouring; this helps create an even and balanced surface in each candle when done correctly. If any stray drops or streaks appear while pouring, they can easily be removed with a cotton swab or nail brush later on during cooling.
Scents and Colorings
Adding scent and color to your candles can give them that extra special touch. There are a few ways you can go about doing this.
Essential oils are the most popular choice to add scent when making candles, as they have a naturally strong fragrance. When selecting an essential oil for your candle, choose one that corresponds with the type of atmosphere or environment you would like to create with your candle. For example, if you want to evoke the feeling of relaxation, Lavender is a great oil to use. Essential oils should be added towards the end of the process before pouring your wax into containers.
Adding waxes or oils (such as paraffin or soy) is also a great way to add scent and it’s best done at the same time as adding wick stabilizers/primers and dyes/color blocks. Waxes are available in both scented and unscented varieties so you can choose which suits your project better. Scented wax provides more of an aroma than just adding essential oils alone, plus it’s usually cheaper than essential oils too!
Dye/color blocks are widely used when making candles and come in various colors – from pastels to bold shades like red and blue – that will give your finished product a unique look. Adding these blocks needs to be done during your melting process because they don’t dissolve well in cold wax; simply add them slowly until you achieve the desired level of color intensity.
Letting the Candles Set
Once you have poured your wax into the jars, allow your candles to cool and harden. Depending on the size of the candles, this can take anywhere from 4-10 hours. It is important to let the wax cool in a draft-free area so that it can harden evenly.
After your candles have cooled, they will need to air-cure for at least 24 hours before they are ready to be used. Air curing helps remove volatile components (such as solvents) and allows any imperfections in the wax surface to even out after cooling. Additionally, it allows for any fine particles or excess scent carrier oils to evaporate from the surface of the candle. After your candles have cured for at least 24 hours, you can light them up and enjoy their beautiful fragrance!
Unmolding the Candles
Molded candles come in a variety of shapes and sizes, and all can be gently pulled out of the mold with some patience and care. To unmold a candle, start by lightly flexing the sides of the mold. If you are having trouble separating them, dip the entire mold into hot water for 15-20 seconds to soften the wax before trying again. Once unmolded, quickly invert the candle onto a hard surface coated with either cornstarch or talcum powder to reduce sticking. Be sure to handle your freshly-made candles carefully as they are delicate and prone to cracking. When you are not using them, store them flat in sturdy cardboard boxes lined with tissue paper to protect their shape and decorative finish. With proper handling and storage, your candles will be beautiful for years to come!
Finishing Touches
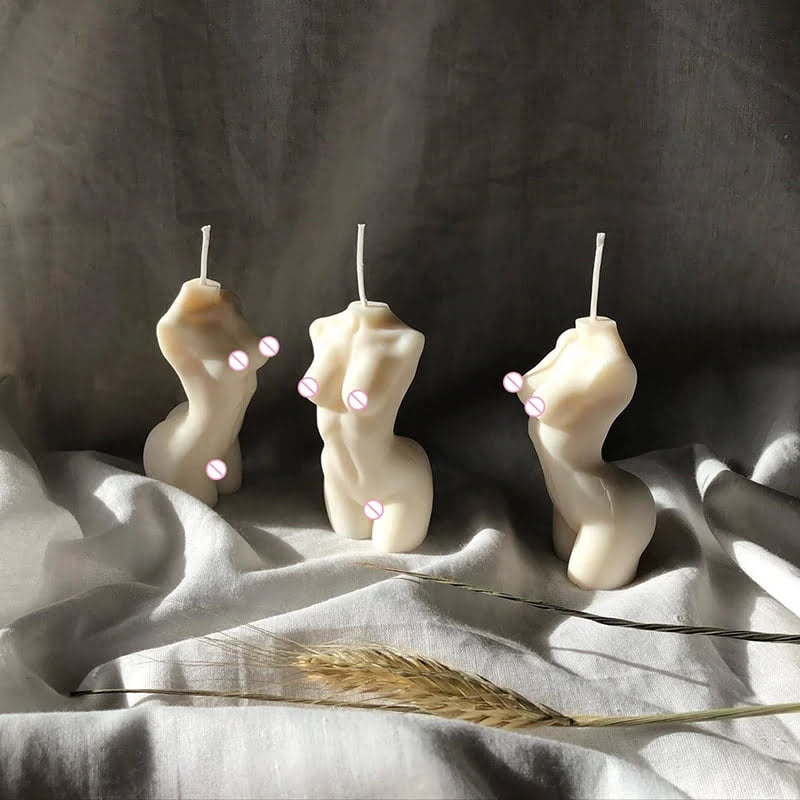
Candle-making is a craft that allows you to create your own uniquely fragranced candles. When making fragrance candles, there are many finishing touches you can add to make your candle look most professional. First, when putting the wax in the container, be sure to tamp it down firmly as this will help keep the container from having air bubbles or gaps in between the wax. To really enhance the visual appeal of your finished product, you can use decorative components such as colors for swirling, mica powders for shimmer and tinted glitters for sparkle. You can also enhance the look with embellishments like beads or molded objects, such as seashells or real flowers and herbs. Finally, adding a label with your company name or personal message can really complete the look of your candle. These finishing touches will go a long way in making your final product stand out from traditional store-bought candes and create a unique experience every time your customers light one of these fragrant candles.
Safety Precautions
Making candle scents is a fun, creative hobby that can be both exciting and therapeutic. However, it’s important to ensure you’re taking steps to ensure the process is as safe as possible. Here are some useful tips for providing a safe environment while making candles and burning them:
• Make sure you are working in a well-ventilated area and keep away from any open flames or heat sources like stoves or ovens.
• Ensure all wicks are kept vertical while melting wax with either an electric hot plate, double boiler system, or melting pot.
• Wear protective eyewear and gloves while handling hot wax to prevent any accidents that may occur due to suddenly splattered wax.
• Be extremely careful when handling wax that’s near or at its melting temperature of almost 200 degrees Fahrenheit as it can cause serious burns if it comes in contact with skin.
• Always use approved containers for candlemaking such as glass, metal, ceramic porcelain molds that won’t easily catch fire. Do not make pillar candles in glass jars without further protection (like using a heat shield).
• Test your new scented candles with care before lighting, ensuring the fumes do not prove too strong for enclosed spaces without proper ventilation.
Tips and Tricks
Making fragrance candles is an enjoyable activity that can often be productive. Taking the time to properly prepare your supplies and double-check measurements will make all the difference when it comes to final results. Here are some helpful tips and tricks for making candles with ease:
1. Choose a scent you like – whatever type of candle you plan to make, spend time selecting a scent or essential oil that will fill your home with pleasing aromas once lit. Check customer reviews, compare price points and figure out what fragrances will create the atmosphere you want.
2. Invest in quality materials – using high quality ingredients helps ensure that your candle burns evenly, smells great and looks appealing once completed. Look for beeswax, wick, container, dye and fragrance oil specifically designed for use in candle making before getting started.
3. Measure out carefully – measure out wax chips/flakes according to product instructions and pour them into a double boiler on medium heat until completely melted down (~120°F). If adding scent or coloring, mix them in after wax has melted entirely and stir until fully incorporated. Make sure not to overheat!
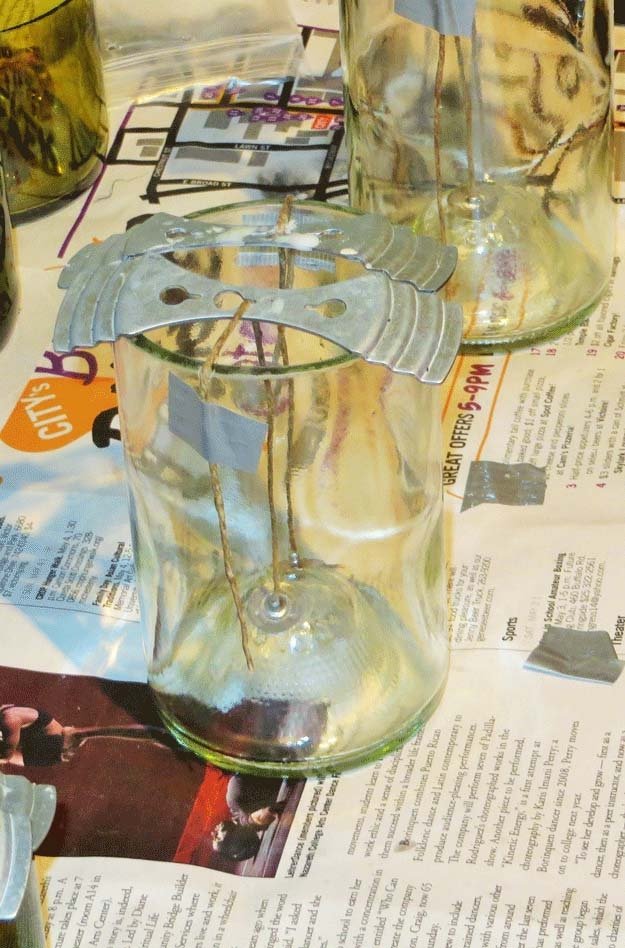
4. Pour correctly – place wick into the container and secure it with a clothespin or wire holder before slowly pouring wax into container at least 1 inch below rim of container to avoid overflow during burning process. Wait 10-15 minutes between each pour (ensuring fusion) if layering different colored waxes together; let cool completely between layers as needed ” otherwise bubbling can occur from uneven temperature levels which can potentially ruin the mixture!
5. Unmold correctly – wait 8 hours in general before attempting to unmold car candles; this allows for perfect adhesion of material without risking any breakage due to too hasty removal from tin/jar during curing stage after cooling period passes” then gently pull away from sides so as not stress/damage flame conditioner (wick) inside*
Conclusion
Making fragrance candles at home can be highly therapeutic and creative. There are endless possibilities for creating the perfect candle, through experimenting with various fragrances, colors, and materials. By adding essential oils to melted wax, and customizing a container according to your taste, you can make a unique candle that reflects your own personal style. As you become more experienced in making candles, you can even explore other techniques such as swirling colors or decorative molds. No matter what type of candle you choose to make, it’s sure to look beautiful and smell amazing! Whether you’re looking for an enjoyable activity or simply trying to relax after a long day, making your own custom-crafted candle is a great way to discover a fun new hobby and enjoy the therapeutic power of scents.

Welcome to my candle making blog! In this blog, I will be sharing my tips and tricks for making candles. I will also be sharing some of my favorite recipes.

