Introduction
Making scented candles without essential oils is an excellent way to enjoy the therapeutic benefits of scented candles. When making candles without essential oils, you’ll need wax, a container for your candle, a wick, and something to give your candle a scent. In most cases, fragrance oils or extracts can be substituted for essential oils to give your candle its desired scent. Here’s a step-by-step guide to making scented candles without essential oils.
Step 1: Choose the Right Container
The first step in the process is choosing the right container for your candle. The size and shape of your container will play a big role in how well your finished product looks and smells. Make sure that it’s not too small as this could cause potential safety issues due to overheating of wax during burning. It’s also important that you choose a container made from heat resistant material such as glass or ceramic.
Step 2: Prepare Your Wick
Once you’ve chosen the right container for your candle, it’s time to prepare your wick. If necessary, trim down the length of the wick so that it fits comfortably within your chosen container with at least two inches room between the top of container and top of wick once placed inside (this is important for fire safety). It is important that when choosing a wick you pick one suitable to handle greater temperatures otherwise it can be easily damaged when melting/pouring hot wax – particularly for larger containers.
Step 3: Prepare Your Wax
Now it’s time to melt down some wax! Heat up some wax in a double boiler until it reaches its liquid form then pour into your chosen container ensuring not to overfill – if at anytime this occurs allow additional minutes for wax inside container cool before topping up with extra melted wax as required . . .
Gather Your Supplies
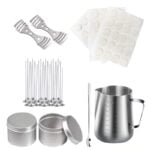
To make scented candles without essential oils, you will need: wax (paraffin or soy wax), candle wicks, and a variety of scent items such as herbs, spices, fruits and nuts. For tools, you’ll need some sort of container to hold the wax while it melts (microwavable ceramic or glass is recommended) and something to stir with. It’s also useful to have a thermometer to monitor the temperature when melting the wax.
Once your supplies are gathered together decide what type of candle mould you want to use — jars are great for multiple uses — or if you plan on making pillar candles then choose a shape that suits your needs. If you’re using pillar moulds then make sure that they are made of metal or plastic otherwise the melted wax may leak through. If you don’t want to use a mould at all then place your wick in the desired spot in any non-flammable vessel or cup.
Next, begin melting your wax; set up a double boiler (a heat safe container inside another heat safe container filled with an inch of water) over medium flame and slowly melt approximately 1 ½ times more wax than space available in your vessels as some will evaporate. Once melted allow this first layer of wax to cool slightly — around 165 degrees Fahrenheit — before adding scent items such as fresh herbs, spices, chopped fruits and/or nuts along with essential oil drops if preferred. Stir ingredients into melted wax until thoroughly combined; ensure that scent items do not float on top surface as this can cause them to catch fire when lit later on!
Finally pour your scented liquid wax into prepared containers leaving room for additional layers if desired. Once cooled for about two hours attach wicks securely by wrapping their base around pencils resting across tops of vessels if needed so that wicks stay upright during process once released from pencil allow candles sit undisturbed for 12-24 hours before lighting and enjoying.
Fragrance Options
Fragrance options that don’t require essential oils are endless. Some candle makers use synthetic fragrances in the form of fragrance oils, while others use natural ingredients or supplies such as herbs, spices, teas, various juices and extracts. Additionally, some vegetable or animal fats can also be used to achieve a desired scent. Many retailers offer pre-made scented wax blocks in a variety of different scents that make it easier for candle makers not to employ essential oils.
Alternatively, you can incorporate essential oils into your candles in an indirect manner that is safe and avoids contact with the oil directly. One way to do this is by using high content waxes infused with essential oils, called “fragrant pastilles”. These allow candle makers to easily add essential oils without any risk of leakage or potential damage from direct contact. Another method is making infusion blends with beeswax and drizzling them over the melted wax for candles. Alternatively you can place small amounts of the essential oil on special absorbent sachets or cotton swabs inside the jar away from the wick that will disperse fragrance into the air when lit—just remember to never place these directly in contact with the flame source as this may cause a safety hazard!
Candle Wax
When it comes to making scented candles without using essential oils, the type of wax you use is very important. There are various kinds of waxes available for candle making, each with different characteristics and burning qualities. If you’re making a natural candle, you will want to use a vegetable-based wax (typically soy), which is both renewable and sustainable. Alternatively, paraffin wax is a popular choice because it has a good scent throw, but some people may object to its non-renewable origins. Beeswax can also be used for natural scented candles since the scent does not have to be added at all – the scent comes from honey. A blend of beeswax and paraffin can create an inviting aroma too.
If you are wanting a stronger scent throw or a more durable candle, then using gel candles could be the best option as they hold up well in higher temperatures. Gel candles also tend to burn longer than regular wax candles as well so it’s useful if you want your scented candle to last longer than usual. It’s important to choose the right wax depending on what type of candle you plan on making that way your finished product will live up to your expectations!
Melting the Wax
When it comes to melting and tempering the wax of your candles, there are multiple methods you can use. The most common methods are with a double boiler, on the stovetop, or a microwave.
A double boiler is a preferred choice for those making candles as it yields a controlled temperature and results in an even melt throughout the wax. A double boiler requires two vessels – one that holds water and one that fits inside with the candle wax. In order to ensure your safety while working with this equipment, take extra caution and always be sure to keep any hot items kept away from children or pets. In addition, resist any temptation to put cold items directly into your heated containers of melted wax as this could cause splattering which may result in skin burns or dangerous spills.
Alternatively, you can use your stovetop to melt candlewax by placing it in an aluminum container and heating it using low-to-medium heat levels. Just like when using the double boiler method – make sure you keep all flammable objects away from the flame and never leave it unsupervised. Once again, keep all hot items away from little hands and paws!
Lastly, the microwave is also an effective method for melting down wax although should be done so with caution due to its extreme temperatures and effectiveness at quickly reaching dangerously high levels. Monitor every 15 seconds of heating time until it’s fully melted then remove immediately from showing signs of smoke/overheating from occurring- remember once again not to leave any hot item unattended.
To scent your candles without essential oils you can use ingredients such as Rubbing Alcohol 90%, Safflower Oil Extracts, Bakery Grade Purees (like Grapefruit), Fragrance Oils (such as Sweet Smelling Spices & Essential Oils), Cupcake Sprinkles, Vanilla Extract (Yep!), dried herbs such as Lavender Buds – just stick them into pouring pot when wax begins to melt & stir around for about 5 minutes before pouring into molds!
Adding the Fragrance
Adding fragrance to your scented candles without essential oils is an easy process that can be done at home with ingredients you likely already have on hand. The first step is to decide what type of scent you’d like your candle to have. This could be anything from citrusy orange blossom or a light vanilla, whatever suits your fancy!
Next, Do a simple substitution: Instead of using essential oils, use a combination of natural extracts and fragrant herbs such as cinnamon, cedarwood, rosemary, lavender and other scents that suit the aroma profile desired. To make the process easier mix 1 part extract to 3 parts wax for a stronger scent. Next, melt the wax and add approximately one teaspoon (or more if desired) of extract per pound of wax and stir until thoroughly combined.
You want to make sure your scented candles exude strong aromas- this can be achieved by adding an appropriate fixative such as paraffin, beeswax or carnauba wax which will help keep the scent in your candles once they cool down or over time when burning. Another tip would be to double the percentage of scent compared to the required amount suggested per candle recipe- this will help create a much bolder and alluring aroma when lighting the candle. Leaving space between wicks will also help spread out the scent throughout any room where placed.
Final Steps
Before pouring the wax, make sure your candle container is prepped and ready. Wipe down the inside of the container with a clean cloth to remove any dust or debris. If an wick tab was included, attach it to the base of the wick, making sure that it’s centered in your glass jar or mold. Place a layer of glue along the bottom of the wick and press into place at the center of your container. Tie a small weight (such as a paperclip) to one end of a piece of thread and tie this around the top of your wick to help keep it in place while you pour. Periodically re-position and adjust your wick so it stays firmly in place at the center of your candle tin or jar as you go about pouring your wax.
Next, measure out 4 ounces (120 grams) of beeswax pellets (or grated beeswax). Use wax tailor suited for candles such as palm oil blend, soy or paraffin wax which can be found in many craft stores or online retailers. Place a cooking pot on low heat with some water ensuring that none gets in contact with your wax pellets or chips. Fit another pot onto this pot crossing over slightly to provide an indirect source heating for melting down your wax slowly without burning it eventually fouling its scent. Keep stirring until all pellets melt completely then turn off heat and allow to cool off a bit before pouring into candle containers leaving enough room on top when taking into consideration potential shrinkage during cooling process after its poured into containers. Finally add colorant if desired then any scent either through use of essential oils – it depends purely upon individual preference!
Enjoy the Benefits
Making scented candles without essential oils is easy and relatively inexpensive. You’ll need wax, wicks, wax dye, fragrance oil, a pot for melting the wax, and candle jars. Warm the wax over a double boiler and add in your chosen colorant or dye. Once melted, add drops of the fragrance oil according to desired strength of scent. Stir the mixture for 10 minutes until all ingredients are fully blended then pour the liquid wax into a pre-prepared candle jar and let it harden.
Once your candles are set and hardened you can enjoy burning them but remember to do so in a safe space such as a large room with ample ventilation. Make sure nothing flammable is within three feet of your burning candles and never leave them unattended while they are lit. Use appropriate sized wicks that curl higher than the rim of your candle jar when lit – this will help to prevent smoking or extensive dripping when extinguished.
Store scented candles away from direct sunlight or heat sources to help preserve the scent and keep their colour vibrant for longer. Additionally, it might be necessary to occasionally trim t he candle’s wick if it appears too long – this helps to ensure an even burn next time you light it up . As always take into consideration any safety guidelines when using essential oils such as not using on the skin exposed directly to sunlight after use or having any medical conditions that may influence your use of essential oils before lighting your scented candles.
Conclusion
To make scented candles without essential oils, you’ll need beeswax and fragrance oil (which can be found in hobby shops or online). Start by melting the wax in a double boiler on low-medium heat. Once melted, stir in the fragrance oil to your desired strength and pour into a candle mold or jar. Let cool for several hours until the wax hardens.
Adding essential oils to homemade candles can provide additional fragrances, colors and therapeutic benefits. When combining essential oils with beeswax, start with a ratio of ¼ tsp. of essential oil per pound of beeswax. Melt the wax and add the oil after it has reached a liquid state. Shake or stir gently before pouring into your desired container. Essential oils are stronger than regular fragrance oils so not much is needed to add scent. In addition, they may help with relaxation, concentration, stress relief or even aromatherapy depending on the combinations used.
Making scented candles without using essential oils is an easy and affordable way to create decorative pieces that smell nice too! With added focus on the possible benefits because of their ingredients, using essential oils in candle making can be beneficial when seeking different levels of aromas as well as therapeutic results.

Welcome to my candle making blog! In this blog, I will be sharing my tips and tricks for making candles. I will also be sharing some of my favorite recipes.


