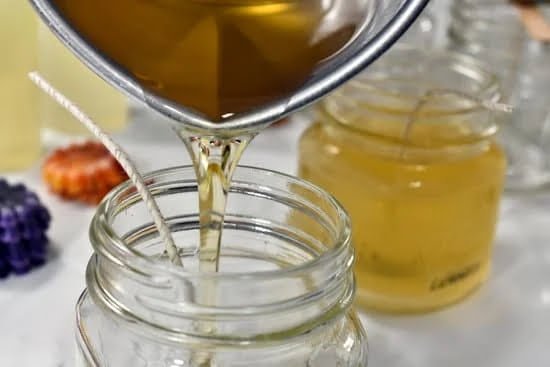
Candle making has become a popular hobby and business venture, with more and more people discovering the joy of creating their own unique candles. To ensure successful candle making, it is crucial to understand the importance of properly melting wax.
Melting wax is a fundamental step in the candle making process, as it allows the wax to transform into a liquid state that can be poured into molds or containers. This process not only gives candles their shape but also plays a significant role in determining their overall quality and performance.
Properly melted wax ensures that the fragrance or essential oils are evenly distributed throughout the candle, resulting in a strong and long-lasting scent when they burn. It also helps prevent issues like tunneling or uneven burning that can occur if the wax hasn’t been melted thoroughly. Additionally, melting wax at the correct temperature prevents any damage to its properties, preserving its texture, color, and ability to hold shape when poured.
In this article, we will explore various methods for melting wax for candle making projects, including using a double boiler, microwave, or slow cooker. Each method has its own advantages and considerations based on factors like desired candle size and quantity. We will provide step-by-step guides for each method and offer troubleshooting solutions for common issues that may arise during the melting process.
Whether you are just starting out on your candle making journey or looking to expand your knowledge and skills, understanding how to melt wax properly is essential for creating beautiful candles that truly shine. So let’s dive in and master the art of melting wax for candle making.
Different Types of Wax to Consider for Candle Making
Candle making offers a wide range of creative possibilities, and the type of wax you choose is a crucial factor in determining the quality and characteristics of your candles. There are several types of wax available in the market, each with its own unique qualities. Understanding the pros and cons of each type will help you make an informed decision for your candle making projects.
Soy wax is a popular choice among candle makers due to its eco-friendliness and clean-burning properties. Made from soybean oil, it has a natural, creamy appearance and excellent fragrance throw. It also has a lower melting point compared to other waxes, which can result in longer burning times for your candles.
Beeswax is another environmentally friendly option that is known for its natural golden color and sweet honey scent. It has a high melting point, which means that candles made from beeswax have a slower burn rate. Beeswax also emits negative ions when burned, which can help purify the air around you.
Paraffin wax, on the other hand, is widely used in commercial candle production due to its affordability and versatility. It is derived from petroleum refining and has a low melting point, making it easy to work with. Paraffin wax can hold large amounts of fragrance and dye, allowing for vibrant colors and strong scents in your candles.
It’s important to weigh the pros and cons of each type of wax before deciding on the best one for your candle making projects. Consider factors such as desired aesthetics, burn time, fragrance throw, cost, and sustainability. Experimenting with different types of wax will allow you to discover your personal preferences and create candles that perfectly suit your needs.
| Type of Wax | Pros | Cons |
|---|---|---|
| Soy Wax | Eco-friendly, clean-burning, long burning time | Higher cost, can be softer and prone to frosting |
| Beeswax | Natural color and scent, slow burn rate, purifies air | Higher cost, limited fragrance options |
| Paraffin Wax | Affordable, versatile, holds fragrance and dye well | Petroleum-derived, not eco-friendly |
Choosing the Right Wax Melting Method for Your Candle Making Project
When it comes to melting wax for candle making, there are several methods to choose from. Each method has its own advantages and considerations, depending on the size and quantity of candles you plan to make. In this section, we will compare three popular wax melting methods: the double boiler, microwave, and slow cooker.
1. Double Boiler:
Using a double boiler is a traditional and reliable way to melt wax. Here’s how it works:
- Fill a large pot with water and place it on the stove.
- Place a smaller pot or heat-proof container in the water-filled pot.
- Add your wax to the smaller pot and heat it slowly over low to medium heat.
- Stir occasionally until the wax is completely melted.
Benefits of using a double boiler method include precise temperature control and even heating. This method is recommended when working with larger quantities of wax or if you prefer a slower melting process.
2. Microwave:
If you’re short on time or want a more convenient wax melting option, using a microwave can be effective. Follow these guidelines:
- Place your wax in a microwave-safe container.
- Heat the wax in short intervals at medium power settings to prevent overheating.
- Stir the wax between each heating interval until fully melted.
The advantage of using a microwave is that it allows for faster melting, especially when working with smaller quantities of wax or for quick projects. However, make sure to follow safety guidelines and avoid overheating to prevent accidents or damage to your microwave.
3. Slow Cooker:
Using a slow cooker offers simplicity and convenience when melting wax for candle making. Here’s how you can do it:
- Fill your slow cooker with water up to about halfway.
- Place your desired amount of wax in a separate heat-proof container inside the slow cooker.
- Turn on the slow cooker to its lowest setting and allow it to heat gradually.
- Stir occasionally until the wax is completely melted.
One advantage of using a slow cooker is that it provides a gentle and consistent heat source, which can help prevent the wax from scorching or overheating. This method is especially useful when melting larger quantities of wax or if you prefer a hands-off approach to melting.
Preparing Your Workspace for Safe Wax Melting
Creating a dedicated workspace for safe wax melting is essential in ensuring a successful and accident-free candle making experience. By taking the time to prepare your workspace properly, you can minimize the risk of fire hazards, burns, and other potential mishaps. Here are some tips to help you create a safe environment for melting wax:
- Choose a Well-Ventilated Area: Select a well-ventilated area for your workspace to prevent the buildup of potentially harmful fumes from the melting wax. Good ventilation also helps regulate the temperature in the room during the candle making process.
- Use Heat-Resistant Surfaces: Place your double boiler, microwave-safe container, or slow cooker on a heat-resistant surface like a sturdy table or countertop. This will protect your work area from heat damage and reduce the risk of accidental fires.
- Clear Away Clutter: Remove any flammable materials, such as paper or fabrics, from the vicinity of your workspace. It’s important to have a clutter-free area to avoid any accidents.
- Have Fire Safety Equipment Nearby: Keep a fire extinguisher or fire blanket within reach of your workspace in case of emergencies. Familiarize yourself with how to use these safety tools effectively.
- Wear Appropriate Protective Gear: Before you start melting wax, ensure that you have protective gear like long sleeves to shield your skin from potential splatters or spills. Additionally, consider wearing heat-resistant gloves when handling hot containers or utensils.
- Keep Children and Pets Away: For everyone’s safety, it’s best to keep children and pets out of the workspace while you are melting wax. They may not understand the potential dangers involved and could accidentally get burned or injure themselves.
By following these guidelines and preparing your workspace properly, you significantly reduce risks associated with wax melting during candle making projects. Remember that safety should always be prioritized to ensure an enjoyable and accident-free candle making experience.
Step-by-Step Guide
When it comes to melting wax for candle making, using a double boiler is a popular and effective method. This technique provides a gentle and controlled heat source, ensuring that the wax melts evenly without the risk of overheating or burning. Follow these step-by-step instructions to melt wax using a double boiler for your next candle making project.
Step 1: Gather Your Materials
To begin, gather all the necessary materials for melting wax using a double boiler. You will need a saucepan (also known as the bottom pot) and a heat-safe container (such as an old can or glass jar) that fits inside the saucepan without touching the bottom. Additionally, you will need your choice of wax flakes or blocks, a thermometer, and any desired fragrance or color additives.
Step 2: Set Up the Double Boiler
Fill your saucepan about halfway with water and place it on the stove over medium heat. Assemble your double boiler by placing the heat-safe container inside the saucepan, so it sits comfortably in the water but does not touch the bottom of the pan. Make sure there is enough water in the pan to create steam but not so much that it overflows when boiling.
Step 3: Add Wax to the Heat-Safe Container
Once your double boiler is set up, add your chosen type of wax flakes or blocks into the heat-safe container. The amount of wax you use depends on how many candles you intend to make. Consult your specific candle-making recipe or instructions for guidance on how much wax to melt.
Step 4: Monitor and Control Temperature
As the water heats up in the lower saucepan, it will create steam which gently warms and melts the wax in the upper container. Attach a thermometer to monitor the temperature of both the water in the bottom pot and the melting wax. Different types of waxes have different melting points, so refer to the wax manufacturer’s instructions for the recommended temperature range.
Step 5: Stir Occasionally and Add Fragrance/Color.
While the wax is melting, gently stir it occasionally with a heat-resistant utensil to help it melt evenly. If desired, add any fragrance or color additives according to your specific candle-making recipe. Remember to follow the recommended usage rate for your chosen fragrance oil or dye.
Step 6: Pour and Mold
Once the wax has completely melted and reached the desired temperature, carefully remove the heat-safe container from the double boiler. Take caution as both the container and melted wax will be hot. Slowly pour the melted wax into your chosen candle molds or containers, making sure to leave a bit of room at the top for any additional layers or decorations.
Step-by-step guides like this one can help you confidently melt wax using a double boiler for your candle making endeavors.
Step-by-Step Guide
When using a microwave to melt wax for candle making, it is crucial to follow the recommended temperature and power settings to ensure safe and effective melting. Here are some guidelines to help you achieve the best results:
- Temperature Range: The ideal temperature range for melting different types of wax in the microwave varies. Generally, soy wax melts at around 120-140°F (49-60°C), beeswax melts at about 145-150°F (63-66°C), and paraffin wax melts at approximately 130-145°F (54-63°C). It is important not to exceed these temperature ranges as overheating can result in discoloration or even combustion of the wax.
- Power Setting: Set your microwave to a low or medium power setting when melting wax. High power can cause the wax to heat too quickly and unevenly, leading to potential safety hazards or poor quality candles. Start with short increments of time at low power settings, such as 1-minute intervals at 50% power, and then gradually increase if necessary.
Tips for Achieving Even Melting:
- Cut the Wax into Small Chunks: To promote even heating, cut your wax into small, uniform-sized chunks before placing them in a microwavable container.
- Stir Regularly: Every time you check on the progress of the melting process, give the wax a good stir. This will help distribute any hot spots and promote more consistent melting.
- Be Patient: Avoid the temptation to increase the microwave’s power or cook time drastically if the wax is not melting as quickly as you expected. Patience is key when working with a microwave; remember that slower, gradual heating is safer and more likely to produce better results.
Safety Considerations:
- Use Microwave-Safe Containers: Ensure that the container you use for melting the wax is specifically labeled as microwave-safe. Avoid using plastic containers, as they can melt or release harmful chemicals when exposed to high temperatures.
- Be Cautious of Hot Wax: Always use oven mitts or heat-resistant gloves when handling the container or removing it from the microwave. The wax can become extremely hot and cause burns if not handled carefully.
- Ventilation: Open a window or ensure proper ventilation in your workspace to prevent the accumulation of fumes from the melting wax. Adequate airflow is important for safety and overall comfort during the candle making process.
By following these step-by-step instructions and safety guidelines, you can successfully melt wax using a microwave for your candle making projects. Remember to always prioritize safety, take things slow, and monitor the wax closely throughout the melting process.
| Temperature Range | Power Setting |
|---|---|
| Soy wax: 120-140°F (49-60°C) | Low power, gradually increase if necessary |
| Beeswax: 145-150°F (63-66°C) | Low power, gradually increase if necessary |
| Paraffin wax:130-145°F (54-63°C) | Low power, gradually increase if necessary |
Step-by-Step Guide
Using a slow cooker to melt wax for candle making can be a convenient and efficient method, especially for those who prefer a hands-off approach. Here is a step-by-step guide on how to effectively use a slow cooker for melting wax.
- Prepare your materials and workspace: Start by gathering all the necessary materials, including your slow cooker, wax, fragrance oils, wicks, and any desired additives. Ensure you have a dedicated space for candle making and cover the area with newspapers or wax paper for easy cleanup in case of spills.
- Set up your slow cooker: Place the empty slow cooker on a heat-resistant surface and make sure it’s clean and dry before use. Set the temperature to low or medium heat – avoid using high heat as it can overheat the wax or cause it to burn.
- Measure the right amount of wax: Determine the amount of wax needed based on your candle size and quantity. Then, weigh out the required amount of wax using a kitchen scale. It’s important to note that different types of wax have different densities, so be sure to consult the manufacturer’s instructions for accurate measurements.
- Add the wax to the slow cooker: Once you’ve measured out the correct amount of wax, carefully add it to the bowl of the slow cooker. Be cautious not to spill any wax outside of the container as this could present a fire hazard.
- Melting process: Allow the wax to gradually melt in the slow cooker. It is crucial not to leave it unattended at any time as overheating can occur quickly in a closed environment like a slow cooker. Stir occasionally with a wooden spoon or silicone spatula to ensure even melting and prevent hot spots from forming.
- Optional: Add fragrance oils or additives (if desired): If you want scented candles or desire other additives like colorants or glitter, add them once the wax has melted completely. Stir gently to evenly distribute the additives throughout the wax.
- Pouring the melted wax: After your wax is completely melted and any desired additives have been incorporated, carefully pour the melted wax into your chosen candle containers using a heat-resistant pitcher or ladle. Be cautious when handling the hot wax to avoid burns.
- Curing and trimming: Allow your candles to cool and cure for at least 24 hours, or as recommended in the specific wax manufacturer’s instructions. Once fully hardened, trim the wick to an appropriate length (usually around 1/4 inch) before lighting.
Using a slow cooker for melting wax offers a controlled and safe method that yields smooth and consistent results. Remember to always prioritize safety by keeping an eye on the melting process at all times and practicing caution when handling hot materials.
Troubleshooting Common Wax Melting Issues and Solutions
Uneven Melting
One common issue that candle makers may encounter during the wax melting process is uneven melting. This can result in candles with lumpy or uneven surfaces, which can affect both the appearance and functionality of the final product. Uneven melting can be caused by several factors, including improper temperature control or inadequate stirring.
To address this issue, it is important to ensure that the wax is evenly distributed in the container or double boiler before beginning the melting process. Stirring the wax regularly while it melts can also help promote even heat distribution and prevent any clumps from forming. Additionally, monitoring and adjusting the heat source throughout the melting process can help maintain a consistent temperature and prevent hot spots from developing.
If uneven melting still occurs despite these precautions, one possible solution is to pour off any melted wax that has already liquefied and reintroduce it to the heat source for further melting. This allows any remaining solid pieces of wax to fully dissolve and promotes a more even consistency. It may also be helpful to invest in a quality thermometer to accurately monitor the temperature of the melted wax and make necessary adjustments.
Discoloration
Another common problem that candle makers may face when melting wax is discoloration. Discoloration can occur due to various reasons, such as overheating or using low-quality dyes or fragrances. The resulting candles may have an unattractive color or appear mottled rather than uniform.
To avoid this issue, it is crucial to carefully follow any instructions provided by dye or fragrance manufacturers regarding proper usage and recommended temperatures. Overheating can cause dyes or fragrances to degrade and lead to discoloration of your melted wax.
Furthermore, testing small batches of melted wax with different dyes or fragrances before creating larger batches of candles can help identify any potential compatibility issues that could result in discoloration. Using high-quality dyes and fragrance oils specifically formulated for candle making can also help minimize discoloration problems.
If discoloration does occur, there are a few steps you can take to salvage the wax. One option is to add more dye or fragrance to try and cover up the undesired coloration. Alternatively, you could consider repurposing the discolored wax for other projects or use it as an inner core within a layered candle where the exterior remains unaffected by the discoloration.
Overheating
Overheating the wax is another issue that candle makers may encounter during the melting process. This can lead to various complications, such as loss of fragrance, color degradation, or even potential safety hazards if the wax ignites.
To avoid overheating, it is essential to closely monitor the temperature of your melting wax throughout the process. Different types of wax have different melting points, so it is important to know and stay within the appropriate temperature range for your chosen wax. Using a thermometer specifically designed for candle making can help ensure accuracy and prevent overheating.
In the event that the wax does overheat, immediate action should be taken to cool it down. Removing it from the heat source and stirring vigorously can help dissipate excess heat quickly. Placing the container in an ice bath or adding small amounts of cold water while stirring can also aid in cooling down overheated wax.
Taking preventive measures, such as using proper heat control settings on your double boiler or microwave and monitoring melting times carefully when using a slow cooker, can further reduce the risk of overheating your wax. By paying close attention to temperature and implementing these precautions, you can minimize overheating issues during your wax melting process.
Tips for Properly Storing and Reusing Melted Wax
Guidelines for Storing Leftover Melted Wax
Once you have successfully melted your wax for candle making, you may find yourself with some leftover melted wax. It’s important to properly store this wax to ensure its usability for future projects. Here are some guidelines for storing leftover melted wax:
- Allow the Wax to Cool: Before transferring the melted wax to a storage container, make sure it has reached room temperature. Moving hot wax can be dangerous and can cause burns or spills. Let it sit undisturbed until it is cool to the touch.
- Use Airtight Containers: To prevent your wax from drying out or absorbing any moisture from the air, store it in airtight containers such as glass jars or plastic containers with secure lids. This will help maintain the quality of the wax over time.
- Label and Date: To keep track of your wax supplies, consider labeling each container with the type of wax and the date it was melted. This will help you easily identify and prioritize which batch of melted wax should be used first.
- Store in a Cool, Dark Place: To preserve the quality of the wax, store it in a cool and dark place away from direct sunlight or heat sources. Excessive heat or exposure to light can cause the wax to degrade or lose its fragrance.
Creative Ideas for Repurposing Excess Wax
Instead of discarding excess melted wax, there are several creative ways you can repurpose it for future candle making projects. Here are some ideas:
- Layered Candles: Using different colors and scents, melt various batches of leftover wax and create layered candles by pouring each layer one on top of another as they start to solidify.
- Scented Wax Melts: Pour small amounts of leftover melted wax into silicone molds designed for creating scented melts or tarts. Once cooled and solidified, these can be used in wax melt warmers to fill your space with delightful aromas.
- Emergency Candles: Fill small glass jars or tins with leftover melted wax, insert candle wicks, and let them cool and solidify. These homemade emergency candles can come in handy during power outages or outdoor activities.
- Wax Sachets: Pour melted wax into fabric sachet bags or heat-resistant molds to create scented wax sachets. Place them in drawers, closets, or hang them in your car for a pleasant fragrance wherever you go.
By following the guidelines for properly storing melted wax and exploring creative ways to repurpose excess wax, you can make the most out of your candle making materials and reduce waste. It’s a win-win situation where you not only save money but also contribute to sustainable crafting practices.
Conclusion
In conclusion, mastering the art of wax melting is crucial for successful candle making endeavors. Throughout this article, we discussed the importance of properly melting wax and highlighted various methods and techniques to achieve optimal results.
We began by introducing candle making as a popular hobby or business venture and emphasized the significance of melting wax correctly. We then explored different types of wax available in the market, such as soy wax, beeswax, and paraffin wax, providing an overview of their pros and cons.
Next, we delved into the various wax melting methods to consider, including the double boiler, microwave, and slow cooker methods. Factors such as desired candle size and quantity were taken into account when selecting the appropriate method. Additionally, we provided safety precautions to ensure a safe working environment when handling hot wax.
Furthermore, step-by-step guides were provided for each method – using a double boiler, microwave, and slow cooker – along with temperature ranges, time settings, and troubleshooting tips to overcome common issues encountered during the melting process.

Welcome to my candle making blog! In this blog, I will be sharing my tips and tricks for making candles. I will also be sharing some of my favorite recipes.

