The joy and comfort that scented candles bring into our lives are undeniable. The flickering flame, the enchanting aroma, and the warm ambiance they create make them a staple in many households. If you’ve ever wondered how to start making scented candles from scratch, then this article is for you.
Making scented candles can be a rewarding and fulfilling hobby. Not only do you have the opportunity to create beautiful and fragrant candles for yourself or as gifts, but it also allows you to explore your creativity and enjoy the therapeutic process of candle making.
In this article, we will guide you through the step-by-step process of making scented candles. We’ll cover everything from understanding the basics of scent selection and wax types to gathering essential materials and equipment. We’ll also provide tips on creating an organized workspace, as well as troubleshooting common issues that may arise during the candle-making process.
So whether you’re a complete beginner or someone looking to elevate their candle-making skills, this article will provide you with all the information you need to start your journey in crafting beautiful scented candles. Get ready to immerse yourself in this delightful hobby and fill your home with the captivating fragrances of your own creations.
Understanding the Basics of Scented Candles
Scented candles have become increasingly popular, bringing a sense of relaxation and serenity to our homes. However, there is something uniquely fulfilling about making scented candles from scratch. Not only does it allow you to customize the scent and design to your liking, but it also provides a rewarding hobby that can bring joy and satisfaction. This section will delve into the basics of scented candles, including the importance of wax types, fragrance oils, and wick options.
When it comes to scented candles, the choice of wax plays a crucial role in the candle’s performance and scent throw. There are different types of wax available, such as soy wax, paraffin wax, beeswax, and more. Each type has its own unique qualities and characteristics.
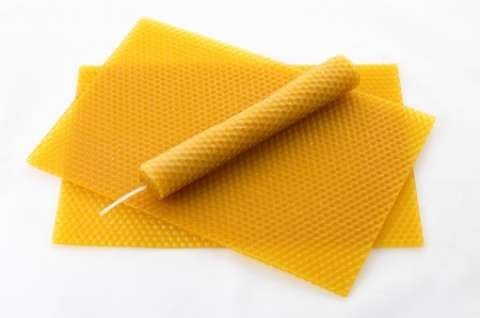
For example, soy wax is known for its clean burn and excellent fragrance retention, while beeswax offers a natural alternative with a subtle honey scent. It’s important to consider factors such as burn time, scent throw, and sustainability when choosing the right wax for your candles.
Selecting the perfect fragrance oil is another vital aspect of making scented candles. There is a vast range of fragrance oils available in various scents and strengths. Whether you prefer floral notes or warm vanilla aromas, it’s essential to choose fragrances that not only smell pleasant but also blend well with your chosen wax type. Experimentation is key here – don’t be afraid to mix different fragrances to create unique scent combinations that will delight your senses.
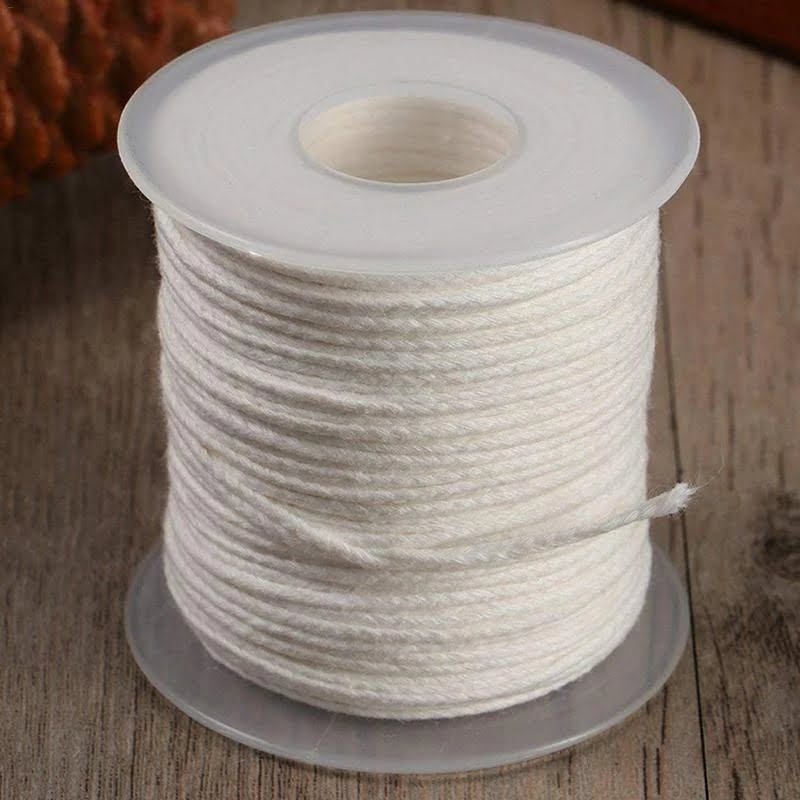
In addition to wax and fragrance oils, wicks also contribute significantly to how a scented candle burns and releases fragrance into the air. Different wick options can affect burn time and scent diffusion. Generally, cotton wicks are widely used due to their clean burn and low soot production.
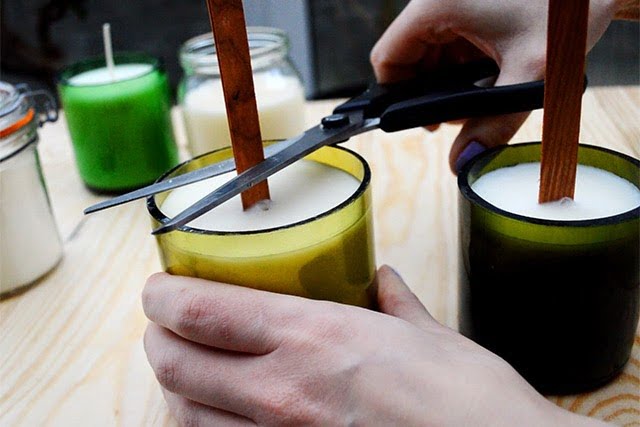
However, other wick materials like wood or metal can provide unique characteristics depending on your desired effect or style preference. Finding the right wick size for the diameter of your candle is equally important to ensure an even burn and proper scent release.
Gathering Essential Materials and Equipment
To begin making scented candles, it is important to gather all the essential materials and equipment. Having the right tools and supplies will ensure that your candle-making process goes smoothly and yields optimal results. Here are the necessary items you will need:
- Wax: The type of wax you choose will greatly affect the quality and performance of your candles. Soy wax is a popular choice for its clean burn, while beeswax is known for its natural fragrance and long-lasting burn time. Paraffin wax is more affordable and offers a wider range of options for customization.
- Fragrance Oils: Selecting the perfect scent for your candles is crucial in creating an enjoyable sensory experience. Consider using high-quality fragrance oils that are specifically designed for candle making. You can choose from a wide range of scents, such as floral, fruity, or woody fragrances.
- Wick: The type and size of wick you use will determine how well your candle burns and how effectively it diffuses scent. Cotton wicks are commonly used due to their clean burn, but there are also other options available, such as wooden or eco-friendly wicks.
- Containers: Choose containers that are safe for candle making, such as heat-resistant glass jars or tin cans. The size and shape of the containers will depend on your personal preference and the intended use of the candles.
- Thermometer: A thermometer is essential for monitoring the temperature of the wax during melting and pouring to ensure safety and avoid any issues with burning or tunneling.
- Double Boiler or Wax Melter: To melt your wax safely without direct heat, it is recommended to use a double boiler setup or a dedicated wax melter. This helps prevent overheating and ensures even melting.
- Pouring Pitcher: A pouring pitcher with a spout makes it easier to pour melted wax into containers without spills or messes.
- Stirring Utensils: Use heat-resistant utensils, such as spoons or spatulas, for stirring and mixing the melted wax and fragrance oils.
- Scales: Accurate measuring of ingredients is crucial for consistent results. A digital scale will help you measure the precise amount of wax, fragrance oils, and any additives or dyes.
When gathering materials and equipment, it is important to prioritize quality and safety. Look for reliable suppliers that offer high-quality ingredients and tools to ensure the best outcomes for your scented candles. Additionally, if you’re on a tight budget, there are often more affordable alternatives available that can still produce great results – don’t hesitate to explore these options.
With all your essential materials in place, you’ll be ready to move on to the next step: preparing your workspace.
Preparing Your Workspace
Creating a dedicated and organized workspace is crucial for successful candle making. Not only does it make the process more efficient, but it also ensures safety and helps maintain the quality of your candles. Here are some essential steps to prepare your workspace for candle making.
Firstly, choose a suitable area for your candle-making activities. Make sure you have enough space to work comfortably and safely. It’s recommended to designate a specific table or countertop solely for candle making to prevent cross-contamination with other materials.
Next, consider the ventilation in your workspace. Adequate airflow is important as it helps dissipate any fumes produced during the candle-making process. If possible, set up your workspace near a window or use fans to improve air circulation.
In addition to proper ventilation, it’s important to take fire prevention measures. Keep flammable materials away from your workspace and always have a fire extinguisher within reach. Never leave melting wax unattended, especially if using an open flame.
Furthermore, organizing your supplies and tools is essential for efficiency. Have all necessary equipment within arm’s reach to avoid unnecessary movement during the process. Consider using storage containers or trays to keep everything organized and easily accessible.
Lastly, don’t forget about personal protective gear. Always wear gloves and long sleeves when handling hot wax to protect yourself from burns. Keep a first aid kit nearby in case of accidents or minor injuries.
By following these steps and preparing your workspace properly, you’ll create an environment that promotes safe and enjoyable candle making. Taking these precautions will not only enhance the quality of your candles but also give you peace of mind while indulging in this creative hobby.
Step-by-Step Candle Making Process
To create your own scented candles, follow this step-by-step process that will guide you through the entire candle making journey. With the right materials and techniques, you’ll soon be enjoying the ambiance and fragrance of your homemade creations.
- Melting the Wax: Start by melting your chosen wax in a double boiler or a heatproof container placed in a pot of simmering water. Different types of wax have different melting points, so be sure to follow the manufacturer’s instructions. Stir the wax gently until it is completely melted and smooth.
- Adding Fragrance Oils: Once the wax has melted, it’s time to add fragrance oils to create those heavenly scents. The amount of fragrance oil needed depends on the type of wax and desired scent strength. Generally, it is recommended to use about 1 ounce (30 ml) of fragrance oil for every pound (454 grams) of wax. Stir well to ensure even distribution throughout the melted wax.
- Customizing Colors: If desired, you can add color to your candles for a more visually appealing effect. Be cautious when using candle dyes as they can affect burn quality if added in excess. Alternatively, consider using natural colorants such as mica powder or dried flowers for a more rustic look. Add small amounts gradually, stirring well after each addition until you achieve your desired hue.
- Choosing and Priming the Wick: Select an appropriate wick size based on the diameter of your candle jar or mold. Remember that larger diameter candles require thicker wicks to ensure proper burning and scent diffusion. Before inserting the wick into your candle container or mold, prime it by dipping it into melted wax and allowing it to cool and harden for better combustion.
- Pouring and Setting: Carefully pour the scented wax mixture into your prepared containers or molds while ensuring that the wick stays centered throughout the pouring process. Leave a small space at the top of the container to avoid overflowing. Allow the candles to cool and set undisturbed for at least 24 hours or until completely hardened.
- Trimming the Wick: Once your candles have set and cooled, trim the wick to about a quarter of an inch (0.6 cm) before lighting them. This lengthens their burning time and prevents excessive smoke and soot.
- Enjoying Your Homemade Scented Candles: Now that your candles are ready, it’s time to light them up and enjoy their fragrance. Place them in a safe location away from flammable objects and never leave them unattended while lit. Sit back, relax, and let the delightful scent of your homemade candles fill your space.
Remember, creativity is key when it comes to candle making. Don’t be afraid to experiment with different fragrances, colors, and designs to create unique candles that reflect your personal style and taste. With practice, you’ll become more proficient in crafting perfect scented candles that add warmth and ambiance to any space.
| Step | Description |
|---|---|
| 1 | Melt the wax in a double boiler or by placing it in a heatproof container inside a pot of simmering water. |
| 2 | Add fragrance oils to the melted wax according to the recommended ratio. |
| 3 | If desired, add colorants gradually until the desired hue is achieved. |
| 4 | Select an appropriate wick size and prime it by dipping it into melted wax. |
| 5 | Pour the scented wax mixture into containers or molds, ensuring the wick stays centered. |
| 6 | Allow the candles to cool and set undisturbed for at least 24 hours. |
| 7 | Trim the wick to a quarter of an inch before lighting the candle. |
Curing and Troubleshooting
Importance of Curing
Curing is a crucial step in the candle making process that should not be overlooked. After pouring the wax and adding fragrance oils, it is important to allow the candle to cure for a certain period of time before burning it. This allows the wax and oils to blend together thoroughly, resulting in a stronger and more even scent throw. Additionally, curing allows the candle to reach its full potential in terms of burn time and performance.
During the curing process, it is recommended to keep your candles in a cool and dry place away from direct sunlight. The ideal curing time can vary depending on factors such as the type of wax used and the size of the candle.
Generally, soy wax candles may take around 1-2 weeks to cure, while paraffin or beeswax candles may require 2-4 weeks. It is important to be patient during this time and resist the temptation to burn your candles prematurely.
Troubleshooting Common Candle Issues
Despite our best efforts, sometimes issues may arise with our homemade scented candles. Here are some common problems you may encounter during the candle making process and tips on how to troubleshoot them:
- Tunneling: This occurs when a candle burns down only in the middle while leaving excess unburned wax at the sides. To prevent tunneling, ensure that you have chosen an appropriate wick size for your candle diameter. Trimming the wick to around ¼ inch before each use can also help promote an even burn.
- Uneven Burning: If your candle is burning unevenly, try rotating it periodically while it is lit. This helps distribute heat more evenly across the surface of the wax.
- Sooty Wick: If you notice black soot forming on your wick or around your candle jar, this could be due to using a wick that is too large for your candle diameter. Try using a smaller wick or adjusting the wick size to achieve a cleaner burn.
- Fragrance Fade: If you find that the scent of your candles is not as strong as desired, ensure that you are using fragrance oils specifically formulated for candle making. You may also want to consider increasing the amount of fragrance oil used, while still adhering to recommended safety guidelines.
Remember, troubleshooting candle issues often requires some experimentation and adjustments to find what works best for your specific candles. Don’t be discouraged by setbacks as they can provide valuable learning experiences along your candle making journey.
Packaging and Styling
Once you have successfully made your scented candles, it’s important to think about how you will package and style them to enhance their appeal. The presentation of your candles is crucial in capturing the attention of potential customers and creating a memorable experience for those receiving them as gifts. Here are some creative ideas and tips for attractive and professional packaging options:
- Box Packaging: Consider using custom-made boxes to hold your candles. These can be made from cardboard or other sturdy materials, and can be customized with your logo or design. Box packaging not only protects the candles but also creates a sense of luxury.
- Mason Jars: Mason jars are a popular choice for candle packaging due to their rustic charm. They are affordable, versatile, and can be easily personalized with ribbons, twine, or labels. Additionally, mason jars can be reused by customers after they’ve finished burning the candle.
- Organza Bags: For a more delicate and elegant look, consider placing your candles in organza bags. These sheer fabric bags come in various colors and sizes, perfect for showcasing the beauty of your scented candles while adding a touch of sophistication.
- Decorative Tins: Metal tins are another stylish option for packaging scented candles. They give off a modern and sleek vibe that appeals to many customers. Decorate the tins with labels or stickers that match the scent or theme of your candle.
Labeling is also an important aspect when it comes to packaging your scented candles. It not only provides necessary information but also adds professionalism to your product. Ensure that you include the following details on your labels:
- Candle name.
- Fragrance description.
- Burn time.
- Ingredients used.
- Safety instructions.
Complying with legal requirements is essential when selling homemade candles. Make sure to research any regulations or labeling requirements specific to your country or region.
In addition to providing information, you can enhance the aesthetic appeal of your candles with decorative touches. Consider adding a personalized touch, such as ribbon bows, dried flowers, or charms that match the theme or scent of your candles. These small details will make your candles stand out and capture the attention of potential customers.
Packaging and styling are key factors in creating an attractive and professional product that will leave a lasting impression on your customers. Don’t be afraid to experiment with different packaging options and decorative elements to find what resonates best with your target market. Remember, the way you present your candles is just as important as their quality and fragrance.
Tips for Building a Successful Candle-Making Business (Optional)
Starting a candle-making business offers the opportunity to turn your hobby into a profitable venture. If you have a passion for creating beautiful and fragrant candles, here are some tips to help you build a successful candle-making business.
Define Your Niche
To stand out in the competitive market, it’s crucial to define your niche. Consider what makes your candles unique and different from others on the market. Are they made from all-natural ingredients? Do they have a specific theme or target audience? By identifying your niche, you can tailor your marketing efforts and product offerings to attract a specific customer base.
Develop a Brand Identity
Building a strong brand identity is essential for any business. It helps establish trust with customers and makes your candles more recognizable. Consider factors such as logo design, packaging, and overall aesthetic that aligns with your targeted audience and niche. Invest time in designing labels that reflect your brand’s personality and enhance the visual appeal of your candles.
Utilize Social Media and Online Platforms
In today’s digital age, social media platforms provide excellent opportunities for promotion and reaching potential customers. Create engaging content on platforms like Instagram or Facebook to showcase your candles, share behind-the-scenes footage of the candle-making process, and interact with your audience. Additionally, consider selling your candles on online marketplaces like Etsy or Amazon Handmade to increase visibility.
Collaborate with Influencers or Local Businesses
Collaborating with influencers or local businesses can greatly boost the exposure of your candle-making business. Identify influencers or bloggers within the home decor or lifestyle niche who align with your brand values and offer them complementary candles in exchange for promotion on their platforms. Similarly, reach out to local spas, boutiques, or gift shops to explore opportunities for partnerships or consignment arrangements.
Offer Customization and Personalization
Providing customization options that allow customers to create personalized candles is a great way to attract a broader customer base. Consider offering choices in fragrance, color, and packaging to add an extra level of personalization and exclusivity. This approach can also help establish long-term relationships with customers who appreciate the unique experience of designing their own candles.
Focus on Customer Service and Quality
Providing exceptional customer service and high-quality products is paramount in building a successful candle-making business. Respond promptly to inquiries, address any concerns or issues promptly, and ensure your candles meet or exceed customers’ expectations in terms of scent throw, burn time, and overall craftsmanship. Positive word-of-mouth referrals from satisfied customers can significantly contribute to the growth of your business.
By following these tips, you’ll be well on your way to building a successful candle-making business. Remember to continually innovate and refine your products based on market trends and customer feedback. With dedication, passion, and a strong entrepreneurial mindset, your hobby can evolve into a thriving business venture.
Conclusion
In conclusion, starting to make scented candles from scratch can be a rewarding and fulfilling hobby. The process may seem daunting at first, but understanding the basics of scented candles and gathering the necessary materials and equipment will set you up for success. By following the step-by-step candle making process, you can create beautiful and fragrant candles that bring joy into your life and those around you.
One of the most satisfying aspects of making scented candles is the ability to customize and experiment with different scents and designs. With a wide variety of wax types, fragrance oils, and wick options to choose from, you have endless possibilities to create unique combinations that suit your personal preferences. Whether you prefer floral, fruity, or woody scents, there is a fragrance oil out there for everyone.
Additionally, making scented candles allows for creativity in packaging and styling. You can explore various attractive and professional packaging options to elevate the visual appeal of your homemade candles. Don’t forget to label your candles accurately and appropriately adhere to any legal requirements. Adding aesthetic touches such as ribbons or decorative charms can also enhance their overall appeal.
Frequently Asked Questions
What do I need to start making scented candles?
To start making scented candles, there are a few essential items and materials you will need. First and foremost, you will need wax, which is the base of the candle. Popular options include soy wax, beeswax, or paraffin wax.
Additionally, you will require fragrance oils or essential oils to add scent to your candles. Other necessary supplies include wicks, containers or molds to shape your candles, a thermometer to monitor the temperature of the wax, a melting pot or double boiler for melting the wax, and a heat source such as a stove or electric potpourri burner. Along with these core items, you may consider investing in colorants for adding visual appeal to your candles and various tools like a scale, stirring utensils or pour pots for precise measurement and pouring.
Is making scented candles profitable?
Making scented candles can indeed be profitable if approached strategically and with proper market research. The candle industry has experienced consistent growth in recent years with an increasing demand for natural handmade products. Creating unique scents and appealing designs can help differentiate your candles from competitors in the market.
Factors like quality ingredients, appealing packaging, effective marketing strategies, and establishing a loyal customer base contribute towards profitability in this business. It is important to carefully analyze costs associated with production and marketing while considering competitive pricing to ensure that your candle-making venture generates profits.
How much does it cost to start a scented candle business?
The cost of starting a scented candle business primarily depends on various factors such as the scale of production, location (whether home-based or storefront), sourcing options for raw materials at affordable prices, equipment requirements, marketing plans, and more. Generally speaking though, starting costs can range anywhere from hundreds to thousands of dollars.

Welcome to my candle making blog! In this blog, I will be sharing my tips and tricks for making candles. I will also be sharing some of my favorite recipes.


