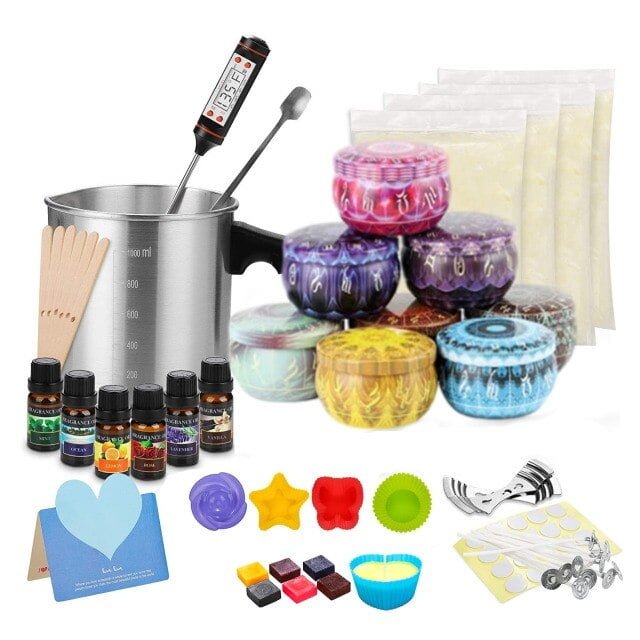
Are you looking for a unique and rustic touch to your homemade candles? Learn how to use wood wicks in candle making. Wood wicks offer a natural and cozy ambiance, along with the soothing crackling sound of a fireplace. In this article, we will explore the benefits and characteristics of wood wicks, as well as provide a step-by-step guide to incorporating them into your candle making projects.
Wood wicks have become increasingly popular among candle makers due to their aesthetic appeal and clean-burning nature. Unlike traditional cotton wicks, wood wicks add a touch of warmth and charm to any room. Understanding the benefits and characteristics of wood wicks is essential for creating high-quality candles that are both visually appealing and functional.
When it comes to selecting the right wood wicks for your candle making project, there are various factors to consider such as the size of the container, the type of wax being used, and personal preference. Additionally, preparing your materials and workspace is crucial for ensuring a smooth and successful wood wick candle making process. From choosing the appropriate tools to setting up a clean and organized work area, proper preparation sets the stage for crafting beautiful wood wick candles.
Selecting the Right Wood Wicks for Your Candle Making Project
Choosing the right wood wick for your candle making project is essential in achieving the desired burn and aesthetic appeal. Wood wicks come in various sizes and shapes, each offering unique burning characteristics. When selecting wood wicks for your candles, consider factors such as the type of wax you are using, the diameter of your container, and the desired burn time and crackling sound.
The size of your candle will determine the thickness of the wood wick needed. For example, thicker wood wicks are ideal for larger candles with a wider diameter, while thinner wicks work well for smaller containers. Additionally, different types of wood wicks produce varying degrees of crackling sounds when burned. If you desire a more audible crackle, opt for a larger-sized wooden wick.
It’s also crucial to consider the type of wax used in your candle making project. Soy wax, paraffin wax, and beeswax all have different melting points and burning characteristics. Match the appropriate wood wick size to the specific type of wax you are working with to ensure optimal burning performance.
Overall, understanding how to use wood wicks in candle making involves selecting the correct size and type based on your container size, desired burn time, and preferred crackling sound. Experimenting with different wood wick options will allow you to determine which works best for your specific candle making project.
| Wood Wick Size | Recommended Candle Size | Desired Burn Time | Crackling Sound Intensity |
|---|---|---|---|
| Thicker Wicks | Larger containers | Longer burn times | More audible crackle |
| Thinner Wicks | Smaller containers | Shorter burn times | Gentle crackle |
Preparing Your Materials and Workspace for Wood Wick Candle Making
When it comes to preparing your materials and workspace for wood wick candle making, there are a few important steps to take to ensure a successful and enjoyable experience. Here are some essential tips for getting ready to create your own wood wick candles:
- Gather Your Materials: Before you begin your wood wick candle making project, make sure you have all the necessary materials on hand. This includes soy or beeswax, fragrance oils or essential oils, dye chips or liquid dye, a double boiler or microwavable pitcher, a thermometer, containers for your candles, and of course, wood wicks.
- Set Up Your Workspace: Designate a clean and organized area for your candle making endeavors. Make sure you have enough space to work comfortably and safely. It’s also important to protect your surfaces with newspaper or a heat-resistant mat to catch any spills or drips.
- Gather Safety Equipment: Ensuring that you have safety equipment on hand is crucial when working with hot wax. This includes heat-resistant gloves, long sleeves, safety goggles, and a fire extinguisher just in case. Safety should always be a top priority when making candles.
Taking the time to properly prepare your materials and workspace before diving into wood wick candle making can make the process much smoother and more enjoyable.
In addition to gathering all the necessary materials and setting up your workspace, it’s important to familiarize yourself with how to use wood wicks in candle making. Wood wicks offer unique benefits such as a soothing crackling sound when burning and an aesthetically pleasing appearance. Understanding the characteristics of wood wicks and how they behave in different types of wax is essential for successful candle making.
Step-by-Step Guide to Using Wood Wicks in Candle Making
Now that you have selected the right wood wicks for your candle making project, it’s time to dive into the step-by-step process of using them to create beautiful and unique candles. Follow these guidelines to ensure a successful and enjoyable wood wick candle making experience:
- Prepare your work area: Before you begin, make sure you have a clean and organized workspace to work in. Gather all the necessary materials including wax, fragrance oils, dye (if desired), containers, and of course, your wood wicks.
- Melt the wax: Use a double boiler or a wax melting pot to melt the wax. It is important to heat the wax to the recommended temperature according to the type of wax you are using.
- Prepare the wood wicks: While the wax is melting, prepare your wood wicks by securing them in the center of your candle containers. You can use wick stickers or hot glue to ensure they stay in place during pouring.
- Pouring the wax: Once the wax has reached the appropriate temperature, add any desired fragrance oils and dye. Stir gently to combine. Carefully pour the wax into your prepared containers, being mindful not to disturb the wicks.
- Setting and trimming: Allow the candles to cool and set completely before trimming the wood wicks to about a quarter of an inch. This will help ensure a clean burn when it comes time to light your wood wick candles.
Following these steps will help you create beautiful wood wick candles that will add warmth and ambiance to any space. Experiment with different fragrances and colors to customize your creations and enjoy the soothing crackling sound that comes with burning wood wick candles. Happy candle making.
Troubleshooting Common Issues With Wood Wick Candles
Wood wick candles are a popular choice for many candle makers due to their unique crackling sound and aesthetic appeal. However, like any other type of candle, wood wick candles can sometimes present issues during the making process or when they are being burned. Understanding these common problems and how to troubleshoot them is essential for achieving successful results.
One common issue with wood wick candles is tunneling, which occurs when the wax burns down the center, leaving a thick wall of unmelted wax around the wick. This can be caused by using a wick that is too small for the diameter of the candle or by not allowing the candle to burn long enough on the initial lighting.
To troubleshoot this issue, it is essential to select the appropriate wick size for your candle and ensure that you allow it to burn long enough on the first use to create an even melt pool.
Another common problem is weak or inconsistent flame height. This can happen if the wick is not properly centered in the candle while it is setting or if there is an obstruction in its path, such as air bubbles in the wax.
To address this issue, make sure that your wicks are straight and centered while your candles are cooling. Additionally, carefully pouring your melted wax into the containers and gently tapping them afterward can help release any trapped air bubbles that may affect the flame.
Lastly, mushrooming at the tip of the wood wick can occur when excess carbon builds up on top of it during burning. This can lead to sooty residue and uneven burning. To prevent this from happening, regularly trim your wood wicks to 1/8 inch after each burn using specialized wick trimmers or nail clippers. Trimming will help keep your wood wicks clean and promote a steady burn with minimal smoking.
| Common Issue | Troubleshooting Solution |
|---|---|
| Tunneling | Select appropriate wick size; Allow initial burn to create even melt pool |
| Weak/Inconsistent Flame Height | Ensure proper wick centering; Release air bubbles in wax before cooling |
| Mushrooming at Wick Tip | Regularly trim wood wicks; Keep them clean for steady burn |
Adding Fragrance and Color to Your Wood Wick Candles
Choosing the Right Fragrances
When selecting fragrances for your wood wick candles, it’s important to consider the type of wax you are using and the scent throw you desire. If you are using soy or beeswax, it’s best to opt for fragrances specifically formulated for these types of wax. For a strong scent throw, consider using fragrance oils with a high concentration of essential oils. Experiment with different scents to create unique combinations that appeal to your target audience.
Incorporating Color
Adding color to your wood wick candles can enhance their visual appeal and complement the fragrance you’ve chosen. When working with natural waxes like soy or beeswax, consider using dye chips or liquid dyes specifically formulated for these types of wax. It’s important to carefully measure the amount of dye used to achieve consistent and vibrant colors in your candles.
Best Practices for Adding Fragrance and Color
When adding fragrance oils and colorants to your melted wax, it’s crucial to follow recommended guidelines provided by suppliers. Overloading your candle with fragrance oil can lead to poor burn performance and an overpowering scent. Similarly, adding too much dye can affect the burn quality of your candle. Practice caution when incorporating fragrance and color into your wood wick candles to ensure a high-quality end product.
Finishing Touches
After successfully making your wood wick candles, it’s important to know how to properly trim and maintain them to ensure optimal performance and safety. Trimming and maintaining wood wick candles is a crucial step in the candle making process that can affect the burn time, fragrance throw, and overall appearance of your candles.
Trimming Wood Wicks
To maintain a clean and efficient burn, it’s essential to keep your wood wick trimmed to the proper length. The ideal length for wood wicks is typically between 1/8 to 3/16 of an inch. Using a wick trimmer or sharp scissors, carefully trim the wood wick before each use to remove any buildup or charred wood. This will promote a cleaner burn and help prevent excessive smoking or soot buildup on the container.
Maintaining Wood Wick Candles
In addition to trimming the wood wick, it’s important to properly maintain your wood wick candles to prolong their life and ensure consistent performance. Keep the candle free from any debris or foreign objects that could impede the proper burning of the candle. Make sure to store your wood wick candles in a cool, dry place away from direct sunlight or heat sources to prevent melting or warping.
Enhancing Safety
Always remember to follow basic candle safety guidelines when using wood wick candles. Trimmed wood wicks help reduce the risk of excessive flame height or potential hazards, but it’s still essential to never leave a burning candle unattended and keep them out of reach of children and pets. By properly trimming and maintaining your wood wick candles, you can enjoy a longer-lasting, cleaner burn while maximizing their aesthetic appeal as well.
Enhancing Your Candle Making Skills
In conclusion, mastering the use of wood wicks in candle making can open up a world of creative possibilities for experienced crafters. Once you have a solid understanding of the benefits and characteristics of wood wicks, as well as how to select the right ones for your project, you can begin experimenting with advanced techniques to take your candle making skills to the next level.
As you continue to hone your craft, consider exploring innovative ways to incorporate fragrance and color into your wood wick candles. Whether it’s through blending unique scents or creating captivating color combinations, adding these elements can elevate the overall aesthetic and sensory experience of your candles.
Furthermore, don’t overlook the importance of maintaining and troubleshooting wood wick candles. By learning how to properly trim and care for your candles, as well as addressing common issues that may arise, you can ensure that each creation meets high-quality standards.
In essence, by delving into advanced techniques for using wood wicks in candle making, you have the opportunity to push boundaries and unleash your creativity. Embrace the journey of continuous learning and experimentation, and let your passion for candle making shine through in every meticulously crafted wood wick candle.
Frequently Asked Questions
Do You Need to Soak Wood Wicks for Candles?
It is recommended to soak wood wicks for candles before using them. This helps the wick to ignite more easily and prevents it from burning too quickly or unevenly. Soaking also reduces the risk of tunneling in the candle.
How Do You Use a Wooden Candle Wick?
Using a wooden candle wick involves trimming it to about 1/8 inch before lighting. The wick should be positioned in the center of the container and kept at a medium length during burning to promote an even, steady flame.
Do You Need to Prime Wooden Wicks?
Priming wooden wicks is important as it involves pre-treating the wick with melted wax. This helps to create a consistent burn when the candle is first lit and prevents any potential issues such as tunneling or carbon buildup on the wick.

Welcome to my candle making blog! In this blog, I will be sharing my tips and tricks for making candles. I will also be sharing some of my favorite recipes.


