Introduction
Scented teacup candles are a fun and creative way to add beauty, warmth, and fragrance to any room in your home. In addition to having a lovely appearance, these candles are also very easy and quick to make. Unlike other types of candles, scented teacup candles require no wick or wax melting equipment; the ingredients simply need to be stirred together and poured into the desired teacup or mug. You can customize your own scent with essential oils or fragrant extracts for a truly personal touch. These steps are simple enough for even novice DIYers! The result is an aesthetically pleasing and delicately fragranced candle that will delight family and friends alike. With the cost of store-bought scented candles being quite expensive, making them yourself at home is both a money-saving strategy and enjoyable craft project.
Types of Wax and Wicks
Choosing the right combination of wax and wicks for your scented tea cup candles is important in achieving a successful outcome. Different waxes have different melting points and burn times, making some better suited for different purposes. Paraffin wax, which is made from petroleum or coal, is most commonly used to make tea cup candles as it has a lower melting point and long overall burn time. Soy wax is also popular among candle makers as it has a clean burn and reduces soot production, however it has a higher melting temperature than paraffin wax and may add a slight discoloration to your candle. Beeswax is an excellent choice if you are looking for an all-natural beeswax with a pleasant honey scent and stable burning properties, however this can be quite expensive compared to paraffin or soy wax. Wooden wicks are preferred by most tea cup candle makers over cotton as they are clean burning, self-trimming, and add extra aesthetic value due to creating a mini flame inside the tea cup. In addition, using citronella-infused wooden wicks can ward off mosquitos during summer evening outdoor gatherings!
Container Selection
When you make scented teacup candles, it’s important to take into consideration the container you will use. Container selection can be one of the most enjoyable parts of making a candle, as it adds an extra layer of personalization and creativity to your project. If you want your candle making to stand out, explore creative designs for your teacups and experiment with off-the-wall ideas that are sure to keep your audience interested. Consider using cups featuring unique shapes or interesting illustrations, allowing you to create a centerpiece that really stands out. Additionally, selecting vibrant colors can help create a stunning visual display and can perfectly match your desired ambiance. With so many options available, the possibilities are endless – embrace this opportunity to unleash your creativity and set yourself apart from others!
Fragrance and Color Combos
Making your own scented candles can be an enjoyable and rewarding experience. It allows you to experiment with different fragrance and color combos to create a unique scent that you will love. Teacup candles, in particular, provide the perfect medium for combining different fragrances and colors to create something truly special. When choosing a combination of scents and colors for your teacup candle, there are numerous options available!
Popular options include floral scents such as rose or lavender paired with earthy hues like olive green or terra cotta; fruity aromas like citrus mixed with shades of sunny yellow; or spicy notes such as peppermint mixed with soft pink. Whatever combination you choose is sure to delight the senses with its pleasant aroma. To make the candle even more special, add dried flowers, colorful beads, glitter, or sequins to the wax before it sets. This will give the teacup candle an extra layer of appealing texture and interest
Preparing the Materials
Scented teacup candles make for a delightful gift or decoration. Fortunately, they’re a relatively easy craft to put together. However, you may need some instructions in order to get the job done right. This guide will explain all of the materials you need and how to put them together!
The first step is to gather all of the required materials: tea cups, wax, fragrance oil, wicks, double boiler, and scissors. Besides a tea cup”preferably with a wide opening”you’ll need to buy wax pellets or bars as well as pre-tabbed wick holders and cotton candle wicks. The amount of wax and number of wicks depends on how large your tea cups are. You also have plenty of options when it comes to scents; though bear in mind that most oils are concentrated for use in candles and should not be used directly on skin.
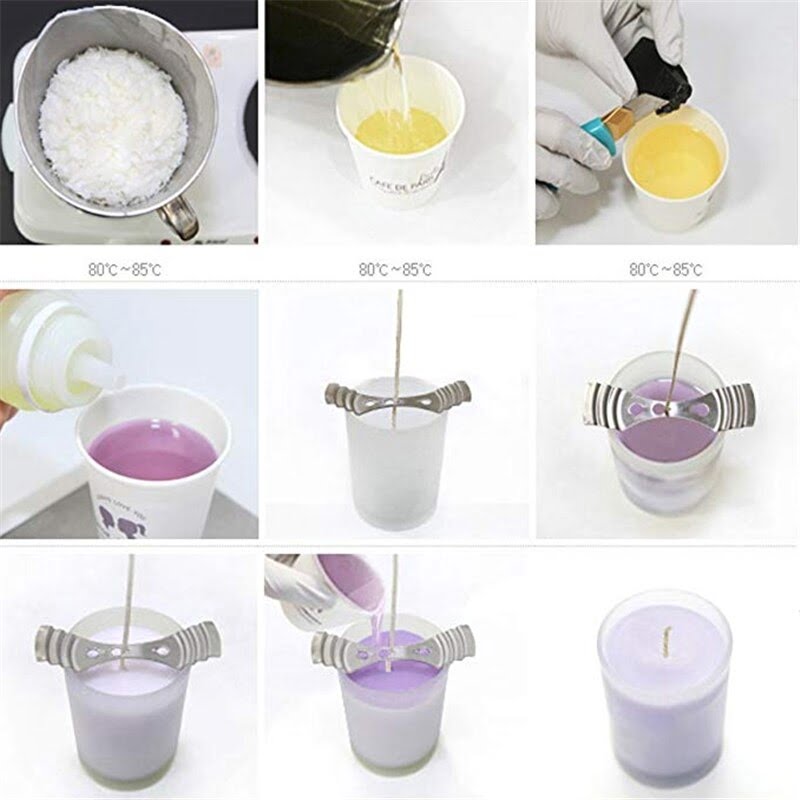
Once you’ve selected all your supplies, the next step is setting up for melting. A double boiler is recommended for safe melting; this can easily be created by partially filling a saucepan with water and placing an oven-safe bowl atop it so that the bottom of the bowl does not touch the water beneath it. Place your wax inside the bowl and bring the water to simmering point over medium heat until your wax melts completely. Once that has been achieved, stir in your fragrance oils using a spoon or popsicle stick while stirring continuously so they fully combine with the melted wax without clumping up and sticking to the sides of your bowl.
Finally, position each wick tab into one side of each teacup before pouring in around half an inch worth of melted wax into each cup (this amount can vary depending on how deep or large your tea cups are). Allow the liquid wax to cool down before adding more until there’s around one or two inches left from the rim of each cup”leaving enough space at top so that when lit, you won’t have any overflow issues from too much heat expanding upwards. Once cooled down (around three hours), trim off excess wick strands before displaying or gifting away!
Melting and Pouring the Wax
Making scented teacup candles requires melting and pouring the wax carefully to ensure that it burns evenly. In order to correctly melt the wax, it is important to measure the temperature correctly and use a double-boiler so that the wax does not have a chance to overheat. Carefully pour the melted wax into each teacup, leaving a quarter inch of room at the top for the wick.
Once all of the teacups are filled, add your desired scent. This can be added in either liquid or block form depending on preference. The most common types of wax used for candle-making include beeswax, soy wax, palm wax, and paraffin. Keep in mind that some of these materials may require additives such as stearic acid to help them burn more evenly. Finally, set up and secure your wicks along with any other necessary items such as wick holders or centering pins. Once all preparations are complete, allow your candles to cool completely before trimming any excess wick or packaging them for use!
Designing and Decorating Your Candle
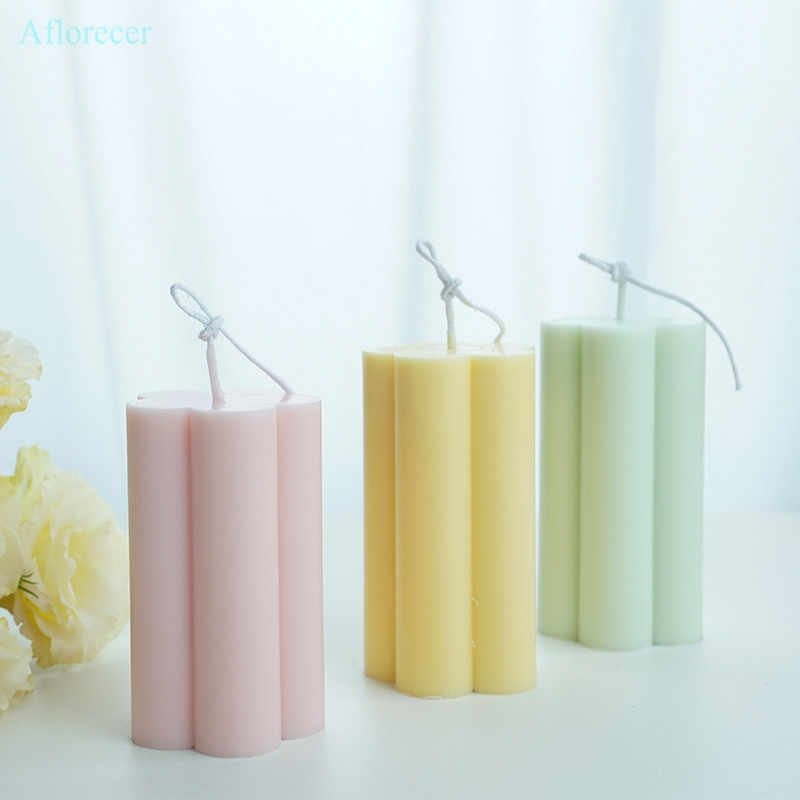
Once you have made your scented teacup candles, there are a multitude of ways to further Enhance the aesthetic aspect of them. For one thing, you could add layers of colors to the candles by using different wax colors, or through the process of dipping the candle in different colored waxes. To give off additional textures, decoupage can be used to adorn teacups with images and items like lace and ribbon. You could also paint symbols and designs on the teacup portion for added flair. Glitter can also be sprinkled onto the wax itself for a more sparkly look. Finally, consider purchasing specialized wick holders and embellishments such as flowers, shells or charms that can go a long way towards adding pizzazz to your t-cup candle creations!
Lighting and Enjoying Your Scented Teacup Candles
Once you have made your unique scented tea cup candles, you are ready to experience the full joys of a sensually scented environment. The act of lighting and enjoying your handmade creation can help to bring a sense of peace and well-being. For many, it is the anticipation of relaxing with a delightful aroma that makes the experience truly special.
To light up your candle place your match or lighter close to its wick and wait for it to ignite. This should only take about 5 seconds, after which you may want to make sure that the flame is steady before moving away from it. Once lit, allow yourself some time to take it in; from smelling its pleasant aroma and observing how it gently fills the space around you with something beautiful ” all while providing your mind with an escape into an olfactory world. Taking time out for yourself will help you relax and unwind as you enjoy the calming scent that radiates around you throughout the day or night.
Tips and Tricks for Making Unique Candle Designs
Making scented teacup candles is a superb way to express your creativity while adding a little flair to your home. It’s also a relatively inexpensive and easy process with the right materials and tools. To get started on creating unique candle designs with teacups, here are some useful tips and tricks:
1. Use quality wax for an even burn: While cheap wax will work when making candles, it’s not recommended due to the inconsistent burning that can result from using lower-grade waxes. So, make sure you use premium wax which not only gives you an even burn but will ensure your candle looks nice and neat too.
2. Choose high-quality wicks and fragrances according to the size of your teacup: Selecting high-quality wicks can help prevent any mishaps such as tunneling or drowning flames during the burning process. Experiment with different types of fragrances until you find what works best for you! Properly sizing the wick based on the size of your teacup helps ensure there will be enough room for your wax to pool around it when finished.
3. Have various decorations on hand: Decorations are essential if you want to add the perfect amount of personalized details to your teacup candles! Consider having flowers, ribbons, beads, glitter or even herbs ready so that when inspiration strikes, you’ll have everything you need for decorative accents. Make sure these decorations are safe when lit so avoid anything that is flammable or made from metal that could become hot enough to start a fire on contact with the flame or heat from the burning candle’s wick.
4. Experiments with color effects: Candle dyes provide endless possibilities for color palette experimentation! From bold primary hues to subtle pastels ” playing around each combination until you get something truly unique is part of this fun crafting process. Just remember that certain dyes may cause discoloration in lighter colored waxes so it’s best to experiment first before committing too much dye into the mix at once!
Conclusion
Making scented teacup candles is a great way to add a personal touch to your home décor. Not only are these candles visually appealing, but they also come in unique shapes and sizes”from tiny teacups for votives to large ceramic teacup vessels for larger sizes. They also spread pleasant aromas through their carefully blended waxes and essential oils. With minimal supplies, a few basic tools, and little effort you can make beautiful, scented teacup candles that will bring warmth to any room.
The great thing about making scented teacup candles is that they are low-cost and easy enough for someone with no candle-making experience to pull off. Furthermore, most of the supplies needed can be found around the house or at a craft store without breaking the bank. It’s even possible to get creative and use different waxes, colours, fragrances, and accessories to make unique creations. Whether you choose one of the classic tea cup styles or experiment with scents and designs of your own; creating scented teacup candles can be an enjoyable hobby that produces beautiful end results ” sure to impress friends and family alike!

Welcome to my candle making blog! In this blog, I will be sharing my tips and tricks for making candles. I will also be sharing some of my favorite recipes.

