In today’s busy world, it’s important to find ways to unwind and tap into our creative side without breaking the bank. One such activity that offers relaxation, artistic expression, and affordability is candle making. Welcome to the world of low budget candle making, where we will guide you through the joys of creating beautiful candles without straining your wallet.
Candle making has been a cherished craft for centuries, offering an outlet for creativity and a sense of accomplishment when a unique, handcrafted candle is completed. However, many people hesitate to delve into this hobby due to concerns about the cost. This is where low budget candle making comes in. By finding alternatives for traditional candle making supplies and discovering cost-effective methods, anyone can enjoy this fulfilling craft without breaking the bank.
In this series of articles, we aim to inspire readers to embark on their own candle making adventure on a budget. From essential tools and materials that won’t drain your wallet to DIY techniques for creating unique candle shapes, we will cover every aspect of low budget candle making.
Additionally, we will explore affordable wax options and celebratory decoration techniques that add a personalized touch to your creations. And let’s not forget about the thrill of finding hidden gems as containers for your candles at thrift stores and online marketplaces.
So let this introduction be both an invitation and encouragement: ignite your creativity with low budget candle making and watch as tranquility enters your life while saving money along the way. With the upcoming sections filled with tips, techniques, and resources, there has never been a better time to embark on this joyful journey of low budget candle making.
Benefits of Low Budget Candle Making
Low budget candle making offers numerous benefits for both your wallet and your well-being. Not only does it allow you to save money, but it also provides a therapeutic and artistic outlet that can bring joy and relaxation to your life. By engaging in this fulfilling craft without breaking the bank, you have the opportunity to explore your creativity and ignite your passion for candle making.
One of the major advantages of low budget candle making is the cost savings. Traditional candle making supplies can be quite expensive, especially if you are just starting out or on a tight budget. However, by opting for low-cost alternatives, you can significantly reduce your expenses without compromising on quality. This means that you can enjoy the satisfaction of creating beautiful candles while saving money at the same time.
In addition to cost savings, low budget candle making also provides a therapeutic and artistic hobby that can be immensely satisfying. The process of melting wax, adding fragrance and color, and pouring it into molds allows you to tap into your creativity and express yourself through each individual candle creation. This creative outlet has been found to reduce stress levels, improve focus and concentration, and provide a sense of accomplishment and pride in your handmade creations.
Overall, low budget candle making offers an affordable way to engage in a fulfilling craft that brings numerous benefits to your life. Whether you are looking for a new hobby or want to add a personal touch to your home decor or gifts, exploring the world of low budget candle making is sure to ignite your creativity while providing an enjoyable and therapeutic experience. So why wait? Grab some affordable supplies and start creating beautiful candles today.
Essential Candle Making Tools and Materials on a Low Budget
Candle making can be a fulfilling and therapeutic hobby that allows individuals to showcase their creativity and make personalized gifts. However, it is often assumed that candle making requires expensive tools and materials. This section will provide valuable insights into essential candle making tools and materials that are budget-friendly alternatives.
Cost-effective Alternatives
When it comes to low budget candle making, there are many cost-effective alternatives for traditional candle making supplies. For instance, instead of purchasing expensive metal candle molds, you can use household items such as empty soda cans or milk cartons. These can be easily cut and reshaped to create unique candle shapes.
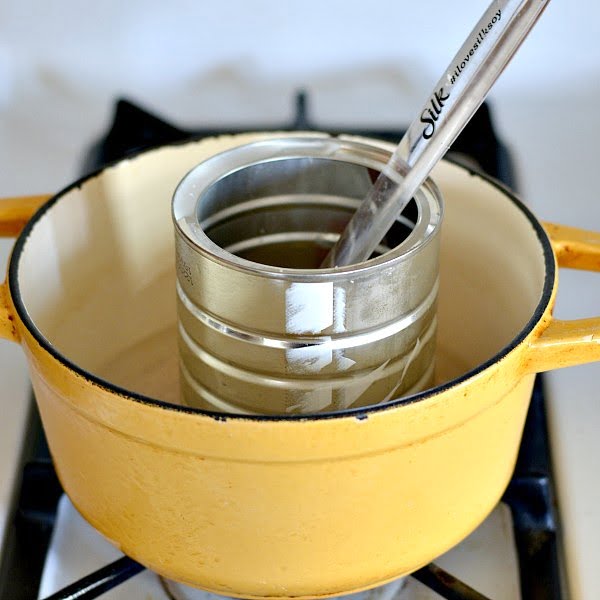
Another essential tool in candle making is a wax melting pot. While dedicated pots designed specifically for candle making can be costly, you can use an old saucepan or a thrifted pot from a local thrift store as a more affordable alternative. Just make sure that the pot is designated only for candle making to avoid any cross-contamination with food.
Budget-Friendly Materials
In addition to cost-effective alternatives for tools, there are also lesser-known materials that are easily accessible and budget-friendly for low budget candle making. For example, instead of using expensive fragrance oils, you can explore natural options such as dried herbs or essential oils from local health food stores or online marketplaces. These not only add a lovely scent but also provide additional therapeutic benefits.
Furthermore, consider using recycled materials as containers for your candles. Empty glass jars from food products or thrifted mason jars can give your candles a rustic and unique look without breaking the bank. Additionally, repurposing old candles by melting them down and pouring them into new containers is another great way to save money while indulging in this creative craft.
By exploring these cost-effective alternatives for essential tools and materials in low budget candle making, individuals can enjoy the art of candle making while keeping their wallets happy. The next section will delve into creating unique candle shapes without spending a fortune on expensive molds.
DIY Candle Molds
Creating unique candle shapes can add a touch of creativity to your candle making endeavors. While traditional candle molds can be expensive, there are budget-friendly alternatives that allow you to explore different shapes without breaking the bank.
Alternative Materials for DIY Candle Molds
One cost-effective option for creating your own candle molds is using silicone. Silicone is an easily accessible material that is flexible and heat-resistant, making it perfect for DIY molds. You can use everyday objects such as food containers, ice cube trays, or even old baking molds to create unique candle shapes. Simply pour your melted wax into the silicone mold and let it cool and solidify before removing it.
Another alternative material for DIY candle molds is plastic. Plastic containers like empty yogurt cups or disposable food containers can serve as great makeshift molds. Ensure that the plastic is clean and free from any residue before pouring in the melted wax. It’s important to note that while plastic can withstand lower temperatures, high heat exposure may cause distortion or melting.
Creating Homemade Candle Molds
If you’re feeling especially creative, you can also make your own homemade candle molds using materials found around the house. One method involves creating a container out of cardboard or paper by rolling it into a cylinder shape and securing it with tape. You can then pour the wax directly into this homemade mold.
For more intricate shapes, you can use modeling clay to sculpt your desired design for the mold. Once the clay has hardened, carefully remove it from the mold and pour melted wax into the cavity left behind. This method allows you to create highly personalized and one-of-a-kind candles.
By utilizing these alternative materials and methods, you can unleash your creativity and experiment with various shapes and designs without spending a fortune on expensive commercial molds.
Low Cost Wax Options
Low budget candle making doesn’t mean you have to compromise on the quality or variety of wax options available. In fact, there are several affordable wax options that can expand your choices without overspending. Here are some types of wax to consider for your low budget candle making projects:
- Paraffin Wax: Paraffin wax is one of the most common and budget-friendly options for candle making. It is readily available and often sold at a lower price compared to other waxes. Paraffin wax has a high melting point and provides good scent throw, making it suitable for many types of candles.
- Soy Wax: Soy wax is another cost-effective option that has gained popularity among candle makers. It is made from soybeans, which makes it a natural and renewable choice. Soy wax also has excellent fragrance retention and produces a clean burn. While it may be slightly more expensive than paraffin wax, its eco-friendly properties make it worth considering.
- Beeswax: Although beeswax is generally more expensive than other waxes, it offers unique qualities that make it desirable for certain candle projects. Beeswax candles have a beautiful natural fragrance, long burn time, and emit negative ions that purify the air. If you’re looking to add a touch of luxury to your low budget candle making ventures, consider incorporating beeswax into your repertoire but in smaller quantities or by mixing it with other less expensive waxes.
To further stretch your budget while still enjoying a variety of wax options, consider exploring alternatives such as blended waxes or experimenting with different ratios of different types of wax.
One important aspect to keep in mind when selecting low-cost wax options is to ensure they meet quality standards and provide good performance in terms of scent throw, burn time, and appearance. Always read reviews or seek recommendations from experienced candle makers in online forums or local communities before settling on a specific wax choice.
By exploring these low-cost wax options, you can expand your choices without overspending and continue to create beautiful candles that are both budget-friendly and high quality. Remember, with some creativity and resourcefulness, you can ignite your candle making journey while still saving money.
Budget-Friendly Candle Decoration Techniques
Decorating your candles doesn’t have to be an expensive endeavor. In fact, there are many budget-friendly candle decoration techniques that you can employ to add a personalized touch to your creations without breaking the bank. Whether you’re looking to create a rustic, elegant, or fun design, there’s a cost-effective way to achieve the look you desire.
One popular and affordable method is decoupage. By using materials such as tissue paper, magazine cutouts, or even napkins, you can create unique patterns and designs on your candles. Simply apply a thin layer of decoupage glue onto the candle surface and carefully place your chosen material on top.
Smooth out any wrinkles or bubbles using a brush or your fingertips. Once dry, seal the design with another layer of decoupage glue for added durability. This technique allows for endless possibilities in terms of color and pattern choices.
Another budget-friendly option is using natural elements found in your surroundings. For instance, you can incorporate dried flowers and herbs into your candle designs. Gather items such as lavender petals, rosebuds, or eucalyptus leaves and arrange them around the candle’s surface.
Secure them in place by wrapping twine or ribbon around the candle tightly. Not only does this method give your candles a charming and organic look, but it also adds a subtle scent when the candle is lit.
If you’re feeling especially creative, try carving designs into your candles using basic tools like toothpicks or small knives. This technique works best with softer waxes like soy or beeswax. Start by drawing your desired design lightly onto the candle’s surface with a pencil before carefully carving along those lines with your tools. This simple yet effective decoration method allows you to personalize each candle with intricate patterns or even monograms.
Thrifted Candle Containers
One great way to keep costs low in candle making is by finding inexpensive containers. Thrift stores, garage sales, and online marketplaces are treasure troves of hidden gems just waiting to be discovered. Not only can you save money, but you can also find unique and one-of-a-kind containers that will make your handmade candles stand out.
When searching for thrifted candle containers, it’s important to keep a few tips in mind. First, look for containers made from non-flammable materials such as glass or ceramic. These materials are not only safe for burning candles but also provide a beautiful aesthetic.
Another tip is to look for containers with lids or covers. This allows you to easily transport or store your candles, keeping them free from dust and prolonging their shelf life. Additionally, consider the size and shape of the container. Look for options that are compatible with your chosen candle molds or allow space for pouring melted wax directly into the container.
To make the most of your thrift store shopping experience, it’s helpful to have an idea of what you’re looking for beforehand. Do you want vintage mason jars? Teacups? Mason jars? There’s no shortage of options available if you know what kind of vibe you’re going for.
| Container Type | Advantages | Disadvantages |
|---|---|---|
| Glass Jars | – Durable material – Transparent, allowing the glow of the candle flame to shine through. – Easily customizable with labels or ribbons | – Limited availability in certain sizes and shapes – May require cleaning before use |
| Ceramic Containers | – Variety of unique designs and patterns – Heat resistant, making them suitable for larger candles or tea lights. – Often come with lids or covers | – Fragile and can break easily if not handled carefully – May have limited choices depending on availability |
| Teacups | – Charming and elegant aesthetic – Can often be found in sets, making it easy to create matching candles for gifts or home decor | – Limited space for pouring melted wax directly into the cup – Typically smaller in size, resulting in shorter burning times |
With a little patience and a keen eye, you can find beautiful candle containers at a fraction of the price of new ones. So next time you visit a thrift store or explore online marketplaces, keep an open mind and be prepared to stumble upon hidden gems that will elevate your candle making experience without breaking the bank.
Low Budget Candle Making Tips and Tricks
When it comes to low budget candle making, there are plenty of tips and tricks you can employ to maximize your resources and minimize costs. Whether you’re a beginner or a seasoned candle maker on a tight budget, these tips will help ignite your creativity while saving you money.
1. Use what you have: One of the best ways to keep costs down when making candles is to use materials that you already have at home. Look around your kitchen and find items that can be repurposed as candle-making tools.
For example, instead of purchasing specialized stirring sticks or wicks holders, use wooden chopsticks or paperclips. Get creative and think outside the box – you’ll be surprised at how many everyday objects can be used in candle making.
2. Buy in bulk: Purchasing candle-making supplies in bulk is a great way to save money in the long run. Look for online suppliers or local stores that offer discounts for buying larger quantities.
Not only will this reduce the cost per unit of each item, but you’ll also have a stockpile of materials that will last for multiple projects. Consider teaming up with other candle makers in your community to buy supplies together and split the cost.
3. Upcycle containers: Instead of buying brand new containers for your candles, consider repurposing items that would otherwise end up in the trash or recycling bin. Glass jars, tin cans, teacups, or even seashells can make interesting and unique candle containers. Visit thrift stores, garage sales, or check online marketplaces for inexpensive containers that have character and charm.
4. Experiment with natural dyes: Instead of purchasing expensive candle dyes, try using natural ingredients from your kitchen to add color to your candles. Beetroot powder, turmeric, coffee grounds, or even tea leaves can create beautiful hues when added to melted wax. Not only is this a cost-effective option, but it also allows you to create unique and personalized colors for your candles.
By implementing these low budget tips and tricks, you’ll be able to enjoy the art of candle making without breaking the bank. Remember, creativity knows no bounds – embrace the challenge of working with limited resources and let your imagination run wild.
Conclusion
In conclusion, low budget candle making offers individuals the opportunity to ignite their creativity and save money while pursuing a fulfilling and therapeutic hobby. By exploring cost-effective alternatives for traditional candle making supplies, such as DIY molds and affordable wax options, enthusiasts can create unique and personalized candles without overspending. Additionally, thrifty shopping for container options and implementing budget-friendly decoration techniques adds an extra layer of charm to the finished products.
One of the major benefits of low budget candle making is the financial savings it offers. With careful planning and resourcefulness, individuals can enjoy the satisfaction of creating beautiful candles without breaking the bank. By utilizing lesser-known tools and materials that are easily accessible and affordable, crafters can explore different techniques and experiment with various designs without incurring high expenses.
Moreover, engaging in low budget candle making not only provides an outlet for creativity but also serves as a therapeutic activity. The process of melting wax, pouring it into molds, choosing fragrances, and adding personal touches to each candle cultivates a sense of calmness and mindfulness. This hobby allows individuals to unplug from technology, relax their mind, and focus on creating something tangible with their own hands.
In conclusion, low budget candle making is a rewarding craft that combines artistic expression with frugality. It offers countless possibilities for creativity while being mindful of one’s financial resources. By embarking on this journey, readers can unlock their creative potential, indulge in therapeutic moments of relaxation, and enjoy the fruits of their labor without hesitation or guilt. So go ahead – ignite your creativity and save with low budget candle making.

Welcome to my candle making blog! In this blog, I will be sharing my tips and tricks for making candles. I will also be sharing some of my favorite recipes.


