Candle making has become a popular hobby for many, with one particular trend catching the attention of DIY enthusiasts – making candles in jelly jars. The appeal of these charming jars goes beyond their aesthetic appeal, as they offer a unique and practical vessel for your homemade creations. In this article, we will delve into the art of candle making in jelly jars, exploring everything from selecting the right jars to safety tips and creative decorating ideas.
Choosing the right jelly jars for your candle making project is essential, as different types and sizes can impact the overall look and functionality of your candles. Whether you prefer standard mason jar shapes or quirky mini jelly jars, there are plenty of options to suit your style and vision.
Additionally, selecting the perfect wax is crucial in achieving the desired burning time and scent throw. From soy wax to beeswax and paraffin, each type offers its own unique benefits for candle making.
Adding fragrance to your candles can elevate the sensory experience, but it requires careful consideration and blending to create harmonious scents. Similarly, coloring your candles can be a fun way to customize your creations using natural dyes or synthetic coloring.
As we explore these different aspects of candle making in jelly jars, you will learn valuable tips and techniques to enhance your craft. So roll up your sleeves, gather your supplies, and let’s get started on this creative journey together.
Choosing the Right Jelly Jars
When it comes to making candles in jelly jars, choosing the right type and size of jar is essential to ensuring a successful and aesthetically pleasing end product. Jelly jars, also known as canning jars, come in various shapes and sizes, making them versatile containers for candle making. The most common sizes for jelly jars range from 4 oz to 16 oz, providing options for different candle sizes and burn times.
Types of Jelly Jars
There are different types of jelly jars available on the market, including regular-mouth and wide-mouth jars. Regular-mouth jars have a smaller opening, which can be ideal for creating a more concentrated scent throw when the candle is burning.
On the other hand, wide-mouth jars offer easier access for adding wax and fragrance oils during the candle-making process. Additionally, some jelly jars come with decorative patterns or textured glass that can add a unique touch to your candles.
Choosing the Right Size
The size of the jelly jar you choose will depend on the type of candle you want to make. Smaller 4 oz jars are perfect for creating votive candles or small travel-sized candles, while larger 16 oz jars are great for creating statement pieces or longer-burning candles. Consider the burn time you want to achieve and the intended use of the candle when selecting the size of your jelly jar.
Whether you prefer a classic look with regular-mouth jelly jars or a more contemporary style with wide-mouth ones, choosing the right jelly jar is an important step in creating beautiful and functional candles. Experimenting with different jar sizes and types can also inspire creativity in your candle-making process and lead to unique designs that stand out.
Explore various options available in terms of shapes, textures, and colors to find the perfect jelly jar for your next candle-making project.
Selecting the Perfect Wax
When it comes to making candles in jelly jars, selecting the perfect wax is a crucial step that can greatly impact the quality and characteristics of your final product. There are several types of wax options available for candle making, each with its own unique qualities and benefits. Let’s explore some of the most popular choices:
- Soy Wax: Soy wax is a natural and renewable resource made from soybean oil. It burns cleanly, slowly, and evenly, making it a great choice for candle makers looking for an eco-friendly option. Soy wax also has excellent scent throw capabilities, allowing fragrances to disperse effectively.
- Beeswax: Beeswax is another natural option that carries a subtle honey-like scent. It has a long burn time and emits negative ions when burned, which can help purify the air. Beeswax candles have a beautiful golden hue and are known for their dripless burn.
- Paraffin: Paraffin wax is derived from petroleum, making it an affordable and widely available choice for candle making. It has excellent scent throw and can hold colors well, allowing for vibrant candle creations. However, some may prefer natural alternatives due to environmental concerns.
Each type of wax offers unique characteristics that cater to different preferences and needs. Experimenting with different options can help you find the perfect wax for your homemade jelly jar candles.
When making candles in jelly jars, consider not only the type of wax but also factors like melting point, fragrance compatibility, and overall aesthetic appeal. Whether you opt for soy wax for its eco-friendly properties or beeswax for its natural beauty, choosing the right wax is key to creating high-quality candles that will delight both yourself and those around you.
Adding Fragrance
When it comes to making candles in jelly jars, adding fragrance is a crucial step to create a delightful and inviting atmosphere in your space. The right scent can enhance the ambiance of any room and evoke specific emotions or memories. Here are some tips for selecting and blending different scents to create unique candle fragrances:
- Start by choosing high-quality fragrance oils specifically designed for candle making. These oils are formulated to disperse well in wax and provide a strong, long-lasting scent when the candle is burned.
- Consider combining multiple fragrance oils to create complex and distinctive scents. Experiment with different combinations, such as floral and fruity notes or woody and spicy undertones, to find the perfect blend that appeals to your senses.
- Keep in mind the season or occasion when selecting fragrances. For example, opt for fresh and citrusy scents for spring and summer, warm and cozy scents for fall and winter, or festive scents for holidays like Christmas or Halloween.
Adding fragrance to your candles can truly elevate the overall experience, making them not only visually appealing but also aromatically pleasing. Whether you prefer soothing lavender, invigorating eucalyptus, or sweet vanilla bean, the options are endless when it comes to creating your own signature candle scents. Remember to always follow recommended guidelines for the safe usage of fragrance oils during the candle-making process.
Share your unique candle creations on social media using the hashtag #JellyJarCandleCreations to inspire others to embark on their own creative journey of making candles in jelly jars. Let your imagination run wild as you experiment with different fragrances and blends, bringing warmth and light into your home with personalized candles that reflect your individual tastes and style.
Coloring Your Candles
When it comes to making candles in jelly jars, coloring your creations can add a touch of personalization and style. There are various techniques for adding color to your candles, whether you prefer natural dyes or synthetic coloring options.
Natural Dyes
One popular option for coloring candles is using natural dyes derived from sources like herbs, spices, fruits, and vegetables. These dyes not only provide beautiful colors but also align with a more eco-friendly approach to candle making. For example, turmeric can create a lovely yellow hue, while beetroot powder can result in a soft pink shade. Experimenting with natural dyes can bring a unique element to your candle-making process.
Synthetic Coloring
On the other hand, synthetic coloring offers a wide range of vibrant and customizable options for tinting your candles. Liquid candle dye is one common choice for easily incorporating color into your wax mixtures. These dyes are highly concentrated, so only a few drops are usually sufficient to achieve the desired color intensity. Whether you prefer pastel tones or bold shades, synthetic colors allow for endless possibilities in creating visually appealing candles.
Incorporating color into your candles not only enhances their aesthetic appeal but also allows you to match them with specific themes or decors. Whether you opt for natural dyes for a more organic feel or choose synthetic coloring for vivid hues, experimenting with different colors can elevate your candle-making experience and result in beautiful customized creations that reflect your personal style.
Safety First
Making candles in jelly jars has become a popular trend among DIY enthusiasts and crafters looking to create unique and personalized candles. Safety is paramount when embarking on this creative endeavor, as working with hot wax can pose risks if not done properly. This section will provide detailed instructions on how to safely melt wax, add fragrance, and pour the hot wax into jelly jars for your candle-making project.
Before starting the candle-making process, it is essential to gather all the necessary materials and tools. This includes a double boiler or microwave-safe container for melting the wax, a thermometer to monitor the temperature, fragrance oils or essential oils for scent, wicks suitable for container candles, jelly jars for pouring the wax into, and any coloring agents if you choose to add color to your candles.
When melting the wax, it is crucial to do so using a gentle heat source to prevent scorching or overheating. Whether you are using soy wax, beeswax, or paraffin, each type of wax has its melting point that should be followed closely. Overheating the wax can result in safety hazards such as fires or burns.
Always stir the melted wax gently and never leave it unattended while heating. Once the wax has reached the desired temperature and consistency according to the specific type being used, carefully add your chosen fragrance oil while stirring gently to ensure even distribution.
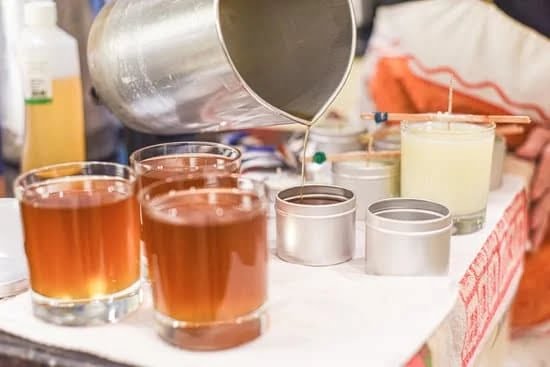
After adding fragrance to your melted wax mixture, you are ready to pour it into your prepared jelly jars. Be cautious during this step as hot wax can cause severe burns if spilled or splashed. To avoid any accidents, use caution when handling the containers with molten wax and consider using protective gloves if necessary. Additionally, make sure that your work area is clean and free from any clutter that could pose a hazard while pouring the hot wax.
| Materials Needed | Safety Tips |
|---|---|
| Double boiler/microwave-safe container | Use caution when handling hot materials |
| Thermometer | Monitor temperature closely to prevent overheating |
| Fragrance oils/essential oils | Add slowly while stirring gently |
Decorating Your Candles
When it comes to making candles in jelly jars, the decoration and finishing touches play a significant role in the overall appeal of your final product. Adding personalized labels to your jelly jar candles not only gives them a professional look but also allows you to showcase your creativity.
You can design and print custom labels with the name of your candle scent, ingredients used, and even your own logo or branding. This extra touch will make your candles stand out and make them perfect for gifting or selling.
Another creative way to decorate your jelly jar candles is by using ribbons. You can choose ribbons in different colors, patterns, and textures to complement the fragrance of your candle or match a specific theme.
Whether you tie a simple bow around the neck of the jar or create intricate designs with ribbon wrapping, this versatile decorating option adds a charming and elegant touch to your candles. Ribbons not only enhance the visual appeal of your candles but also make them more giftable and visually appealing.
In addition to labels and ribbons, incorporating charms into your jelly jar candles can take their decorative appeal to a whole new level. Charms come in various shapes, sizes, and themes, allowing you to customize each candle according to its scent or intended purpose. From small metal charms that reflect the fragrance notes of the candle to themed charms that match seasonal occasions or holidays, there are endless possibilities for adding a unique and personal touch to your homemade candles.
| Decoration Options | Benefits |
|---|---|
| Personalized Labels | Showcase creativity and professionalism |
| Ribbons | Add charm and elegance; perfect for gifting |
| Charms | Customize candles; add unique touch based on theme or scent |
Caring for Your Candle
In conclusion, the trend of making candles in jelly jars has been steadily increasing in popularity due to their aesthetic appeal, versatility, and ease of customization. Choosing the right jelly jars, selecting the perfect wax, adding fragrance, coloring your candles, and ensuring safety during the candle-making process are all crucial steps in creating high-quality candles that not only look beautiful but also emit captivating scents.
Once you have successfully made your candles in jelly jars, it is essential to know how to care for them properly. By following simple tips such as trimming the wick before each use, keeping the candle away from drafts or heat sources, and storing them in a cool, dry place away from direct sunlight, you can ensure their longevity and maintain an optimal burning experience every time you light them.
We encourage you to try your hand at making candles in jelly jars and unleash your creativity by experimenting with different scents, colors, and decorations. Share your unique creations on social media using the hashtag #JellyJarCandleCreations to inspire others to embark on their candle-making journey. Let’s spread the joy of crafting homemade candles while enjoying the cozy ambiance they bring into our living spaces.

Welcome to my candle making blog! In this blog, I will be sharing my tips and tricks for making candles. I will also be sharing some of my favorite recipes.

