The process of making candles out of mason jars is not only a creative and enjoyable activity, but it also produces beautiful and versatile candles that can add warmth and charm to any space. Mason jar candles have become increasingly popular due to their rustic aesthetic and practicality.
Whether you want to create a romantic ambiance during dinner, unwind with a soothing scent after a long day, or simply add a touch of coziness to your home decor, mason jar candles are the perfect choice.
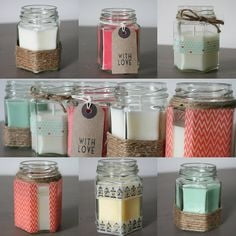
One of the reasons why mason jar candles have gained such popularity is their versatility. These glass jars come in various sizes, shapes, and styles, allowing you to customize your candle creations according to your preferences and the specific atmosphere you want to create. From small votives that fit perfectly on a bedside table to large jars that make a statement centerpiece, there is no limit to what you can achieve with mason jar candles.
In this article, we will explore the fascinating world of making candles out of mason jars. We’ll start by understanding the essential supplies and tools needed for candle making so that you can gather everything before getting started. Then, we’ll delve into the different options available when choosing the perfect mason jars for your candles.
Additionally, we’ll discuss the various types of candle wax and how they affect the burning time and overall quality of your creations. Finally, we’ll touch on safety precautions and tips for achieving stunning designs while pouring the wax.
Whether you’re new to candle making or an experienced hobbyist looking for new inspiration, this article will provide you with all the information needed to create beautiful mason jar candles. So grab your apron, gather your supplies, and let’s dive into the wonderful world of crafting these charming and versatile candles.
Understanding the Basics
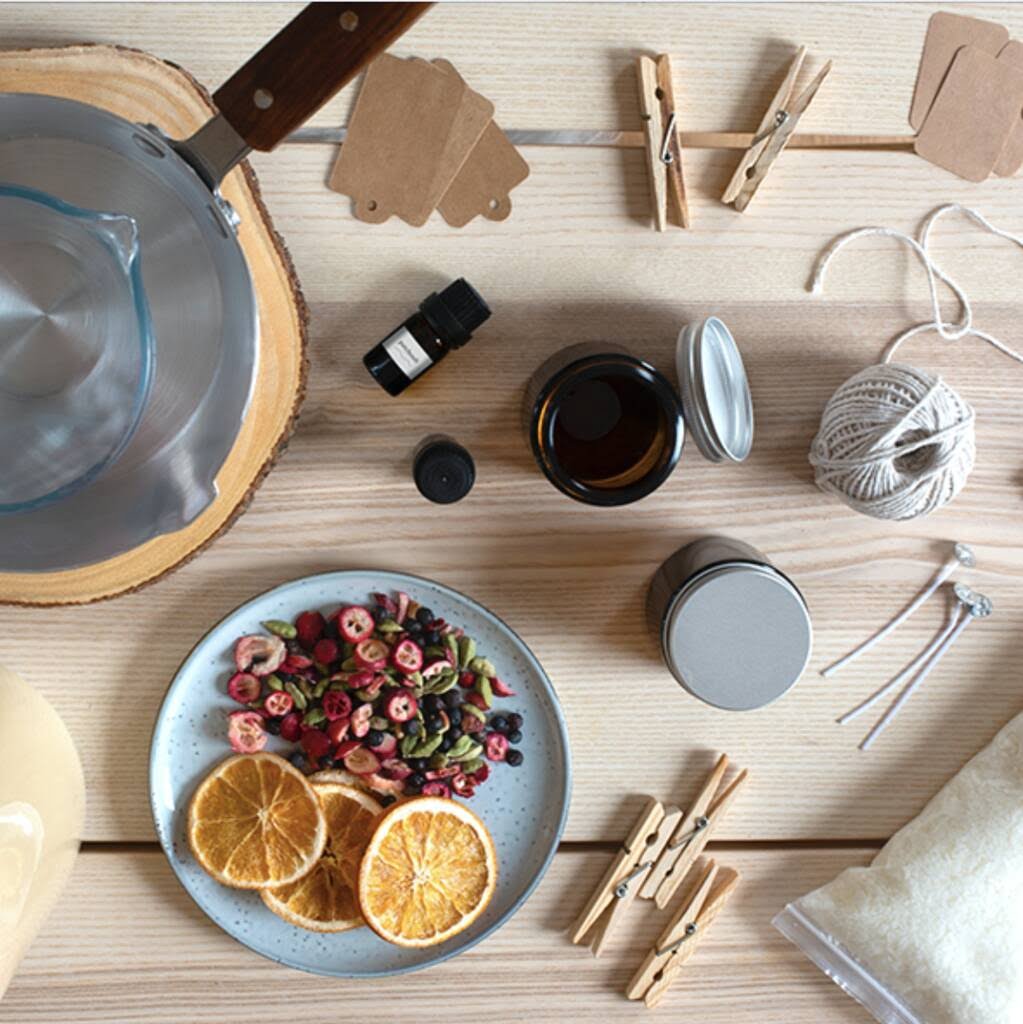
Candle making can be a fun and rewarding hobby, and mason jars provide the perfect vessel for creating beautiful candles. Before getting started, it is important to understand the basic supplies and tools needed for candle making. Having the right materials on hand will ensure that your candle making process goes smoothly and that your finished candles turn out beautifully.
Here are some essential supplies and tools you will need for candle making:
1. Wax: The main ingredient in candles, wax comes in different types such as soy wax, paraffin wax, or beeswax. Choose a wax that suits your preferences and needs.
2. Mason Jars: Of course, you will need mason jars of various sizes to create your candles. The size of the jar will depend on how large or small you want your candle to be.
3. Wicks: Wicks are crucial for a successful candle making process. They come in different sizes and thicknesses, so choose a wick that matches the diameter of your mason jar.
4. Fragrance Oils: If you want scented candles, you’ll need fragrance oils to add an appealing scent to your candles. There are countless options available, from floral scents to fruity aromas.
5. Colorants: To add color to your candles, you’ll need colorants such as dyes or pigments. They come in various forms like liquid or powder, so choose the type that works best with your chosen wax.
In addition to these essential supplies, there are also some tools that will make your candle making process easier:
1. Double Boiler: A double boiler is used to heat the wax gently and prevent it from scorching or overheating. It consists of a smaller pot placed inside a larger pot filled with water.
2. Thermometer: To ensure the correct temperature for melting and pouring the wax, use a thermometer designed specifically for candle making.
3. Pouring Pitcher: A pouring pitcher with a spout makes it easy to transfer the melted wax into the mason jars without spilling.
4. Stirring Utensil: You’ll need a heat-resistant stirring utensil, such as a wooden or silicone spoon, to mix the wax and incorporate any fragrance oils or colorants.
By gathering these essential supplies and tools, you will be well-equipped to start your candle making journey. Understanding how each item contributes to the process will help you create beautiful and customized candles that you can enjoy or give as thoughtful gifts.
Choosing the Perfect Mason Jars
When it comes to making candles out of mason jars, one of the most important aspects to consider is choosing the perfect mason jars. The right jar not only enhances the overall aesthetic appeal of your candle but also ensures that it functions properly. In this section, we will explore different sizes, shapes, and styles of mason jars that are ideal for candle making.
1. Sizes: Mason jars come in various sizes, ranging from small votive jars to large containers. The size of the jar you choose depends on your preferences and the purpose of the candle. Smaller jars are perfect for creating individual or gift-sized candles, while larger containers are great for centerpiece or statement candles.
2. Shapes: Mason jars are available in different shapes such as traditional round jars, square jars, hexagonal jars, and more. Each shape offers a unique visual appeal to your candle design. Consider the style you want to achieve and select a shape that complements your desired aesthetic.
3. Styles: Apart from traditional clear glass mason jars, there are also colored glass options available in various hues like amber or blue. These colored glass jars can add a touch of elegance and sophistication to your candle designs. Additionally, you can opt for frosted or textured glass mason jars to create a more artistic and visually interesting look.
When choosing mason jars for your candles, keep in mind factors such as burn time (larger jars typically have longer burn times), heat resistance (ensure that they can withstand high temperatures), and compatibility with other supplies such as lids or tops if you want to seal your finished candles.
By carefully considering the different sizes, shapes, and styles of mason jars available on the market, you can find the perfect ones that align with your creative vision for handmade candles. Experimenting with different combinations can result in stunning and unique candle designs that will captivate both the eye and the senses.
Selecting the Right Wax
Candle wax is one of the most important factors to consider when making candles out of Mason jars. Different types of wax have unique characteristics that affect the appearance, burn time, and scent throw of the candle. It is essential to choose the right wax to achieve the desired results. Here, we will explore and compare different candle wax types and their benefits.
1. Paraffin Wax: Paraffin wax is a popular choice for candle making due to its affordability and versatility. It has a low melting point, which allows for easy pouring and faster setting time. Paraffin wax also has good scent throw and produces bright, long-lasting flames. However, it is a petroleum byproduct, so some people prefer more natural alternatives.
2. Soy Wax: Derived from soybean oil, soy wax is an eco-friendly option that is gaining popularity among candle makers. It burns cleaner than paraffin wax and produces minimal soot. Soy candles have a longer burn time compared to paraffin candles, meaning they last longer. They also have excellent scent throw and can hold fragrances well.
3. Beeswax: Beeswax is a premium choice for luxurious candles. It has a beautiful natural aroma and emits negative ions when burned, which can purify the air in your space. Beeswax candles burn slowly and produce a warm glow with minimal dripping. However, beeswax is more expensive than other types of wax.
4. Coconut Wax: Made from the meat of coconuts, coconut wax offers excellent scent throw and a clean burn like soy wax but with an even higher melting point. This makes it ideal for creating candles with intricate designs or in warmer environments.
| Wax Type | Key Features |
|---|---|
| Paraffin Wax | Affordable, versatile, good scent throw, bright flames |
| Soy Wax | Eco-friendly, clean burn, long-lasting, excellent scent throw |
| Beeswax | Natural aroma, slow burning, minimal dripping |
| Coconut Wax | Strong scent throw, clean burn with high melting point |
When selecting the right wax for your Mason jar candles, consider factors such as cost, environmental impact, fragrance performance, and burn time. Each type of wax has its advantages and disadvantages. Experimenting with different waxes can help you find the perfect match for your candle making projects.
Adding Fragrance and Color
When it comes to making candles out of mason jars, adding fragrance and color is a crucial step to create beautiful and personalized creations. Whether you want to create scented candles for relaxation or decorative candles to match your home decor, there are various essential oils and pigments that you can use to bring your vision to life.
Choosing the Right Essential Oils
Essential oils not only provide a pleasant aroma but also offer potential therapeutic benefits. When selecting essential oils for your mason jar candles, it’s important to consider the scent profile you desire as well as any potential health benefits you may be seeking.
Some popular essential oil options include lavender for relaxation, eucalyptus for invigoration, and citrus scents like lemon or orange for an uplifting experience. Be sure to choose high-quality essential oils from reputable sources to ensure the best scent throw and safety in your candles.
Exploring Pigments for Colorful Creations
Adding color to your mason jar candles can enhance their aesthetic appeal. There are several ways you can introduce pigments into your candle-making process. One option is to use liquid dyes specifically designed for candle making, which can easily mix into melted wax and create vibrant hues.
Another option is using solid color blocks or chips made from pigmented wax that melt directly into the wax pool while burning, providing a gradual release of color throughout the life of the candle. Whichever method you choose, always follow manufacturer instructions on quantity usage guidelines.
Experimenting with Blends
Don’t be afraid to get creative with fragrance combinations and colors. You can experiment with blending different essential oils together to create unique scent profiles that suit your preferences. For example, combining lavender with vanilla creates a soothing and comforting aroma, while mixing citrus scents like orange and grapefruit can create an energizing and invigorating blend.
Additionally, you can play with layering different colors within the same candle to create a visually stunning effect. This experimentation allows you to personalize your mason jar candles and make them truly one-of-a-kind.
By exploring various essential oils and pigments, you can add fragrance and color to your mason jar candles, creating not only visually appealing but also aromatic accents for your space. Remember to always follow guidelines for proper usage of essential oils and pigments in candle making to ensure safety and optimal scent throw. With a bit of creativity and experimentation, you can transform ordinary mason jars into extraordinary candles that will delight both your eyes and nose.
The Art of Wicking
One of the most important aspects of making candles out of mason jars is choosing and positioning the right wick. The wick plays a crucial role in how well your candle burns, so it’s essential to understand the art of wicking. Here is a step-by-step guide on choosing and positioning the right wick for your mason jar candles.
1. Determine the Size and Type of Wick: The size and type of wick you choose will depend on the diameter of your mason jar. To determine the appropriate size, you can use a wick sizing chart or follow general guidelines based on jar size. For small jars (under 2 inches in diameter), a small-sized cotton wick is usually sufficient, while larger jars may require medium or large-sized wicks.
2. Consider the Candle Wax: Different types of wax burn differently, so it’s important to consider the specific wax you’re using when selecting a wick. Soy wax, for example, tends to require larger wicks than paraffin wax. Research the recommended wick sizes for your chosen wax to ensure optimal burning.
3. Positioning the Wick: Once you’ve chosen an appropriate wick, it’s time to position it in your mason jar. Begin by applying a small amount of hot glue to the metal base of your sustainer tab (the metal plate that attaches to the bottom of the wick). Press this onto the bottom center of your mason jar, ensuring it is secure.
4. Securing the Wick: To keep your wick straight and centered while pouring in the wax, you can use several techniques.
One option is to use a clothespin or pencil as a holder and rest it across the top rim of your mason jar with the sustainer tab hanging down into the center. Another option is to tie a knot at one end of your wick and loop it around a wooden skewer or popsicle stick, resting it across the top of your mason jar.
By following these steps, you can master the art of wicking and ensure your mason jar candles burn beautifully. Remember to always test your chosen wick in a small sample candle before pouring it into your final mason jar to ensure optimal burning and safety.
Pouring the Wax
One of the most crucial steps in making candles out of Mason jars is pouring the wax. This step requires precision and careful technique to achieve stunning candle designs. In this section, we will explore the process of pouring the wax and provide helpful tips for success.
To begin, it is important to choose the right type of wax for your project. There are various options available such as soy wax, beeswax, and paraffin wax. Each type has its own unique characteristics, so it is essential to consider factors such as burn time, scent throw, and eco-friendliness when selecting your wax.
Next, you will need to melt the wax using a double boiler or a specialized melting pot. This helps ensure even heat distribution and prevents the wax from scorching. It is important to closely monitor the temperature of the wax while melting to avoid overheating or underheating.
Once your wax has reached the desired temperature, it is time to pour it into your Mason jar. Start by slowly pouring a small amount of melted wax at the bottom of the jar to create a solid base for your wick. Then, carefully position your pre-tabbed wick in the center of the jar and secure it in place using a wick sticker or a dab of melted wax.
After securing the wick, continue pouring the melted wax into the jar while holding onto the wick to keep it centered. Be mindful not to overfill the jar, leaving enough space at the top for proper burning. As you pour, you can also experiment with layering different colors or adding decorative elements like dried flowers or glitter for unique candle designs.
By mastering the technique of pouring the wax, you can achieve stunning candle designs that not only provide beautiful ambient lighting but also make great personalized gifts for friends and family. Remember to always exercise caution when working with hot wax and follow safety guidelines throughout each step of the candle making process.
| Component | Description |
|---|---|
| Wax types | Soy wax, beeswax, paraffin wax |
| Tools | Double boiler or melting pot, thermometer, jar holder or oven mitts, stirring utensil |
| Temperature range | Varies depending on the type of wax (typically between 120°F – 180°F) |
Personalizing Your Candles
One of the greatest joys of making candles out of mason jars is the opportunity to personalize and decorate them to your heart’s content. Whether you’re making candles for yourself or as gifts for loved ones, adding a personal touch can make them truly special. In this section, we will explore some creative tips and techniques for decorating mason jar candles.
Choosing the Right Decorative Materials
When it comes to decorating your mason jar candles, the possibilities are endless. From ribbons and twine to lace and glitter, there are numerous materials you can use to enhance the aesthetic appeal of your candles. Consider the theme or occasion you have in mind and choose decorative materials that complement it.
For a rustic look, try using burlap or jute twine to wrap around the jar. If you’re going for an elegant feel, delicate lace or satin ribbon can add a touch of sophistication.
Adding Embellishments
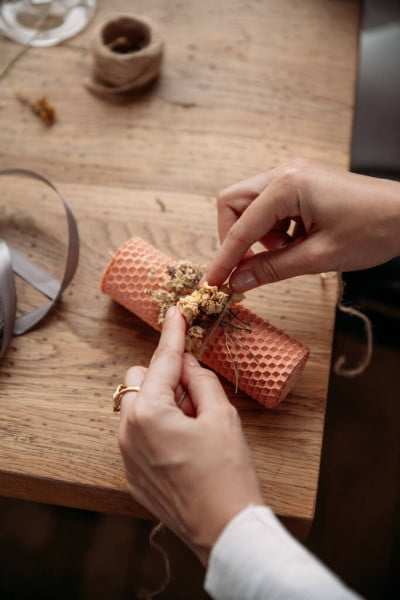
In addition to decorative materials, you can also add embellishments to further customize your mason jar candles. One popular option is attaching charms or small trinkets onto the jars using hot glue or adhesive dots. This can create a unique and eye-catching design that showcases your personal style. Another idea is to incorporate dried flowers or herbs into your candle decoration by pressing them onto the outside of the jar before pouring in the wax.
Experimenting with Labels and Tags
Labels and tags offer another way to personalize your mason jar candles and give them a professional finish. You can design custom labels on your computer, print them out on adhesive paper, and stick them onto the jars.
Alternatively, consider using hang tags tied around the necks of the jars with colorful string or ribbon. These labels and tags not only add flair but also provide an opportunity for you to include important information such as the scent of the candle or a personal message.
By incorporating these creative tips and techniques, you can transform plain mason jar candles into stunning works of art. Experiment with different materials, embellishments, and labeling options to create candles that truly reflect your style and personality. The joy of decorating mason jar candles lies in the endless possibilities for customization, making it a delightful activity for both beginners and experienced candle makers alike.
Safety First
Mason jar candles not only provide a cozy and warm ambiance, but they also offer endless possibilities for creativity and personalization. However, it’s important to prioritize safety when making candles to prevent accidents or potential hazards. This section will outline the best practices and precautions that should be taken to ensure a safe candle making process.
One of the most important aspects of candle making safety is working in a clean and well-ventilated space. This helps to minimize the risk of fire hazards and ensures that any potential fumes from melting wax or fragrance oils are properly ventilated. It’s also essential to have a fire extinguisher nearby in case of emergencies and to never leave candles unattended while they are lit.
When handling hot wax, it is crucial to take necessary precautions such as wearing protective gloves, long sleeves, and safety glasses to protect yourself from burns or splashes. It is recommended to use a double boiler or a dedicated melting pot for melting the wax instead of using direct heat sources such as stovetops or microwaves. This helps prevent accidental overheating or burning of the wax.
Choosing the right wicks is another important safety consideration. It’s essential to select wicks that are appropriate for the size of your mason jar candles to ensure proper burning without excessive smoke or soot buildup. There are various types of wicks available, including cotton-core wicks, wooden wicks, and zinc core wicks, each with their own benefits and considerations.
In summary, prioritizing safety when making mason jar candles is vital for a successful and hazard-free experience. This includes practicing good hygiene, using the proper equipment, working in a well-ventilated area, choosing appropriate wick sizes, and being vigilant throughout the entire candle making process. By following these best practices and taking necessary precautions, you can enjoy the creative process of candle making while ensuring the safety and well-being of yourself and others.
| Safety Precautions | Best Practices |
|---|---|
| Work in a clean and well-ventilated space | Choose a dedicated melting pot or double boiler for wax melting |
| Have a fire extinguisher nearby | Select appropriate wick sizes for your mason jar candles |
| Never leave lit candles unattended | Protective gloves, long sleeves, and safety glasses when handling hot wax |
Lighting Up Your Space
Candles are not only a great way to add warmth and ambiance to any space, but they can also create a cozy and inviting atmosphere. Proper candle placement is essential to ensure both safety and aesthetic appeal. Here are some tips for placing your mason jar candles strategically and creating a cozy atmosphere in your space.
Consider the purpose of the space
Before placing your mason jar candles, think about the purpose of the room or area you are decorating. Different spaces may require different types of candle arrangements. For example, if you are looking to create a serene and relaxing environment in a bedroom, consider placing candles on nightstands or dressers. If you want to enhance the cozy atmosphere in a living room, scatter mason jar candles on coffee tables or shelves.
Grouping and layering
To create depth and visual interest, consider grouping and layering your mason jar candles. Grouping candles together can create a focal point and amplify their impact. For example, place three differently sized mason jar candles of similar colors together on a tray or decorative plate. Layering candles at varying heights adds dimension to the arrangement. Use candle holders or risers to elevate some jars while leaving others at tabletop level.
Safety precautions
While it’s important to focus on creating an inviting atmosphere with your mason jar candles, safety should always be the top priority. Never leave burning candles unattended and keep them away from flammable objects such as curtains or furniture. Make sure that jars are placed on sturdy surfaces that won’t tip over easily. If using multiple candles in one area, make sure they are spaced out enough so that they don’t come into contact with each other.
By considering the purpose of the space, grouping and layering your candles strategically, and taking necessary safety precautions, you can create a cozy atmosphere with your mason jar candles that will enhance the overall aesthetic of your space. So go ahead and experiment with different candle placements to transform your environment into a warm and inviting haven.
Conclusion
Creating handmade mason jar candles is a truly rewarding and enjoyable process. Throughout this article, we have explored the beauty and versatility of these candles, delved into the essential supplies and tools needed for candle making, and learned about various aspects such as selecting the perfect mason jars, choosing the right wax, adding fragrance and color, mastering the art of wicking, pouring the wax, personalizing the candles, and ensuring safety.
By now, you should have a clear understanding of how to make your own stunning mason jar candles. The possibilities are truly endless when it comes to creating unique and personalized designs that can enhance any space. Whether you want to create scented candles for relaxation purposes or decorative candles to add a touch of warmth to your home decor, making candles out of mason jars offers an incredible amount of creative freedom.
Not only do these homemade candles make beautiful gifts for loved ones, but they also serve as a soothing addition to any space. When lit up, they create a cozy atmosphere that instantly promotes relaxation and comfort. So why not indulge in this wonderful hobby and bring joy to yourself and those around you with handmade mason jar candles?
With practice and experimentation, you can become a master at creating stunning candle designs that reflect your own unique style and personality. So go ahead – embrace the joy of candle making.

Welcome to my candle making blog! In this blog, I will be sharing my tips and tricks for making candles. I will also be sharing some of my favorite recipes.

