Introduction
Making essential oils candles is a fun, easy way to make beautiful items and add a pleasant aroma to any room. They are simply made from materials like wax, essential oils and wicks. Not only can you make them quickly, but they also leave the air feeling fresh and smelling great! Depending on what type of wax and essential oil you choose, the process only takes about an hour or two for start to finish. With just a few supplies, you can transform your home into a tranquil and welcoming space with handmade essential oils candles.
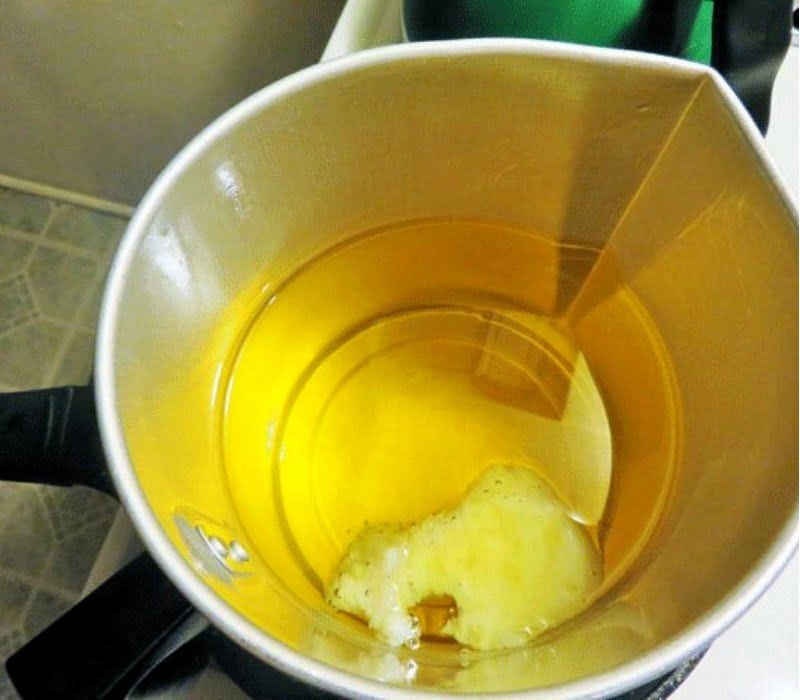
When making essential oils candles there are several key steps involved in the process. First, measure out your wax into enough pieces to fit inside the jar or container that you have chosen. Then melt each piece of wax using either a double boiler or microwave method until it reaches an appropriate melting temperature. Once the wax has melted you can add the desired amount of essential oil along with any other type of additives if desired. Finally, use the wick to guide the placement of your melted wax and let it cool before enjoying your homemade candle!
Choose Your Materials & Supplies
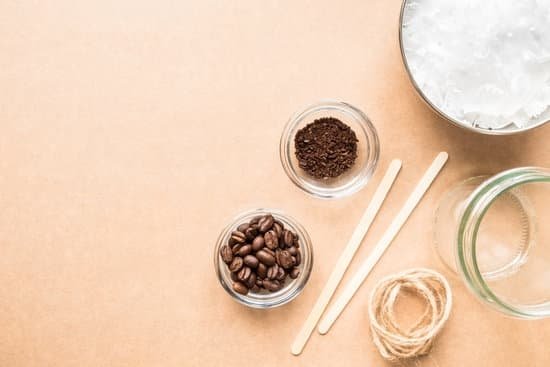
Making essential oil candles is a fun and creative way to add beautiful aromas to your home, office, or garden. The first step in creating these fragrant candles is to select the right materials and supplies so that you can make the perfect candle for your needs. Here are some of the essential items you will need:
1. Wax: You can use either paraffin or soy wax when making your essential oil candles, but be sure to pick a wax that has been specially designed for candlemaking.
2. Essential Oils: To give your candles a scent, you’ll need high quality essential oils or fragrance oils of your choosing. Be sure to buy the purest concentration available and avoid synthetic scents if possible.
3. Wicks: There are many different kinds of wicks available, so decide which substance (such as wood, cotton or paper) would work best for the type of candle you want to create.
4. Dyes/ Pigments: If you want to give your candle more visual appeal then add dyes/pigments that coordinate with the scent of your chosen essential oils.
5. Containers: After deciding on the type of wax and fragrance you’ll need containers like glass jars, cups and tins suitable for melting the wax in and pouring it into appropriate holders or molds once cooled.
6. Safety Gear: No matter what steps you take while creating essential oil candles, safety should always be considered a priority; this means investing in safety gear such as eye protection, gloves, aprons, face masks and hairnets before starting any project involving an open flame or hot liquids/melts/waxes.
Prepping the Wicks
Making essential oils candles is a rewarding and enjoyable project. Before beginning your project, there are several steps that must be taken to ensure the success of your end product.
The first step in making an essential oil candle is prepping the wicks. To start, you will need to carefully choose the type of wick you would like to use, such as braided cotton or bamboo wicks. The wick should be just long enough to comfortably fit inside whatever it is that you are using as a vessel for your candle (example: a glass container). It is best to avoid lengths that are too long which may create excessive smoke and smothered flames when burning. Additionally, the thinkness of your chosen wick should match the size of the vessel being used; thinner vessels may need a thinner wick while thicker vessels can handle larger ones.
Once you have determined which type of wick is most suitable for your project, you can prepare it by cutting off any strands on either side to create even ends and dipping it into wax so that each strand forms around 3-4 beads of wax near its tip (this will help hold it securely in place once placed into the vessel). Afterward, allow some time for the wax to cool until solidified before moving onto melting and scenting!
Blending
When blending essential oils for candle making, it is important to take into account a few key elements. First, you will need to decide what type of wax you are going to use and the melting point needed to achieve the desired end product. This can help avoid breakage or cracking of the finished candle due to too low of a temperature being reached during burning. Second, be mindful of any potential incompatibility between the essential oils and the wax being used. Certain components in some essential oils can cause an “acid reaction” when blended with certain types of waxes which can discolor or degrade the resulting candles over time. Third, consider maximum load percentages for using different essential oils in your candles; certain fragrances have much more volatile compounds than others and may lose scent if added at too high of a percentage. Finally, ensure that your final blend has been tested for safety; i.e., combustibility and flashpoint ratings should be determined ahead of pouring your candles. Being cautious with your formulation helps ensure that you create beautiful, quality candles people will want coming back for!
Crafting
Making essential oils candles can be as rewarding as it is relaxing. There are a few techniques to consider when wicking, pouring and finishing your candles. Depending on the supplies you have, you may opt for either the traditional or modern method of candle-making.
When it comes to wicking your candle, there are two primary styles of recent days ” pre-waxed cotton cord or hot glue and metal tab. Whichever method you choose will depend on the type of wax you are using ” soy or paraffin blends tend to do better when using pre-waxed cotton cord while natural beeswax works better with hot glue and metal tabs. Regardless of whether you prefer one technique over another, the key here is to make sure the wick is securely affixed so that it won’t move around when you pour in your wax and fragrances.
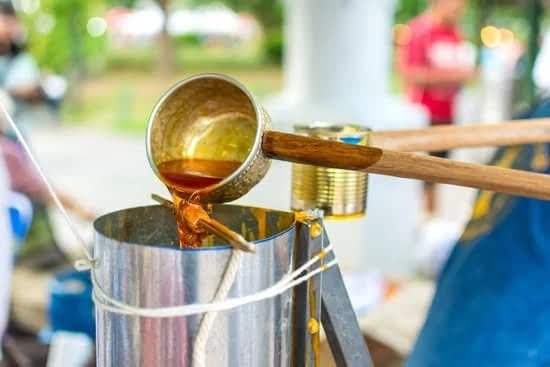
Pouring your essential oils into the heated wax can be tricky if you’ve never done it before. The general idea here is to slowly add your ingredients into heated wax as if you were stirring soup ” guidance from a seasoned candle maker or friend always helps in this regard! Afterward, always check temperatures with a thermometer before transferring it into mold forms or vessels for cooling purposes.
Finally, after letting your candles cool down completely, the final step involves adding decorative decorations such as labels, ribbons or glitter to enhance their look. Additionally, trimming off any excess wicks with scissors once cooled can help create perfectly even tops for a neat finished presentation! With these steps in mind, crafting essential oil candles at home should be an enjoyable endeavor that gets even more fun with each new batch created!
Enhancing Your Environment
Making essential oils candles can be a great way to add a relaxing scent to any room in your home. Not only do essential oils create pleasant aromas, but some scents can also have added benefits such as helping to reduce stress or provide energy. The process of making essential oils candles is fairly simple, and you can easily customize each candle with different types of essential oils, waxes, and holders.
First, decide which type of wax you would like to use. Some popular choices include soy wax and beeswax. Soy wax is often preferred because it burns longer than other types of wax and has low emissions that are better for the environment. Choose a reusable holder that fits your aesthetic preference such as glass jars or terra-cotta clay pots.
Next, melt the wax in a double boiler or microwave safely by following the instructions on the packaging. Once melted, add essential oils drop by drop using a pipette or small spoon depending on how strong you want the scent to be. Pour the mixture carefully into the holder and let cool before lighting for an enjoyable smell throughout your home!
Care & Preservation
One of the best ways to extend the life of your essential oil candle is to trim the wick every time you use it. A large, long flame can cause the wax to heat up and burn too fast, reducing its lifespan. Trimming your wick to 1/4” will help slow down the burning process and help keep the flame under control. Also, try to avoid burning your candle in drafty areas, as this could cause an excessive amount of smoke that will not only reduce its longevity but also interfere with aromatherapy sessions.
Additionally, be sure to store your essential oil candles in a cool dry place when not in use. This will prevent them from melting or becoming brittle from direct sunlight or humidity. When it comes time for another aromatherapy session or meditation practice, allow the candle enough time to warm up back up into optimal pouring temperature before using. It is also important to remember that essential oils are highly volatile substances, which means they can dissipate quickly when heated at a high temperature for too long!
Reflection
Making an essential oil candle is a fun and rewarding experience. The process of creating the candles allows you to be creative and express yourself through the design and combination of essential oils you use. You get to be in control of what type of scent and atmosphere your carefully crafted candle brings into the home. Additionally, it’s very satisfying to make something with your own two hands that can bring happiness to others.
The process is relatively simple, with few materials required – wax, fragrances and wicks – so you don’t need any specialized skills or previous experience to create unique (and beautiful) candles. You will just have to decide which type of wax and wick best suit your candle design – some people choose paraffin wax because it has a low melting point, ensuring a photogenic end result, while soy wax provides more natural longevity for the product. Once you have selected these elements, it’s time to prepare your scents! Essential oils come in many different varieties – floral, citrusy and musky are just some examples – so there’s sure to be a scent that’s perfect for the mood of your space. With these two components prepared all that’s left is pouring in the ingredients and waiting for it all to dry! As you bask in the aroma released from your new creation enjoy knowing that you created something that was both fun and special ” there’s nothing quite like making an essential oil candle !
Round-Up
Essential oil candles are an excellent way to fill any space with soothing fragrances while creating a tranquil atmosphere. Making them is relatively simple and requires only a few items. Begin by getting your candle wax, wick, essential oils, melting pot, double boiler (or microwave approved container for melting wax) secondary containers/tins for pouring the finished mixture and thermometer.
Once you’ve collected all of the tools necessary to make your essential oil candles, it’s time to start crafting! Start by setting up your double boiler or microwave approvedContainer. Then measure out your neutral scentless candle wax or choose from craft or beeswax depending on the desired final product and place in the container. Heat to 140°F and stir until completely melted.
Next add any additional desired ingredients such as melted soy wax if making a vegan candle followed Slowly by the essential oils you would like in your fragrance blend allow nearly 10 drops of individual oil per 1 oz of wax rolled up securely in cupcake liners and add while stirring periodically.
Continue stirring briskly and continuously until all ingredients are fully incorporated at which point check to ensure that your temperature is no higher than 120°F then remove from heat 12 ounces completed at this temperature works best. Slowly pour the mix into whichever containers selected filling almost near the top and leaving room for wicks set wicks add approximately one inch deep into containers poured with scented men adding weights if needed so they stand straight trimming when dry completely and let cool be sure to store extra candles in a cool place away from direct sunlight; this will help preserve their natural properties as well as keep aromas true.
Last but not least remember that safety should always be a priority when handling hot material and open flame keep an active eye during burning time so as not burn unattended or leave candles burning for too long”this will allow for maximum enjoyment time with minimal effort. Following these steps means loving enjoyable homemade essential Oil Candles crafted efficiently!

Welcome to my candle making blog! In this blog, I will be sharing my tips and tricks for making candles. I will also be sharing some of my favorite recipes.

