Are you looking to create a warm and inviting atmosphere in your home? One way to set the scene for a cozy night is by making homemade floating candles. Whether you’re hosting a dinner party, relaxing in a bath, or simply unwinding after a long day, these flickering beauties can add that extra touch of ambiance to any space.
Crafting your own floating candles not only allows you to customize the colors and scents but also provides a creative and fulfilling experience. In this guide, we will walk you through the process of making these unique candles step by step. From selecting the right materials to adding fragrance and color, we’ve got you covered with all the tips and tricks you need to create your own homemade floating candles.
Imagine soft candlelight dancing on water as you enjoy a peaceful evening at home. With our detailed instructions on creating and molding floating candles, you’ll be able to bring this enchanting vision to life in no time. So gather your supplies, roll up your sleeves, and let’s get crafting.
Materials Needed
Wax
When it comes to making homemade floating candles, the first and most essential material you’ll need is wax. Beeswax, soy wax, paraffin wax, or a blend of these can all be used for creating floating candles. Each type of wax has its own characteristics and melting points, so be sure to choose one that fits your preferences and needs.
Beeswax is known for its natural aroma and golden hue, while soy wax is eco-friendly and burns cleanly. Paraffin wax is more affordable and widely available, making it a popular choice for many candle makers.
Wicks
Another crucial supply for making floating candles is wicks. Wicks are what sustain the flame of the candle as it burns. When selecting wicks for your homemade floating candles, consider the size of the container or mold you will be using. Choose wicks that are suitable for floating candles, ensuring they stay afloat while lit. Cotton wicks are common for various candle types, including floating candles, and come in different sizes to accommodate different candle diameters.
Containers or Molds
To shape your homemade floating candles, you will need containers or molds where you can pour the melted wax. These containers should be heat-resistant and able to hold liquids without leaking. If you want traditional round-shaped floating candles, opt for small metal tart molds or silicone ice cube trays as your molds.
For more creative shapes like flowers or stars, look for silicone molds specifically designed for candle making. Remember that the size and shape of your container or mold will determine the final appearance of your homemade floating candles.
Step-by-Step Instructions
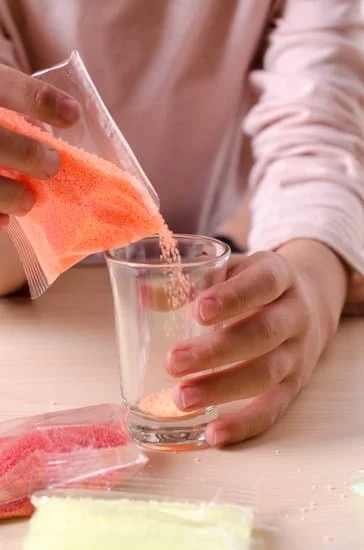
Creating homemade floating candles is a fun and rewarding DIY project that can add ambiance to any space. To get started, gather the necessary materials such as candle wax, wicks, a double boiler, a thermometer, fragrance oils (optional), coloring (optional), and molds. The first step is to melt the wax in a double boiler until it reaches the desired temperature, usually around 170-180°F.
Once the wax is melted, add any fragrance oils or coloring for customized candles. Stir well to ensure an even distribution of color and scent throughout the wax. Next, prepare your molds by securing the wicks at the center of each one. You can use adhesive tabs or hot glue to keep the wicks in place.
Carefully pour the melted wax into the molds, ensuring that the wick stays centered. Allow the candles to cool and harden completely before removing them from the molds. Once your floating candles are set, trim the wick to about half an inch and you’re ready to light them up. Place them in a bowl or container filled with water for a beautiful floating effect.
| Materials Needed | Supplies |
|---|---|
| Candle Wax | Soy wax is popular for its clean burn |
| Wicks | Cotton wicks work best for floating candles |
| Double Boiler | To melt wax safely |
| Thermometer | To monitor wax temperature |
Get creative with your homemade floating candles by experimenting with different colors, scents, and mold shapes. Whether you’re making them for a special occasion or just to add some ambiance to your home, these DIY candles are sure to impress. With these step-by-step instructions, you’ll be on your way to creating beautiful floating candles in no time.
Choosing the Right Wax
When it comes to making homemade floating candles, selecting the right wax is crucial for the success of your project. Different types of wax offer unique characteristics that can affect the way your candles burn and float. Here is a breakdown of some common waxes used for floating candles, along with their pros and cons:
- Paraffin Wax: Paraffin wax is a popular choice for making floating candles due to its affordability and ease of use. It has a high melting point, which helps the candle maintain its shape while burning. However, paraffin wax is derived from petroleum, so it may not be the most eco-friendly option.
- Soy Wax: Soy wax is a natural alternative to paraffin wax that is made from soybean oil. It burns cleaner and longer than paraffin wax, making it a more environmentally friendly choice for homemade floating candles. Additionally, soy wax can hold fragrance oils well, allowing you to scent your candles effectively.
- Beeswax: Beeswax is another natural option for making floating candles. It emits a subtle honey-like scent when burned and produces a warm glow. However, beeswax can be more expensive than other waxes and may require additional additives to help it float effectively.
Each type of wax offers distinct advantages and considerations, so choose one that aligns with your preferences and values when making homemade floating candles. Experimenting with different waxes can also help you determine which type works best for your specific needs.
Remember to consider factors such as burn time, scent retention, cost, and sustainability when deciding on the right wax for your floating candles. By selecting the appropriate wax for your project, you can create beautiful and functional homemade floating candles that enhance the ambiance of any space in a sustainable way.
Scenting Your Candles
Scenting your homemade floating candles can elevate the ambiance of any room and provide a personalized touch to your creation. Choosing the right fragrance is essential to create a calming or invigorating atmosphere, depending on your preference. When making homemade floating candles, it’s important to select high-quality fragrances specifically designed for candle-making to ensure a long-lasting scent.
Types of Fragrances
There are various types of fragrances available for candle-making, including essential oils, fragrance oils, and blends. Essential oils are natural extracts from plants that offer therapeutic benefits along with pleasant scents. On the other hand, fragrance oils are synthetic scents designed to provide a wide range of aromas not always possible with essential oils. Blends combine both types to create unique and complex fragrances for your homemade floating candles.
Adding Fragrance
To add fragrance to your homemade floating candles, it’s best to do so during the melting process when the wax reaches the recommended temperature. The general rule of thumb is to add 1 oz of fragrance oil per 1 lb of wax, but this can vary depending on the strength of the scent and personal preference.
Stir the fragrance oil evenly into the melted wax before pouring it into the mold to ensure an even distribution of scent throughout the candle. Remember that different fragrances have varying strengths, so start with a smaller amount and adjust accordingly based on your desired intensity.
Adding Color
Another creative way to add color to your floating candles is by incorporating natural elements like dried flowers, herbs, or petals into the wax. These organic materials not only provide subtle hints of color but also add texture and visual interest to your candles. You can experiment with different combinations of botanicals to create unique patterns and designs in your floating candles.
For those looking for a more artistic approach, consider using colored glitter or mica powder to embellish your homemade floating candles. These additives can create a shimmering effect when the candles are lit, adding a touch of glamour and sophistication to your space. Whether you prefer bold and vibrant colors or soft pastel hues, there are endless possibilities for coloring your floating candles to match your style and ambiance.
| Technique | Description |
|---|---|
| Candle Dye Chips/Liquid Candle Dye | Wide range of colors, easy to mix for custom shades |
| Natural Elements (Dried Flowers, Herbs, Petals) | Add subtle hints of color and texture |
| Colored Glitter/Mica Powder | Create shimmering effect for added glamour |
Best Practices
When it comes to making homemade floating candles, ensuring safety is of utmost importance. By following proper precautions and best practices, you can enjoy the process of candle-making without any risks.
One crucial aspect of safety when making homemade floating candles is to work in a well-ventilated area. This helps to prevent the accumulation of fumes from the melting wax, which can be harmful if inhaled for an extended period. Additionally, always have a fire extinguisher nearby in case of any accidents or mishaps during the candle-making process.
Another important practice to follow is to use caution when handling hot wax. Make sure to wear protective gloves and handle the melted wax with care. Avoid any spills or splashes as hot wax can cause burns if it comes into contact with your skin.
Furthermore, it is essential to keep flammable materials away from the candle-making area to reduce the risk of fires. Be mindful of your surroundings and ensure that there are no potentially hazardous items near your workspace. By taking these safety precautions and following best practices, you can enjoy the creative process of making homemade floating candles while keeping yourself safe.
Display and Enjoy
Setting the scene with homemade floating candles can elevate any space, creating a cozy and inviting ambiance perfect for a relaxing evening or special occasion. Once you have crafted your own floating candles, it’s time to showcase them in creative ways that truly enhance their beauty and maximize their effect. Here are some innovative ideas on how to display and enjoy your homemade floating candles:
- Create a centerpiece: Arrange several homemade floating candles in a decorative bowl or vessel filled with water. Add some flower petals, greenery, or even floating crystals to complement the candles and create a stunning centerpiece for your dining table or coffee table.
- Hanging lanterns: If you have outdoor space, consider placing your homemade floating candles in hanging lanterns. Suspend these lanterns from tree branches or hooks around your patio or garden for a magical glow that will enchant your guests during evening gatherings or al fresco dinners.
- Poolside ambiance: For those with a pool or access to a body of water, float your homemade candles in the pool for a mesmerizing effect. The flickering light reflected on the water’s surface creates an ethereal atmosphere that is both relaxing and visually captivating.
Whether you’re hosting a dinner party, enjoying a quiet night in, or celebrating a special occasion, incorporating homemade floating candles into your decor can truly elevate the experience. From romantic date nights to festive gatherings, these versatile candles add warmth and charm to any setting. Get creative with how you display and use your homemade floating candles to create unforgettable moments and enhance the aesthetic of your space.
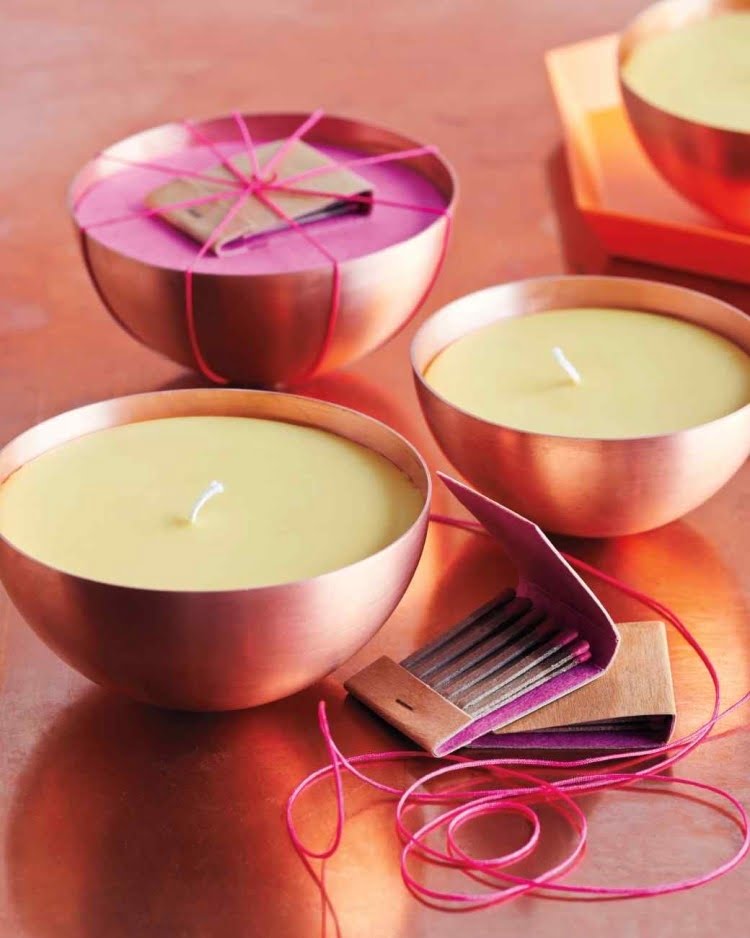
- DIY candle holders: Craft unique candle holders using recycled materials like glass jars, tin cans, or driftwood. Personalize them with paint, beads, or ribbons to complement your homemade floating candles and add an extra touch of creativity to your decor.
- Mix and match sizes: Experiment with different sizes of floating candles to create visual interest. Combine small tea lights with larger round floaters for dimension, or mix varying heights of cylindrical floaters for added drama. Play around with arrangements until you find one that suits your style and space.
- Creative containers: Think outside the box when choosing containers for your homemade floating candles. Use vintage teacups, seashells, hollowed-out fruits like lemons or oranges, or even carved out potatoes for an unexpected twist. The possibilities are endless when it comes to displaying these charming candles in unique vessels.
Embrace the art of making homemade floating candles not only as a craft but also as a means of enhancing your living environment with warmth and sophistication. By exploring different ways to display and enjoy these DIY creations, you can fully appreciate the beauty they bring into any room or setting. Let your imagination guide you as you discover new ways to infuse spaces with the mesmerizing glow of homemade floating candles.
Troubleshooting
While making homemade floating candles can be a fun and rewarding experience, there may be times when you encounter some common issues along the way. One of the most frequent problems that DIY candle makers face is uneven burning. This can result in candles that burn too quickly on one side or don’t burn evenly across the surface.
To prevent this issue, make sure to properly mix and melt your wax before pouring it into the mold. Stirring the wax consistently can help distribute the heat and prevent uneven burning.
Another common issue when making homemade floating candles is air bubbles forming within the wax as it cools. These air pockets can create unsightly holes in the finished candle, affecting its appearance and burning capabilities. To avoid air bubbles, gently tap the mold after pouring the wax to release any trapped air. You can also try using a heat gun to remove any bubbles that rise to the top of the candle’s surface while it’s still cooling.
Additionally, if you notice that your homemade floating candles are burning too quickly or emitting excess smoke, it may be due to using an improper wick size. The wick plays a crucial role in how your candle burns, so make sure to choose a wick size appropriate for the diameter of your candle. Experimenting with different wick sizes and types can help you achieve the desired burn time and flame quality for your floating candles.
By being aware of these common issues and implementing simple solutions like proper mixing techniques, tapping out air bubbles, and selecting the right wick size, you can troubleshoot potential problems while making homemade floating candles. Remember that practice makes perfect, so don’t get discouraged if your first few attempts don’t turn out as expected – embrace the learning process and enjoy creating beautiful candles for yourself or as gifts for loved ones.
Conclusion
In conclusion, making homemade floating candles can truly elevate the ambiance of any space and create a cozy atmosphere for relaxation or special occasions. By following the step-by-step instructions and using the right materials, you can easily craft your own personalized candles that reflect your style and preferences. Whether you choose to add fragrance for a soothing aroma, color to match your decor, or display them creatively, homemade floating candles offer a unique touch to any room.
Additionally, creating your own floating candles allows you to customize every aspect of the process. From choosing the type of wax that best suits your needs to troubleshooting any issues that may arise during the making process, you have full control over the final product. This hands-on approach not only adds a personal touch to your space but also provides a sense of accomplishment and satisfaction knowing that you made something beautiful with your own hands.
So why not embark on this creative journey and explore the art of making homemade floating candles? Not only will you enjoy the process of crafting something unique, but you will also be rewarded with gorgeous candles that bring warmth and charm to your home. Get inspired, gather your materials, and start creating these enchanting candles to add a touch of magic to your living space. Embrace your creativity and enjoy the beauty of handmade floating candles.
Frequently Asked Questions
What Do I Need to Make Floating Candles?
To make floating candles, you will need the necessary candle-making supplies such as wax, wicks, a double boiler for melting wax, a thermometer to monitor temperature, molds or containers for shaping the candles, and fragrance oils or dyes if desired. Additionally, you will need something to create buoyancy in the water like cork pieces.
What Liquid Is Used for Floating Candles?
The most common liquid used for floating candles is water. Other options could include oils like mineral oil or vegetable oil. However, it is essential to ensure that whatever liquid you choose is safe to use with candles and will not affect the candle’s burning process.
What Kind of Wax Do You Use for Floating Candles?
When making floating candles, it is best to use paraffin wax or soy wax because they have lower densities than other types of wax and can float easily in water. Beeswax can also be used but may require additional additives to help it float properly.
It is important to choose a wax that has been specifically formulated for candle-making to ensure safe and efficient burning of your floating candles.

Welcome to my candle making blog! In this blog, I will be sharing my tips and tricks for making candles. I will also be sharing some of my favorite recipes.

