Introducing the Ancient Art of Candle Making
The art of candle making is one that dates all the way back to Ancient Rome. During that time, candles were made by dipping rolled papyrus in melted animal or vegetable fat. Candles would prove to be an important source of light and illumination, especially during religious ceremonies and holidays.
As technology advanced, candle makers began using different ingredients to make their creations. In the Middle Ages, beeswax became increasingly popular as it was more efficient to use than other natural fats and waxes. During this period, glass containers and metal molds were also developed for a variety of shapes and sizes of candles. Later on, in the 16th century, purifying processes were developed which allowed for more reliable production of a better quality wax. This new wax was made from a mixture of bee’s wax and tallow (animal fats) allowing for tougher candles with longer burning times.
As Europeans immigrated to America, they brought along their expertise in candle making ranging from sculpting intricate designs with beeswax to utilizing old-fashioned iron molds during production. In the 19th century, the invention of paraffin allowed manufacturers to mass produce candles which further increased their popularity amongst households across America. Additionally, due to modern day advancements in candle-making equipment such as pressurized machinery and sophisticated scent-dispensing devices; candles are now able not only used just for functional purposes but also as decorative elements in homes or unique gifts for special occasions like birthdays or Christmas celebrations!
Gather the Materials and Equipment Essential to Candle Making
In order to make candles, you need to gather the necessary materials and equipment. This includes wax, wicks, dye, fragrance oil if desired, molds or containers for the candles, a double boiler or melting pot to melt the wax in, thermometer to measure the temperature of the melted wax, pots and pans to create smaller batches of candles at a time if needed and proper ventilation. You can also use colors and decorations as desired. Once you have acquired all of these items you are ready to start making candles!
Wax Preparations
Before making candles, it is important to prepare the wax. This includes heating, coloring and melting the wax. To heat the wax, you can use either a double boiler or an electric pot. Make sure that the temperature does not exceed 180 degrees Fahrenheit in order to prevent burning. Once heated, add your desired color pigment to create the desired shade of wax you need for your candle. After adding the color, pour in a liquidizer and mix until it forms a uniform consistency. Finally, melt the colored wax in a double boiler at 180 degrees Fahrenheit. Be sure to keep stirring so that all chunks are melted down completely. Once done, pour into molds or containers of your choice and you’re ready to start forming your candle!
Crafting the Supporting Structure
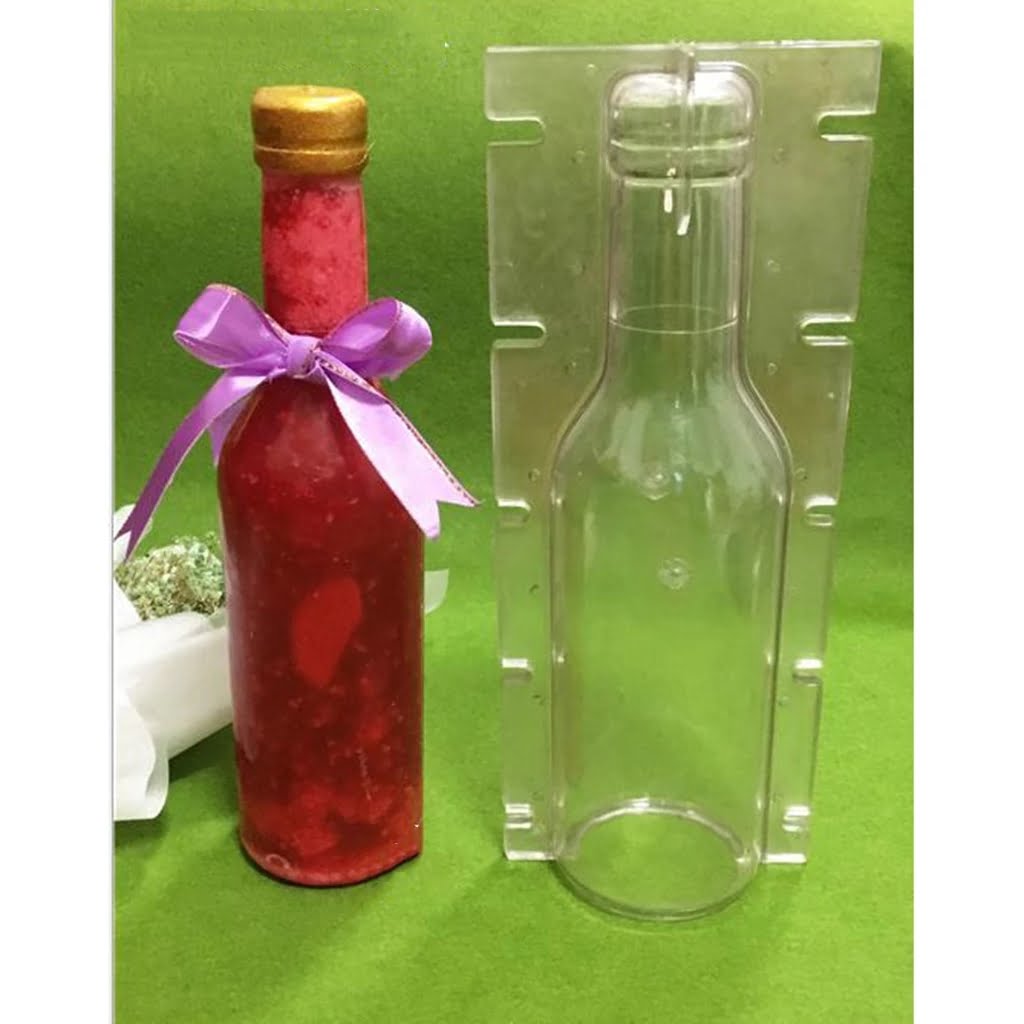
Making the candles involves creating a supporting structure that allows the wax to safely contain and burn the flame. This structure consists of three components; wick, mold, and shape. The wick provides a bridge between the flame and the burning material. It is made out of cotton, wool, paper, or jute fiber that is pre-treated with a stiffening compound such as beeswax or paraffin. The mold is used to create a specific size or shape for the candle and has an open top through which the molten wax can be poured in. Lastly, different shapes can be achieved by using different molds and tools. For instance, when making taper candles one may choose cylindrical tube molds which easily holds their tapered shape while pillar candles will need specialized containers that are closed on top but open at the bottom so they don’t lose their shape while cooling.
Crafting the Core Aromatic Experience
Making candles is a fun and creative activity that allows for an individual to create unique, aromatic experiences in each and every one. The core of the experience starts with the choice of fragrance and embellishments. Fragrances are usually created using essential oils which gives the candle its pleasant aroma. They range from strong scents like cinnamon to mild florals like lavender. For added flair, embellishments such as dried flowers, colorful wax chips, herbs, or even wood shavings can be used when making candles. These embellishments highlight the fragrances and enhance their aromas, creating a more memorable sensory experience. By considering these elements when making candles, an individual is able to craft a personalized aromatic sensation that is truly enjoyable.
Finishing Touches
Adhesive labels, ribbons, and stickers can add a finishing touch to the candle-making process. Labels can contain pertinent information such as the scent of the candle, the burn time, and even the name of the business or individual who has made them. Additionally, if you want to give your candles a more professional look, printing labels with your business logo is an effective way to make your product look polished. Ribbons can be created from various materials like silk or cotton. They are typically used for decorative purposes and embellishment. Lastly, customizing your candles with colorful stickers can make them more eye-catching for potential customers. The stickers could include information about ingredients that have been used in creating the candles or maybe the latest catchphrase that’s trending in the market. No matter how you choose to decorate them, adding these labels, ribbons, and stickers will add a unique touch to your finished product!
Troubleshooting
Cleaning up candles can be quite tricky, as the wax residue can be quite stubborn. In order to clean wax from clothes and surfaces, place item in a sealed plastic bag and freeze for a few hours; then gently peel away the frozen wax. Alternatively, scrape away the wax with a credit card or razor.
When it comes to storing candles, keep them away from direct sunlight and any source of heat or humidity to avoid rapid evaporation or discoloration of the wick or wax. Also avoid storing partially used candles that may have been dropped since they could cause dripping when lit again. To ensure maximum burning time, store your candles upright at room temperature. Never leave a lit candle unattended and always maintain appropriate safety measures while using candles.
Experiencing the Creative Joy of Candlesmaking
Candlemaking is a fun and creative activity that provides hours of enjoyable crafting time, as well as a beautiful and unique result. The process begins by gathering the materials needed: wax, wicks, molds or containers (if creating votive candles or tapers), dyes and/or scented oils. Once all the supplies have been collected, melting the wax can begin. This can be done either in a double boiler on the stovetop or in a specialized wax melter. After choosing any desired elements such as color and fragrance for the candles, these items can then be added to the melted wax. After stirring these together until they are fully blended, it is time to then pour the hot wax into molds or directly onto wicks when making votive candles or tapers. Then wait until the candles cool completely before taking them out of their forms–and voila! You now have DIY candles perfect for gifting and decorating your home anytime. Of course, this is just one method of candlemaking; there are many more intricate styles available for those who are looking for something more complex. But at its core, this easy candlemaking process makes it simple for anyone to enjoy the joys of creative expression through crafting beautiful homemade candles!

Welcome to my candle making blog! In this blog, I will be sharing my tips and tricks for making candles. I will also be sharing some of my favorite recipes.


