Introduction
Candle making is an ancient craft and art form with a fascinating history. Its use has waxed and waned over the centuries, but never really gone away entirely. People have been using candlelight since Ancient Egypt ” more than 5,000 years ago! Early candles were made most often from tallow (animal fat) or beeswax and ran the gamut from utilitarian measures to items of luxury.
Candles provide light when there’s no electricity, offer warmth in frigid weather, lend atmosphere for special occasions, create a comforting background glow, help to set an ambiance for relaxation, romance or spiritual contemplation and so much more. Making candles at home today can be just as beneficial as it was in years past. DIY candle makers enjoy creating something beautiful largely from natural ingredients that are often locally sourced and also play around with fragrances to come up with unique scent combinations.
Process:
Making your own candles can be divided into three main steps: melting the wax, forming the wicks and adding scent. Here’s the breakdown of each step:
1. Melting The Wax: The first step in making a candle involves melting down your wax of choice ” soy wax flakes are popular due to their natural properties ” using either a double boiler setup or microwave oven method. Soy wax is easy to work with because it has a lower melting point than its paraffin counterparts, so you don’t need hot tools like glue guns or blow torches to melt it down sufficiently. When working with hot wax it’s important to take precautionary measures such as wearing protective gloves and eyeglasses for safety purposes.
2. Forming The Wicks: The next step involves inserting pre-tabbed wicks into containers once all of the melted wax has cooled off slightly (a few degrees below its original molten state). Tabbed wicks should always be used as they make working on your project easier thanks to their pre-made metal bases which enable them to stand upright within your container until fully submerged in liquid wax during pouring. Wicking needs vary depending on the type of container being used; smaller jars may require only one wick while larger vessels may require multiple lengthier ones
3. Adding Scent: For aroma candles you first need to decide what type of scent Note that all fragrances should always be added whilst your wax is in liquid form; this means right before you pour your mixture into containers and tabbed wicks are securely inserted into place (beginner tip alert!). Preferably add scents according to manufacturer instructions noting ratio-specific measurements stated per weight of finished product Please bear in mind that adding too much fragrance oil can cause problems such as potential burning hazards; so always err on the side of caution where possible by erratically reduce recommended dosage amounts if necessary .
Exploring Candle Making
The process of making candles can vary depending on what type of candle you are making. Some of the most common types include paraffin wax, soy wax, beeswax and gel candles. Each of these types has its own unique set of instructions for creating the perfect candle.
Paraffin Wax Candles: To make paraffin wax candles you will need a heat-resistant container (such as an old pot), pieces of pre-melted paraffin wax, wicks, dyes and scents. After measuring out the desired amount of paraffin wax, melt it in your heat-resistant container, stirring until all lumps break down. Once the wax has completely melted, add any desired dyes or scents then pour into a pre-made container or mold and allow it to cool. Finally, attach the wick to the base of your candle and voila!
Soy Wax Candles: Soy wax candles are made with hydrogenated soybean oil instead of traditional paraffin wax. Soy is known to produce a cleaner burning flame with reduced soot buildup which makes it more eco-friendly than paraffin wax. These candles also contain longer burning times so they last longer too! Creating soy wax candles requires much of the same steps as for regular paraffin ones – such as melting down your pre-measured soy wax chips in a heat resistant container then adding dyes and scents ” but you may need to use either metal wicks or natural cotton wicks in order for them not burn poorly due to differences in melting points between paraffin and soy based materials.
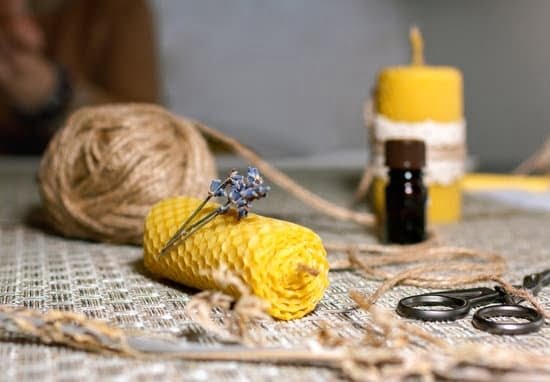
Beeswax Candles: Beeswax is one of the oldest known candle crafts with historical references dating back as far as ancient Egypt! It’s naturally scented with sweet honey notes and produces a warm glow when lit that adds a delightful ambiance to any home decor setting. Making beeswax candles requires purified natural beeswax blocks brought up to temperature at low speeds in a double boiler before being poured into moulds or containers ” either plain or decorated according to preference – where they cool completely before use.
Gel Candles: Gel candles are made from special polymerized mineral oils that have been thickened into a jelly-like state (hence why they’re often referred to simply as ‘gel’). They usually contain no colorants or fragrances added although this isn’t always consistent between manufacturers so read labels carefully! The process of creating gel candles starts off like any other ” by melting down your gel materials in a heat resistant container ” but once melted combined with fragrance oils carefully chosen for compatibility within this type medium, you’ll need huge amounts patience waiting through successive hours while allowing your creation set completely before being able light them – it could take days! However once complete though those special patience gestures will be rewarded with luminous geometric creations that last much longer than conventional alternatives while throwing off an additional glow intensity not expected elsewhere.
Essential Equipment and Materials for Making Your Candles
Making your own candles at home requires the right equipment and materials. To make a great looking candle, you’ll need a few supplies including wax, wicks, a melting pot or double boiler, a candle mold or container, dye and fragrances if desired. If making tapered candles, you would also need dipping equipment such as metal dipping cans and metal tapers rods.
In addition to the fundamental items mentioned above, there are several ancillary items that are useful for making quality product. These items include thermometers for gauging the temperature of liquid waxes and metal pouring pitchers for pouring melted wax into molds more easily. Safety equipment such as respirators and thermal protection gloves should also be used when handling hot liquids; basic first aid supplies may come in handy in case of accidental burns from hot waxes. Lastly, wax additives like vybar can be added to improve the characteristics of finished candles.
Before starting your project it’s important to gather everything you need ahead of time so that you won’t have to abandon your work due to lack of proper materials. Once you have everything prepared it’s time to begin making your candles!
Prepping Your Workspace and Safety Tips
Before you start making your candles, it’s important to have a safe and organized workspace. Make sure that all materials used in the candle-making process are out of reach from children or pets. Clear the surfaces of your workspace and ensure there is nothing flammable anywhere near where you will be working. Wax can burn at extremely high temperatures so make sure to wear appropriate protective clothing, such as oven mitts, a flame-resistant apron, and safety glasses when melting wax or pouring into molds. Use caution when handling containers with melted wax; these should always be kept away from any heat sources during the cooling process. A fire extinguisher should also be accessible in case of an emergency. Candle wicks should properly fit inside each of the vessels being used for your candles to reduce potential tipping over once lit. Glue dots or another type of adhesive can help secure the base of each wick until the wax sets.
Measuring, Melting, and Adding Colors to the Wax
The process of making candles begins with measuring the right amount of wax needed for the desired size and quantity. This is usually done by weight, as it is important to have precisely the right amount of wax to ensure quality. After the wax has been weighed out and prepared, it must be melted down so that it can be manipulated in the candle-making process. The melted wax should then be transferred into vessels or containers that are designed for candle-making.
At this point, colors can be added to give the wax a certain hue or a more interesting look to enhance its aesthetic appeal. Several different color pigments are available for use in candle-making, which can provide a wide range of unique looks from subtle variations on traditional shades to bold and fun options. It’s important not to overcrowd these containers with too much pigment though, as this could affect how well your candles will burn when finished. Adding natural elements like herbs and essential oils are other great ways to add scents and style to your candles! Finally, after all of these components are gathered, the next step is pouring hot wax into molds or wick containers where they will solidify before you’ve created your very own homemade candles!
Wicking Your Candles
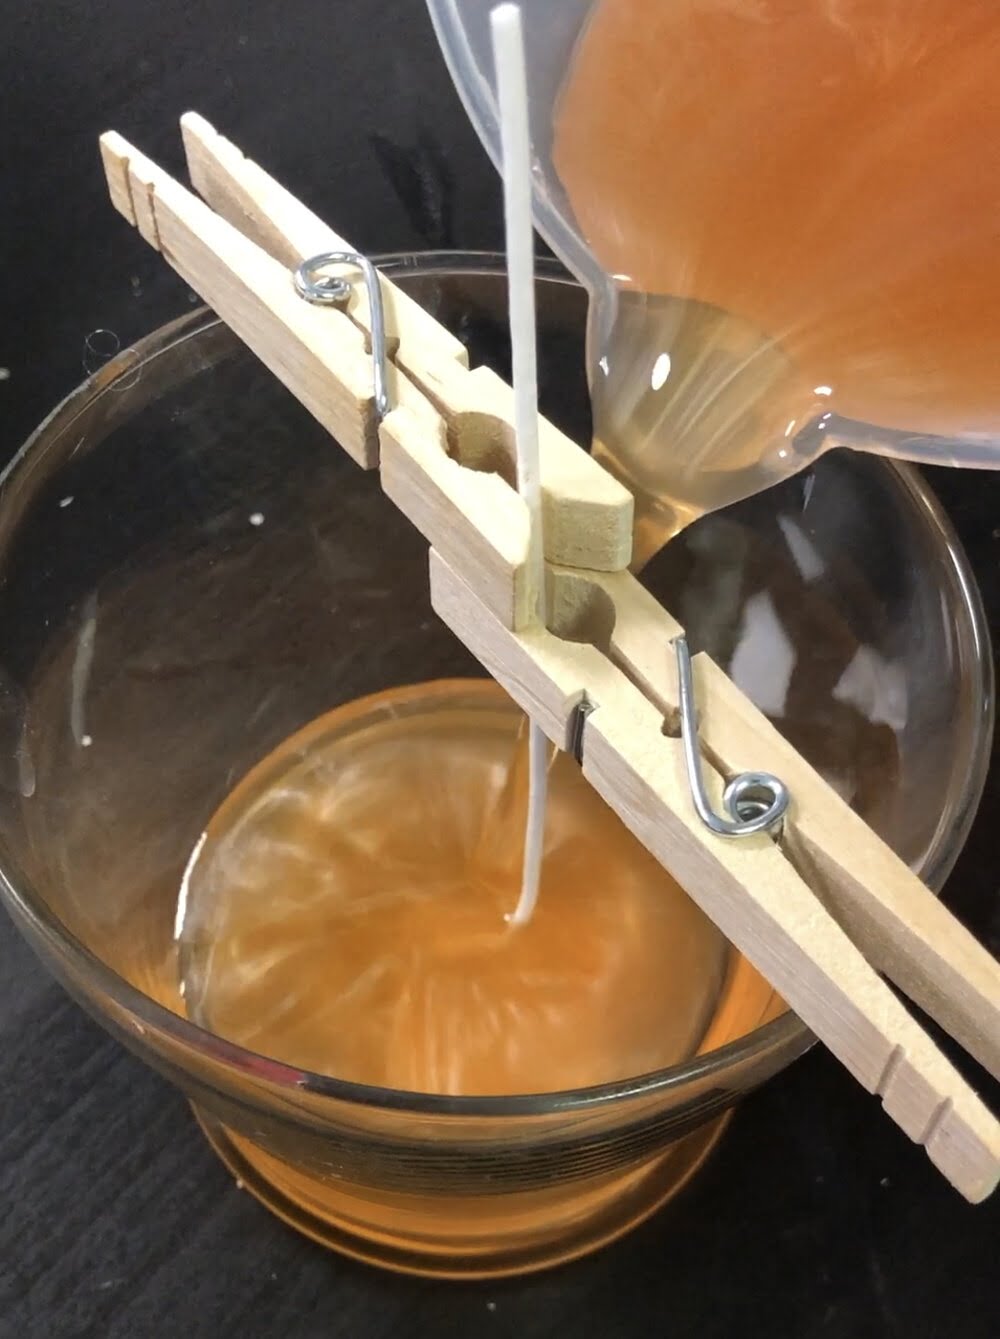
The process of wicking your candles involves choosing the appropriate size wick for the desired candle size. Many people use a trial and error method for this. Start by cutting a length of wick that is a few inches longer then your desired jar or mold. Now, thread the wick through a metal tab and secure with a flat disc or nut, now place the wire end in the bottom of your jar and clip the top of it to an object, such as a pencil or chopstick to keep it in place. This will ensure that your wick stands straight. Once you have measured and cut the wick exactly to fit your candle, you can begin melting your wax.
Pouring the Wax Into the Molds and Finishing Touches
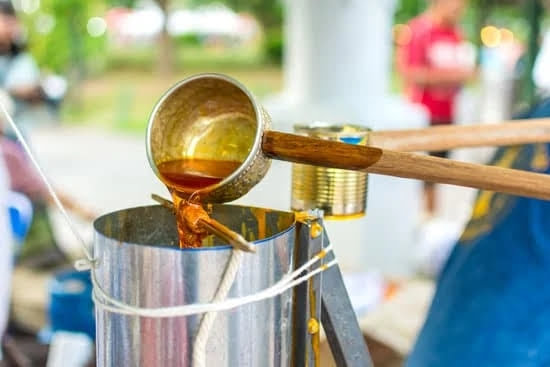
Making candles is a delicate yet rewarding process. To start, the wax must be melted carefully either over a double boiler or in a specialized melting pot specifically designed for candle-making. Once the wax has fully melted, it is time to pour it into the desired molds. This requires careful pouring from the correct height, so the molten wax properly sets. Once the first layer of wax hardens (which usually takes about fifteen minutes), additional layers can be added until the mold reaches its desired thickness.
Once all of the layers of wax have been poured and set, it’s time to remove them from the molds so they can take on their final look and shape. This process typically involves running small scissors around the edges to loosen up any excess wax and then popping out each individual candle. At this stage, any imperfections should be removed using tweezers or similar tools; any stubborn chunks can also be dissolved with mineral or vegetable oil and then wiped off with a cloth. Finally, candles can be customized with decorative items like paint finishes, fabric wraps, unique labels and more ” making them ready for sale or gift!
Troubleshooting Common Candle Making Issues
The process of making candles is a fun and rewarding experience, allowing you to customize your own unique pieces for decoration or gift-giving. However, the process can sometimes be challenging, and occasional issues can occur that impact the quality of your candle. Below is a guide to common candle making problems, as well as troubleshooting tips on how to address them.
Cracking: Cracking in candles is caused by overheating during the melting process. To prevent cracking during melting, ensure that your wax is not heated above its melting point. Additionally, always heat and stir wax slowly, as sudden changes in temperature can cause stress fractures in the finished product.
Poor Scent Throw: If properly measured scent was added to your candles but they still produce an unsatisfactory scent throw when burning them, this may be because of poor hot or cold scent throw capabilities due to scent oil deficiencies or incompatibility with wax type. Try substituting certain essential oils with other types better suited for colder climates or experimenting with different ratios of oil and fragrance seeds for increased potency.
Tunneling: If your candles are tunneling down the center when burning them instead of creating an even burn pool on top, this could indicate improper wicking size or too much space between the wick and container walls due to lack of containersize optimization before pouring melted wax into it. The fix is simple ” if wicks are too small in proportion to your containers try switching to larger ones; if not enough space has been left between wall and wick adjust accordingly each time before pouring melted wax into container during next attempt.
Adding Fragrances to Enhance Your Candles
Adding fragrances to your candles can make them even more enjoyable and uniquely crafted. You should always add the fragrance after you finish the process of making candles, otherwise the wax won’t melt and absorb the scent. Fragrances can be natural extracts like essential oils, or synthetic versions called “fragrance oils”. Depending on which type you use, it may require different amounts of oil to be added; keep that in mind when using your supplies so you don’t overpower the smell of your candle. Generally speaking, you should use 7-15 drops for every ounce of liquid wax. Use a chopstick to stir in the fragrance to ensure it is dissolved throughly and evenly dispersed throughout your batch. Lastly, let the wax cool down for about 30-40 minutes before adding a wick and letting your newly scented candle set!
Finalizing and Curing the Candles
Once the wick and wax are added to the candle, it’s time for the curing process. The curing of a candle helps to ensure that your candle burns evenly. It also helps adjust any lopsidedness from the pouring stage. The curing process involves leaving your candles in a cool area for at least 24 hours after you pour them with wax. This gives the wax ample time to cool and harden before burning it. The recommended storage temperature is around 65°F – 70°F, preferably in a dark place away from moisture and humidity until the candles have completely cooled down. You can also use a fan to speed up the cooling process if needed. After this, your candle should be set and ready to burn!
Creative Projects to Try with Candle Making
Making candles is a fun and creative project that allows you to be creative and experiment with different color combinations, fragrances, wicks and molds. The process of candle making consists of melting wax and combining it with dyes, scents, wicks and molds to create unique candles. Here are some fun projects to try when making candles:
-Create layered candles by melting different colors of wax separately in different containers then pouring them into the same mold one after another.
-Make multi-wick candles by adding multiple lengths of wicks to your candle in the same container for a dramatic effect.
-Experiment with herbs, spices, natural oils and items from nature such as bark or leaves. Use these things to create hidden scents in the bottom/side layers of your candle or as decorative elements on the surface such as pressed flower petals or crushed nuts.
-Impress guests by making special tea light holders out of clay or terracotta tiles for an added touch of individuality.
-Set the mood for get togethers by using tall pillar candles wrapped intricately with ribbons and yarn or soy based paint dipped images!
Conclusion
Candle making is an enjoyable and rewarding craft. It is a thoughtful way to show someone you care, or the perfect addition to your home décor. With a few simple steps, anyone can have success at creating candles of all shapes, colors, and sizes. The tools required for candle making are mostly affordable and easily accessible. The first step in the process is to melt the store-bought wax, then pour it into a container of your choice. After that, wicks need to be added to the container to draw the wax up within the candle itself. Once the wick is securely placed, fragrances and colors can be mix included during cooling. The last step is to let the wax cool completely and remove it from its mold or container. After taking these steps in creating a beautiful candle DIY style, you can proudly display your masterpiece! Candle making can yield valuable lifelong skills as well as stunning results when taking on new projects with patience and practice. With just a little effort and some creativity, novice crafters of all ages can enjoy this craft successfully now matter their skill level. There is also something special about giving Homemade candles as gifts; they often carry so much more meaning than store bought goods! Embrace the craft of candle making: get out those supplies and get started today!

Welcome to my candle making blog! In this blog, I will be sharing my tips and tricks for making candles. I will also be sharing some of my favorite recipes.

