Introduction
Candle making is a unique and rewarding craft that brings your creative designs to life. Whether you’re experimenting with colors, patterns, or scents, the process of designing and producing beautiful, hand-made candles can be an incredibly satisfying experience. You may even find yourself wanting to branch out and create more intricate designs as you advance in skill. Here are the secrets to candle making that will help you on your journey towards becoming a master creator!
The first secret to achieving success in candle making is understanding the different types of molds used. There are various shapes and sizes available from round and cylindrical molds to intricate tealight holders and special seasonal molds. The type of mold you choose determines the final shape of your creations. Do some research beforehand to decide which works best for your project and always double check that it’s heat resistant before using it.
Another important tip to keep in mind when creating candles is ensuring that all materials are safe for burning during use. Wax tends to burn much hotter than other natural elements like soybean oil so don’t underestimate its intensity”wax can burn quickly if not monitored correctly. Be sure to also thoroughly research any essential oils or additives you plan on incorporating into your candles as these have their own distinct properties depending on which brand or type you buy.
The last essential tip for crafting unique candles involves experimentation! Don’t be afraid to try out different color combinations, unusual scents, textures, and patterned waxes like marbling or swirls for something truly incredible! If things don’t turn out as expected just remember it was all apart of the learning process”you never know if something will work until you try it!
Choosing The Essential Supplies For Candle Making
When it comes to candle making, having the right supplies is essential. Start off by gathering essential supplies like wicks and wax. Pick up natural beeswax or soy wax, as these are renewable resources and provide a longer-lasting burn. Wick sizes will vary depending on how large your candles are and their availability in certain stores. Furthermore, you may want to purchase a variety of colors, fragrances, and possibly consider looking into specialty brands that offer the best quality possible. Once you’ve gathered all your supplies test out some of them on a sample project before beginning your first real candle project.
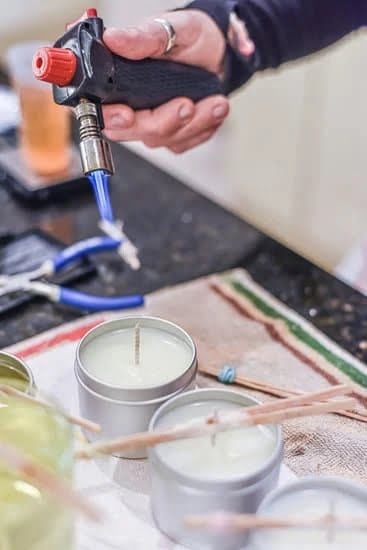
Once all basic supplies have been acquired for candle-making, additional supplies such as mason jars for container candles or tin plates for votives can be purchased from craft stores and thrift stores alike. Making sure to get an appropriate heat source like a double boiler or electric melting pot will come in handy when melting waxes down so they become more manageable. Lastly, drip guards (for larger candles) help to protect the wall around the candle from becoming stained by the melted wax during use. Other decorative touches such as wire wraps, raffia bows, and lace can help complete any design desired and add something extra to your finished product if desired.
Understanding The Science Behind Candle Burning
The science behind a burning candle is complex and interesting. The fuel for a candle flame is the wax it is made of. The heat produced by the flame melts the wax, which then evaporates in the form of gas. As the gas rises it encounters oxygen, which causes the gas to ignite, creating light and heat.
The size of the flame will vary depending on temperature, air flow and how much wax is melted. The higher the temperature, or lack of air flow, more wax will melt resulting in a larger flame. The cooler air and consistent air flow will cause less melting resulting in a smaller flame. It is important to keep an eye on your candle while it burns so you can optimize its burn time and achieve optimal performance from your candle. Trimming off any excessive wick length right before lighting your candle can help control flame size as well as overall safety.
Additionally, scent plays an important role in creating a pleasant atmosphere when burning your candles. Essential oils are typically used in small amounts to give off subtle aromas that are long-lasting yet gentle on your senses. If you would like a stronger scented experience then adding fragrances specifically designed for candles should create just what you desire! Be sure to remember that too much scent can be overwhelming and can also reduce burn time since more oil equals more fuel burned quicker. By following these simple tips you’ll be able to enjoy your candles senses with style!
Setting Up The Wick and Preparing The Wax
Before starting your candle making process, you need to make sure your wick is properly set up and your wax is prepared. To set up the wick, you should use a wick holder and cut it to the desired length. Wicking needs to be done correctly as it determines how well the candle will burn. Next, weigh out the appropriate amount of wax depending on the size of your vessel and melt it in a double boiler until it reaches its melting point. Once melted, add any scent or color that you wish to use and stir thoroughly until it is evenly distributed throughout. After this step is completed make sure that the wax does not cool off too much before pouring into the vessel in order for it to adhere properly to the sides.
Infusing Your Candles With Special Scents
One of the secrets to creating unique and special candles is infusing them with a unique or special scent. Deciding what kind of scent you’d like your candle to have can be a great way to make it stand out from the rest. This can be especially helpful if you’re trying to create something fun for a special occasion or event. There are several different options for adding fragrance when making candles, so it’s important to find one that suits your needs best. Fragrance oils are a popular choice because they allow you to customize each candle with a variety of different scents, while using less wax compared to using essential oils. Fragrance oils come in just about any scent imaginable, and many companies offer custom fragrances that allow you to truly make something unique. If you prefer not to use fragrance oils, then you can also try using essential oils directly in your wax blend before pouring it into the molds. Essential oils provide an unaltered and true-to-nature aroma, but they require more Wax so that the scent is strong enough when lit. Many essential oil blends will produce pleasant aromas similar to fragrance oils, but some may not work as well depending on their volatility and other factors. Either way, experimenting with either option is a great way to ensure your candles have a unique and personalised smell that people will remember!
Crafting Colorful Candles With Dyes & Pigments
Do you want to make your own colorful candles but aren’t sure where to start? Candle making requires a few basic skills and supplies. Once you get the hang of it, you will be able to craft beautiful candles in any color or scent you desire. Here are some secrets for candle making so that you can become an expert crafter:
Material Selection: Select quality waxes and dyes when crafting candles. Soy wax, paraffin wax, beeswax, and palm wax all have different qualities and behaviors, so do research before selecting one for your project. Likewise, there are many types of dyes and pigments available depending on what type of finish or hue you want to achieve.
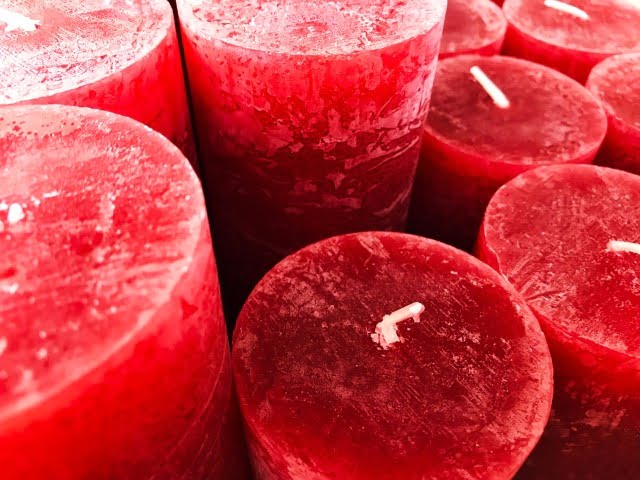
Color Blending & Pouring Techniques: Mixing two dyes together can create new shades or depths of color. It helps to conduct research beforehand on the combination of colors that work best with each other when creating candles. Also learning how to pour correctly is a skill that takes practice; make sure the right amounts of each color are poured into the container at designated times.
Adding Decorative Elements: Decorative elements such as glitters and feathers can further enhance the aesthetic appeal of your candle while adding additional layers of design complexity. Glitters should always be mixed with a binder such as glue before being used; this will help keep them from separating from the surface of the candle once it has been lit up with flame. Similarly, feathers should be secured in place by applying a small amount of adhesive or spray mount before inserting them into your candles design.
Pouring The Candle Into A Container & Choosing Proper Wicks
Making candles can be a fun and rewarding experience, with some basic knowledge and practice, your candles will soon be glowing! One of the most important elements of making any type of candle is pouring the molten wax into a suitable container and choosing the proper wick for your candle.
When it comes to choosing the right container for your candle, you want something that won’t leak or melt from the heat. Ceramic or metal containers are often used as they hold up better against extreme heat. Mason jars are also a popular choice in candlemaking as they lend themselves to more rustic designs, decorations and fragrances. However, clear glass containers are best if you want maximum fragrance diffusion.
Choosing wicks is also an essential element in achieving beautiful looking, long burning candles. It’s important to use the correct size wick for each candle size; this ensures that there won’t be too much smoke or too little flame due to the incorrect shape or size of wick chosen. Additionally, you should take into consideration other factors such as the wax weight per inch or burning rate in order to prevent undesirable results such as an overly large flame that can lead to dripping or tunneling (under-burning). Lastly, it’s important to remember that paper core cotton wicks work best for natural/vegetable waxes like soy and palm plus gel candles as these produce a consistent flame rate.
Mastering The Art Of Perfect Trimming
One of the most important secrets to making perfect candles is getting the right trim. When a candle’s wick is too long, it will cause it to flicker and smoke while burning, while too short a wick can result in poor candle performance. To prevent both scenarios, your candle’s wick should be trimmed when it reaches about 5mm long. This will help to ensure that your flame remains a consistent size throughout burning and that it does not create any excess smoke. Trimming should be done with a pair of scissors or nail clippers for best results. After each use, you should check the length of the wick and make sure it is still at 5mm or less. If it’s longer than that, trim again until the desired length is met. Also remember to remove any debris (such as ash) from the wick before lighting for further improved performance. By mastering this practice, you can ensure your candles are always burning perfectly!
Showcasing & Storing Your Candles Properly
One of the most important tips to keep in mind is to showcase and store your candles properly. Candles should be stored in a cool, dry place away from direct sunlight. This will help prevent the colors, fragrances, and waxes from fading or melting too quickly.
When displaying candles, make sure to rotate the styles and colors throughout your shop so that customers are able to view all available options. Place different sizes, scents, and colors in various displays around your shop so that customers can easily find what they are looking for. Additionally, organize all storage shelves alphabetically or by color to create a more organized and aesthetically pleasing look.
For homemade candle makers especially, it’s essential to package candles securely with tissue paper and a sturdy box for transportation and shipping. Clear labeling on each item with scent and burning instructions will also help ensure customers get the best possible experience with their candle purchases. Taking extra care when packaging is sure to impress returning customers as well!
Identifying Issues & Learning To Troubleshoot Effectively
Learning to troubleshoot effectively when candle making is a must in order to achieve success. Eventually, you will encounter problems with your candles such as excess smoking or discoloration. Therefore, it’s important to be mindful and pay attention during the process and try to diagnose any issues before they become too intense.
The first step towards troubleshooting effectively involves identifying what could potentially go wrong during the process. Possible factors can include burning temperature of the room, size of wicks used, uneven wax distribution inside the container, etc. Keeping an eye on each factor and ensuring that predetermined standards are maintained goes a long way towards effective troubleshooting.
Recognizing common problem trends also helps in understanding what could be going wrong while running experiments with different types of waxes or containers and recording outcomes accordingly allows better insight into mistakes made originally that could have been avoided.
Reading materials related to proper safety protocols in candle making and knowledge exchange between experienced peers goes a long way in not only greatly reducing chances of erroneous decisions but also clarifying most concepts related to candid making processes which further improve skill levels considerably over time.
Tips On Maximizing Candles’ Efficiency & Light Output
One of the best aspects of candle making is that with a few simple tips, you can maximize candles’ efficiency and light output. Here are some great tips to help ensure that you have the best quality candles:
1. Make sure that your wicks are trimmed to 1/4 inch before lighting them. This will help prevent the flame from getting too high, which could cause sparking and sooting.
2. When using scented waxes, use less scent than suggested in order to enjoy a more subtle fragrance without overwhelming the senses. Additionally, use essential oils which burn longer than synthetic fragrance oils and will heat up quickly when burning, emitting stronger individual aromas.
3. When designing candle containers for maximum light output, consider shapes such as globe or tumbler styles as they allow light to be cast in all directions when air is allowed through small holes at their bottoms.
4. Use quality wicking materials that are appropriate for the type of wax being used to give proper fuel delivery while still controlling the quality of the flame size and shape. If it’s too tight, it won’t provide sufficient fuel while if it’s too loose, it could lead to wasteful smoke production and shortening of the candle’s life span.
5. Make sure there are no drafts in the room in order to ensure that all heat produced by your candles goes into lighting them properly instead of being dispersed through air flow around them
Conclusion
Candle making is a rewarding activity that provides a great opportunity to be creative and make something beautiful. The scents, colors, textures, and shapes of candles can bring immense joy to the maker and those who receive the finished products. For individuals wanting to discover ways to reduce stress or simply enjoy a pleasurable activity, candle making is an ideal solution. Candles have spiritual meanings, but also practical benefits such as providing light for enjoyable activities or being used in medical situations where dim lighting may be beneficial. Beyond that, candles provide comfort through their fragrant aromas or soothing colors. With the proper materials at hand and an understanding of the basics of candle making, anyone can easily become proficient at this creative hobby. Making your own candles can offer you not only hours of fun but tremendous satisfaction from having something you’ve made yourself.

Welcome to my candle making blog! In this blog, I will be sharing my tips and tricks for making candles. I will also be sharing some of my favorite recipes.


