Are you looking for a new and rewarding hobby? Look no further than candle making. In this article, we will explore the art of candle making and why it has become increasingly popular among craft enthusiasts. Not only is candle making a creative outlet, but it also offers several therapeutic benefits. So, whether you’re a seasoned crafter or a beginner looking to embark on a new hobby, candle making could be just the activity for you.
In recent years, the art of candle making has experienced a resurgence in popularity. People are drawn to this craft not only for its simplicity but also for its ability to provide a sense of relaxation and mindfulness. Assembling your own candles allows you to tap into your creativity while also enjoying the therapeutic effects of working with wax and fragrances. Plus, the end result is not only aesthetically pleasing but can also fill your home with beautiful scents.
Before you dive into the world of candle making, it’s important to understand the different types of wax available and their pros and cons. Beeswax, soy wax, and paraffin wax are just a few examples of materials commonly used in candle making. Each type has its unique characteristics that can affect factors such as burn time and scent throw. By familiarizing yourself with these various waxes, you can make informed decisions when selecting materials for your candles.
So get ready to ignite your creativity and discover the joys of making your own candles. From choosing the right tools and materials to troubleshooting common problems, this article will guide you through every step of the process. Whether you’re interested in creating exquisite scents or experimenting with decorative additions, we have plenty of tips and techniques to help you achieve beautiful results. So don’t wait any longer – let’s dive into the art of candle making.
Understanding Different Types of Wax for Candle Making
When it comes to candle making, choosing the right type of wax is crucial for achieving desired results. There are several types of wax commonly used in candle making, each with its own unique characteristics and properties. Understanding the different types of wax available can help you make an informed decision and create candles that meet your specific needs.
One popular choice among candle makers is beeswax. Beeswax is a natural wax that is known for its sweet honey scent and beautiful golden color. It burns cleanly and produces a bright, warm flame. However, beeswax can be more expensive compared to other waxes and may require special handling due to its higher melting point.
Another commonly used wax is soy wax, which is derived from soybean oil. Soy wax is known for its clean burn and excellent scent throw. It has a lower melting point than beeswax, making it easier to work with. Additionally, soy wax is considered more eco-friendly as it is a renewable resource.
Paraffin wax, on the other hand, is a traditional choice for candle making. It’s widely available and relatively inexpensive. Paraffin wax offers excellent scent throw and allows for vibrant colors due to its ability to hold large amounts of fragrance oil and dye. However, paraffin candles may produce more soot compared to other types of wax.
These are just a few examples of the various types of wax available for candle making. Each type has its own advantages and disadvantages, so it’s important to consider factors such as cost, environmental impact, scent throw, burn time, and personal preference when selecting the right wax for your candles. Experimenting with different waxes can also be an exciting part of the candle making journey as you discover which type works best for your needs and desired outcomes.
Essential Tools and Materials for Candle Making Beginners
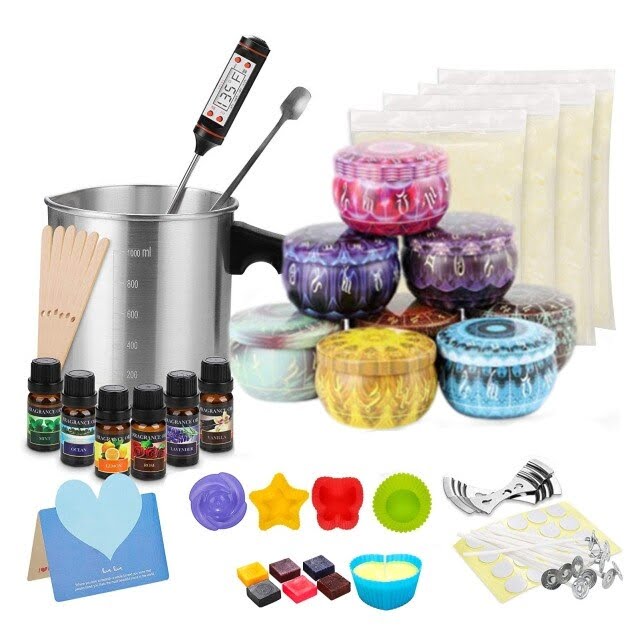
To embark on your candle making journey, it is essential to have the right tools and materials. Here is a detailed list of everything you will need as a beginner in candle making:
- Wax: The type of wax you choose will depend on your preferences and the desired outcome of your candles. Beeswax, soy wax, and paraffin wax are commonly used options. Consider their pros and cons before making a decision.
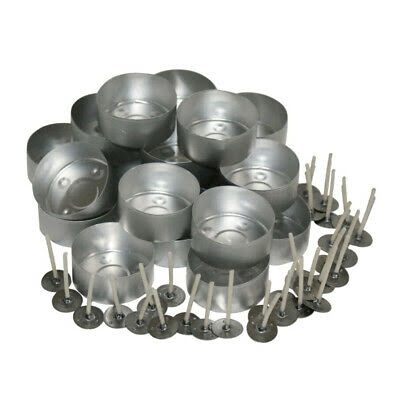
- Wicks: Wicks are responsible for carrying the flame in your candles. They come in different sizes, so it is important to choose one that suits the size of your container or mold.
- Containers/Molds: You will need containers or molds to hold the melted wax while it solidifies into a candle shape. Glass containers, tin containers, or silicone molds are popular choices.
- Fragrance Oils/Essential Oils: Adding scents to your candles can enhance the ambiance they create. Choose fragrance oils or essential oils that are specifically designed for candle making.
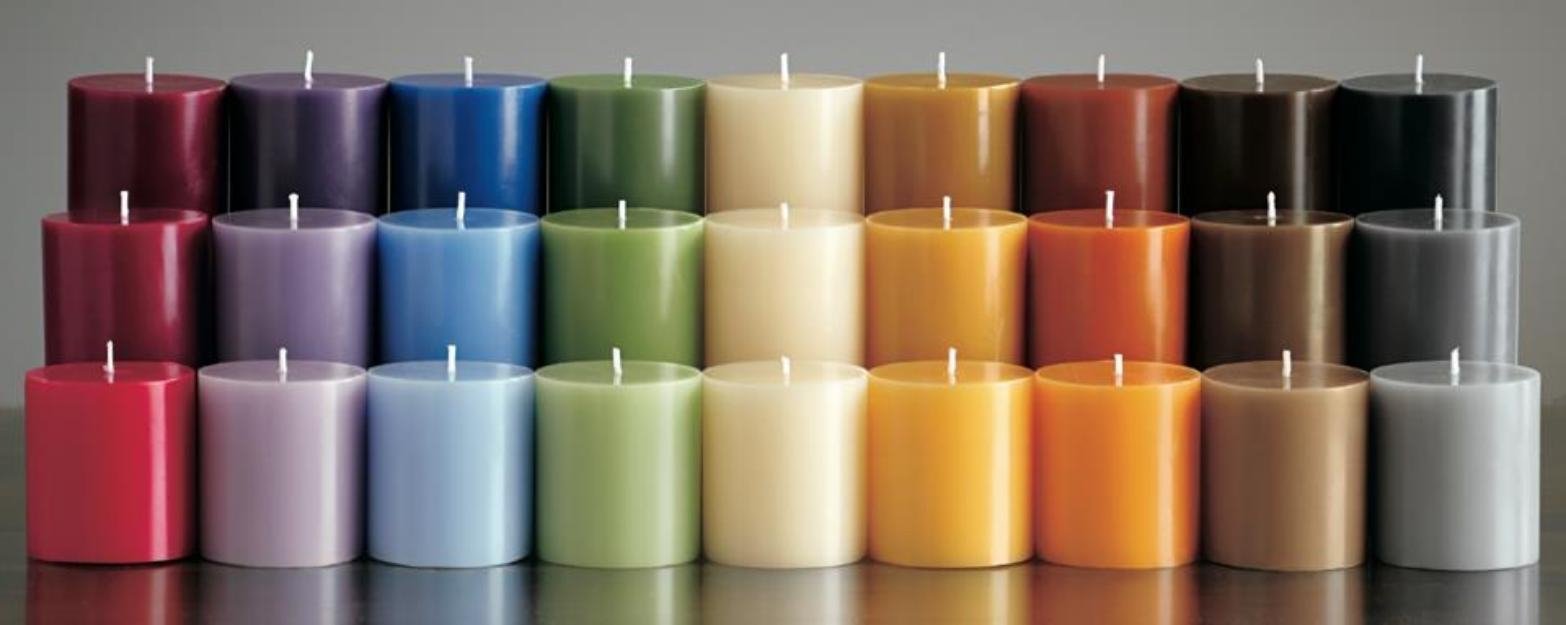
- Dyes/Pigments: If you want colored candles, dyes or pigments can be added to the melted wax to achieve the desired hues.
- Thermometer: A thermometer is crucial for monitoring the temperature of the melted wax. This ensures that it is at the correct temperature before pouring into containers or molds.
- Double Boiler/Heat Source: A double boiler or heat source such as a melting pot, slow cooker, or microwave can be used to melt the wax safely and evenly.
- Stirring Utensil: To blend fragrances and colors evenly into the melting wax, a stirring utensil such as a stainless steel spoon or spatula will be required.
- Safety Equipment: Safety should always be a priority when working with hot wax and flames. Keep a fire extinguisher, oven mitts, and safety goggles handy.
9. Heat – resistant Surface: Protect your work area by placing newspapers or heat-resistant mats underneath your candle making workspace.
It is important to invest in high-quality tools and materials to ensure the best results in your candle making projects. By having the right supplies on hand, you will be well-prepared for an enjoyable and successful candle making experience.
| Tools | Materials |
|---|---|
| Wicks | Wax |
| Containers/Molds | Fragrance Oils/Essential Oils |
| Thermometer | Dyes/Pigments |
Safety Precautions and Tips for Avoiding Common Candle Making Mistakes
When it comes to candle making, safety should always be a top priority. Here are some essential safety precautions and tips to help you avoid common mistakes and ensure a safe and enjoyable candle making experience:
Work in a Well-Ventilated Area
Candle making involves working with potentially harmful materials such as fragrances, dyes, and melted wax. It’s crucial to work in a well-ventilated area to avoid inhaling any toxic fumes. Open windows or use fans to ensure proper air circulation throughout your workspace.
Use Protective Gear
Protective gear can safeguard you from potential accidents or skin irritations. Wear heat-resistant gloves when handling hot wax and pouring it into containers. Safety goggles can also protect your eyes from splashes of hot wax or fragrance oils.
Keep Flammable Objects Away
Ensure that your workspace is clear of any flammable objects like curtains, paper, or loose clothing. A momentary distraction could lead to these objects catching fire if they come into contact with the open flame of a candle or hot waxes.
Never Leave Candles Unattended
It is essential never to leave candles unattended while they are burning. Always extinguish candles before leaving the room or going to sleep to prevent accidental fires.
Use Proper Candle Containers
Choosing the right container for your candles is crucial for safety reasons. Ensure the container you use is heat-resistant and won’t crack under high temperatures. Glass jars specifically designed for candle making are often a safe choice.
Properly Trim Wicks
Trimming your wicks before lighting them helps prevent uneven burning, excessive smoking, and large flames that could be a fire hazard. Trim the wick to about ¼ inch before each burn to maintain a safe and optimal burning experience.
Use a Double Boiler or Wax Melter
When melting waxes, it is best to use a double boiler or wax melter rather than direct heat. This method reduces the risk of the wax overheating or catching fire. Avoid using microwaves or stovetops directly as they can create uneven heating and increase safety risks.
By following these safety precautions and tips, you can avoid common mistakes and ensure a safe candle making experience. Remember, safety should always be your top priority when working with potentially hazardous materials like hot wax and fragrance oils. So stay cautious, enjoy your creative process, and embrace the art of candle making.
Step-by-step Guide
Making your own candles at home can be a fulfilling and enjoyable experience. Not only will you have the opportunity to create unique and personalized candles, but you will also have full control over the ingredients used and the scents that fill your space. Follow this step-by-step guide to learn how to make your own candles at home.
Step 1: Prepare Your Materials
Before you begin making your candles, gather all the necessary materials. You will need wax (such as soy wax or beeswax), wicks, containers, fragrance oils, a double boiler or melting pot, a thermometer, and any desired colorants or additional decorative elements. Ensure that your containers are clean and dry before use.
Step 2: Melt the Wax
The next step is to melt the wax using a double boiler or melting pot. Place the wax into the double boiler or pot and heat it slowly over low to medium heat until it reaches its melting point. It’s important to closely monitor the temperature of the wax using a thermometer to prevent overheating or burning.
Step 3: Add Fragrance and Color
Once the wax has melted completely, it’s time to add fragrance oils and color if desired. Measure out your preferred amount of fragrance oil using a dropper or measuring spoon according to the manufacturer’s recommendations. Similarly, add any colorant if you want to tint your candles. Stir well to ensure even distribution of both fragrance oil and color throughout the melted wax.
Step 4: Secure Wicks and Pour Wax into Containers
Now it’s time to prepare your containers by securing wicks in them. Attach wick stickers or use hot glue dots at the bottom center of each container, then press the metal end of each wick onto them firmly. To keep each wick centered during pouring, place a pencil or chopstick across the top of the container and position the wick around it.
Once your wicks are secure, carefully pour the melted wax into each container. Leave a small amount of space at the top to allow for any potential shrinkage during cooling. Allow the candles to cool completely and solidify before moving them.
By following these steps, you can easily make your own candles at home. Experiment with different fragrances, colors, and containers to create personalized candles that suit your taste and style.
Enhancing Your Candles
When it comes to candle making, the aroma is just as important as the visual appeal. The scent of a candle has the power to transport us, evoke emotions, and create a comforting atmosphere in our homes. In this section, we will explore creative ideas for scent combinations and decorative additions that can take your candles to the next level.
Experimenting with Scent Combinations
One of the most exciting aspects of candle making is the ability to create unique scents by combining different fragrance oils. Let your creativity run wild and experiment with various scent combinations to find your signature blend. Consider combining lavender and vanilla for a calming and soothing experience, or citrus and spice for an invigorating and uplifting ambiance. The possibilities are endless.
To achieve a balanced scent profile, start by adding small amounts of fragrance oils and gradually increase until you reach your desired intensity. Be mindful of not overpowering the aroma, as some scents can become overwhelming when too concentrated. Keep careful notes on your experiments so you can replicate successful combinations in the future.
Addition of Decorative Elements
If you’re looking to add an extra touch of charm and personalization to your candles, consider incorporating decorative elements into your designs. Dried flowers such as lavender buds or rose petals can be gently pressed onto the surface of hot wax before it solidifies, creating a beautiful visual effect and releasing subtle natural fragrances when burned.
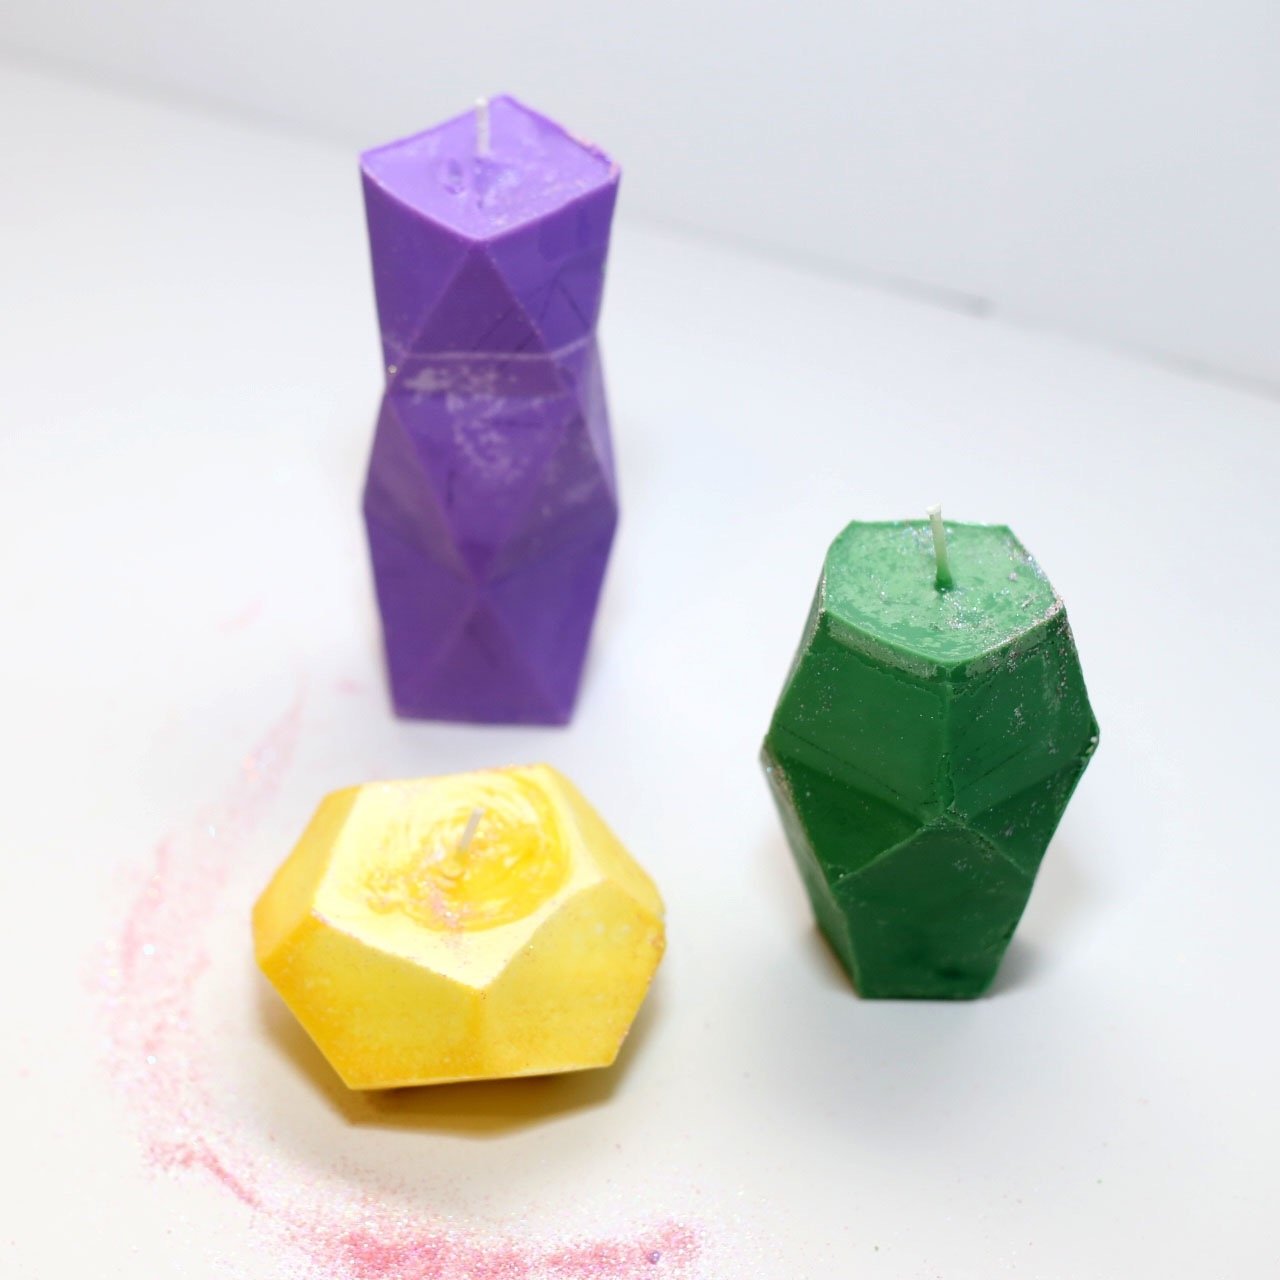
For those seeking a bit of sparkle, glitter can be sprinkled onto the surface of candles while they are still warm but not completely hardened. This adds a magical shimmer that catches the eye when the candle is lit. Make sure to choose cosmetic-grade glitter specifically designed for use in candles to ensure safety.
Another popular technique is embedding objects into the wax for a unique look. Small items such as seashells, gemstones, or decorative beads can be carefully positioned in the container before pouring the wax. As the candle burns down, these hidden treasures gradually reveal themselves, delighting the senses and adding an element of surprise.
Tips for Achieving Perfectly Burning and Long-Lasting Candles
Achieving perfectly burning and long-lasting candles is a goal that every candle maker strives for. To help you achieve this, here are some tips to ensure optimal burning results and maximize the longevity of your candles:
- Proper Wick Placement: The placement of the wick in your candle is crucial for a clean and even burn. Make sure to center the wick in the middle of your container or mold before pouring the wax. This will help prevent tunneling and ensure that the entire surface of the candle melts evenly.
- Wick Trimming: Before lighting your candle, it’s important to trim the wick to an appropriate length. A wick that is too long can result in excessive sooting and uneven burning. Trim the wick to about ¼ inch before each use to maintain a controlled flame.
- Candle Maintenance: Take care of your candles by keeping them away from drafts, which can cause uneven burning. Also, be mindful of storing them in a cool, dry place to avoid discoloration or warping due to heat or humidity.
- Burn Time: For optimal results, it’s recommended to let your candles burn for at least 1 hour per inch of diameter during each use. This helps create a wide melting pool and prevents tunneling.
- Maximizing Longevity: To extend the life of your candles, consider using them in shorter intervals rather than burning them continuously for extended periods of time. This can help preserve their fragrance and prevent excessive heat damage.
By following these tips, you can enhance your candle making experience and produce candles that burn perfectly and last longer.
Diagnosing and Fixing Common Candle Problems
Candle making is a delightful activity that allows individuals to express their creativity and create beautiful, handmade candles. However, like any craft, candle making can come with its fair share of challenges. In this section, we will explore some common issues that may arise during the candle making process and provide practical solutions for diagnosing and fixing these problems.
One common problem that candle makers encounter is uneven burning. This occurs when the candle burns unevenly, leaving excess wax on one side while the other side remains unburned. To resolve this issue, it is essential to ensure proper wick placement.
Place the wick in the center of the container or mold and use a wick holder to keep it in place during pouring. Trimming the wick to an appropriate length (around ¼ inch) before lighting can also play a crucial role in promoting even burning.
Another frequent issue is tunneling, which refers to a small hole forming down the center of the candle while leaving untouched wax around the outer edges. Tunneling can be caused by a number of factors, including using an improperly sized wick or not allowing the initial burn to create a wide enough melt pool in the first use.
To fix this problem, ensure that you choose an appropriate wick size based on your container’s diameter and adjust your pour temperature accordingly. Additionally, always allow your candle to burn long enough for a full melt pool to form across the entire surface before extinguishing it.
Excessive sooting is yet another challenge faced by candle makers. Sooting happens when black smoke appears around the flame, causing unsightly marks on containers and walls over time. The primary cause of sooting is usually an overly long or mushroom-shaped wick. It is important to select an appropriate-sized wick and trim it regularly to prevent excessive soot formation. Additionally, avoiding drafty areas and using high-quality, clean-burning waxes can also contribute to reducing sooting.
By addressing these common candle problems with the troubleshooting tips provided, you can overcome any challenges you may encounter during your candle making journey. Remember that trial and error is a part of the learning process, and with patience and perseverance, you will master the art of creating high-quality candles that burn beautifully.
Candle Making for Profit
Candle making can be more than just a hobby; it can also be a profitable business venture. With the growing demand for handmade and unique products, there is a market for high-quality homemade candles. Starting your own candle business allows you to showcase your creativity, passion, and entrepreneurial skills. Here are some tips to help you turn your candle making hobby into a successful small business.
1. Research the Market: Before diving into the candle industry, it’s crucial to research and understand the market. Identify your target audience, their preferences, and trends in the industry. Keep an eye on popular scents and designs that are currently in demand. This knowledge will help you create products that appeal to customers and stand out from competitors.
2. Develop Your Brand: Building a strong brand is essential to differentiate yourself from other candle makers and establish a loyal customer base. Create a unique brand name, logo, and packaging design that reflects your style and values. Consider what makes your candles special – whether it’s using organic ingredients or promoting sustainability – and craft a compelling message around it.
3. Quality Matters: To succeed in the candle industry, delivering high-quality products is non-negotiable. Use premium ingredients like natural waxes, fragrance oils, and eco-friendly materials for your candles. Invest in good equipment and tools to ensure consistent results with each batch. Pay attention to details like scent throw, burn time, and aesthetics to create candles that customers will love.
4. Market Your Candles: Establishing an online presence is crucial for reaching potential customers beyond your immediate circle. Create a professional website or online store where customers can browse and purchase your candles easily. Use social media platforms like Instagram or Facebook to showcase your products through captivating visuals and engaging content. Consider collaborating with influencers or partnering with local stores to expand your reach.
5. Price Appropriately: Pricing plays a significant role in the success of your candle business. Make sure to factor in the cost of materials, labor, overhead expenses, and desired profit margins when determining the price of your candles. Research competitors’ pricing to ensure your prices are competitive yet profitable. Consider offering different sizes or bundles to cater to various customer budgets.
6. Provide Outstanding Customer Service: Building strong relationships with customers is crucial for repeat business and positive word-of-mouth referrals. Offer excellent customer service by promptly responding to inquiries, providing detailed product information, and addressing any concerns or issues that arise. Show appreciation for your customers by including handwritten thank-you notes or small freebies with their orders.
7. Continuous Learning and Innovation: The candle industry is continuously evolving, so it’s important to stay up-to-date with the latest trends and techniques. Attend workshops or online courses related to candle making or business management to enhance your skills and knowledge. Innovate by introducing new scents, designs, or limited edition collections periodically to keep customers interested and engaged.
Starting a small business in the candle industry can be both rewarding and profitable if done right. With careful planning, quality products, effective marketing strategies, and exceptional customer service, you can turn your passion for candle making into a successful enterprise.
Conclusion
In conclusion, candle making is not just a hobby, but an art form that allows individuals to tap into their creativity and create something beautiful and functional. The therapeutic effects of candle making cannot be overstated, as it provides a sense of relaxation and satisfaction. By creating your own candles, you have the ability to customize them to your liking, experimenting with different scents, colors, and designs.
Throughout this article, we have explored the various aspects of candle making, from understanding different types of wax to essential tools and safety precautions. We have also provided a step-by-step guide on how to make your own candles at home, as well as suggestions for enhancing them with creative scent combinations and decorative additions.
Now that you have been armed with knowledge and inspiration, it is time to embrace the art of candle making and unleash your creativity. Start by gathering the necessary supplies and dive into the process. Don’t be afraid to experiment with different techniques or try out new ideas. Candle making is a journey where you can constantly learn and improve your skills.
Not only will you enjoy the process of creating your own candles, but you can also turn it into a business venture. With proper branding, marketing strategies, and pricing tactics, you can sell your homemade candles in a competitive market.
So why wait? Embrace the art of candle making today and experience the joy of creating something beautiful while unleashing your creativity. Start by following the tips and instructions provided in this article, and let your love for candles inspire you on this rewarding craft.

Welcome to my candle making blog! In this blog, I will be sharing my tips and tricks for making candles. I will also be sharing some of my favorite recipes.


