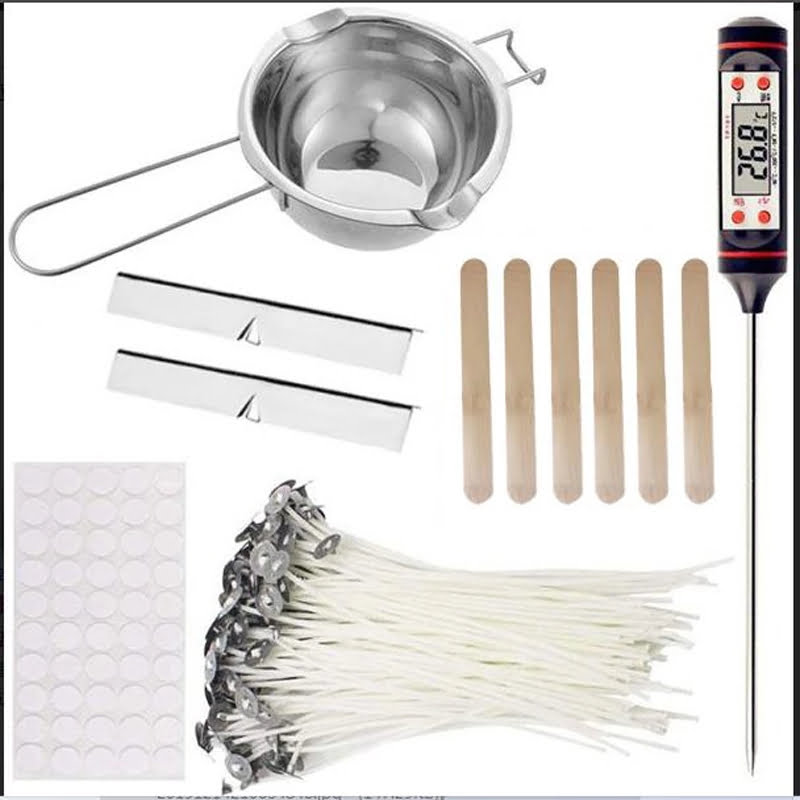
Candle making is truly an art form that requires precision and care to achieve beautiful results. One essential tool that can aid in this process is using a hot plate for candle making. A hot plate provides a controlled heating source, making it easier to melt wax and maintain the desired temperature throughout the candle-making process.
When it comes to creating handmade candles, using a hot plate can offer numerous benefits. Not only does it provide a consistent heat source, but it also allows for precise temperature control, ensuring that your candles turn out just right every time. Additionally, hot plates are versatile and can be used for various candle-making techniques, such as melting wax, blending fragrance oils, or even keeping your molds warm.
In this article, we will explore the world of using a hot plate for candle making, from the benefits it offers to safety precautions you should take when using one. We will also delve into choosing the right hot plate for your candle-making needs, as well as providing step-by-step instructions on how to effectively use a hot plate in your candle-making process.
Let’s embark on this journey and discover how incorporating a hot plate can enhance your candle-making experience.
Benefits of Using a Hot Plate for Candle Making
Increased Control Over Temperature
Using a hot plate for candle making offers the advantage of precise temperature control. This is crucial for achieving the perfect melt point for your wax, ensuring that it melts evenly and thoroughly without overheating. With a hot plate, you can easily adjust the temperature to suit different types of wax and additives, allowing you to create high-quality candles every time.
Efficient Heating Capability
Hot plates are known for their efficient heating capabilities, making them ideal for melting candle wax quickly and evenly. Unlike traditional methods like double boilers or microwaves, a hot plate can heat up rapidly and maintain a consistent temperature throughout the melting process. This saves time and energy, enabling you to focus on the creative aspect of candle making without worrying about uneven melting or scorching.
Versatility in Candle Making Techniques
Another benefit of using a hot plate for candle making is its versatility in accommodating various techniques. Whether you’re hand-pouring candles, making layered designs, or experimenting with different molds and shapes, a hot plate provides the flexibility needed to execute these techniques with precision. Its flat surface also makes it easy to work with multiple containers at once, allowing you to streamline your production process efficiently.
Safety Precautions When Using a Hot Plate for Candle Making
When using a hot plate for candle making, it is crucial to prioritize safety in order to prevent accidents and ensure a smooth candle making process. One of the most important safety precautions to follow is to never leave the hot plate unattended while it is in use. The high temperature of the hot plate can pose a fire hazard if left unsupervised, so it is essential to always be present when using it for melting wax or warming containers.
Another key safety tip when using a hot plate for candle making is to keep flammable materials away from the heat source. Make sure that your work area is clutter-free and free from any items that could easily catch fire. Additionally, always place the hot plate on a stable, heat-resistant surface to prevent accidental spills or tipping over.
Furthermore, it is recommended to use protective gear such as heat-resistant gloves and aprons when handling the hot plate during the candle making process. This will help protect your skin from burns or other injuries that may occur while working with the hot plate. By following these safety precautions, you can create candles with peace of mind and enjoy the convenience of using a hot plate for your candle making projects.
Choosing the Right Hot Plate for Candle Making
When it comes to choosing the right hot plate for candle making, there are a few key factors to consider to ensure that you have a smooth and efficient candle-making process. Here are some tips to help you select the perfect hot plate for your candle making needs:
- Temperature Control: Look for a hot plate that offers precise temperature control, allowing you to maintain a consistent heat level throughout the candle-making process. This will help ensure that your wax melts evenly and at the correct temperature.
- Size and Capacity: Consider the size and capacity of the hot plate, depending on the volume of candles you plan on making. A larger hot plate may be necessary for larger batches, while a smaller one could suffice for smaller projects.
- Material: Opt for a hot plate made from durable materials such as stainless steel or aluminum, as these materials are easy to clean and maintain. Avoid hot plates with non-stick coatings, as these may not be suitable for use with candle-making materials.
In addition to these considerations, it’s also important to choose a hot plate that fits within your budget while still meeting your functional requirements. Compare different models and brands to find one that offers the features you need at a price point that works for you.
By investing in a high-quality hot plate specifically designed for candle making, you can streamline your process and create beautiful candles with ease. Remember, the right equipment can make all the difference in achieving professional results in your candle-making endeavors when using a hot plate for candle making.
Steps to Using a Hot Plate for Candle Making
When it comes to using a hot plate for candle making, there are several steps to ensure a successful and efficient process. Here is a simple guide on how to effectively use a hot plate for your candle making endeavors:
- Set up your work station: Before starting the candle making process, make sure you have a clean and organized work station. Place your hot plate on a stable and heat-resistant surface to avoid any accidents.
- Gather your materials: Collect all the necessary materials for candle making, including wax, fragrance oils, wicks, dye chips (if desired), and any other tools or equipment needed. Make sure everything is within reach before you start melting the wax on the hot plate.
- Melt the wax: Turn on the hot plate to the desired temperature for melting your wax. Place your wax in a heat-safe container or double boiler on the hot plate. Stir occasionally to ensure even melting. Be mindful of the temperature settings on your hot plate to prevent overheating or burning the wax.
Once the wax is fully melted, you can add fragrance oils, dye chips, or any other additives according to your recipe. Stir well to incorporate all ingredients before pouring the melted wax into your chosen containers and setting them aside to cool and solidify. Remember to clean up any spilled wax or residue from the hot plate after each use to maintain its efficiency and prolong its lifespan.
Tips and Tricks for Efficient Candle Making on a Hot Plate
When it comes to using a hot plate for candle making, there are several tips and tricks that can help ensure the process is efficient and successful. One of the best tips is to use a thermometer to monitor the temperature of the wax on the hot plate.
This will help prevent overheating, which can lead to safety hazards and affect the quality of the candles. Additionally, using a double boiler or heat-resistant container can provide a more stable melting environment for the wax.
Another important tip is to stir the wax regularly while it is melting on the hot plate. This helps distribute the heat evenly and prevents any uneven melting or scorching of the wax. It’s also recommended to use a silicone spatula for stirring, as it is heat-resistant and easy to clean afterwards.
Furthermore, consider pre-heating your containers before pouring in the melted wax. This can help reduce air bubbles in the finished candle and create a smoother surface. Additionally, if you’re working with different colored waxes for layered candles or decorations, make sure to maintain separate temperatures on your hot plate for each color to achieve desired results.
| Tips for Efficient Candle Making | Using a Hot Plate |
|---|---|
| Monitor wax temperature with a thermometer | Helps prevent overheating and ensures quality |
| Stir wax regularly while melting | Prevents uneven melting or scorching |
| Pre-heat containers before pouring wax | Reduces air bubbles and creates smoother surface |
By incorporating these tips and tricks into your candle making process using a hot plate, you can enjoy a more efficient and enjoyable experience while creating beautiful candles. With proper techniques and attention to detail, you’ll be able to produce high-quality candles that will impress friends, family, or potential customers.
Cleaning and Maintenance of Hot Plates for Candle Making
Why Cleaning and Maintenance Is Important
When it comes to using a hot plate for candle making, proper cleaning and maintenance are essential to ensure the longevity and efficiency of your equipment. Over time, residue from the wax can build up on the hot plate, affecting its performance and potentially causing safety hazards. Regular cleaning not only keeps your hot plate in good working condition but also helps to prevent any accidents or malfunctions during the candle-making process.
Cleaning Steps for Hot Plates
To effectively clean your hot plate used for candle making, start by ensuring that it is completely cooled down before you begin. Use a soft cloth or sponge with warm soapy water to wipe down the surface of the hot plate, removing any wax residue or spills.
For more stubborn residue, you can use a gentle household cleaner or a mixture of vinegar and water. Be sure to dry the hot plate thoroughly before using it again to prevent any electrical issues.
Maintenance Tips for Hot Plates
In addition to regular cleaning, proper maintenance is key to keeping your hot plate in top shape for candle making. Check the power cord and plug regularly for any signs of wear or damage, as these could be potential safety hazards.
It’s also important to inspect the heating element and controls periodically to ensure they are functioning properly. By taking care of your hot plate through routine cleaning and maintenance, you can enjoy efficient and safe candle making for years to come.
Creative Ideas for Using a Hot Plate for Candle Making
When it comes to using a hot plate for candle making, creativity knows no bounds. One of the innovative ways to make use of a hot plate is by experimenting with different shapes and sizes of molds.
By utilizing silicone molds in various designs such as geometric shapes, animals, or even fruits, you can create unique and eye-catching candles that are sure to be a hit. The flexibility of silicone molds allows you to unleash your imagination and come up with one-of-a-kind candle creations.
Another creative idea for using a hot plate in candle making is to incorporate natural elements into your candles. From dried flowers and herbs to citrus slices and coffee beans, adding these organic materials not only enhances the visual appeal of your candles but also introduces delightful scents when melted. Imagine the aroma of lavender-infused candles or the refreshing scent of eucalyptus filling your space – all achievable using a hot plate for candle making.
Furthermore, you can explore the realm of color blending by melting different colored wax on a hot plate before pouring them into molds. This technique allows you to create captivating layers or intricate patterns within your candles. Whether you opt for vibrant rainbow hues or elegant ombré effects, the hot plate provides the ideal tool for achieving seamless color transitions in your homemade candles.
| Creative Candle Ideas | Description |
|---|---|
| Silicone Mold Designs | Create unique shapes like animals or fruits for visually appealing candles. |
| Natural Elements | Incorporate dried flowers, herbs, or citrus slices for aesthetic appeal and pleasant scents. |
| Color Blending | Experiment with blending different colored waxes on a hot plate for layered or patterned candles. |
Conclusion
In conclusion, incorporating the use of a hot plate for candle making can significantly streamline and enhance your crafting experience. The convenience and efficiency that a hot plate offers make it a valuable tool for both beginners and seasoned candle makers alike. From providing precise temperature control to ensuring even melting of wax, hot plates are essential in creating high-quality candles with consistency.
Furthermore, by embracing the convenience of using a hot plate for candle making, crafters can enjoy a more organized and efficient workspace. The compact size of most hot plates makes them easy to store and set up, allowing you to focus more on the creative aspects of candle making rather than worrying about cumbersome equipment. Whether you are working on small batches or larger production runs, a hot plate can help you achieve professional results with ease.
Overall, the versatility and practicality of using a hot plate for candle making cannot be overstated. By following safety precautions, selecting the right model, mastering the steps involved in using it effectively, and implementing tips and tricks for efficiency – you can elevate your candle-making experience to new heights. Embrace the convenience that hot plates bring to your craft and unlock a world of possibilities in creating beautiful and unique candles.
Frequently Asked Questions
How Do You Melt Candle Wax on a Hot Plate?
Melt candle wax on a hot plate by placing the wax in a heat-safe container on the hot plate. Gradually increase the temperature to melt the wax without overheating it or causing it to catch fire.
How Do You Use a Candle Warmer Plate?
Using a candle warmer plate involves simply placing the candle on the warmer and turning it on. The plate will gently heat the candle from below, releasing its fragrance without a flame. Just make sure to monitor it while in use.
What Is the Best Heat Source for Candle Making?
The best heat source for candle making depends on personal preference and safety considerations. Some people prefer using a double boiler setup on the stove, while others opt for electric wax melters or crock-pots. Choose whichever method works best for you and always follow safety guidelines when working with heat sources during candle making.

Welcome to my candle making blog! In this blog, I will be sharing my tips and tricks for making candles. I will also be sharing some of my favorite recipes.

