Candle making is a timeless craft that allows individuals to create beautiful and personalized candles for various occasions. One popular method among DIY enthusiasts is the use of crayons in candle making. By incorporating crayons, crafters can easily add color to their candles in an effective and affordable way. This technique opens up a world of possibilities for creating vibrant and unique candles that suit any style or theme.
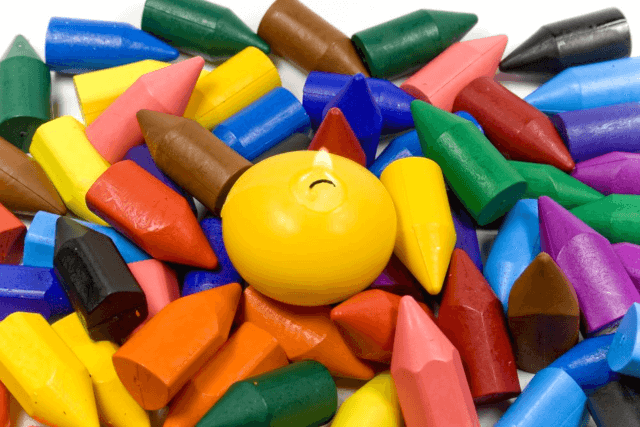
Using crayons in candle making offers several benefits, especially when it comes to enhancing the visual appeal of the final product. Crayons come in a wide range of colors, making it easy to find the perfect shade for your candles.
Whether you prefer pastel hues or bold tones, crayons allow you to customize the color of your candles with ease. Additionally, crayons are readily available and inexpensive, making them a cost-effective option for those looking to add a pop of color to their candle creations.
In this article, we will explore the concept of using crayons in candle making, discussing the benefits of this technique and providing tips on choosing the right type and quality of crayons for your projects. We will also delve into the process of incorporating crayons into candle making, offering a step-by-step guide on how to melt and mix crayons into the wax effectively.
So get ready to unleash your creativity and experiment with different color combinations as we dive into the colorful world of using crayons in candle making.
Benefits of Using Crayons in Candle Making
Using crayons in candle making is a cost-effective and creative way to add vibrant colors to your homemade candles. Not only do crayons come in a wide range of hues, but they are also readily available and easy to work with, making them a popular choice among DIY enthusiasts. Here are some benefits of incorporating crayons into your candle making projects:
- Cost-Effective: Crayons are an affordable option for adding color to candles, especially compared to purchasing specialized candle dyes. This allows you to experiment with different shades and combinations without breaking the bank.
- Wide Color Selection: Crayons come in a variety of colors, from basic shades like red, blue, and yellow to metallics and neons. This gives you endless possibilities for customizing your candles to match any theme or decor.
- Easy to Use: Melted crayons blend smoothly into the wax, creating rich and opaque colors that evenly distribute throughout the candle. They require no special equipment or techniques, making them ideal for beginners or those looking for a simple way to enhance their candle designs.
When choosing crayons for candle making, it’s important to select non-toxic options made from high-quality pigments. Look for crayons that have vibrant color payoff when melted and mixed with wax. Additionally, consider experimenting with different brands and types of crayons to see which ones produce the best results in terms of color intensity and consistency. By carefully choosing the right crayons for your candles, you can ensure beautiful and long-lasting color throughout your creations.
Choosing the Right Crayons
When it comes to choosing the right crayons for candle making, selecting the best type and quality is essential to ensure that you achieve vibrant and long-lasting color results in your candles. With a wide variety of crayons available on the market, it’s important to consider certain factors before incorporating them into your candle making process.
Quality Matters
When picking crayons for candle making, opt for high-quality, non-toxic crayons that are free from additives or chemicals that could affect the burning performance of your candles. Look for crayons made from pure wax with strong pigments that will blend well with the wax base without compromising the quality of the final product.
Type of Crayon
While traditional wax-based crayons are commonly used in candle making, you may also explore other types such as gel or twistable crayons for unique effects. Gel crayons produce a translucent finish when mixed with wax, perfect for creating layered or marbled designs in your candles. Twistable crayons offer convenience as they are easy to handle and melt smoothly when incorporated into the wax.
Color Selection
Consider the color intensity and compatibility of the crayons with the wax base when choosing hues for your candles. Keep in mind that lighter colors may appear more subtle once blended into the wax, while darker shades can provide a more intense and vibrant outcome. Experimenting with different color combinations can help you achieve custom shades that suit your preferences and overall design aesthetic.
By carefully selecting the right type and quality of crayons for your candle making projects, you can create visually appealing candles with stunning colors that enhance their decorative appeal and personal touch. Remember to test out various options and combinations to discover what works best for your specific designs and enjoy the creative process of using crayons in candle making.
The Process of Incorporating Crayons Into Candle Making
When it comes to incorporating crayons into candle making, the process can be both fun and rewarding. Not only do crayons add vibrant colors to your candles, but they also allow for endless creative possibilities. By following a step-by-step guide on how to melt and mix crayons into the wax effectively, you can achieve a personalized touch to your candles that is unique and visually appealing.
Selecting the Right Crayons
To begin the process of using crayons in candle making, it is essential to choose the right type and quality of crayons. Opt for non-toxic crayons that are safe for use in candles and will not release harmful chemicals when burned. Look for crayons with intense pigmentation to ensure that the colors remain vibrant once incorporated into the melted wax.
Melting the Crayons
Once you have selected your preferred crayon colors, gather them together and remove any paper wrappers before melting them. Using a double boiler or microwave-safe container, melt the crayons at a low temperature until they reach a liquid state. Stir the melted crayons gently to ensure even color distribution and prevent clumping.
Mixing Crayons Into Wax
After melting the crayons, it’s time to incorporate them into your melted wax mixture. Gradually pour the melted crayons into the melted wax while stirring continuously to achieve your desired color intensity. Take care not to add too much crayon as it may affect the consistency of your candle wax. Experiment with different color combinations and amounts of crayon to create unique and customized candles that reflect your personal style.
Safety Precautions
When using crayons in candle making, it is crucial to prioritize safety throughout the process. The combination of hot wax and crayons can pose potential risks if proper precautions are not taken. One of the most important safety measures to remember is to never leave a double boiler or melting wax unattended while working on your candles. This will help prevent accidental fires or burns from occurring.
Additionally, it is essential to work in a well-ventilated area when melting crayons and wax for candles. The fumes emitted during the melting process can be harmful if inhaled for an extended period. Opening windows or using a fan can help dissipate these fumes and create a safer working environment for yourself. Furthermore, wearing appropriate protective gear such as heat-resistant gloves and goggles is recommended to avoid any accidents or injuries while handling hot wax.
Another key safety precaution when using crayons in candle making is to keep children and pets away from your workspace. The temptation of colorful crayons and enticing scents may attract curious little ones, so it’s best to work in an area that is inaccessible to them. By maintaining a child-free zone around your candle-making materials, you can ensure the safety of your loved ones and focus on creating beautiful candles without any distractions.
| Safety Measure | Importance |
|---|---|
| Never leave a double boiler unattended | Prevents accidental fires or burns |
| Work in a well-ventilated area | Reduces inhalation of harmful fumes |
| Keep children and pets away from workspace | Avoid accidents or distractions during candle making |
Creative Ways to Use Crayons in Candle Making
One of the most exciting aspects of using crayons in candle making is the ability to experiment with different color combinations and techniques to create unique and vibrant candle designs. By incorporating crayons into your candle-making process, you can unleash your creativity and add a personalized touch to your creations.
One creative way to use crayons in candle making is to blend multiple colors together to achieve custom shades that are not readily available in store-bought candles. This allows you to match your candles to specific color schemes or themes for special occasions or home decor.
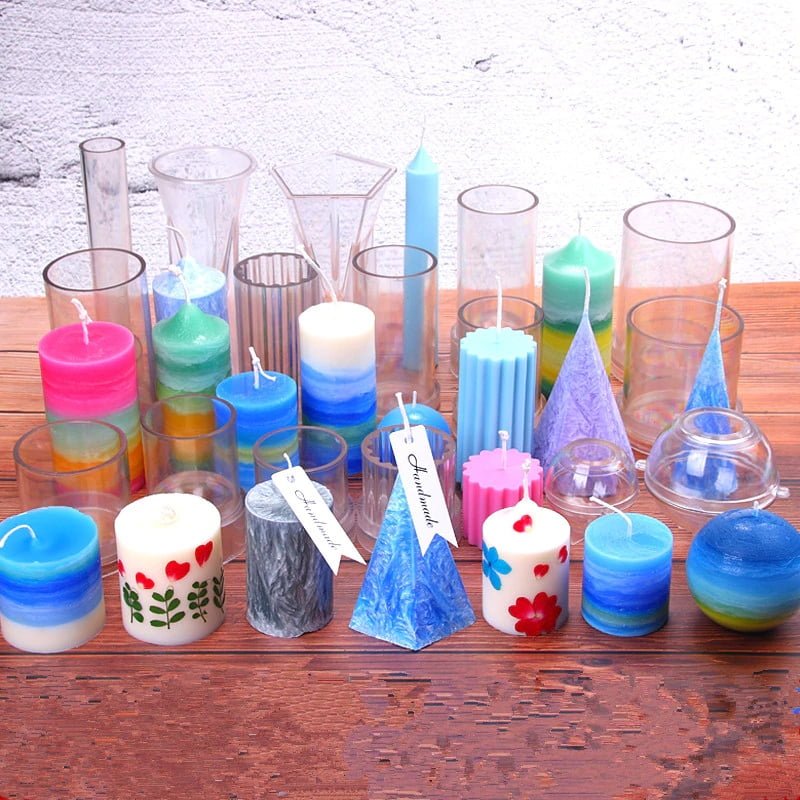
Another fun idea for using crayons in candle making is to create ombre or gradient effects by layering different colors within the wax. This technique involves pouring layers of melted wax mixed with crayon shavings of varying hues, allowing them to blend together seamlessly as they cool.
The result is a stunning visual effect where the colors transition smoothly from one shade to another, adding depth and dimension to your candles. Ombre candles make beautiful centerpieces or gifts that are sure to impress friends and family.
Additionally, you can explore advanced techniques such as marbling or swirl patterns by incorporating melted crayons into the wax in a more intricate manner. By carefully swirling different colored waxes together before they solidify, you can create mesmerizing patterns reminiscent of marble stone or abstract art.
This artistic approach to using crayons in candle making adds a whimsical and sophisticated flair to your creations, elevating them from ordinary candles to works of art that double as decorative pieces. Experimenting with various color combinations and techniques opens up endless possibilities for expressing your individual style through DIY candle making.
| Candle-Making Technique | Description |
|---|---|
| Blending Colors | Mixing multiple crayon hues together for custom shades |
| Ombre Effects | Layering different colors within the wax for gradient effects |
| Marbling/Swirl Patterns | Create intricate designs by swirling colored waxes together |
Troubleshooting Common Issues
When using crayons in candle making, it is common to encounter some challenges along the way. However, with the right knowledge and techniques, these issues can be easily addressed. Here are some common problems that may arise when incorporating crayons into your candle-making process, along with practical solutions to overcome them:
- Uneven Color Distribution: One of the most common issues when using crayons to color candles is achieving uneven color distribution. This can result in blotchy or streaky patterns on the surface of the candle. To avoid this problem, make sure to thoroughly mix the melted crayon wax with the main wax base before pouring it into the mold. Stirring continuously and evenly will help distribute the color more consistently throughout the candle.
- Wax Hardening Too Quickly: Another challenge that DIY candle makers may face is the wax hardening too quickly before achieving the desired color intensity. To prevent this from happening, work in small batches and melt only a small amount of wax at a time when mixing in crayons. This allows for better control over the melting process and ensures that you have enough time to incorporate and blend the colors evenly before pouring.
- Fading Colors: Over time, some candles made with crayons as coloring agents may experience fading colors, especially if exposed to sunlight or heat sources. To preserve the vibrancy of your colored candles, consider using high-quality artist-grade crayons or adding a UV inhibitor to your wax mixture. Additionally, storing your finished candles in a cool, dark place can help maintain their color intensity for longer periods.
By being aware of these potential issues and implementing these simple solutions, you can enhance your candle-making skills and create beautiful customized candles using crayons as coloring agents. Remember that experimentation and practice are key in perfecting this technique, so don’t be afraid to try out different methods until you find what works best for you.
Conclusion
In conclusion, using crayons in candle making is a creative and cost-effective way to add vibrant colors to your homemade candles. The benefits of this method are numerous, from the wide range of color options available to the ease of use and affordability of crayons compared to traditional candle dyes.
DIY enthusiasts have embraced this technique for its versatility and fun, allowing them to unleash their creativity in crafting unique candles for personal use or as thoughtful gifts for friends and family.
When choosing the right crayons for candle making, it is important to consider the type and quality that will best suit your project. Opt for non-toxic crayons with rich pigments that can easily blend into the wax to achieve your desired shades. By following a simple process of melting and mixing the crayons into the wax, you can create custom candles with beautiful hues that reflect your personal style and aesthetic preferences.
As you embark on your journey of incorporating crayons into candle making, remember to prioritize safety precautions when working with hot wax and melting materials. It is crucial to handle these components with care and follow recommended safety guidelines to ensure a safe and enjoyable crafting experience. With a little experimentation and creativity, you can explore different color combinations and techniques to enhance your candle designs, turning ordinary candles into works of art using crayons in candle making.
So why not give it a try? Unleash your inner artist and enjoy the process of creating stunning candles with this fun and versatile technique.
Frequently Asked Questions
Is It Safe to Use Crayons in Candles?
Using crayons in candles is not safe due to the materials they are made of, such as paraffin wax and colorants that may release toxins when burned. It is recommended to use candle dyes specifically made for candle making to ensure safety.
Can I Make Candles With Crayons?
While it is possible to make candles with crayons, it is not recommended because they are not designed for this purpose. Crayons contain additives and pigments that can affect the way a candle burns, creates smoke, or even pose safety hazards.
How Do You Add Color to Homemade Candles?
To add color to homemade candles, there are several options available. Using liquid candle dye specifically made for candle making is the safest choice as it won’t affect the burning properties of the candle. Another option is using natural colorants like herbs or spices, but be mindful of their burn properties and safety considerations.

Welcome to my candle making blog! In this blog, I will be sharing my tips and tricks for making candles. I will also be sharing some of my favorite recipes.

