Introduction
Creating beautiful and decorative candles is a fun, creative outlet. With the right materials and step-by-step guidance, anyone can craft customized water-filled candle vessels that can be lit up to create mesmerizing displays in almost any home. This video tutorial will teach you how to confidently make these special water candles in your own home.
Benefits
Making your own water candles can provide a great deal of relaxation and enjoyment in addition to decorating your home with unique, handmade decorations. The process itself is calming as it requires precision and focus — perfect for those who enjoy mindful activities. Its results are beautiful, functional pieces that can be used as centerpieces or scattered around a room to create an atmosphere of tranquility and peace.
Making water candles also allows for creative expression by mixing different dyes or scents to achieve different effects — bubblegum-scented pink or ocean-breeze blue, for example. Additionally, these creative candles may be sold or gifted as special presents that are meaningful due to the time and care put into their making. Lastly, not only are these candle projects inexpensive to make — usually requiring few supplies except for water, heat resistant glass and wax — but you may even turn a profit by selling your homemade wares.
Supplies
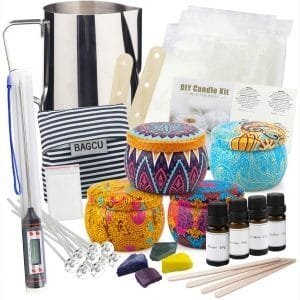
Finding the right supplies for making a water candle is easy and can be done inexpensively or free of charge. The most important safety equipment needed is eye protection, such as certified safety goggles. Additional materials will vary depending on specific instructions but may include wax, candles, emulsifier and coconut oil. Many suppliers have instructional videos online that explain the process in detail. Additionally, many online tutorials offer instructions that are free to use and may even provide templates for creating different designs. It is important to always read directions carefully before beginning a project.
How-To
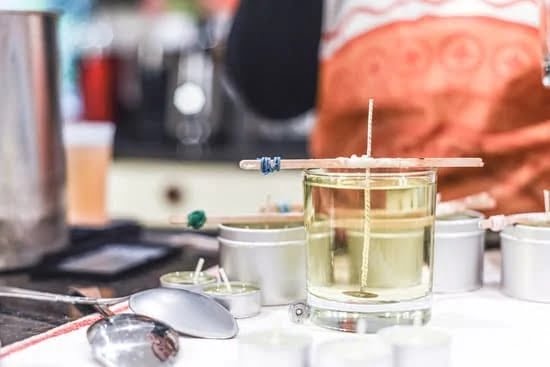
STEP 1: Start by taking an empty glass container (e.g. Mason jar, bowl, or vase) and fill it with water.
Diagram:
| Glass Container |
———————
| Water |
STEP 2: Take a tea light candle and place it in the center of the container so that it sits on the bottom. Make sure to select a candle of appropriate size for the container you are using.
Diagram: ___ Tea Light Candle ___
—————————–
| Water |
———————–
Tips
When it comes to making water candles, here are some of the tips you should keep in mind to avoid mistakes:
1. When melting the wax and pouring it into the jar or cup, take care not to let the wax foam up too much; this can cause issues such as air bubbles in your candle.
2. Make sure not to fill the jars or cups with too much liquid; this can cause them to overflow when the wax hardens.
3. Securely close the lid of your container before beginning, as you want to ensure a tight seal when you put the wick in for better results.
4. When inserting the wick into your jar or cup, make sure it is long enough and positioned correctly so that it can easily be lit later on.
5. After filling each jar with liquid and placing a wick in it, leave a few inches between each one so they don’t disrupt each other’s burn pattern when lit.
Decorating Ideas
To make your homemade water candle even more decorative and unique, there are several everyday objects you can use to add color and personality. For example, you can decorate your water candles with shells or rocks collected from a beach outing. Or, try using colorful flowers like daisies or roses for a romantic look. Use pieces of string, ribbon, or raffia to tie the decorations around the candle and make a festive statement. Mix different colors and textures together to create an attractive design that is sure to be admired. You could also add charm by adding tiny beads inside the wax mixture before pouring it into the molds.
Video
At the end of the video, users should be given the opportunity to provide their review and feedback on the water candle making process. This can be done by setting up a poll or survey that they can take once they have finished making the candles. The goal is to collect user feedback on what parts of the project went well, what areas could use more guidance or instruction, and any overall impressions of the experience. Additionally, providing a place for users to share photos of their work — whether it’s on social media platforms or in a dedicated forum — can encourage further engagement in learning about how to make water candles.
Closing
So now you know how to make water candles, the perfect way to add a unique touch of light and dcor to any space. Consider giving them as gifts or displaying them in your own home for a warm, inviting ambience. To get started on your next project, be sure to purchase all necessary materials at your local hobby shop or online retailers. With some practice, you’ll soon be able to master the art of making beautiful water candles for yourself and others!

Welcome to my candle making blog! In this blog, I will be sharing my tips and tricks for making candles. I will also be sharing some of my favorite recipes.

