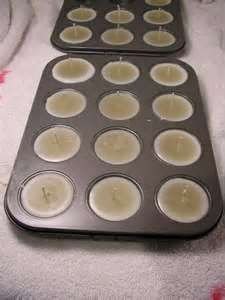
Candle making dipping vats have long been an essential tool in the art of creating beautifully crafted candles. This traditional method of candle making involves immersing a wick repeatedly into a vat of melted wax to build up layers and create unique designs. In this article, we will delve into the intricacies of candle making dipping vats, exploring their history, components, benefits, and how to use them effectively.
The history of candle making dates back centuries, with dipping vats playing a crucial role in the evolution of this craft. From early civilizations using animal fat and beeswax to modern-day paraffin and soy waxes, the process of dipping candles has remained a timeless tradition. Understanding the components of a candle making dipping vat is key to mastering this technique, from the vat itself to the temperature controls and accessories needed for successful candle making.
Using a dipping vat in candle making offers numerous benefits, such as producing candles with smooth and even layers, creating uniform shapes, and allowing for endless creativity in design. Whether you are a seasoned candle maker or new to the craft, incorporating a dipping vat into your process can elevate your creations to new heights.
Stay tuned as we guide you through step-by-step instructions on using a candle making dipping vat and share valuable tips for perfecting this age-old art form.
The History of Candle Making and the Evolution of Dipping Vats
Candle making has a rich history that dates back thousands of years, with the earliest known candles being made by the ancient Romans using tallow or beeswax. Over time, candle making techniques evolved, leading to the development of dipping vats as a more efficient way to produce candles in larger quantities. The use of dipping vats revolutionized the candle making process, allowing for faster production and more consistent results.
To better understand the evolution of dipping vats in candle making, it’s important to look at how candles were traditionally made before their invention. Early candle makers would typically pour hot wax into molds or hand-dip wicks repeatedly to build up layers of wax.
While effective, these methods were time-consuming and required a great deal of skill and labor. The introduction of dipping vats streamlined the process by immersing multiple wicks into liquid wax simultaneously, creating uniform candles with less effort.
Components of a candle making dipping vat may vary depending on the design and size of the vat. However, some essential elements are common among most dipping vats.
These components typically include a tank or container for holding the molten wax, heating elements to keep the wax at the optimal temperature for dipping, and a system for suspending and rotating the wicks during immersion. Some advanced dipping vats may also feature temperature controls, timers, and other automated functions to further simplify the candle making process.
- Tank/container for holding wax
- Heating elements
- System for suspending and rotating wicks
- Temperature controls (in some models)
- Early candle making techniques involved pouring hot wax into molds or hand-dipping wicks.
- Dipping vats revolutionized the process by allowing for simultaneous immersion of multiple wicks.
- Components of a dipping vat include a tank/container for wax, heating elements, and systems for handling wicks.
Understanding the Components of a Candle Making Dipping Vat
A crucial aspect of mastering the art of candle making lies in understanding the components of a dipping vat. A dipping vat is an essential tool used in the candle making process, allowing for the creation of beautifully crafted candles with a smooth and even finish. The primary components of a dipping vat include a heat source, a reservoir for melted wax, and a series of racks or rods for dipping candles.
The heat source in a dipping vat is typically a burner or heating element that maintains the temperature of the wax at an optimal level for dipping. This ensures that the wax remains in its liquid state throughout the candle making process, allowing for consistent and uniform layers to be built up on the candles. The reservoir holds the melted wax, providing a ready supply for dipping and coating the candles evenly.
In addition to these basic components, some dipping vats may also feature adjustable racks or rods that can be used to suspend multiple candles at once. This allows for efficient dipping of several candles simultaneously, speeding up the production process. Understanding how these components work together is essential for achieving professional results in candle making using a dipping vat.
Benefits of Using a Dipping Vat in Candle Making
Candle making dipping vats offer numerous benefits that make them an essential tool for crafting beautiful and high-quality candles. One of the primary advantages of using a dipping vat is the efficient and consistent coating it provides to the candles. The design of the vat allows for easy dipping of multiple candles at once, ensuring that each one receives an even layer of wax for a smooth and professional finish.
Another key benefit of using a dipping vat in candle making is the ability to control the temperature of the wax. Maintaining a consistent temperature is crucial in ensuring that the wax adheres properly to the candles without causing any drips or imperfections. Dipping vats are equipped with heating elements that help regulate the wax temperature, resulting in a seamless and uniform coating on the candles.
In addition to providing a superior finish to your candles, using a dipping vat can also increase your efficiency and productivity in the candle making process. By being able to dip multiple candles simultaneously, you can create batches of candles in less time compared to other methods. This time-saving aspect allows you to produce more candles efficiently, whether for personal use or for selling purposes.
| Benefits | Description |
|---|---|
| Efficient Coating | Ensures even layer of wax on multiple candles |
| Temperature Control | Regulates wax temperature for consistent finish |
| Increased Efficiency | Dipping multiple candles simultaneously saves time |
Step-by-Step Guide to Using a Candle Making Dipping Vat
Preparing the Dipping Vat
Before using a candle making dipping vat, it is essential to ensure that it is clean and free from any residue of previous candle dips. Start by thoroughly cleaning the vat with warm, soapy water and allowing it to dry completely.
Once clean, check the temperature settings of the dipping vat to ensure it is at the desired level for the type of wax being used. It is crucial to maintain a consistent temperature throughout the candle making process to achieve uniform dips.
Dipping Candles in Wax
To begin dipping candles using a dipping vat, start by melting your preferred candle wax in a separate pot or container according to manufacturer instructions. Once the wax has reached the desired consistency and temperature, carefully dip the wick portion of the candle into the melted wax, ensuring an even coat covers the entire surface.
Lift the wick out of the wax slowly and allow any excess wax to drip back into the vat before repeating the process for additional dips.
Building Candle Layers
As you continue dipping your candles into the vat, you will gradually build up layers of wax around the wick, creating a thicker candle with each dip. It is important to maintain patience during this process to achieve smooth and uniform layers on your candles.
To create different effects or designs, consider varying the speed at which you dip your candles or experimenting with different colors or additives in your wax mixture. Repeat this process until you have reached your desired candle size and shape.
Tips and Tricks for Mastering the Art of Dipping Candles
Dipping candles is a traditional method that requires skill and practice to master. Here are some tips and tricks to help you become an expert in the art of candle making using a dipping vat:
- Choose the right wax: Selecting high-quality wax is essential for successful candle dipping. Be sure to use paraffin wax or beeswax, as these are known for their ability to create smooth and even candles.
- Control the temperature: Maintaining the correct temperature of the wax in your dipping vat is crucial. Too hot, and the wax may drip; too cold, and the layers may not adhere properly. Use a thermometer to ensure the wax stays within the optimal temperature range.
- Practice patience: Dipping candles takes time and precision. Allow each layer of wax to cool and harden before dipping again to avoid uneven candles. Remember, patience is key to achieving beautiful results.
Mastering the art of candle dipping also involves experimenting with different techniques and styles. Here are some additional tips to help you create unique and eye-catching candles:
- Try adding color: Add dye or pigment to your wax before dipping to create colorful candles. Experiment with different shades and combinations for a personalized touch.
- Explore fragrance options: Enhance your candles by incorporating scents into the wax. Consider using essential oils or fragrance oils for added ambiance.
- Get creative with designs: Use various tools like toothpicks or skewers to create swirls, patterns, or textures on your dipped candles. Let your imagination run wild as you design one-of-a-kind creations.
By following these tips and tricks, you can elevate your candle making skills and produce stunning dipped candles that are sure to impress. Remember, practice makes perfect, so don’t be afraid to experiment and refine your technique until you achieve mastery in this timeless craft.
Exploring Different Types of Dipping Vats and Their Features
Candle making dipping vats come in various types and offer unique features that cater to different preferences and needs of candle makers. One common type is the traditional metal dipping vat, which is typically made of stainless steel or aluminum. These vats are durable, heat-resistant, and perfect for dipping candles repeatedly without warping or damage. Additionally, some metal dipping vats come with adjustable heights to accommodate different candle sizes.
Another popular type of dipping vat is the silicone dipping vat, known for its flexibility and ease of use. Silicone vats are non-stick, making it simple to remove the dipped candles without any residue left behind. They are also lightweight and easy to clean, adding convenience to the candle making process. Furthermore, silicone dipping vats often come in vibrant colors, adding a fun element to the craft.
For those looking for a more modern approach to candle making, electric dipping vats are available in the market. These vats are equipped with heating elements that allow for precise temperature control during the melting and dipping process. Electric dipping vats also have safety features like automatic shut-off functions to prevent overheating. While they may be pricier than traditional options, electric dipping vats offer efficiency and accuracy in candle production.
–
| Type of Dipping Vat | Main Features |
|---|---|
| Metal Dipping Vat | Durable, heat-resistant, adjustable height. |
| Silicone Dipping Vat | Non-stick, lightweight, easy to clean, available in vibrant colors. |
| Electric Dipping Vat | Precise temperature control, safety features like automatic shut-off. |
Creative Ideas for Designing and Decorating Candles Using a Dipping Vat
This process involves dipping a plain candle into a colored wax after the initial layers have been applied, creating beautiful layers of different colors. The result is a unique and eye-catching multi-colored candle that can add a touch of flair to any space.
Another creative idea for designing and decorating candles with a dipping vat is using different types of waxes. By combining paraffin wax with beeswax or soy wax, you can create candles with varying textures, colors, and scents.
Each type of wax has its own unique properties that can be utilized to achieve specific design aesthetics. For example, beeswax has a natural golden hue and emits a subtle honey scent, while soy wax is known for its clean burn and ability to hold fragrance well.
Additionally, experimenting with additives like glitter, dried flowers, or essential oils can take your dipped candles to the next level. Adding these elements to the dipping vat before immersing the candle can create one-of-a-kind designs that are both visually stunning and aromatic.
Whether you’re looking to create elegant wedding favors or personalized gifts for loved ones, utilizing different techniques and materials in your candle making process with a dipping vat can result in truly captivating creations that showcase your artistic flair.
Troubleshooting Common Issues When Using a Candle Making Dipping Vat
Wax Temperature Fluctuations
One common issue that candle makers may face when using a dipping vat is wax temperature fluctuations. Inconsistent temperatures can result in uneven layers of wax on the candles, affecting their appearance and quality. To troubleshoot this issue, it is important to monitor the temperature of the wax closely and make adjustments as needed. Using a reliable thermometer and maintaining a steady heat source can help prevent these fluctuations.
Dripping or Uneven Coating
Another challenge that candle makers might encounter when using a dipping vat is dripping or uneven coating on the candles. This problem can arise due to factors such as the viscosity of the wax, dipping speed, or insufficient drying time between dips.
To address this issue, it is essential to ensure that the wax has the right consistency for dipping and to practice a consistent dipping technique. Allowing the candles to dry properly before each subsequent dip can also help achieve a smooth and even coating.
Cooling Time and Setting
Proper cooling time and setting of dipped candles are crucial aspects in candle making with a dipping vat. Inadequate cooling time can lead to premature handling of the candles, resulting in misshapen or blemished final products. It is essential to allow sufficient time for each layer of wax to cool and set before proceeding with additional dips.
Placing the dipped candles on a flat surface while they cool can help maintain their shape and finish. Regularly checking for any signs of defects during the cooling process can help prevent issues from escalating.
Conclusion
In conclusion, the art of candle making with dipping vats holds a special place in the realm of traditional crafts. Through this age-old technique, artisans have been able to create exquisite candles that not only illuminate spaces but also evoke a sense of nostalgia and craftsmanship. The journey through the history and evolution of dipping vats has shed light on the importance of preserving this traditional method in today’s fast-paced world.
Using a candle making dipping vat offers numerous benefits, from achieving uniform layers to creating unique color combinations and textures. The step-by-step guide provided gives enthusiasts the tools they need to delve into this craft with confidence and creativity. By understanding the components of a dipping vat and learning tips and tricks for mastering the art, beginners can embark on a rewarding journey towards crafting their own beautiful candles.
As we explore different types of dipping vats and their features, it becomes apparent that there is endless potential for innovation and design in candle making. From intricate designs to personalized creations, the creative possibilities are truly limitless.
Troubleshooting common issues when using a dipping vat ensures that enthusiasts can overcome challenges with ease, allowing them to fully embrace the traditional craft of candle making with confidence and skill. In essence, embracing the use of a dipping vat in candle making is not just about creating candles; it is about preserving a timeless tradition that embodies beauty, artistry, and dedication.
Frequently Asked Questions
How Do You Use a Candle Dipping VAT?
Using a candle dipping vat involves heating a container of wax to the desired temperature for dipping candles. The wick is repeatedly dipped into the melted wax, creating layers of wax around it. This process is repeated until the desired thickness is achieved.
What Kind of Wax Do You Use for Dipped Candles?
When making dipped candles, it is essential to use paraffin wax or beeswax. Paraffin wax is commonly used due to its availability and affordability. Beeswax, on the other hand, is a natural and sustainable option known for its pleasant scent and clean burn.
What Is the Best Wick for Dipping Candles?
The best wick for dipping candles depends on personal preference and the type of candle being made. Cotton wicks are a popular choice due to their affordability and ability to hold up well during the dipping process. However, choosing the right wick size and material is crucial for successful candlemaking.

Welcome to my candle making blog! In this blog, I will be sharing my tips and tricks for making candles. I will also be sharing some of my favorite recipes.

