Are you wondering, “how much is a candle making machine?” With the growing popularity of candle making as a hobby and a business venture, more people are considering investing in their own candle making machines. From small-scale hobbyists to established candle businesses, the demand for efficient and cost-effective candle making equipment is on the rise.
Candle making has evolved from a traditional craft to a thriving industry, with an increasing number of individuals and businesses entering the market. This trend can be attributed to various factors such as the rising demand for unique and personalized candles, the popularity of DIY crafts, and the growing interest in sustainable and eco-friendly products.
Investing in a candle making machine comes with several benefits, including increased production capacity, improved product consistency, and reduced labor costs. Whether you’re looking to elevate your hobby or expand your candle business, a reliable machine can streamline your production process and enhance overall efficiency.
In this article, we will explore the various types of candle making machines available, factors to consider when purchasing one, current market prices, return on investment considerations, maintenance tips, and additional expenses involved in operating a candle making machine. So if youwant to know how much it costs to invest in this equipment or are exploring whether it’s worth it – read on.
The Benefits of Investing in a Candle Making Machine
Investing in a candle making machine can offer a wide range of benefits for both individuals and businesses. One of the primary advantages of owning a candle making machine is the ability to produce candles on a larger scale, increasing production efficiency and reducing labor costs. By automating the candle making process, you can significantly increase the volume of candles produced without having to rely on manual labor.
In addition to increasing production capacity, owning a candle making machine allows for greater control over the quality and consistency of the candles being produced. With automated machines, you can precisely control factors such as temperature, fragrance distribution, and color mixing, resulting in high-quality, uniform candles. This level of consistency is essential for businesses looking to establish a strong brand reputation and attract repeat customers.
Another significant benefit of investing in a candle making machine is the potential for cost savings in the long run. While there may be an initial investment required to purchase the machine, the reduction in labor costs and increased efficiency can lead to significant savings over time. Additionally, by producing candles in-house, businesses can eliminate the need to outsource manufacturing, further reducing expenses.
| Benefits | Description |
|---|---|
| Increased Production Capacity | Owning a candle making machine allows for higher volume production at a faster rate. |
| Quality Control | Automated machines provide precise control over factors such as temperature and fragrance distribution, ensuring consistent high-quality candles. |
| Cost Savings | The initial investment in a machine can lead to long-term savings through reduced labor costs and elimination of outsourcing expenses. |
For those interested in these benefits and considering purchasing a candle making machine should conduct thorough research on available options – from manual to automated machines – as well as current market prices. Understanding these factors will help determine how much is a candle making machine and whether it aligns with your budget and business goals.
Types of Candle Making Machines
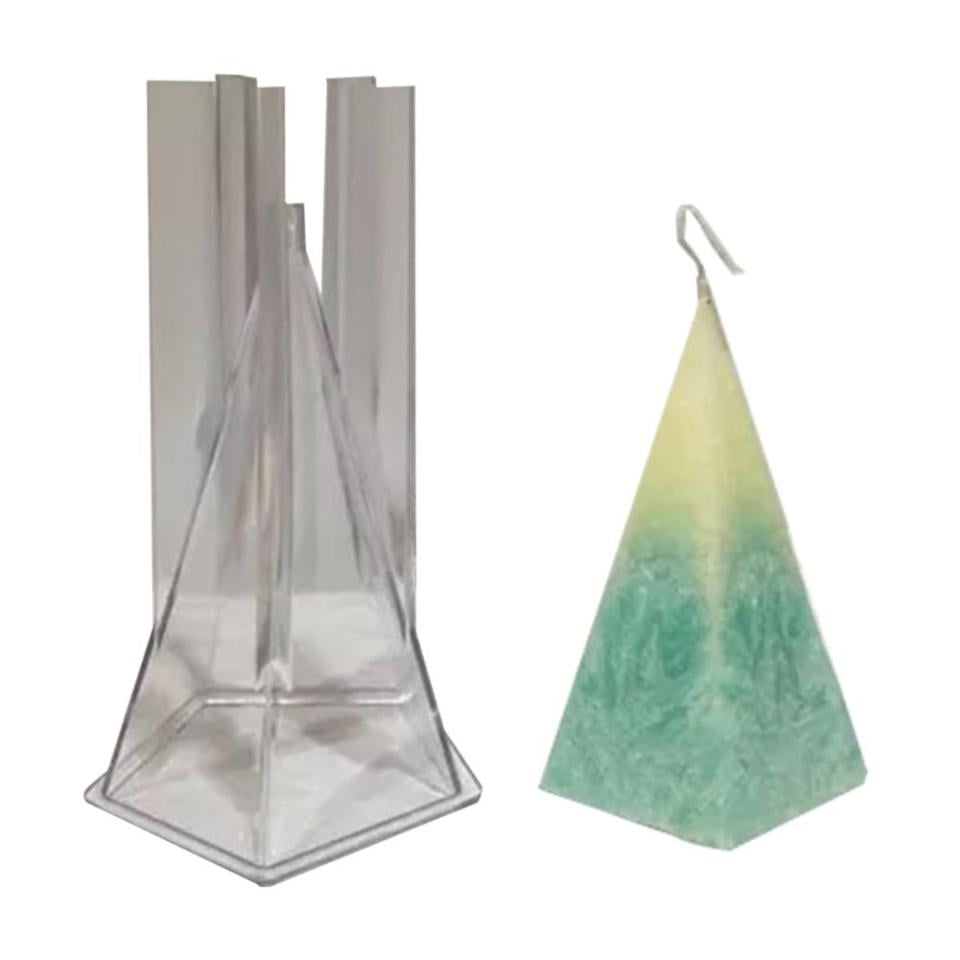
When it comes to candle making machines, there are various types available on the market, ranging from manual to fully automated. Manual candle making machines are often more affordable and simpler to operate, making them a popular choice for small-scale or hobbyist candle makers. These machines require more hands-on work and attention from the operator, but they can still produce high-quality candles.
On the other hand, fully automated candle making machines are designed for larger-scale production and offer greater efficiency and output. These machines are capable of running without constant supervision, which can significantly increase productivity and reduce labor costs. However, they often come with a higher price tag compared to their manual counterparts.
In addition to manual and fully automated options, there are also semi-automated candle making machines that offer a middle ground between the two. These machines require some level of human intervention but also feature automated processes to streamline production.
Before investing in a specific type of machine, it’s important to consider your production needs, budget, and long-term goals for your candle making business. Understanding the differences between these types of machines will help you make an informed decision on how much is a candle making machine and which one is the best fit for your operation.
Factors to Consider When Purchasing a Candle Making Machine
When considering the purchase of a candle making machine, there are several important factors to take into account. One of the first things to consider is the production capacity that you require. It’s essential to match the machine’s capacity with your production needs. For small-scale production, a manual or semi-automatic machine may be sufficient, while for larger scale operations, an automated machine would be more suitable.
Another key factor to consider is the type of candles you intend to produce. Different machines are designed for different types of candles, such as pillar candles, container candles, or taper candles. Ensure that the machine you choose is compatible with your intended products.
Additionally, it’s important to think about the space available in your workshop or production area. Some candle making machines are larger and require more space than others. Make sure to measure your space accurately and take into account any future expansion plans before making a purchase.
It is also crucial to consider your budget when purchasing a candle making machine. The cost can vary widely depending on the type and capacity of the machine. Manual machines are generally more affordable compared to automated ones, but they also require more labor. On average, the cost of a candle making machine ranges from $500 for a small manual unit up to $50,000 for a fully automated industrial-grade machine.
| Factor | Consideration |
|---|---|
| Production Capacity | Match with production needs |
| Type of Candles | Compatibility with intended products |
| Space Available | Size and space requirement in workshop |
| Budget | Affordability and cost range |
Current Market Prices for Candle Making Machines
If you are considering investing in a candle making machine, one of the most pressing questions on your mind is likely, “How much is a candle making machine?” The price range for a candle making machine can vary widely based on the type of machine and its capabilities.
Manual Candle Making Machines
Manual candle making machines are typically the most affordable option on the market. These machines require more hands-on work and may have lower production capacities compared to automated machines. However, they are a great entry point for small businesses or hobbyists looking to get started with candle making.
Semi-Automated Candle Making Machines
Semi-automated candle making machines fall in the mid-range of pricing. These machines offer some level of automation, reducing the amount of manual labor required while still being more budget-friendly compared to fully automated options.
Fully Automated Candle Making Machines
Fully automated candle making machines are the most expensive option but offer high production capacities and minimal manual intervention. These machines are often used by large-scale operations that require consistent and efficient production.
When determining how much a candle making machine will cost, it’s important to consider not just the initial purchase price, but also ongoing expenses such as maintenance, power consumption, and raw materials. It’s always best to do thorough research and compare prices from different manufacturers before making a decision on which machine to invest in.
Understanding the Return on Investment for a Candle Making Machine
When considering investing in a candle making machine, it’s important to understand the potential return on investment. By automating the candle making process, you can increase production capacity and efficiency, ultimately leading to higher profits. Here are some key factors to consider when evaluating the return on investment for a candle making machine:
- Production Capacity: One of the most significant benefits of a candle making machine is its ability to increase production capacity. With a manual process, production may be limited by the speed at which candles can be made by hand. An automated machine can significantly boost production, allowing you to meet increased demand and fulfill larger orders.
- Labor Costs: Automating the candle making process can also lead to cost savings in labor. With a manual process, you may need to hire multiple workers to keep up with demand. A machine can streamline the process and reduce the need for as many manual laborers, cutting down on labor costs over time.
- Quality and Consistency: A candle making machine can also improve the quality and consistency of your products. Automated machines are designed to produce uniform candles every time, reducing waste and ensuring customer satisfaction. This can lead to increased sales and customer loyalty, further contributing to your return on investment.
In addition to these factors, it’s essential to consider how much is a candle making machine in relation to your budget and financial goals. While there will be an initial investment required for purchasing the machine, it’s crucial to weigh this cost against the potential long-term benefits. Conducting a thorough cost-benefit analysis can help you determine whether investing in a candle making machine is a financially sound decision for your business.
Tips for Maintaining and Caring for Your Candle Making Machine
Investing in a candle making machine can be a significant decision for any business or individual looking to scale up their candle production. Once you’ve made the investment, it’s crucial to properly maintain and care for your candle making machine to ensure its longevity and optimal performance. Here are some tips for keeping your machine in top condition:
Regular Cleaning and Lubrication
One of the most important aspects of maintaining a candle making machine is regular cleaning and lubrication. Over time, wax residue can build up on various parts of the machine, leading to decreased efficiency and potential malfunctions. It’s vital to establish a regular cleaning schedule and use appropriate lubricants to keep all components running smoothly.
Inspecting for Wear and Tear
Another essential aspect of caring for your candle making machine is regularly inspecting it for signs of wear and tear. Friction from continuous use can cause parts to degrade over time, so it’s crucial to monitor the condition of components such as molds, wicks, and heating elements. Identifying any worn-out parts early on can prevent more significant issues down the line.
Following Manufacturer Guidelines
Manufacturers often provide specific guidelines for the maintenance and care of their candle making machines. It’s essential to familiarize yourself with these recommendations and adhere to them diligently. This may include specific cleaning products to use, recommended replacement schedules for parts, or other essential maintenance procedures.
By following these tips for maintaining and caring for your candle making machine, you can extend its lifespan and ensure that it continues to produce high-quality candles efficiently. Keeping your machine in top condition will also contribute to the overall success of your candle-making endeavors.
The Cost of Operation
When considering the cost of operating a candle making machine, it is important to take into account the various expenses involved in running and maintaining the equipment. Here are some key expenses to consider:
- Raw Materials: One of the primary expenses for operating a candle making machine is the cost of raw materials such as wax, wicks, fragrances, and dyes. The quantity and quality of these materials will impact the overall cost of production.
- Utilities: Running a candle making machine requires energy, so factoring in electricity or gas costs for operating the equipment is essential. Additionally, water may be needed for cleaning and maintenance purposes.
- Maintenance and Repairs: Over time, candle making machines may require routine maintenance or repairs to ensure smooth operation. This can include replacing parts, lubrication, and professional servicing.
In addition to these operational expenses, there are also indirect costs that come with running a candle making business. These can include marketing and packaging materials, labor costs if you hire employees to assist with production, as well as overhead expenses such as rent for your workspace.
It’s important to carefully consider these operational costs when calculating the overall investment required for running a candle making machine. By understanding these expenses upfront, you can better assess the financial feasibility of investing in this equipment and develop a comprehensive business plan for your candle making venture.
Conclusion
In conclusion, the decision to invest in a candle making machine is a significant one for individuals or businesses looking to enter the lucrative candle making industry. The growing popularity of candle making as a hobby and business venture has made the purchase of a candle making machine an attractive prospect for many. The benefits of investing in a candle making machine are numerous, from increased production efficiency to cost savings in the long run.
When considering the types of candle making machines available, individuals and businesses have options ranging from manual to fully automated machines. The choice will depend on production needs, budget, and desired level of automation. Factors such as production capacity, ease of use, and reliability should all be carefully considered when purchasing a candle making machine.
Understanding the return on investment for a candle making machine is crucial in making an informed decision. This includes not only upfront costs but also ongoing expenses such as maintenance, raw materials, and operational costs. By carefully assessing current market prices for candle making machines and factoring in additional expenses for running and maintaining the equipment, prospective buyers can better gauge how much they need to invest and how quickly they can recoup their initial outlay.
So, how much is a candle making machine? It depends on various factors including size, capacity and level of automation – these considerations will ultimately impact your return on investment.
Frequently Asked Questions
What Is the Cost of Candle Making Machine?
The cost of a candle making machine can vary widely depending on the type and size of the machine. Entry-level small-scale machines can cost anywhere from $200 to $500, while larger, more advanced machines can range from $1000 to $5000 or more.
It’s important to consider your production needs and budget when considering purchasing a candle making machine.
How Profitable Is Candle Making?
Candle making can be quite profitable for those who are able to produce high-quality, unique products that appeal to their target market. With the right marketing and sales strategy, candle makers can generate a steady income from selling their products through various channels such as online stores, local markets, or wholesale to retailers.
How Do I Start My Own Candle Making Business?
Starting your own candle making business involves several key steps. First, you’ll need to decide on the type of candles you want to create and identify your target market.
Then, you’ll need to create a business plan, secure funding for equipment and supplies, set up a workspace, obtain any necessary permits or licenses, and establish sales and distribution channels. Additionally, it’s important to invest time in learning about candle making techniques and experimenting with different wax types, fragrances, and designs to develop unique product offerings that stand out in the marketplace.

Welcome to my candle making blog! In this blog, I will be sharing my tips and tricks for making candles. I will also be sharing some of my favorite recipes.


