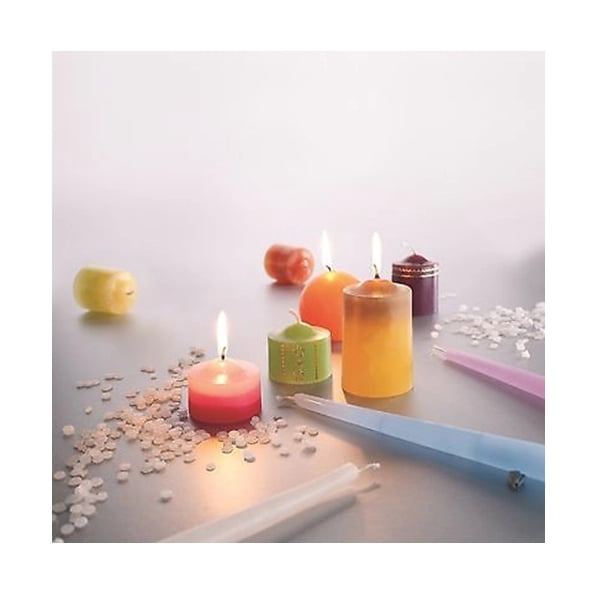
Are you looking for a unique and stylish addition to your home decor? Making a concrete candle holder might be the perfect DIY project for you.
The appeal of concrete candle holders lies in their modern, minimalist aesthetic and the opportunity for creative customization. In this article, we will explore the process of making a concrete candle holder from start to finish, including materials needed, step-by-step instructions, design and customization tips, safety precautions, finishing and sealing techniques, display ideas, troubleshooting, and helpful tips.
Making a concrete candle holder allows you to create a custom piece that reflects your personal style and adds a touch of industrial chic to any space. Whether you are an experienced crafter or new to DIY projects, this undertaking offers both artistic fulfillment and functional decor. By using specific types of concrete, molds, safety equipment, and optional decorative elements, you can craft a one-of-a-kind piece that enhances the ambiance of your home.
Throughout this article, we will provide detailed guidance on every aspect of the concrete candle holder-making process. From preparing the mold to mixing the concrete, pouring it into the mold, allowing it to cure properly, demolding it with care, and finishing with sanding and sealing techniques – we’ve got all the information you need to embark on this rewarding creative endeavor.
So let’s get started on making a stunning concrete candle holder that showcases your craftsmanship and eye for design.
Materials Needed
Making a concrete candle holder is a fun and creative DIY project that allows you to personalize your home decor with a unique and stylish accessory. Before you embark on this crafting endeavor, it’s essential to gather all the necessary materials to ensure a smooth and successful process. The following is a detailed list of the materials needed for making a concrete candle holder:
1. Concrete: Choose a high-quality concrete mix suitable for crafting. Opt for a fine-grain mix that will result in a smooth finish for your candle holder.
2. Molds: Select appropriate molds for shaping your concrete candle holder. Silicone molds are an excellent choice for easy demolding, but you can also use plastic or cardboard molds.
3. Safety Equipment: Protect yourself during the crafting process by wearing gloves, safety goggles, and a dust mask to prevent exposure to concrete dust and chemicals.
4 – Optional Decorative Elements: Consider adding decorative elements such as pigment powders or decorative stones to customize the appearance of your concrete candle holder.
Now that you have all the necessary materials at hand, you can proceed with confidence in creating your own unique and personalized concrete candle holders. Whether you opt for a minimalist design or choose to embellish your creations with colorful accents, the materials listed above will set you on the right path to making stunning concrete candle holders that will enhance any space in which they are displayed.
| Materials | Description |
|---|---|
| Concrete Mix | High-quality fine-grain mix suitable for crafting |
| Molds | Silicone, plastic, or cardboard molds for shaping the candle holder |
| Safety Equipment | Gloves, safety goggles, and dust mask for protection |
Step-by-Step Instructions
To start the process of making a concrete candle holder, you will need the following materials:
- Concrete mix: Choose a high-quality concrete mix suitable for crafting projects. You can also opt for quick-setting concrete for faster results.
- Mold: Select a mold in the shape and size you desire for your candle holder. This can be a silicone mold specifically designed for candle making or a DIY option such as a plastic container or cardboard tube.
- Mixing container and tools: Use a sturdy plastic or metal container to mix the concrete, along with a trowel or mixing stick to ensure thorough combining of the materials.
- Safety equipment: Protect yourself with gloves, safety goggles, and a mask to prevent skin irritation and inhalation of concrete dust.
- Optional decorative elements: Consider adding embellishments such as glass pieces, pebbles, or pigment to customize your candle holder.
The step-by-step instructions for making a concrete candle holder are as follows:
- Prepare the mold by ensuring it is clean and dry. Apply a thin layer of cooking oil or non-stick spray to the inside of the mold to aid in demolding the finished candle holder.
- Mix the concrete according to the manufacturer’s instructions, using the appropriate water-to-concrete ratio. Stir well until it reaches a smooth, lump-free consistency.
- Carefully pour the mixed concrete into the prepared mold, tapping the sides to release air bubbles and ensure an even fill. If desired, add decorative elements at this stage by gently pressing them into the concrete.
- Allow the concrete candle holder to cure undisturbed in a dry, well-ventilated area for at least 24 hours before attempting to demold it.
- Once fully cured, carefully remove the hardened candle holder from the mold and gently sand any rough edges with fine-grit sandpaper for a smoother finish.
By following these comprehensive steps and taking necessary safety precautions, you can successfully create your own unique concrete candle holder that adds an industrial-chic touch to your home decor or makes for an impressive handmade gift option.
Design and Customization
When it comes to making a concrete candle holder, the design and customization options are endless. Adding a personal touch to your DIY project allows you to create a unique and one-of-a-kind piece that reflects your style and creativity. Here are some tips on how to personalize your concrete candle holder:
- Adding color: One way to customize your concrete candle holder is by incorporating color into the mix. You can use pigments or dyes specifically designed for concrete to achieve a wide range of hues. Whether you prefer bold and vibrant tones or subtle, earthy shades, adding color can completely transform the look of your candle holder.
- Texture and patterns: Get creative with texture and patterns to give your concrete candle holder an interesting and tactile finish. You can use textured molds or experiment with different materials to create unique imprints on the surface of the concrete. Additionally, you can try techniques such as marbling or layering to add visual interest and depth.
- Embellishments: Consider embellishing your concrete candle holder with decorative elements like gemstones, shells, or metallic accents. These embellishments can be embedded directly into the wet concrete before it sets or adhered onto the surface after the candle holder has cured. Just make sure that any added elements are heat-resistant and will not pose a safety hazard when the candle is lit.
By experimenting with color, texture, and embellishments, you can truly make your concrete candle holder a reflection of your personal style, making it a standout piece in any space where it’s displayed. Take the opportunity to express yourself creatively while crafting a functional home decor item that doubles as an eye-catching conversation starter.
Safety Precautions
When it comes to making a concrete candle holder, safety should always be a top priority. Handling concrete can pose certain risks, but with the right safety precautions and equipment, you can ensure a safe and enjoyable crafting experience. In this section, we will highlight the importance of safety gear and proper handling of concrete to avoid potential hazards during the crafting process.
Protective Gear
Before you begin working with concrete, it is crucial to wear the appropriate protective gear. This includes gloves, eye protection, and a dust mask. Concrete contains harsh chemicals that can irritate the skin and eyes, as well as produce harmful dust particles when mixed or sanded. By wearing the proper protective gear, you can safeguard yourself from potential skin and respiratory issues.
Proper Ventilation
Working with concrete in a well-ventilated area is essential for maintaining good air quality and preventing the inhalation of hazardous fumes or particles. If possible, consider working outdoors or in a garage with open doors and windows to ensure adequate ventilation. Additionally, using a respirator can provide an extra layer of protection against inhaling concrete dust.
Handling Concrete Safely
When mixing and pouring concrete, it’s important to follow the manufacturer’s instructions carefully. Always wear gloves when handling wet concrete to prevent skin irritation or chemical burns. Avoid breathing in dust particles by using a wet-dry vacuum or damp cloth to clean up any spilled concrete. By handling concrete safely and responsibly, you can minimize the risk of accidents or health concerns associated with its use.
By being mindful of safety precautions and taking the necessary measures to protect yourself during the process of making a concrete candle holder, you can create your masterpiece without compromising your well-being. With the right safety gear and handling techniques in place, you can enjoy a rewarding crafting experience while ensuring your personal safety.
Finishing and Sealing
After the concrete candle holder has been demolded, it’s important to take the time to finish and seal it properly. This will not only enhance the appearance of the candle holder but also ensure its durability over time. The finishing process involves sanding down any rough or uneven areas on the surface of the concrete. Start with a coarse-grit sandpaper to smooth out major imperfections, then gradually move to finer grits for a smoother finish.
Once the surface of the concrete candle holder is smooth and free of any noticeable flaws, it can be polished to achieve a more polished and refined look. A high-quality concrete sealer can then be applied to protect the surface from stains and moisture, as well as give it a more finished appearance. These steps are essential for making sure your DIY concrete candle holder looks professional and lasts for a long time.
In addition to sanding, polishing, and sealing, you may also want to consider adding decorative elements or personal touches to your concrete candle holder at this stage. For instance, you could use metallic leafing or acrylic paint to add some color and visual interest to the finished piece. Experiment with different techniques and materials to create a customized look that suits your style and complements your home decor.
| Materials | Tools |
|---|---|
| Coarse-grit sandpaper | Molds for holding candles in place while sealing |
| Fine-grit sandpaper | High-quality concrete sealer |
| Polishing pads or buffing wheel | Metallic leafing or acrylic paint (optional) |
Display and Use
After successfully making a concrete candle holder, the next step is to showcase your creation in a way that highlights its unique appeal. Whether you intend to keep it for personal use or give it as a gift, there are numerous creative ideas for displaying and using the finished concrete candle holder in home decor. Additionally, these handmade pieces can make for a thoughtful and one-of-a-kind gift that will surely impress the recipient.
Home Decor Display
The finished concrete candle holder can be displayed as a standalone piece on a mantelpiece, shelf, or side table. Its minimalist and industrial aesthetic adds character to any space and can serve as a conversation starter. For a more visually striking display, consider grouping multiple concrete candle holders of varying sizes together in a cluster arrangement. This creates an eye-catching focal point in any room and enhances the ambiance with warm candlelight.
Outdoor Use
Concrete candle holders are not limited to indoor spaces. They can also be used to enhance outdoor areas such as patios, gardens, or balconies. Placing them strategically among potted plants or along pathways adds an element of charm to outdoor settings, especially during evening gatherings or al fresco dining experiences.
Gift Giving
For those inclined to share their crafting talents with others, concrete candle holders make for unique and stylish gifts. Whether it’s for a housewarming party, birthday celebration, or holiday present, the handcrafted nature of these items adds sentimental value and shows thoughtfulness in selecting a personalized gift. To further personalize the gift, consider customizing the design or incorporating the recipient’s favorite colors into the concrete candle holder.
By considering these creative ideas for displaying and using your finished concrete candle holder in home decor or as a unique gift idea; you will achieve maximum enjoyment from your DIY project while also sharing your creativity with others.
Troubleshooting and Tips
In conclusion, making a concrete candle holder can be a fulfilling and creative DIY project for anyone looking to add a unique touch to their home decor. With the right materials, careful attention to safety precautions, and creativity in design, you can personalize your concrete candle holder to fit your style and taste. By following the step-by-step instructions provided and taking note of the troubleshooting tips, you can overcome common challenges and achieve a professional-looking finished product.
One of the key advantages of making your own concrete candle holder is the ability to customize it according to your preferences. Whether you choose to add color, texture, or other embellishments, you have the flexibility to create a one-of-a-kind piece that reflects your personal creativity. Additionally, the finished concrete candle holder can serve as a stylish and thoughtful gift for friends and loved ones.
Remember that while working with concrete may present certain challenges, these can be easily addressed with proper preparation and attention to detail. By following the guidelines outlined in this article and approaching the project with patience and creativity, you can successfully create a stunning concrete candle holder that adds character and charm to any space in your home.

Welcome to my candle making blog! In this blog, I will be sharing my tips and tricks for making candles. I will also be sharing some of my favorite recipes.

