Introduction
Creating candles with shells is a fun, creative and meaningful activity that offers many benefits. It gives you an opportunity to make something unique and beautiful, as well as connect with nature in a new way. Not only that, but it’s an inexpensive and simple craft project that requires little materials apart from the shells themselves. You’ll also be able to choose from all kinds of interesting shapes, sizes and colors for your DIY masterpiece. Crafting candles with shells can also make for a great group activity – everyone will come away with their own customized creations at the end of the session! Finally, once lit, these delightful little candles can add an ambient glow to your room or patio as well provide a calming aroma when scented wax is used. With all its advantages, making homemade candles from shells definitely makes for an enjoyable pastime!
Steps to Prepare Your Shells
1. Begin by collecting various types of shells, such as scallop, cowry, oyster and mussel shells. Make sure the shells are clean. If not, then wash them in water to remove dirt and other particles.
2. If desired, paint the shells with acrylic paint and seal them with one or two coats of spray clear enamel for a more vibrant look. Let the paint dry according to instructions on the package.
3. Buy wax pellets or melt down pre-made wax candles and pour some into each shell. This will be your candle’s foundation. Allow the wax to cool until it is slightly solidified but still soft enough to shape with your hands and mold into place before it hardens completely.
4. Place wick tabs in each shell so that the tab sticks out from the top middle of each shell just enough for the wick to come through once inserted later, using a pair of tweezers if needed for placement ease.
5. Put a wick in all of your finished Shell Candles, by threading though the hole where you previously placed the tab until it’s almost fully extended up through candle wax mixture and pushed securely against inner side wall of shell cavity space without any slack left hanging freely inside Wax Pool Area at base of each Shell Candle.. Tie off excess length tip at top portion outside your Shell Candle using an adhesive secured knot if necessary for extra secure hold factor via tie-off placement along Wick Strand Line..
6. To create mottled or marbled effects within your Shell Candles, use a toothpick to swirl different coloured blocks (if used) throughout each candle mix until it becomes evenly blended as desired before setting aside/away from boiling pot outlet area vicinity to cool correctly prior Hardening..Once cool, trim excess length off wicks for easier use during light up attempts.] Lastly, adorn these with seashell decorations if you like!
Different Methods of Melting Wax
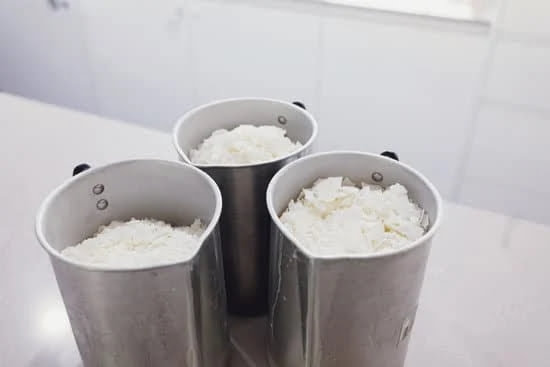
One of the most common methods of melting wax for making candles with shells is to use a double boiler. To create a double boiler you will need a pot, some water and a metal or glass bowl that can fit in the top of the pot without touching any of the sides or bottom. Heat up the water in the pot and place the metal or glass bowl inside, filled with your wax. Allow the wax to melt over low-medium heat. Make sure not to leave it on for too long as it can burn easily.
Another method for melting wax is to do so using a microwave oven. This option requires that you use containers made specifically for melting wax in microwaves and be aware that temperatures will drastically vary depending on your microwave’s wattage. Place your chosen container of wax in the microwave and follow the instructions on your package carefully; this will ensure you don’t overheat and ruin your product.
Finally, one last option is to try pouring hot water into an insulated mug or thermos container where you have placed your wax chips or crumbles before tightly closing it. This method requires extra caution as simply leaving too much hot water on top of unmelted wax can cause it to ignite and lead to hazardous situations, so you must take all necessary precautions before attempting this method.
Supplies Needed to Insert Wicks Into Shells
In order to make candles with shells, in addition to the supplies you need for any typical candle making set up- such as wax, wicks, a thermometer, and containers- you’ll also need some additional supplies specifically tailored to inserting wicks into the shells. These supplies will include: a drill or an awl, a craft knife or hole puncher, clips or rings, and beeswax.
A drill or an awl is important for creating holes large enough for setting in the candle wick. The size of the hole should match the diameter of the candle wick so that it can be securely inserted without being too tight or too loose. You may also want to use a craft knife or a hole puncher to widen narrow crevices that you may find on certain types of shell.
To further secure and center the wick within the shell cavity you can use clips made from metal or clips specifically designed for inserting into shells. You can also use metal rings crafted from metal frame wire if your using wider type of shells that may not fit most clip sizes. Lastly, beeswax can be used to help keep any debris out of your candle and also helps hold your clip more securely against the inner surface of your shell.
Pouring Techniques for Melted Wax Into Shells
Once you have your melted wax, it’s time to start pouring it into the shells. To do this without making a mess, there are a few steps to keep in mind.
First, fill your pot with hot water and set it on the stovetop or an electric burner. You should make sure that the wax level is at least two inches below the top of the shell. If it’s too high, you may end up with wax flowing out from the sides when you attempt to pour in the melted wax. It’s best to start off slow and incrementally increase your pouring speed as you become more comfortable with how much wick you will need for each pour. Be extra careful when pouring near the edges of the shell where air pockets often exist; if hot wax touches these space, it could cause them to explode outward. Lastly, after filling each shell with wax, you can use a skewer to push down any air bubbles that have formed on top of the wax.
Decorative Ideas for Decorating Wax After it Sets
One of the most popular ways to add a coastal vibe to candles made with shells is by filling them with a variety of different shells. This can be done when melting the wax in small batches and adding in a few shells at a time until desired effect is achieved. Crushed seashells can also be used as decoration for the bottom of the candle, to create a unique texture and design. For an even more unique look, try adding in dried lavender or rose petals to the melted wax before pouring it into a shell mold. Additionally, herb scented oils can be added when the wax is fully melted, creating an aromatic finish to any homemade shell candle. To finish off any shell candle, experiment with different color dyes and glitters to create intricately colored layers!
Different Ways to Refine the Candles
Making candles with shells is an enjoyable activity that can also be made into a beautiful home decor item. Once the candles are made, there are several ways to refine them for a more polished look. One way to refine the candles is to use a hot glue gun to secure the shells in place. This will give the finished product a stronger overall structure and prevent any potential shifting of the shells during use. Another way to refine the candles is to paint or dye the shells before they are added. Choosing colors which complement each other will add visual interest and make the finished product even more attractive. Finally, gluing beads between some of the shells can bring out unique patterns in the design and accentuate certain parts of it further. These techniques can make any candle with shells truly unique and aesthetically pleasing when finished!
Tips for Lighting and Enjoying Your Candles
When you are ready to light your seashell candles, prepare the area you will be using by laying down a fire-resistant surface and making sure that nothing flammable such as curtains or furniture is nearby. Make sure your candle holder has a solid base and fill it with sand before placing your candle inside. When you light the wick, use long matches or a long-handled lighter to avoid getting too close to the flame. Once lit, do not leave candles unattended.
Your shell candles can provide both light and fragrance while they burn: add in essential oils or favorite scents in melted wax prior to pouring into shells for an aroma therapy experience. Note that certain scents may have an effect on the flame’s intensity, so if needed reduce the amount of oil used or increase the size of the wick accordingly. As with any other type of candle, always keep your seashell ones away from drafts which could cause them to flicker more than desired. Additionally, make sure there’s plenty of clearance above and around the candle’s flames; this will help prevent any wax from dripping from splattering onto nearby surfaces when burning. Lastly, enjoy your beautiful creation made out of natural sea shells!

Welcome to my candle making blog! In this blog, I will be sharing my tips and tricks for making candles. I will also be sharing some of my favorite recipes.


